

These curtain panels are made from small swirl motifs. Each motif is a solid ring with a tapered crescent wrapped around one side, and the motifs link into long vertical strands that let light through and cast soft, dappled shadows.
The sample uses one rich wine color. It reads warm in sunlight and still looks calm in a neutral room. The style falls somewhere between boho macramé and vintage Irish-crochet lace, but you only need basic stitches: single, half double, double, and treble crochet. The pattern uses US crochet terms.
Each finished panel measures 21.5 in (54.6 cm) wide and 75.5 in (191.8 cm) long from the top of the header to the bottom motif, not counting the tab loops. The pattern makes a matching pair.
The construction is simple and repetitive. You crochet identical motifs, join them into strands, link the strands with chain bridges, then work a solid header band with tabs and sew the strands to it.
Finished Size and Construction
- Finished panel size: 21.5 in × 75.5 in (54.6 cm × 191.8 cm), excluding tabs
- Skill level: Easy-intermediate (repetitive, but the joining needs care)
- Terminology: US crochet terms
- Yarn weight: Worsted weight (#4), cotton or cotton blend
- Hook: 5.0 mm (US H-8)
- Number of pieces: 130 motifs + 1 header per panel (260 motifs and 2 headers for the pair)
- Layout: 5 strands across × 26 motifs down per panel
- Single motif size: 3.5 in wide × 2.75 in tall (8.9 cm × 7.0 cm)
- Size before header (border): 21.5 in × 71.5 in (54.6 cm × 181.6 cm)
- Header (border) depth: 4 in (10.2 cm), plus tab loops about 1.25 in (3.2 cm) tall
Materials
Yarn: Use a smooth, mercerized or combed worsted-weight cotton. Cotton holds the swirl shape, stretches little on a long hang, and shows the stitches clearly. Avoid fuzzy or very stretchy acrylic, because long strands will grow under their own weight.
- Wine/burgundy: about 2,100 g (3,780 m / 4,135 yd), for example 21 balls of 100 g / 180 m (197 yd)
These quantities include a margin of about 15% for swatching, joining, and tails. Buy all of it from one dye lot. A shade change shows easily against a bright window.
Tools:
– 5.0 mm (US H-8) crochet hook
– Tapestry needle
– Stitch markers (at least 4)
– Measuring tape
– Blocking mats and rustproof pins
– Spray bottle
– Curtain rod up to 1 in (2.5 cm) in diameter
Abbreviations (US Terms)
- ch: chain
- sl st: slip stitch
- sc: single crochet
- hdc: half double crochet
- dc: double crochet
- tr: treble crochet
- st(s): stitch(es)
- sp: space
- RS / WS: right side / wrong side
Standing sc: Start with a slip knot on your hook. Insert the hook into the stitch, yarn over, and pull up a loop. Yarn over again and draw through both loops. This attaches the yarn and makes a single crochet in one step.
Gauge and Checkpoints
Gauge: 16 sc and 18 rows = 4 in (10.2 cm) in rows of sc.
Before you commit to 260 motifs, make one motif and one small sc swatch, then measure both:
- After Rnd 1: the ring is 2 in (5.1 cm) across, with a center hole of about 1 in (2.5 cm).
- After Rnd 2: the ring is 2.75 in (7.0 cm) across.
- Finished motif: 3.5 in × 2.75 in (8.9 cm × 7.0 cm). At its tallest, the arc is about 0.75 in (1.9 cm) wide.
- First 4 motifs joined: the strand is 11 in (27.9 cm) long.
If your motif is too big: go down to a 4.5 mm hook. Each extra 0.25 in (0.6 cm) of motif height adds 6.5 in (16.5 cm) to every strand.
If your motif is too small: go up to a 5.5 mm hook. The width has to stay at 3.5 in (8.9 cm) because the header math depends on it.
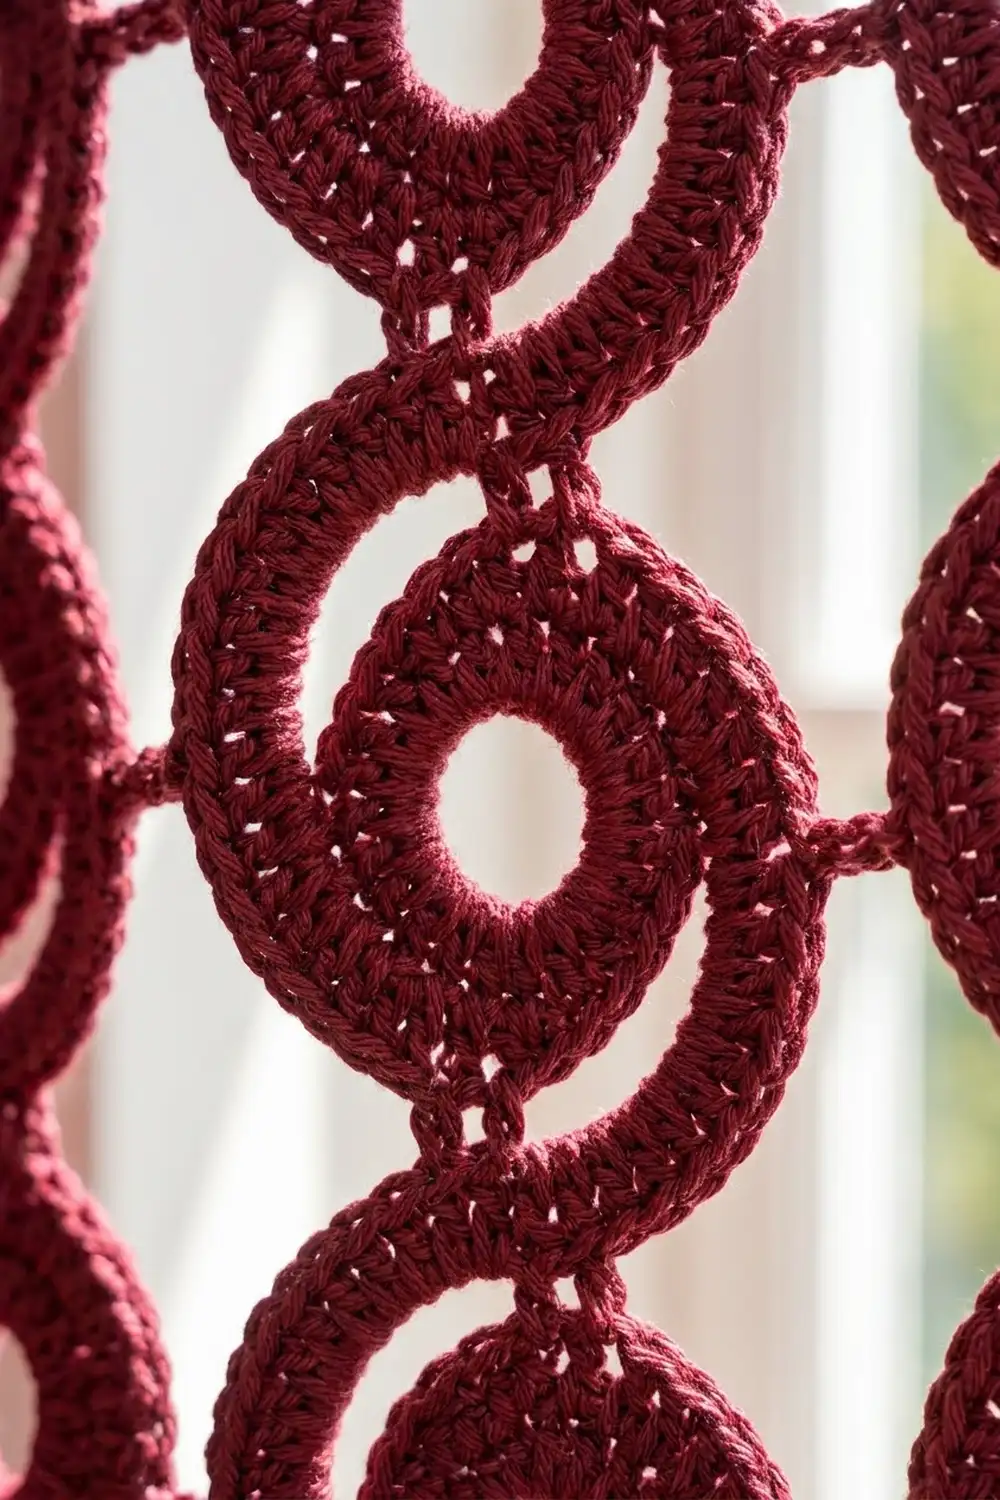
Swirl Motif (Make 260)
Rnd 1: Ch 12 and sl st in the first ch to form a ring. Ch 1 and work 24 sc into the ring. Sl st in the first sc to join. (24 sc)
Rnd 2: Ch 1. Starting in the same st as the join, work (sc in next st, 2 sc in next st) 12 times. Sl st in the first sc to join. (36 sc) Fasten off.
Numbering note: Hold the ring RS facing, with the first sc of Rnd 2 at the top. That stitch is st 1. Count the rest in the direction you worked them: st 10 is at one side, st 19 at the bottom, and st 28 at the other side.
Rnd 3 (arc anchor): Join the yarn with a standing sc in st 5. Ch 18, skip sts 6–14 (9 sts), and sc in st 15. (2 sc + ch-18) The 18 chains are longer than the 9 skipped stitches, so the chain bows outward. That leaves a crescent-shaped slit between the chain and the ring.
Row 4 (tapered arc): Turn. Work 1 st in each ch of the ch-18, as follows: sc in the first 3 ch, hdc in the next 4 ch, dc in the next 7 ch, and tr in the last 4 ch. (18 sts) Sl st in the standing sc at st 5 and fasten off.
The arc grows from short to tall stitches. The thick end sits near the top of the ring and the thin tail curls toward the bottom, which is what makes the swirl. Weave in the ends on the WS. Leave sts 34–36 and 1–4 at the top and sts 18–20 at the bottom unworked, because you need them for joining.
Checkpoint: 3.5 in × 2.75 in (8.9 cm × 7.0 cm).
Make All Pieces
Make 130 wine motifs per panel, 260 in total. Each panel has 5 strands × 26 motifs. In the grid below, R is a motif placed RS up, with its arc on the right. W is a motif flipped WS up, with its arc on the left.
Strand:  1  2  3  4  5
Row 1:   R  R  R  R  R
Row 2:   W  W  W  W  W
Row 3:   R  R  R  R  R
...  (keep alternating) ...
Row 25:  R  R  R  R  R
Row 26:  W  W  W  W  W
Flipping every other motif swings the arc from side to side, so each strand forms an S-curve. Each strand has 13 R and 13 W motifs. Single crochet in cotton looks almost the same on both faces.
Joining
Vertical joins (strands): Place the upper motif above the lower one, so the upper motif’s bottom stitches (sts 18–20) meet the lower motif’s top stitches (sts 36, 1, and 2). Hold them WS together. Working through both pieces at once, sl st st 18 to st 2, st 19 to st 1, and st 20 to st 36. Fasten off. Each join is 3 stitches wide, centered, and adds no length.
Join 26 motifs per strand, and make 5 strands per panel. Checkpoint: each strand is 71.5 in (181.6 cm) long when it hangs freely.
Side joins (bridges): Lay the 5 strands side by side with their motif rows lined up. Each bridge links the facing sides of two neighboring motifs:
- Attach the yarn with a sl st at the outermost point of one motif. On a plain side, that’s st 28. On an arc side, it’s the 2nd tr of Row 4.
- Ch 4.
- Sl st at the outermost point of the neighboring motif, then fasten off.
You need 4 bridges per motif row, or 104 per panel.
Tension advice: A ch-4 should span 1 in (2.5 cm) without pulling. If the strands pucker toward each other, chain 5 instead. Whatever length you choose, keep every bridge the same so the panel hangs square.
Checkpoint: (5 × 3.5 in) + (4 × 1 in) = 21.5 in (54.6 cm) wide, by 71.5 in (181.6 cm) long.
Header Band and Tabs (Border)
Border gauge: 16 sc and 18 rows = 4 in (10.2 cm), the same as your swatch.
Foundation: Ch 87.
Row 1: Sc in the 2nd ch from the hook and in each ch across. (86 sc)
Rows 2–18: Ch 1, turn, and sc in each st across. (86 sc) The header now measures 21.5 in × 4 in (54.6 cm × 10.2 cm).
Why the math works: Each strand takes 14 sts (3.5 in × 4 sts per in), and each bridge gap takes 4 sts (1 in × 4 sts per in). That gives (5 × 14) + (4 × 4) = 70 + 16 = 86 sts. The header width matches the body exactly, with no extra stitches at the seams.
Along Row 1, the stitches divide like this:
– Strand 1: sts 1–14
– Gap: sts 15–18
– Strand 2: sts 19–32
– Gap: sts 33–36
– Strand 3: sts 37–50
– Gap: sts 51–54
– Strand 4: sts 55–68
– Gap: sts 69–72
– Strand 5: sts 73–86
Tabs: Work 5 tabs on Row 18, each 6 sts wide with 14 sts between them. Use sts 1–6, 21–26, 41–46, 61–66, and 81–86. To check: (5 × 6) + (4 × 14) = 30 + 56 = 86.
For each tab, join the yarn in the tab’s first stitch.
- Tab Row 1: Ch 1, sc in the 6 sts. (6 sc)
- Tab Rows 2–16: Ch 1, turn, sc in the 6 sts. (6 sc)
Each tab is about 3.5 in (8.9 cm) long. Fasten off, leaving a 12 in (30.5 cm) tail. Fold the tab to the WS and whipstitch its last row across the back of header Row 14. This makes a loop about 1.25 in (3.2 cm) tall.
Attach the body: Each strand’s top motif is a Row 1 R motif. Center its 7 top sts (34–36 and 1–4) under header Row 1 sts 4–10 of that strand’s section. For the 5 strands, those are sts 4–10, 22–28, 40–46, 58–64, and 76–82. Whipstitch the stitches together one to one. The Row 1 bridges already fill the gaps between strands.
Final Blocking
- Weave in any remaining ends along stitch lines and trim them.
- Lay the panel RS up on the mats, with the strands straight and parallel.
- Pin the header square at 21.5 in × 4 in (54.6 cm × 10.2 cm).
- Pin the strands so the gaps between them stay 1 in (2.5 cm) all the way down.
- Open each swirl slit with a pin, and curve the tall end of each arc smoothly.
- Mist the panel until it’s damp but not soaked.
- Let it dry completely before you unpin it.
- Hang it on the rod for a day so it settles.
Final Quality-Control Checklist
- [ ] Every motif measures 3.5 in × 2.75 in (8.9 cm × 7.0 cm).
- [ ] Every motif has 36 sc in Rnd 2 and 18 sts in its arc.
- [ ] The arcs alternate R/W down every strand.
- [ ] Each strand has 26 motifs and measures 71.5 in (181.6 cm).
- [ ] Each panel has 104 bridges, all the same length.
- [ ] The header has 86 sts × 18 rows and measures 21.5 in × 4 in (54.6 cm × 10.2 cm).
- [ ] The tabs are evenly spaced and securely sewn.
- [ ] The two panels match in length within 0.5 in (1.3 cm).
Troubleshooting
The ring cups: Rnd 2 is too tight. Work Rnd 2 with a hook one size larger.
The ring ruffles: Recount Rnd 2. It should have exactly 36 stitches.
There’s no slit under the arc: The ch-18 is too tight. Chain more loosely.
The arc flips forward: Block the motif WS down and pin the tr end outward.
A strand twists: One motif is probably facing the wrong way. Compare the strand with the R/W grid.
The panel pulls in at the middle: Some bridges are short. Redo them so they all span 1 in (2.5 cm).
The header is wider than the body: Recount to 86 sts and check your gauge.
The panel grows when it hangs: Remove 1 motif from the bottom of each strand.
Care
Hand wash in cool water with a mild detergent and press out the water in a towel. Don’t wring. Dry the panels flat and reblock them to size.
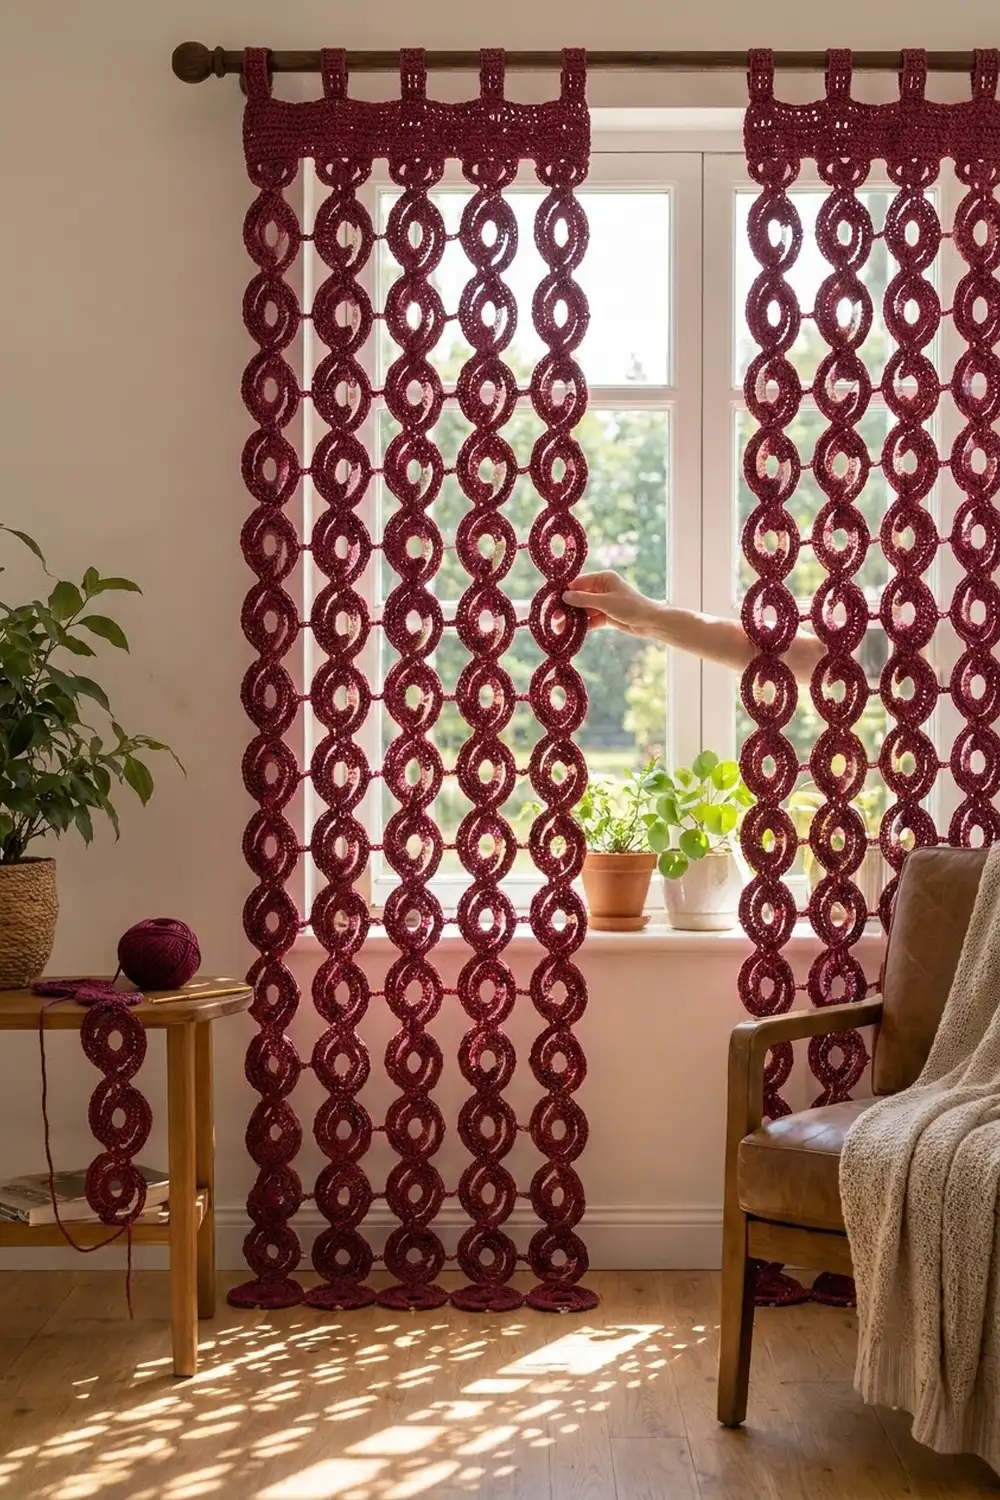
Final Notes
The whole curtain depends on one chain of measurements:
– Each motif measures 3.5 in × 2.75 in (8.9 cm × 7.0 cm).
– 26 motifs make a strand 71.5 in (181.6 cm) long.
– 5 strands plus 4 bridges of 1 in (2.5 cm) each give the 21.5 in (54.6 cm) width.
– The 86-stitch header matches that width stitch for stitch, and its 4 in (10.2 cm) depth brings each panel to 75.5 in (191.8 cm).
Check your gauge on the first motif and again on the first strand, and the rest of the curtain will come out right.
Happy crocheting!