

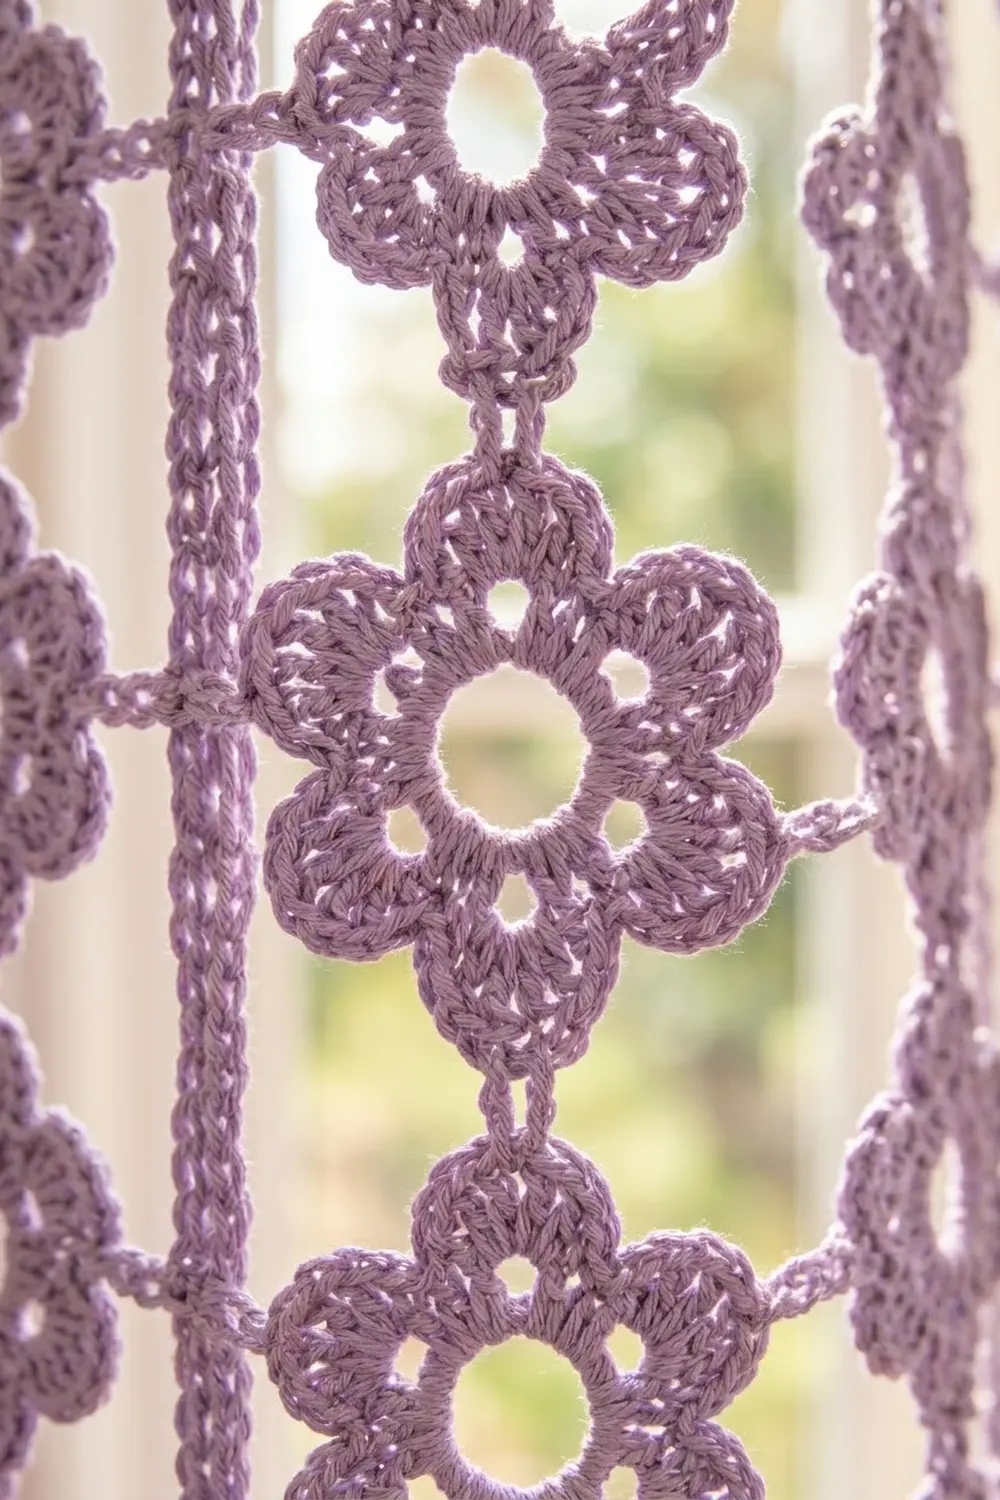
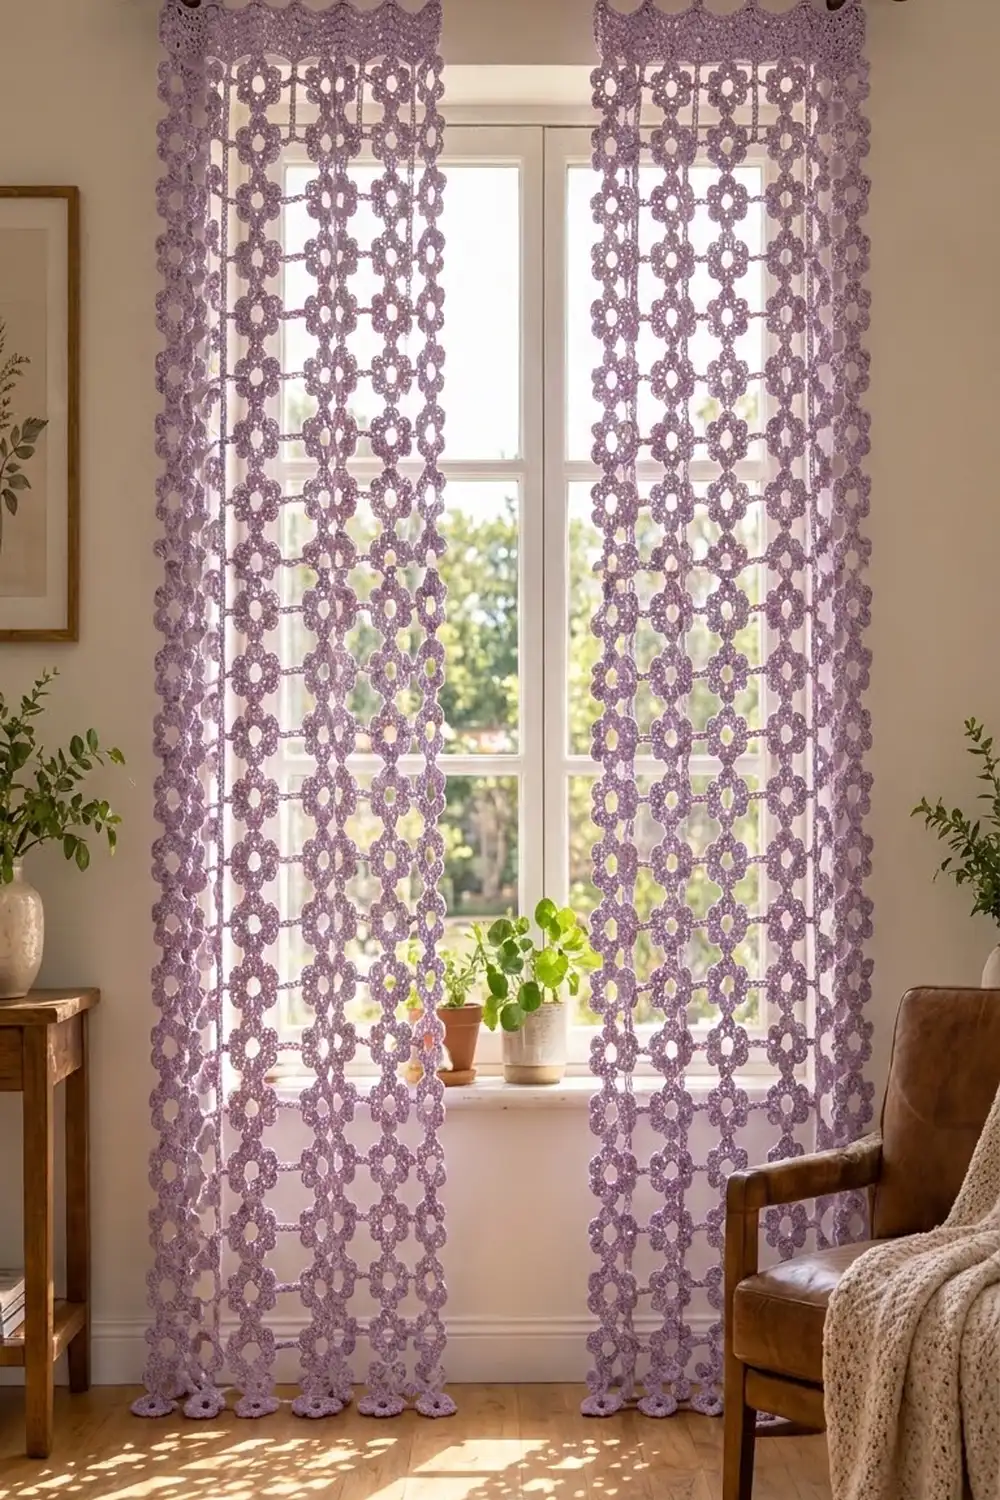
This pair of curtain panels is made from soft lavender six-petal flowers. Each flower has an open round center, and short doubled chain bars link the flowers into an open grid. In a sunny window, the flowers cast dappled shadows on the floor and still give some privacy.
The panels use one color, a muted lavender, so the stitch texture carries the design. You get rounded single-crochet petals, light chain bars, and a solid header band with a softly scalloped lower edge and five hanging tabs. The style is cottage-romantic but simple enough for a modern room.
The pattern uses US crochet terms. Each finished panel measures 23.5 in (59.7 cm) wide and 76.25 in (193.7 cm) long, from the bottom petal tips to the top of the header band. The tab loops rise another 3 in (7.6 cm) above the band.
Each flower motif takes three rounds. From the second motif on, you join each new motif to its neighbors while working its last round (join-as-you-go). Each panel is a grid of 6 columns by 15 rows. Then you work a header band across the top row of flowers. Finally, you work tabs straight up from the band and fold them down.
Finished Size and Construction
- Finished panel size: 23.5 in x 76.25 in (59.7 cm x 193.7 cm), plus 3 in (7.6 cm) tab loops
- Skill level: Intermediate (easy stitches, careful repetition)
- Terminology: US
- Yarn weight: Worsted (#4) cotton or cotton blend
- Hook: 5 mm (US H-8)
- Number of pieces: 90 flower motifs per panel; 180 for the pair
- Layout: 6 columns x 15 rows per panel
- Piece size: each motif is 4 in (10.2 cm) from top tip to bottom tip and 3.5 in (8.9 cm) across the side petals
- Size before border: 23.5 in x 74 in (59.7 cm x 188.0 cm) flower grid
- Border depth: header band 2.25 in (5.7 cm) above the top petal tips; tab loops 3 in (7.6 cm)
Materials
Choose a smooth worsted cotton or cotton blend in lavender. Cotton holds the petal shape, resists stretching under its own weight, and washes well. Avoid fuzzy or very stretchy yarns, because the grid will drop and get longer over time.
- Lavender: 350 g / 543 m per panel; 700 g / 1,085 m for the pair (based on yarn of about 100 g / 155 m)
These amounts include a margin of about 15 percent for gauge differences, tails, and a test motif.
Tools:
- 5 mm (US H-8) crochet hook
- Tapestry needle
- Locking stitch markers (at least 4)
- Scissors
- Measuring tape
- Rust-proof pins and a large blocking surface (foam mats or a bed covered with towels)
- Spray bottle
Abbreviations (US Terms)
- ch – chain
- sl st – slip stitch
- sc – single crochet
- dc – double crochet
- tr – treble crochet
- st(s) – stitch(es)
- RS / WS – right side / wrong side
Special technique – Bar Join:
1. Work the sc at the joining stitch as written.
2. Ch 4 for a vertical join, or ch 5 for a side join.
3. Sl st in the matching stitch of the neighboring motif.
4. Ch 4 (or ch 5) back.
5. Sl st in the top of the sc you just made.
This makes a doubled chain bar. Bar-join chains and sl sts are not included in the round stitch counts.
Gauge and Checkpoints
- Single crochet gauge: 16 sc and 18 rows = 4 in (10.2 cm)
- Chain gauge: 4 ch = 1 in (2.5 cm)
- Motif: 4 in (10.2 cm) from tip to tip after Round 3
Make one test motif before you start, and measure it at each checkpoint:
- After Round 1: the ring is about 1.75 in (4.4 cm) across the outside edge, with an open center about 1 in (2.5 cm) wide.
- After Round 2: the six petals measure about 3.5 in (8.9 cm) from tip to tip.
- After Round 3: 4 in (10.2 cm) from top tip to bottom tip, 3.5 in (8.9 cm) across the side petals, and 2.75 in (7.0 cm) between the 3 o’clock and 9 o’clock valleys.
If your motif is too big, go down 0.5 mm in hook size. If it is too small, go up 0.5 mm. Small errors add up: a motif that is just 1/4 in (0.6 cm) too long makes the panel about 3.75 in (9.5 cm) too long over 15 rows.
Flower Motif
With the motif RS up, use these clock positions on every motif:
- Petal tips: 12, 2, 4, 6, 8, and 10 o’clock
- Valleys: 1, 3, 5, 7, 9, and 11 o’clock
- The 12 o’clock tip joins to the motif above. The 9 o’clock valley joins to the motif on the left.
Round 1: Ch 12, sl st in first ch to form a ring. Ch 1, work 24 sc into the ring, sl st in first sc. (24 sc)
Round 2: Ch 1, sc in same st, skip 1 st, (dc, 3 tr, dc) in next st, skip 1 st; sc in next st, skip 1 st, (dc, 3 tr, dc) in next st, skip 1 st; repeat from * 4 more times. Sl st in first sc. (6 petals; 36 sts: 6 sc + 30 petal sts)
Each repeat uses 4 stitches of Round 1, so 6 repeats use all 24 stitches.
Round 3: Ch 1. Sc in sc (valley), sc in dc, 2 sc in next tr, 3 sc in next tr, 2 sc in next tr, sc in dc; repeat from * 5 more times. Sl st in first sc. (60 sc: 10 per petal)
The middle sc of each 3-sc group is the petal tip. The sc worked into a Round 2 sc is the valley. Fasten off and weave in ends.
Before joining, mark one tip as 12 o’clock. Round 2 spaces the petals evenly, so the 3 and 9 o’clock positions always fall on valleys.
Make All Pieces
Each panel needs 90 lavender motifs (6 columns x 15 rows), so the pair needs 180.
Only the first motif of each panel is finished on its own. For every other motif, work Rounds 1 and 2 separately, then join it to its neighbors while working Round 3.
Layout for one panel. Each F is one motif, each | is a 1.25 in (3.2 cm) side bar, and each – is a 1 in (2.5 cm) vertical bar:
Row 1:  F | F | F | F | F | F
        -   -   -   -   -   -
Row 2:  F | F | F | F | F | F
        -   -   -   -   -   -
  ...   (Rows 3-14 repeat)
        -   -   -   -   -   -
Row 15: F | F | F | F | F | F
That makes 15 x 5 = 75 side bars and 14 x 6 = 84 vertical bars per panel.
Joining
Work from the top row down, left to right across each row.
Row 1, motif 1: Work all three rounds. No joins.
Row 1, motifs 2–6: Work Round 3. At the 9 o’clock valley sc, work a bar join with ch 5 into the 3 o’clock valley sc of the motif on the left. Finish the round.
Rows 2–15, motif 1: At the 12 o’clock tip sc, work a bar join with ch 4 into the 6 o’clock tip sc of the motif above.
Rows 2–15, motifs 2–6: Work two bar joins in the same Round 3: ch 4 at 12 o’clock to the motif above, and ch 5 at 9 o’clock to the motif on the left.
Stitch-to-stitch logic: Tips join to tips and valleys join to valleys, always one stitch to one stitch. You don’t add or skip any Round 3 stitches, so every motif still has 60 sc.
Why the bar lengths work:
– Width: The distance between the 9 and 3 o’clock valleys is 2.75 in (7.0 cm). Adding a 1.25 in (3.2 cm) side bar puts the motif centers 4 in (10.2 cm) apart. Each motif is 3.5 in (8.9 cm) across the side petals, so neighboring petal tips end up 0.5 in (1.3 cm) apart.
– Length: A 4 in (10.2 cm) motif plus a 1 in (2.5 cm) bar puts the motif rows 5 in (12.7 cm) apart, center to center.
Tension advice: Count your chains every time, and keep them as relaxed as your gauge chains. Tight bars pull the grid into slanted diamonds. Loose bars sag and make the panel longer.
Size checkpoint:
- Width: (5 x 4 in) + 3.5 in = 23.5 in (59.7 cm).
- Length: (15 x 4 in) + (14 x 1 in) = 74 in (188.0 cm).
- After Row 3, measure the width. Then measure from the top tips of Row 1 to the bottom tips of Row 3; it should be 14 in (35.6 cm). If either is off, fix your tension now rather than later.
Border: Header Band and Hanging Tabs
The header band and tabs along the top are the panel’s only border. The sides and bottom stay as open petals, which is part of the look.
Border gauge: 16 sc = 4 in (10.2 cm), so 4 sts = 1 in (2.5 cm). To match the grid, the band needs 23.5 x 4 = 94 sts.
Row 1 (leveling row, RS): Work right to left along the top of the Row 1 motifs, starting at the 2 o’clock tip of the right-hand motif.
- Join yarn, ch 4 (counts as tr), then tr in the same st.
- Ch 3, then (sc, ch 2, sc) in the 12 o’clock tip.
- Ch 3, then 2 tr in the 10 o’clock tip.
- Ch 2, 2 tr in the 2 o’clock tip of the next motif, ch 3, (sc, ch 2, sc) in the 12 o’clock tip, ch 3, 2 tr in the 10 o’clock tip; repeat from * 4 more times.
Count:
– Each motif: 2 tr + 3 ch + 1 sc + 2 ch + 1 sc + 3 ch + 2 tr = 14 sts.
– Each gap between motifs: 2 ch.
– Row total: (6 x 14) + (5 x 2) = 84 + 10 = 94 sts.
The side petal tips sit 1 in (2.5 cm) lower than the top tips. The tall tr stitches fill that dip, which gives the band its softly scalloped lower edge.
Row 2: Ch 1, turn. Work 1 sc in each st and in each ch, inserting the hook into the chain itself. (94 sc)
Rows 3–10: Ch 1, turn, sc across. (94 sc) Do not fasten off.
Band depth: Rows 2–10 are 9 rows, or 2 in (5.1 cm). The Row 1 stitches at the 12 o’clock tips add about 1/4 in (0.6 cm). The band ends 2.25 in (5.7 cm) above the top petal tips.
Tab placement: Make 5 tabs, each 6 sts wide, on sts 1–6, 23–28, 45–50, 67–72, and 89–94. That leaves four gaps of 16 sts each: (5 x 6) + (4 x 16) = 30 + 64 = 94.
Each tab:
1. With RS facing, join yarn in the first st of the tab and sc in 6 sts.
2. Ch 1, turn, sc in 6 sts. Repeat this row 25 more times, for 27 rows in all (6 in / 15.2 cm).
3. Fasten off, leaving a 12 in (30.5 cm) tail.
4. Fold the tab to the WS and whipstitch its last row to the back of Row 9 of the band. This makes a 3 in (7.6 cm) loop.
Why the math works: The band is 94 / 4 = 23.5 in wide, exactly the width of the motif grid, so the band neither gathers nor ruffles the flowers.
Final Blocking
- Weave in any remaining ends along the bars or through Round 3 stitches.
- Lay the panel flat, RS up, on your blocking surface. Work in sections if it doesn’t all fit.
- Pin the header band to 23.5 in (59.7 cm) wide.
- Pin the outer petal tips of each column in a straight line. Check that the columns are 4 in (10.2 cm) apart, center to center.
- Pin the bottom tips so the rows are 5 in (12.7 cm) apart and the grid is 74 in (188.0 cm) long.
- Shape the petals round and open up the centers.
- Spray until damp, and let dry completely before unpinning.
- Block the second panel the same way, then lay the two side by side and compare.
Final Quality-Control Checklist
- Every motif has 6 petals and 60 sc in Round 3.
- Every 12 o’clock tip is joined to the 6 o’clock tip above (Rows 2–15).
- Every 9 o’clock valley is joined to the 3 o’clock valley on the left (columns 2–6).
- Vertical bars are ch 4; side bars are ch 5.
- The grid measures 23.5 in x 74 in (59.7 cm x 188.0 cm).
- The header band has 94 sts and 10 rows.
- There are 5 evenly spaced tabs, each folded into a 3 in (7.6 cm) loop.
- The two panels are within 1/2 in (1.3 cm) of each other in length.
- All ends are hidden and secure.
Troubleshooting
- Motif cups: Round 3 is too tight. Go up one hook size for Round 3 only.
- Petals ruffle: Round 3 is too loose, or there are extra sc at the tips. Count again; each petal should have 10 sc.
- Grid slants into diamonds: The bars are too tight or uneven. Redo them with relaxed chains of the same length.
- Panel grows after hanging: Cotton relaxes over time. Block it again to 74 in (188.0 cm), and check that every vertical bar is exactly ch 4.
- Band pulls in: Check that Row 2 has 94 sts. Missed chains in Row 1 are the usual cause.
- Tabs twist: Sew the full width of each tab flat to the band, not just the corners.
Care
Hand wash, or machine wash cold in a mesh bag on a gentle cycle. Lay flat to dry, re-pinning if needed, and never hang the panel while it’s wet, because the weight will stretch the grid.
Final Notes
Here is how the measurements build on each other:
- Each motif is 4 in (10.2 cm) tip to tip and 2.75 in (7.0 cm) across the valleys. A 1.25 in (3.2 cm) side bar puts the motifs 4 in (10.2 cm) apart, center to center.
- Six columns make the panel 23.5 in (59.7 cm) wide.
- Fifteen rows joined with 1 in (2.5 cm) bars make it 74 in (188.0 cm) long.
- The 94-st header band matches that width exactly and adds 2.25 in (5.7 cm).
- The tabs add 3 in (7.6 cm) loops for hanging.
Check gauge on the test motif, check again after Row 3, and your panels will hang straight and even.
Happy crocheting!