

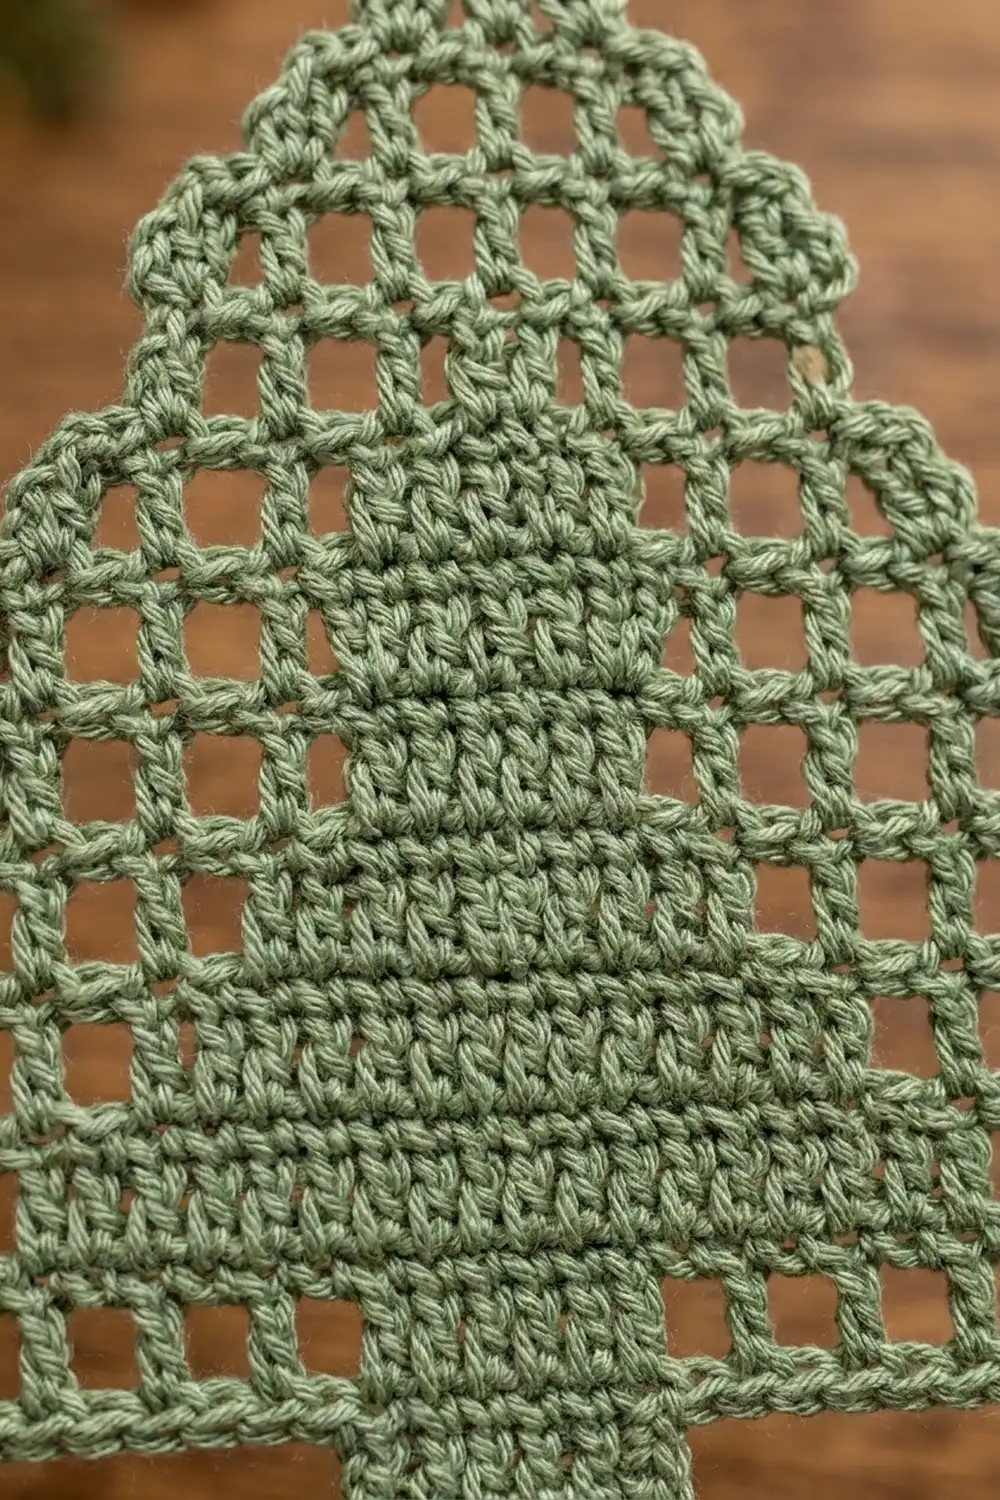
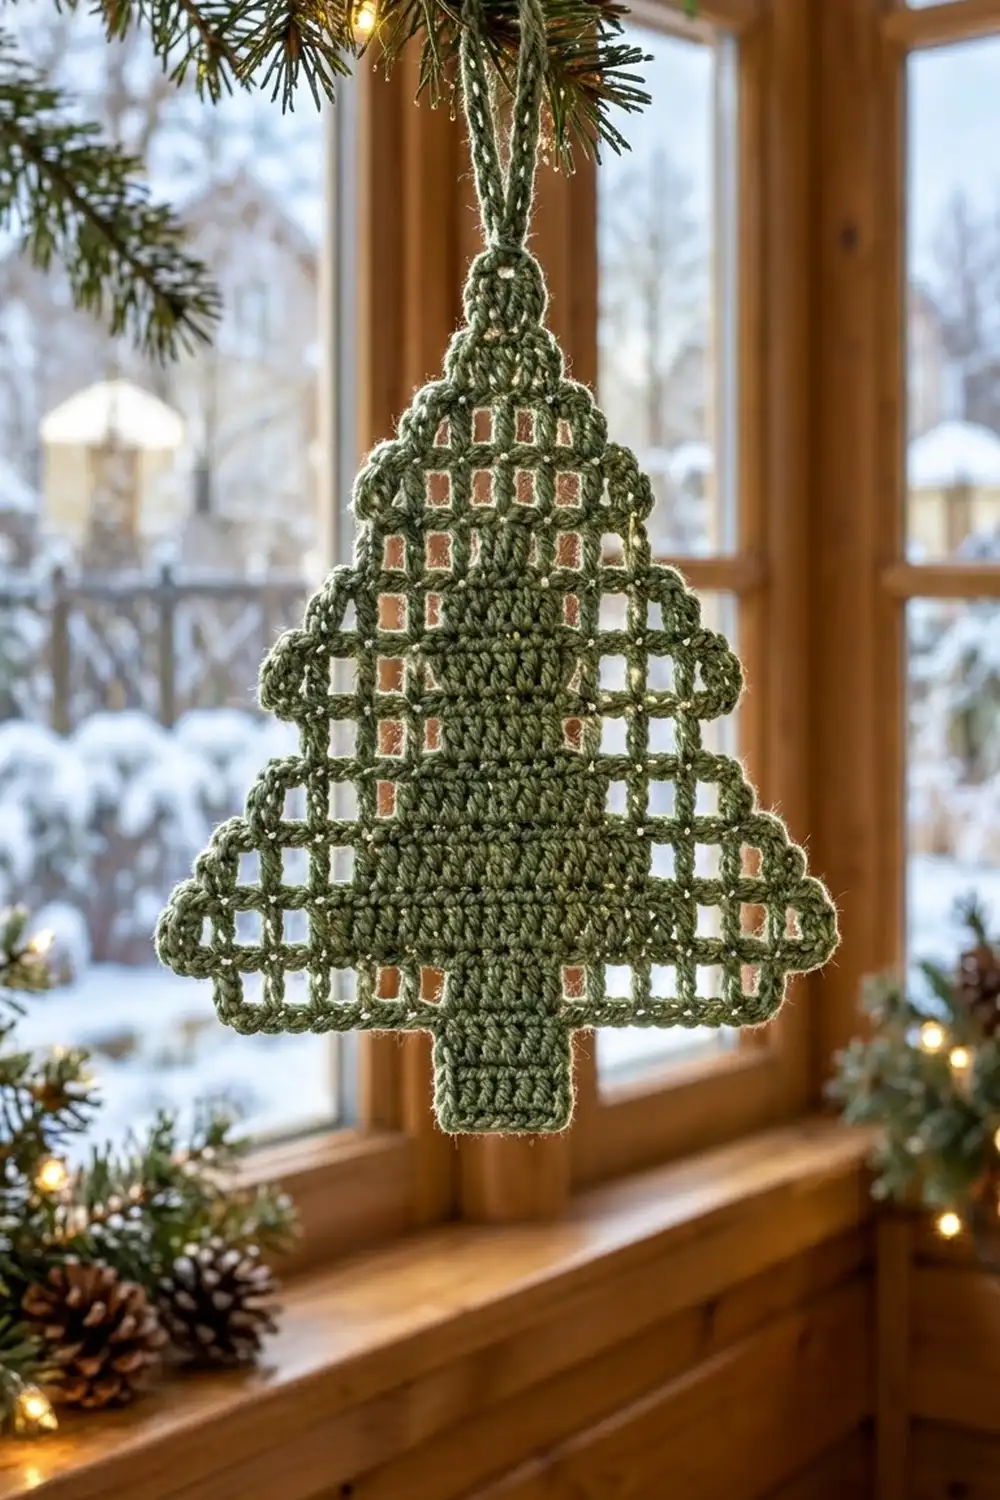
The Evergreen Lattice Tree is a flat Christmas ornament made in filet crochet. Open mesh squares run along each stepped edge, and a solid tree shape fills the center, so it looks like a small lattice window. When it hangs in front of a light, the open squares glow and the solid center stands out as a second, inner tree.
The sample is in one soft sage green, which looks natural and calm. It also works well in deep forest green, cream for a frosty look, or metallic gold for a dressier tree.
This pattern uses US crochet terms. The finished ornament measures 6.25 in (15.9 cm) wide by 6.25 in (15.9 cm) tall, not counting the hanging loop.
The tree is worked flat in rows from the tip down. Each tier grows by one filet square at both ends of every row. A slip-stitch decrease starts each new tier, and the trunk is centered under the last tier. A single round of single crochet neatens the outline, and the hanging loop is added at the tip.
Finished Size and Construction
- Finished size: 6.25 in x 6.25 in (15.9 cm x 15.9 cm), excluding the loop
- Hanging loop: about 1.5 in (3.8 cm)
- Skill level: Intermediate (filet increases and decreases)
- Terminology: US
- Yarn weight: Sport (#2), cotton
- Hook: 2.75 mm (C-2)
- Number of pieces: 1
- Layout: Single flat motif, 15 rows, 3 tiers plus trunk
- Piece size before border: 6.0 in x 6.0 in (15.2 cm x 15.2 cm)
- Border depth: about 0.125 in (0.3 cm) on each side
Materials
Use a smooth mercerized cotton or cotton blend in sport weight. Cotton gives crisp square holes and blocks flat. Fuzzy yarns blur the mesh, so avoid them.
- Sage green: 15 g, about 45 m (49 yd)
- 2.75 mm (C-2) crochet hook
- Tapestry needle
- Scissors
- Rustproof pins and a blocking mat
- Spray bottle
- Stitch marker (optional)
The yarn quantity includes a margin of about 30% for your gauge swatch and weaving in ends.
Abbreviations (US Terms)
- ch – chain
- sl st – slip stitch
- sc – single crochet
- dc – double crochet
- dtr – double treble crochet (yo 3 times, insert hook, yo and pull up a loop, [yo, pull through 2] 4 times)
- sk – skip
- st(s) – stitch(es)
- sp – space
- tch – turning chain
- yo – yarn over
Special stitches
- OB (open block): ch 2, sk next 2 sts (or ch-2 sp), dc in next dc.
- SB (solid block): dc in each of next 2 sts (or 2 dc in ch-2 sp), dc in next dc.
- Inc-B (increase one open block at beginning of row): ch 8, dc in first st (the edge post directly below your hook). Chains 1–3 form the base of the block, chains 4–6 count as the outer dc, and chains 7–8 form the ch-2 sp.
- Inc-E (increase one open block at end of row): ch 2, dtr in the same st where you worked the last dc.
- Dec (decrease one block at beginning of row): sl st in first 4 sts, ch 3 (counts as dc).
Stitch count rule: every row of n blocks has 3n + 1 stitches. Each ch counts as a stitch, and the edge posts count as dc.
The last dc of every row goes into the top of the previous row’s edge post. That is the 3rd ch of a ch-3, the 6th ch of an Inc-B ch-8, or the top of a dtr.
Gauge and Checkpoints
Gauge: 1 filet block = 0.4 in (1.0 cm) wide x 0.4 in (1.0 cm) tall. 5 blocks = 2.0 in (5.1 cm) wide, and 5 rows = 2.0 in (5.1 cm) tall.
Use the top tier as your gauge test: work Rows 1–4, then pin them flat and measure.
Checkpoints:
- After Row 4: 7 blocks wide = 2.8 in (7.1 cm); height 1.6 in (4.1 cm)
- After Row 8: 11 blocks wide = 4.4 in (11.2 cm); height 3.2 in (8.1 cm)
- After Row 12: 15 blocks wide = 6.0 in (15.2 cm); height 4.8 in (12.2 cm)
- After Row 15: height 6.0 in (15.2 cm); trunk 1.2 in (3.0 cm) wide
- After border: 6.25 in x 6.25 in (15.9 cm x 15.9 cm)
Too big: go down to a 2.5 mm hook. Too small: go up to a 3.0 mm hook.
If the blocks are wider than they are tall, pull each dc up a little taller before you finish it. If they are taller than they are wide, keep your chains slightly looser. Square blocks keep the tiers looking even.
Pattern: Tree Body
The tip comes first, and each later row hangs below the one before. Turn at the end of every row.
Tier 1 (Top)
Row 1: Ch 6, dc in 4th ch from hook and in next 2 ch. Turn. (4 sts: 1 SB)
Row 2: Inc-B, SB, Inc-E. Turn. (10 sts: 3 blocks – O, S, O)
Row 3: Inc-B, OB, SB, OB, Inc-E. Turn. (16 sts: 5 blocks – O, O, S, O, O)
Row 4: Inc-B, OB, SB 3 times, OB, Inc-E. Turn. (22 sts: 7 blocks – 2 O, 3 S, 2 O)
Rows 3 and 4 add blocks only at the edges. Each new solid block in the center is worked as 2 dc into the ch-2 sp below.
Tier 2 (Middle)
Row 5: Dec, OB, OB, SB, OB, OB. Leave the remaining 3 sts unworked. Turn. (16 sts: 5 blocks – 2 O, 1 S, 2 O)
Above the solid blocks of Row 4, each OB is ch 2, sk 2 dc, dc in next dc.
Row 6: Inc-B, OB, SB 3 times, OB, Inc-E. Turn. (22 sts: 7 blocks – 2 O, 3 S, 2 O)
Row 7: Inc-B, OB, SB 5 times, OB, Inc-E. Turn. (28 sts: 9 blocks – 2 O, 5 S, 2 O)
Row 8: Inc-B, OB, SB 7 times, OB, Inc-E. Turn. (34 sts: 11 blocks – 2 O, 7 S, 2 O)
Row 5 is narrower than Row 4, so one block of Row 4 sticks out on each side. Row 6 widens again underneath it. This leaves the small notch that separates the tiers.
Tier 3 (Bottom)
Row 9: Dec, OB, OB, SB 5 times, OB, OB. Leave the remaining 3 sts unworked. Turn. (28 sts: 9 blocks – 2 O, 5 S, 2 O)
Row 10: Inc-B, OB, SB 7 times, OB, Inc-E. Turn. (34 sts: 11 blocks – 2 O, 7 S, 2 O)
Row 11: Inc-B, OB, SB 9 times, OB, Inc-E. Turn. (40 sts: 13 blocks – 2 O, 9 S, 2 O)
Row 12: Inc-B, OB, SB 11 times, OB, Inc-E. Turn. (46 sts: 15 blocks – 2 O, 11 S, 2 O)
Trunk
Row 13: Sl st in the first 19 sts (the edge post plus 6 blocks), ch 3 (counts as dc), SB 3 times. Leave the remaining 18 sts unworked. Turn. (10 sts: 3 SB)
Check the math: 19 + 9 + 18 = 46, which matches Row 12. The trunk sits under blocks 7–9 of 15, which centers it exactly.
Rows 14–15: Ch 3 (counts as dc), dc in each st across, with the last dc in the top of the tch. Turn. (10 sts each row)
Fasten off after Row 15. The body should now measure 6.0 in x 6.0 in (15.2 cm x 15.2 cm).
Border
Border gauge: a sc is about half the height of a dc row. That means 2 sc per dc row end and 1 sc per stitch on horizontal edges (3 sc per block).
Border rules:
- Each row end (dc post, ch-3, ch-8 post, or dtr): work 2 sc around the post.
- Each exposed horizontal block edge: work 3 sc. This includes the base chain of an Inc-B, the lower bar of an Inc-E, and unworked or slip-stitched block tops.
- Each outer (convex) corner: ch 1.
- Each inner (concave) corner: no extra stitch. Move straight into the next segment.
Round 1: With the tip at the top, join yarn with sc in the first foundation ch at the top of Row 1. Work the round as follows.
Top of tip: 3 sc across the top of Row 1 (including the joining sc).
Right side, top to bottom (81 sc, 14 ch-1 corners):
- Ch 1 (corner), then 2 sc on the Row 1 end.
- Rows 2–4: for each row, work 3 sc along the top of the new block, ch 1, and 2 sc on the row end. (15 sc, 3 corners)
- Ch 1 (corner). Work 3 sc along the underside of the overhanging Row 4 block, then 2 sc on the Row 5 end. (5 sc, 1 corner)
- Rows 6–8: repeat as for Rows 2–4. (15 sc, 3 corners)
- Ch 1 (corner). Work 3 sc along the underside of the Row 8 block, then 2 sc on the Row 9 end. (5 sc, 1 corner)
- Rows 10–12: repeat as for Rows 2–4. (15 sc, 3 corners)
- Ch 1 (corner). Work 18 sc along the underside of Row 12, out to the trunk. (18 sc, 1 corner)
- 6 sc down the trunk (2 sc per row end, Rows 13–15), then ch 1 (corner). (6 sc, 1 corner)
Check: 2 + 15 + 5 + 15 + 5 + 15 + 18 + 6 = 81 sc. Corners: 1 + 3 + 1 + 3 + 1 + 3 + 1 + 1 = 14.
Trunk bottom: 1 sc in each of the 10 sts of Row 15. (10 sc)
Left side, bottom to top: mirror the right side. Ch 1 (corner) and work 6 sc up the trunk. Continue upward through each segment in reverse order, ending with 2 sc on the Row 1 end and ch 1 (corner). (81 sc, 14 ch-1 corners)
Join with sl st to the first sc.
Round 1 total: 3 + 81 + 10 + 81 = 175 sc, plus 28 ch-1 corners.
Hanging loop: Sl st in the next sc (the center sc of the top 3). Ch 25 and sl st in the same sc. Work 30 sc into the ch-25 loop, then sl st in the same center sc. Fasten off. The loop stands about 1.5 in (3.8 cm) tall.
Why the math works: Two sc fill the height of one dc row, and three sc fill the width of one 3-stitch block. The border therefore follows the edge at its natural length, without ruffling or cupping. The ch-1 corners give each outer step a little extra room, so the points stay sharp. The inner corners get no extra stitches, which keeps the notches crisp. The border adds 0.125 in (0.3 cm) on each side: 6.0 + 0.25 = 6.25 in (15.9 cm) in both directions.
Final Blocking
- Weave in all ends along solid areas, where they will be hidden.
- Soak the ornament in cool water for 10 minutes, then roll it in a towel to remove excess water.
- Lay it flat on a blocking mat with the tip at the top.
- Pin the tip and trunk bottom 6.25 in (15.9 cm) apart.
- Pin the outer points of Row 12 6.25 in (15.9 cm) apart, including the border.
- Pin the outer points of Row 4 (2.8 in / 7.1 cm plus border) and Row 8 (4.4 in / 11.2 cm plus border), centered.
- Use a pin or blunt needle to nudge each open square into a true square.
- Let it dry completely. For a stiffer ornament, mist it lightly with fabric stiffener or a sugar-water mix before it dries.
Final Quality-Control Checklist
- [ ] Rows 1–15 match the listed stitch counts (4, 10, 16, 22, 16, 22, 28, 34, 28, 34, 40, 46, 10, 10, 10).
- [ ] Every edge has exactly 2 open blocks on each side of the solid center (Rows 3–12).
- [ ] The trunk is centered under blocks 7–9 of Row 12.
- [ ] The border has 175 sc and 28 ch-1 corners.
- [ ] The tiers measure 2.8 in (7.1 cm), 4.4 in (11.2 cm), and 6.0 in (15.2 cm) wide before the border.
- [ ] The finished ornament measures 6.25 in x 6.25 in (15.9 cm x 15.9 cm).
- [ ] The hanging loop sits exactly at the center of the tip.
- [ ] All ends are secure and hidden.
Troubleshooting
Open blocks look like rectangles. Your chains are too tight or too loose compared with your dc height. Adjust your chain tension until the blocks are square.
Inc-E edge leans or puckers. Work the dtr loosely and keep it fully extended. If it still pulls, try a triple treble (yo 4 times) instead.
Stitch counts drift. Check that you are always working the final dc into the top of the edge post (the 6th ch of an Inc-B, or the 3rd ch of a ch-3).
Tiers look lopsided. Count your blocks from the center out. Each side should mirror the other.
Border ripples. You are adding extra sc on the steps. Stick to exactly 2 sc per row end and 3 sc per block edge.
Border cups or pulls in. Work the border with a 3.0 mm hook.
Trunk off-center. Recount the Row 13 slip stitches. There should be exactly 19.
Care
Hand wash in cool water and lay flat to dry, reshaping the squares while damp. Store flat or hanging so the tiers keep their shape.
Final Notes
The measurement chain is simple. One block is 0.4 in (1.0 cm). Fifteen blocks make the 6.0 in (15.2 cm) bottom tier, and fifteen rows make the 6.0 in (15.2 cm) height. The single-crochet border adds 0.125 in (0.3 cm) on each side, for a finished 6.25 in x 6.25 in (15.9 cm x 15.9 cm) ornament with a 1.5 in (3.8 cm) loop. Check your gauge after Tier 1 and the rest of the tree will follow.
Happy crocheting!