

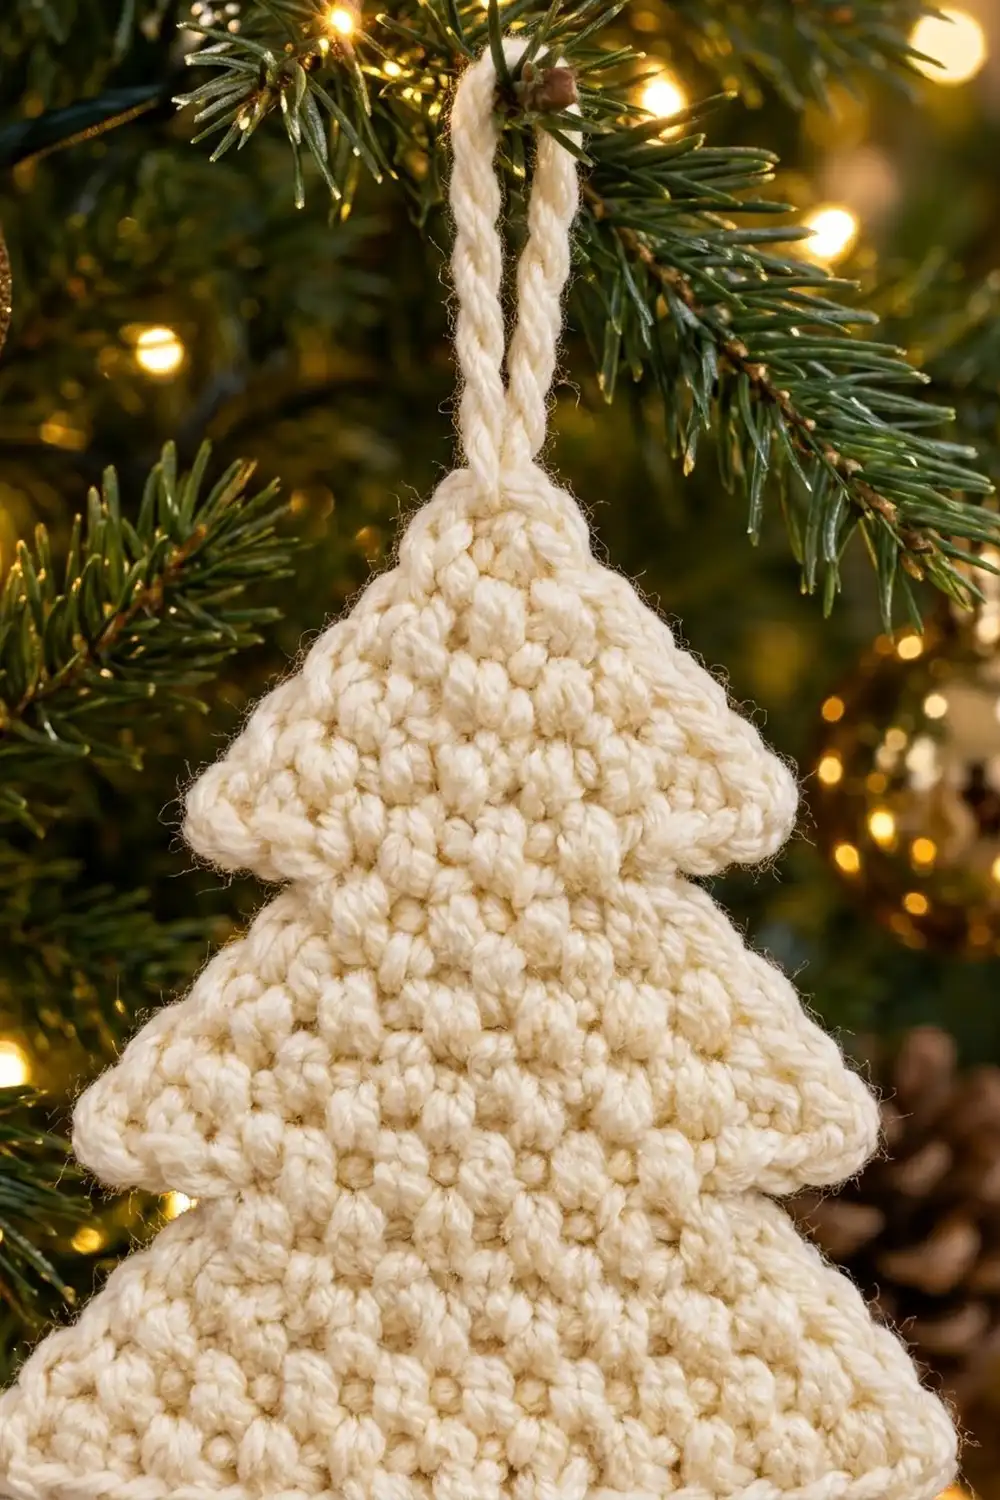
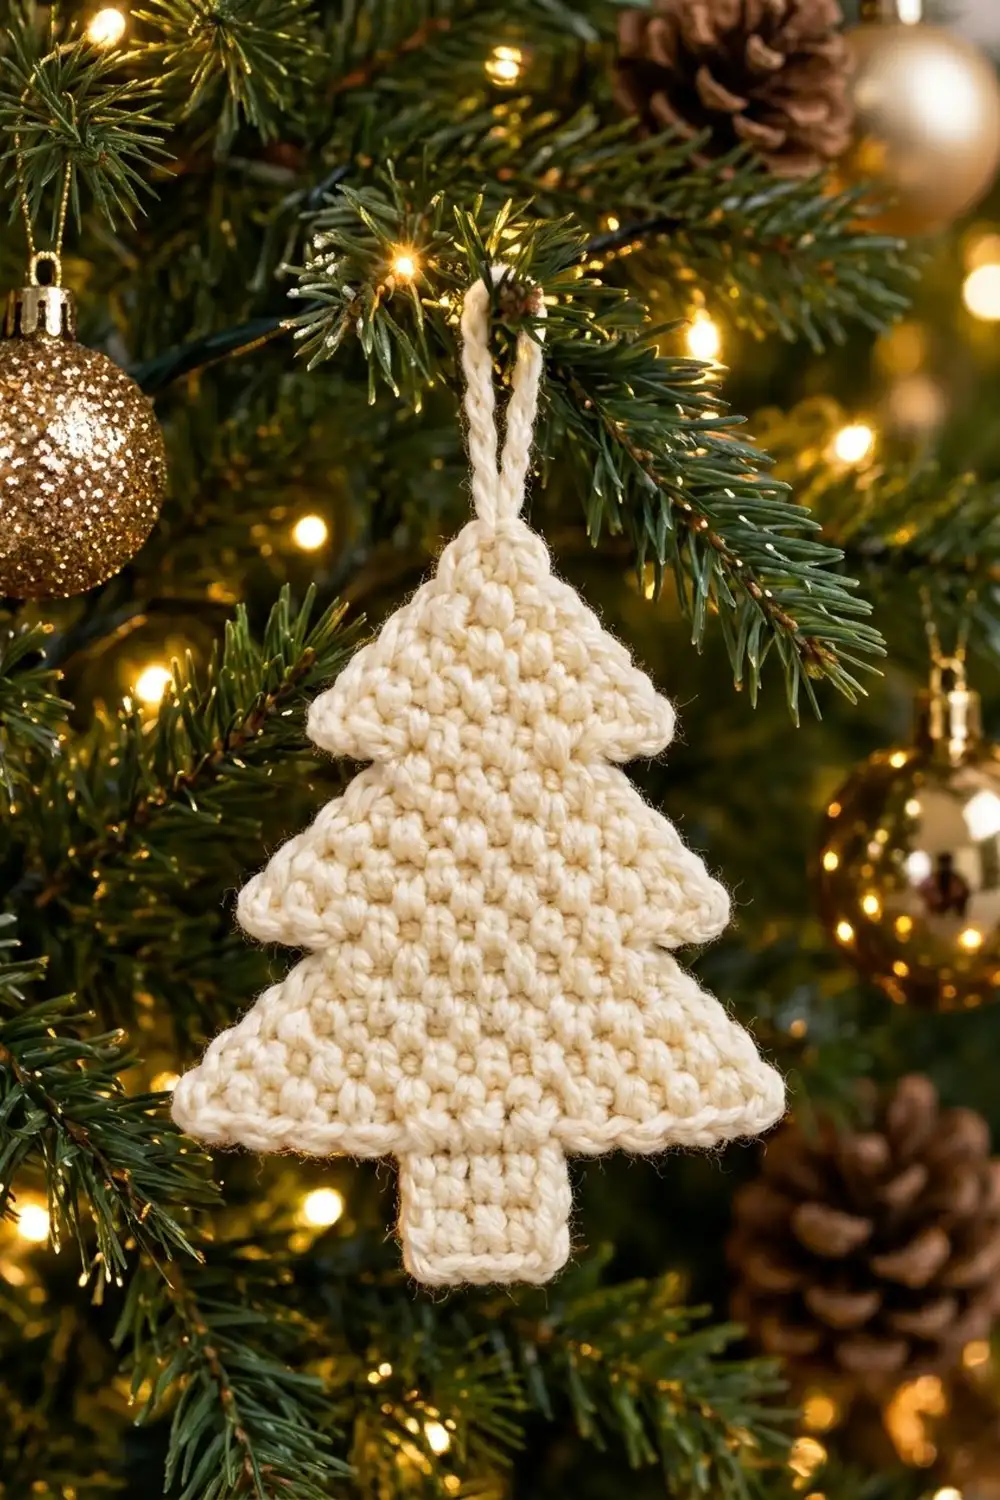
This ornament is a flat, cream-colored Christmas tree with three stepped tiers, a neat little trunk, and a chain loop for hanging. Dense single crochet gives it a soft, pebbly texture, and a single crochet border around the whole outline makes the edge look rounded and finished.
The style is simple and warm, so it fits natural, Scandinavian, or gold-and-ivory tree themes. It looks good on its own on a branch, tied to a gift, or hung in a window. You only need one color and a small amount of yarn.
The pattern uses US crochet terms. With the border, the ornament measures about 4.2 in (10.7 cm) wide and 5.8 in (14.7 cm) tall. The hanging loop adds about 1.5 in (3.8 cm).
You work the tree in one piece from the bottom up, in turned rows of single crochet. The wide bottom tier starts on a foundation chain. A one-row flare creates each ledge, and the tiers then taper to a point. You work the trunk downward into the underside of the foundation chain, then add one border round and the hanging loop.
Finished Size and Construction
- Finished size: 4.2 in (10.7 cm) wide x 5.8 in (14.7 cm) tall, plus a 1.5 in (3.8 cm) loop
- Skill level: Easy / advanced beginner
- Terminology: US crochet terms
- Yarn weight: Worsted (CYC #4, medium)
- Hook: 4.0 mm (US G-6)
- Number of pieces: 1 (single flat piece)
- Layout: Three stacked tiers plus a centered trunk
- Piece size before border: 3.8 in (9.7 cm) wide x 5.4 in (13.7 cm) tall
- Border depth: about 0.2 in (0.5 cm) on every edge
- Size after border: 4.2 in (10.7 cm) x 5.8 in (14.7 cm)
Materials
Yarn: Use a smooth worsted-weight yarn in cream, ivory, or off-white. Cotton or a cotton blend gives the clearest stitch texture and the stiffest finish. Soft acrylic also works and is easier on the hands. Avoid fuzzy or brushed yarns, because they hide the pebbly single crochet and blur the ledges.
- Cream (main and only color): 12 g, about 24 m
This amount includes a margin of about 25% for your gauge swatch, a slightly looser tension, and weaving in ends. One ornament uses about 9 to 10 g.
Tools:
– 4.0 mm (US G-6) crochet hook
– Tapestry needle
– Scissors
– Stitch markers (2)
– Ruler or tape measure
– Blocking mat or folded towel, and rust-proof pins
– Spray bottle with water
Abbreviations (US Terms)
- ch – chain
- sc – single crochet
- sl st – slip stitch
- st(s) – stitch(es)
- sc2tog – single crochet 2 together
- sc3tog – single crochet 3 together
- RS / WS – right side / wrong side
Special stitches:
- sc2tog: (Insert hook in next st, yarn over, pull up a loop) twice, yarn over, pull through all 3 loops on hook. Uses 2 sts and makes 1.
- sc3tog: (Insert hook in next st, yarn over, pull up a loop) three times, yarn over, pull through all 4 loops on hook. Uses 3 sts and makes 1.
- Flare (3 sc in one st): Work 3 sc in the same stitch. Use it at both ends of a transition row to make a ledge stick out 2 sts on each side.
Pattern notes:
– The turning ch 1 at the start of each row never counts as a stitch.
– Work the first sc of each row into the very first stitch.
– Row 1 is the RS. Put a marker on it.
Gauge and Checkpoints
Gauge: 18 sc and 20 rows = 4 in (10.2 cm) in single crochet rows. That is 4.5 sts and 5 rows per inch.
Use a firm, slightly tight tension so the ornament holds its shape. Since this is a single piece, Tier 1 works as your gauge test. Make it first, measure it, and only carry on once it matches.
Checkpoints:
1. After Row 1: 17 sts should measure 3.8 in (9.7 cm) across.
2. After Row 8 (Tier 1 done): height is 1.6 in (4.1 cm), and Row 8 is 2.0 in (5.1 cm) wide.
3. After Row 15 (Tier 2 done): body height is 3.0 in (7.6 cm). Row 9 is 2.9 in (7.4 cm) wide.
4. After Row 22 (tip): body height is 4.4 in (11.2 cm).
5. After the trunk: total height is 5.4 in (13.7 cm), and the trunk is 1.1 in (2.8 cm) wide.
6. After the border: 4.2 in (10.7 cm) x 5.8 in (14.7 cm).
If your piece is too big (Row 1 is wider than 3.9 in / 9.9 cm), go down to a 3.75 mm hook or tighten your tension. If it is too small (narrower than 3.7 in / 9.4 cm), go up to a 4.5 mm hook. A loose piece will curl at the ledges, so going down a size is usually better than having a floppy tree.
Tree Body
Tier 1 (bottom tier)
Foundation: Ch 18.
Row 1 (RS): Sc in 2nd ch from hook and in each ch across. Turn. (17 sts)
Number these foundation sts 1 to 17 from left to right while you look at the RS. Sts 7 to 11 will hold the trunk later.
Row 2: Ch 1, sc2tog, sc in next 13 sts, sc2tog. Turn. (15 sts)
Row 3: Ch 1, sc in each st across. Turn. (15 sts)
Row 4: Ch 1, sc2tog, sc in next 11 sts, sc2tog. Turn. (13 sts)
Row 5: Ch 1, sc in each st across. Turn. (13 sts)
Row 6: Ch 1, sc2tog, sc in next 9 sts, sc2tog. Turn. (11 sts)
Row 7: Ch 1, sc in each st across. Turn. (11 sts)
Row 8: Ch 1, sc2tog, sc in next 7 sts, sc2tog. Turn. (9 sts)
Checkpoint: Tier 1 is 1.6 in (4.1 cm) tall. The sides slope evenly because you decrease on every other row.
Tier 2 (middle tier)
Row 9 (flare row): Ch 1, 3 sc in first st, sc in next 7 sts, 3 sc in last st. Turn. (13 sts: 3 + 7 + 3)
This row uses the 9 sts of Row 8 and adds 2 sts at each end. Those 2 extra sts on each side form the ledge, which sticks out about 0.45 in (1.1 cm) beyond the top of Tier 1.
Row 10: Ch 1, sc in each st across. Turn. (13 sts)
Row 11: Ch 1, sc2tog, sc in next 9 sts, sc2tog. Turn. (11 sts)
Row 12: Ch 1, sc in each st across. Turn. (11 sts)
Row 13: Ch 1, sc2tog, sc in next 7 sts, sc2tog. Turn. (9 sts)
Row 14: Ch 1, sc in each st across. Turn. (9 sts)
Row 15: Ch 1, sc2tog, sc in next 5 sts, sc2tog. Turn. (7 sts)
Checkpoint: Tier 2 is 1.4 in (3.6 cm) tall. Row 15 is 1.6 in (4.1 cm) wide.
Tier 3 (top tier)
Row 16 (flare row): Ch 1, 3 sc in first st, sc in next 5 sts, 3 sc in last st. Turn. (11 sts: 3 + 5 + 3)
Row 16 is 2.4 in (6.1 cm) wide, so it forms the second ledge.
Row 17: Ch 1, sc2tog, sc in next 7 sts, sc2tog. Turn. (9 sts)
Row 18: Ch 1, sc in each st across. Turn. (9 sts)
Row 19: Ch 1, sc2tog, sc in next 5 sts, sc2tog. Turn. (7 sts)
Row 20: Ch 1, sc2tog, sc in next 3 sts, sc2tog. Turn. (5 sts)
Row 21: Ch 1, sc2tog, sc in next st, sc2tog. Turn. (3 sts)
Row 22: Ch 1, sc3tog. (1 st)
Fasten off and leave a 4 in (10.2 cm) tail.
Tier 3 decreases faster near the top (Rows 19 to 22) to make a sharper point. Checkpoint: the body is 22 rows tall and measures 4.4 in (11.2 cm).
Trunk
Turn the tree upside down so the foundation chain is on top, with the RS facing you. The 17 free loops on the underside of the foundation chain are now available.
Row T1: Join yarn with a standing sc in the free loop of foundation st 11. Sc in the free loops of sts 10, 9, 8, and 7. Turn. (5 sts)
Because the piece is upside down, st 11 is now on your right and you work toward st 7. Count carefully: you should have 6 unworked loops on each side of the trunk (sts 1–6 and 12–17).
Rows T2–T5: Ch 1, sc in each st across. Turn. (5 sts each row)
Do not fasten off at the end of Row T5. Keep the loop on your hook for the border.
Checkpoint: the trunk is 1.1 in (2.8 cm) wide and 1.0 in (2.5 cm) tall. The whole piece is now 5.4 in (13.7 cm) tall and 3.8 in (9.7 cm) wide.
Border
Border gauge: Border sc are worked at about 4.5 sts per inch along the edge, the same as the body. Work 1 sc in each row-end, 1 sc in each free st or loop, and 3 sc at every outer point. The border adds about 0.2 in (0.5 cm) to every edge.
Border round: Ch 1. Work around the whole tree as follows:
- Trunk bottom: 3 sc in first st of Row T5 (corner), sc in next 3 sts, 3 sc in last st (corner). (9 sc)
- Trunk side: sc in each row-end of Rows T4 to T1. Then work 1 more sc into the gap where the trunk meets the foundation. (5 sc)
- Tier 1 bottom edge: sc in free loops of the next 5 foundation sts, then 3 sc in the outer foundation st (bottom corner). (5 + 3 = 8 sc)
- Tier 1 side: sc in each row-end of Rows 1 to 8. (8 sc)
- Tier 2 ledge and side: 3 sc in the row-end of Row 9 (ledge tip), then sc in each row-end of Rows 10 to 15. (3 + 6 = 9 sc)
- Tier 3 ledge and side: 3 sc in the row-end of Row 16, then sc in each row-end of Rows 17 to 21. (3 + 5 = 8 sc)
- Tip: 3 sc in the Row 22 stitch. (3 sc)
- Second side, going down: repeat the tier sections in reverse order: Tier 3 side (8 sc), Tier 2 side (9 sc), Tier 1 side (8 sc), then the Tier 1 bottom corner and edge (8 sc), and the other trunk side (5 sc).
- Sl st in the first sc to join.
Border count:
– Tip: 3
– Tier 3: 8 per side x 2 = 16
– Tier 2: 9 per side x 2 = 18
– Tier 1 sides plus bottom edges: (8 + 8) per side x 2 = 32
– Trunk: 9 bottom + 5 + 5 sides = 19
– Total: 3 + 16 + 18 + 32 + 19 = 88 sc
Hanging loop: After the join, sl st along the border to the center sc of the 3-sc tip group. Ch 18, then sl st into the same center sc to close the loop. Fasten off. The loop is about 1.5 in (3.8 cm) tall.
Why the math works: The gauge is 4.5 sts and 5 rows per inch, so one sc per row-end is close to the stitch spacing. On the sloped edges that slight shortage is cancelled out by the extra length of the slope, so the edges lie flat without ruffling. Each 3-sc group at a ledge tip or corner adds 2 sts for the turn, so the point stays crisp. At the inner corners there are no extra stitches, so the edge pulls in a little and the ledges stay clearly defined.
Final Blocking
- Weave in all ends along the border on the WS. Trim them to 0.25 in (0.6 cm).
- Lightly mist the ornament with water until it is damp, but not soaked.
- Lay it RS up on the mat.
- Pin the tip, the two bottom tier corners, and the two trunk corners first. Check for 4.2 in (10.7 cm) width and 5.8 in (14.7 cm) height.
- Pin each ledge tip outward so it sticks out about 0.45 in (1.1 cm) past the tier below.
- Gently straighten the trunk so it is centered under the tip.
- Let it dry completely, at least 6 hours. For a stiffer ornament, brush on a light fabric stiffener before it dries.
Final Quality-Control Checklist
- [ ] Row 1 had 17 sts. Rows 9 and 16 had 13 and 11 sts.
- [ ] Both sides of every tier are mirror images.
- [ ] Both ledges stick out evenly on the left and right.
- [ ] The trunk has 6 free foundation sts on each side.
- [ ] The border has 88 sc and lies flat with no ruffling.
- [ ] The tip has a 3-sc point, with the loop centered on it.
- [ ] Final size is 4.2 in (10.7 cm) x 5.8 in (14.7 cm).
- [ ] All ends are woven in and invisible from the RS.
Troubleshooting
The ledges curl up. Your tension was loose on the flare row. Block the piece firmly, or redo Rows 9 and 16 with tighter stitches.
The tree leans to one side. You missed a decrease on one edge. Count your sts after every decrease row.
The trunk is off-center. Count the free loops on each side again. There should be 6, and the trunk goes in sts 7 to 11.
The border ruffles. Use a smaller hook for the border only, for example 3.75 mm.
The border puckers or pulls. Make sure every row-end got 1 sc and every corner got 3 sc.
The tip is blunt. Pull the sc3tog snug, and work the tip group into the center of that stitch.
Care
Hand wash in cool water with a mild soap, press out the water in a towel, and dry flat, reshaping the ledges. Store flat or hanging so the loop and points keep their shape.
Final Notes
The measurements build up in this order. Row 1 is 17 sts, or 3.8 in (9.7 cm). Tier 1 is 1.6 in (4.1 cm) tall, Tier 2 and Tier 3 are each 1.4 in (3.6 cm), and the trunk is 1.0 in (2.5 cm), for a body height of 5.4 in (13.7 cm). The 88-stitch border adds 0.2 in (0.5 cm) on every side, so the finished size is 4.2 in (10.7 cm) x 5.8 in (14.7 cm), plus a 1.5 in (3.8 cm) loop. If you match the gauge at Row 1 and count stitches at every checkpoint, each tree will come out the same size. Happy crocheting!