

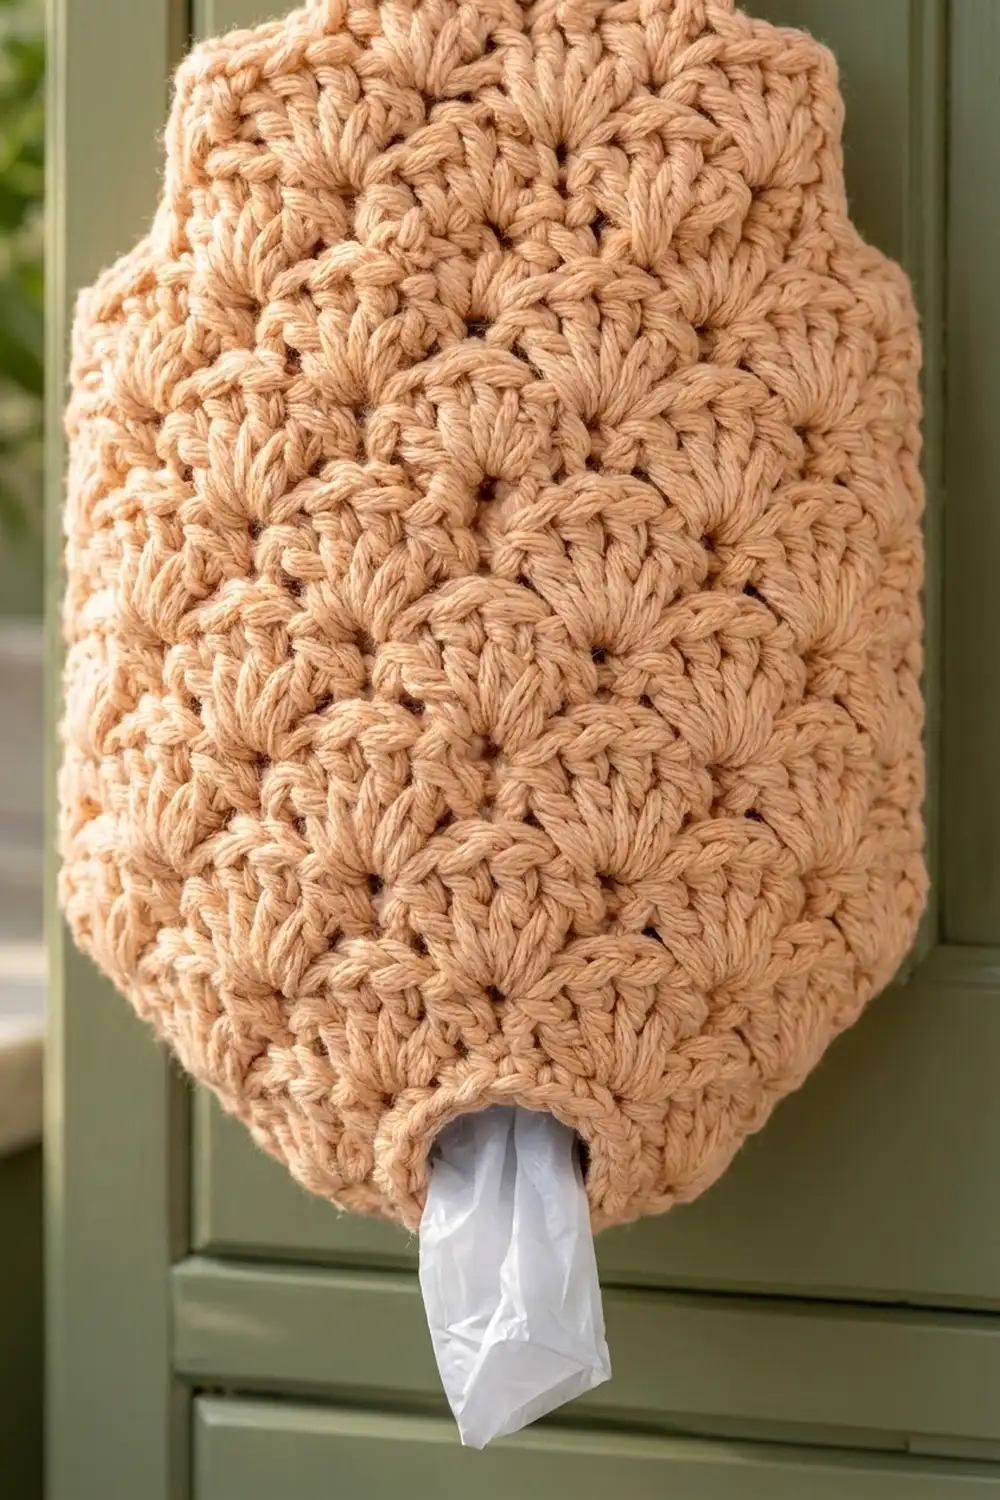
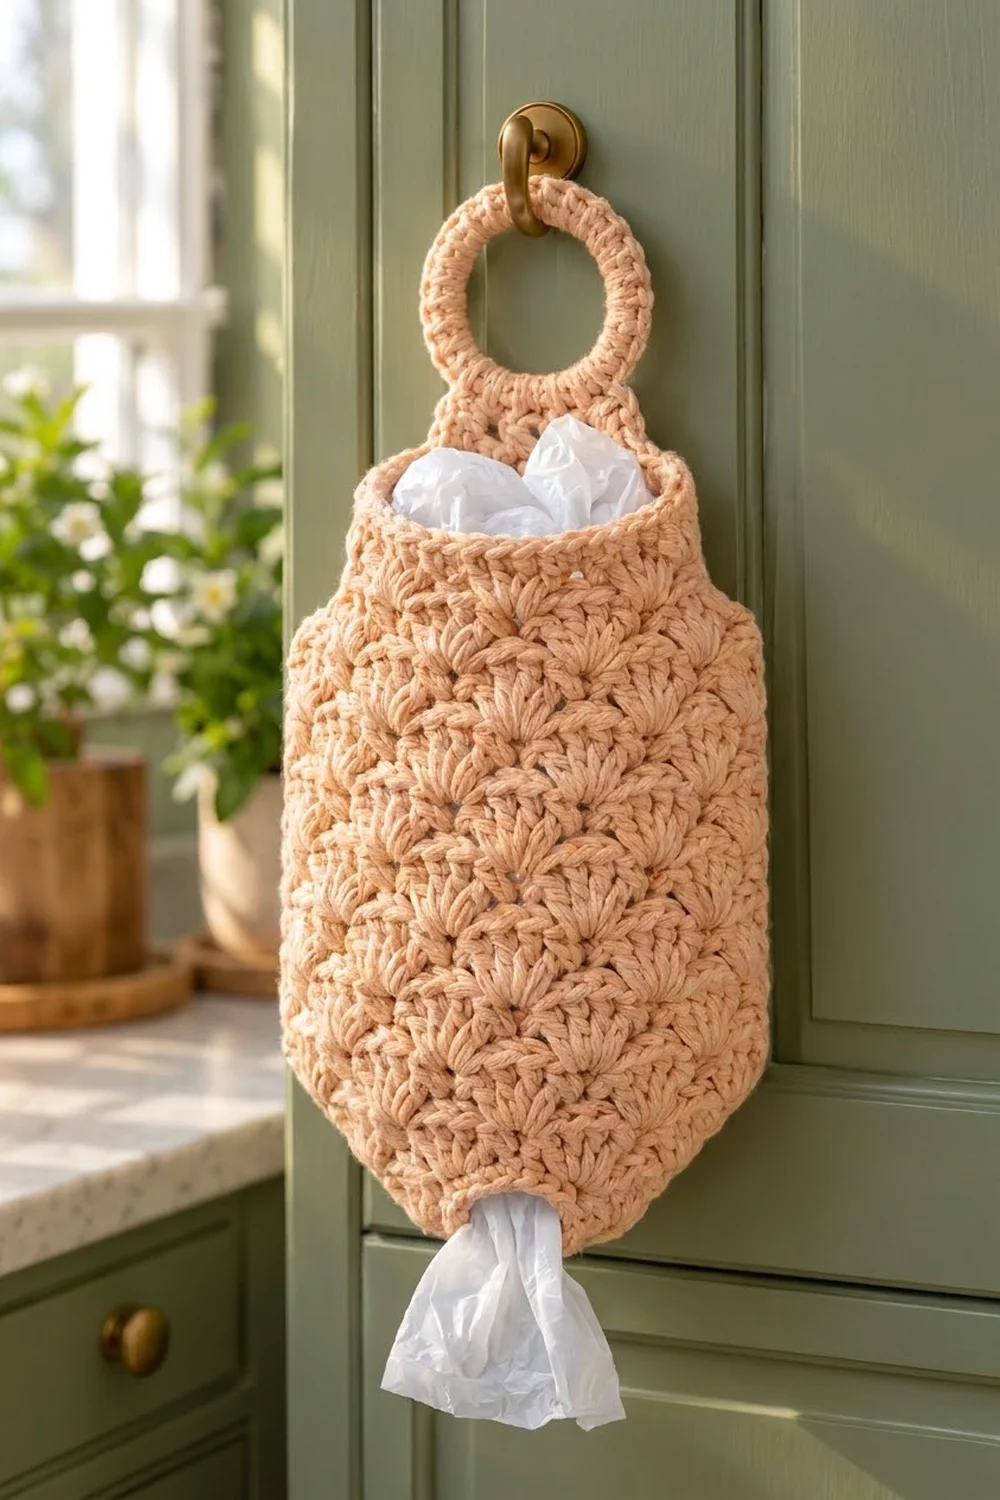
Every kitchen has a drawer full of loose grocery bags. This holder turns that clutter into something pretty: a soft peach tube covered in plump seashell stitches, with a firm hanging ring at the top and a small dispensing opening at the bottom. Push bags in at the top and pull them out one at a time from the bottom.
The design uses one color, a warm apricot-peach cotton, so the shell texture does all the work. The style is calm and cottage-like. It looks at home on a cabinet knob, a pantry door hook, or the side of a fridge.
This pattern uses US crochet terms. The finished holder measures 9″ (22.9 cm) wide when flattened and 13.5″ (34.3 cm) tall in the body. With the hanging tab and ring, it hangs about 18.25″ (46.4 cm) long.
Construction is simple. You work the body in joined rounds from the bottom up as one seamless tube. It starts with a small single crochet band for the dispensing hole. Small shells then grow quickly into full shells, followed by a straight shell section. Another round of small shells tapers the top back in, and a single crochet rim finishes the opening. A short tab and covered chain ring are worked straight off the back of the rim, so there is nothing to sew on.
Finished Size and Construction
- Finished size (body, flattened): 9″ (22.9 cm) wide x 13.5″ (34.3 cm) tall
- Total hanging length: about 18.25″ (46.4 cm), including tab and ring
- Skill level: Easy / advanced beginner
- Terminology: US crochet terms
- Yarn weight: Worsted (#4), cotton or cotton blend
- Hook: 5.0 mm (H-8)
- Number of pieces: 1 (body, tab, and ring are worked as one piece)
- Layout: Single tube, worked bottom-up in joined rounds, not turned
- Body circumference: 18″ (45.7 cm), 12 shell repeats
- Size before border: 12.5″ (31.8 cm) tall after Rnd 22
- Border depth: top rim 0.75″ (1.9 cm); dispenser edge 0.25″ (0.6 cm)
Materials
Choose a smooth worsted-weight cotton or cotton blend. Cotton holds the shell shape well, does not stretch much under the weight of the bags, and survives washing. Avoid fuzzy or very splitty yarns, because the shells will lose definition.
- Peach / apricot: 150 g (about 274 m / 300 yd)
Tools:
- 5.0 mm (H-8) crochet hook
- Tapestry needle
- Scissors
- 2 stitch markers (one for the round start, one spare)
- Measuring tape
- Blocking mat and pins, or a towel
The yarn quantity includes a margin of about 20% to cover differences in tension.
Abbreviations (US Terms)
- ch – chain
- sl st – slip stitch
- sc – single crochet
- dc – double crochet
- sc2tog – single crochet 2 together
- sk – skip
- st(s) – stitch(es)
- Rnd(s) – round(s)
- [ ] – repeat the instructions inside the brackets as directed
Special stitches:
- Shell: 5 dc in the same stitch.
- Small shell: 3 dc in the same stitch.
- Beginning shell: ch 3 (counts as first dc), 4 dc in the same stitch.
Gauge and Checkpoints
Gauge in shell pattern: 4 shell repeats (24 sts) = 6″ (15.2 cm) wide, and 8 shell rounds = 5″ (12.7 cm) tall.
Gauge in sc: 16 sc = 4″ (10.2 cm).
Because this is a single piece, the start of the piece is your test. Work Rnds 1–7, then flatten the tube and measure. This small start tells you everything you need to know before you commit to the full height.
Checkpoints:
- After Rnd 3: the bottom band, flattened, measures 3″ (7.6 cm) across.
- After Rnd 5: the tube, flattened, measures 9″ (22.9 cm) wide. Height is about 2″ (5.1 cm).
- After Rnd 21: the piece measures about 12″ (30.5 cm) tall.
- After Rnd 22: about 12.5″ (31.8 cm) tall.
- After Rnd 25: about 13.25″ (33.7 cm) tall; 13.5″ (34.3 cm) once the dispenser edge is added.
If your tube is too wide, change to a 4.5 mm hook. If it is too narrow, change to a 5.5 mm hook. Do not add or remove stitches, because the shell repeat only works in multiples of 6. If the width is right but the height runs short or long, add or remove pairs of shell rounds in the straight section.
Body
The rounds are joined with a sl st and are not turned. Shell rounds alternate between two types:
- Shell Round A starts with a sc in the center dc of a shell.
- Shell Round B starts with a beginning shell in a sc.
Bottom Band
Ch 24, sl st to the first ch to form a ring. Be careful not to twist the chain.
Rnd 1: Ch 1, sc in each ch around, join with sl st to first sc. (24 sc)
Rnd 2: Ch 1, sc in each st around, join. (24 sc)
Lower Taper
Rnd 3 (growth): Ch 1, [sc in next st, 2 sc in next st] 12 times, join. (36 sc)
Rnd 4 (small shells, growth): Ch 1, [sc in next st, small shell in next st, sk next st] 12 times, join with sl st to first sc. (48 sts: 12 sc + 36 dc)
Each repeat uses 3 stitches from Rnd 3 and makes 4 new ones, so the round grows from 36 to 48.
Rnd 5 (full shells, growth): Beginning shell in first sc, sk 1 dc, sc in next dc (the center dc of the small shell), sk 1 dc, [shell in next sc, sk 1 dc, sc in next dc, sk 1 dc] 11 times, join with sl st to top of beginning ch-3. (72 sts: 12 shells of 5 dc + 12 sc)
Each repeat now uses 4 stitches and makes 6. The fast growth from 24 to 72 stitches over Rnds 3–5 creates the angled lower corners you see when the holder hangs flat.
Checkpoint: flatten the tube. It should measure 9″ (22.9 cm) wide.
Straight Shell Section
Rnd 6 (Shell Round A): Sl st in next 2 dc to reach the center dc of the first shell. Ch 1, sc in same st, [sk 2 dc, shell in next sc, sk 2 dc, sc in next dc] 11 times, sk 2 dc, shell in last sc, join with sl st to first sc. (72 sts: 12 sc + 12 shells)
Rnd 7 (Shell Round B): Beginning shell in first sc, sk 2 dc, sc in next dc, sk 2 dc, [shell in next sc, sk 2 dc, sc in next dc, sk 2 dc] 11 times, join with sl st to top of beginning ch-3. (72 sts)
Each repeat in Rnds 6 and 7 uses 6 stitches and makes 6, so the count stays at 72. Each shell sits in a sc of the round below, which gives the stacked, staggered seashell look.
Rnds 8–21: Repeat Rnds 6 and 7 seven more times. (72 sts each round)
You now have 16 rounds of full shells in the straight section (Rnds 6–21), which adds 10″ (25.4 cm). Rnd 21 is a Shell Round B.
Checkpoint: the piece measures about 12″ (30.5 cm) tall.
Upper Taper
Rnd 22 (small shells, decrease): Sl st in next 2 dc, ch 1, sc in same st, [sk 2 dc, small shell in next sc, sk 2 dc, sc in next dc] 11 times, sk 2 dc, small shell in last sc, join with sl st to first sc. (48 sts: 12 sc + 36 dc)
Each repeat uses 6 stitches and makes 4, pulling the top in so the shoulders slope toward the opening.
Checkpoint: about 12.5″ (31.8 cm) tall. This is the size before the border.
Border: Top Rim and Dispenser Edge
Border gauge: 16 sc = 4″ (10.2 cm), or 4 sc per 1″ (2.5 cm).
When the tube is flattened, it has two sides: a front and a back. Every count below is given in total and per side.
Top Rim
Rnd 23 (conversion): Ch 1, sc in each st around, join. (48 sc = 48 worked 1-per-existing-stitch + 0 added; 24 sc per side)
Rnds 24–25: Ch 1, sc in each st around, join. (48 sc; 24 per side)
Fasten off. The rim adds 0.75″ (1.9 cm).
Why the math works: 48 sc divided by 4 sc per inch gives 12″ (30.5 cm) around, or 6″ (15.2 cm) across when flattened. That is narrower than the 9″ (22.9 cm) body, which creates the soft shoulders, but still wide enough to stuff bags in with one hand.
Hanging Tab
Flatten the tube so the round join sits at the left side fold. Sts 1–24 form the front, and sts 25–48 form the back. The center 10 back sts are sts 32–41.
Join yarn with a sl st in st 32.
Row 1: Ch 1, sc in same st and in next 9 sts. (10 sc)
Row 2: Ch 1, turn, sc in each st across. (10 sc)
Row 3: Ch 1, turn, sc2tog, sc in next 6 sts, sc2tog. (8 sc)
Row 4: Ch 1, turn, sc2tog, sc in next 4 sts, sc2tog. (6 sc)
Row 5: Ch 1, turn, sc in each st across. (6 sc)
The tab adds about 1.25″ (3.2 cm).
Hanging Ring
At the end of Row 5, ch 30. Sl st into the first sc of Row 5 to close the loop. Check that the chain is not twisted.
Ring round: Ch 1, work 45 sc into the loop, working over the chain (3 sc for every 2 ch), then sl st into the last sc of Row 5. Fasten off.
Packing 45 sc over 30 ch makes the ring firm and rounded. The chain loop is 7.5″ (19.1 cm) around. That gives an inner opening of about 2.4″ (6.1 cm) and an outer diameter of about 3.5″ (8.9 cm). For a stiffer ring, work the same 45 sc around a 2.5″ (6.4 cm) plastic ring instead of the chain.
Dispenser Edge
Turn the holder upside down. Join yarn with a sl st in any free loop of the foundation chain.
Rnd 1: Ch 1, sc in each free loop around, join. (24 sc; 12 per side)
Fasten off. This round adds 0.25″ (0.6 cm). It finishes the dispensing hole at 3″ (7.6 cm) across when flattened: 24 sc divided by 4 sc per inch gives 6″ (15.2 cm) around, and half of that is 3″ (7.6 cm). The opening is small enough to hold the bags in, but large enough to pull one out with two fingers.
Final Blocking
- Weave in all ends on the inside of the tube, following the dc posts so they disappear.
- Soak the holder in cool water, then gently squeeze out the water. Do not wring.
- Roll it in a towel and press to remove extra moisture.
- Lay it flat with the ring at the top and the round join at one side fold.
- Pat it into shape: 9″ (22.9 cm) wide in the body and 13.5″ (34.3 cm) tall, with a 6″ (15.2 cm) wide top opening and a 3″ (7.6 cm) wide bottom opening.
- Pin the angled lower corners and the sloping shoulders so both sides match.
- Pin the ring into a circle.
- Let it dry completely before hanging.
Final Quality-Control Checklist
- Body measures 9″ (22.9 cm) wide flattened.
- Body measures 13.5″ (34.3 cm) tall.
- Rnds 5–21 each have 12 shells and 72 sts.
- Rnd 22 has 48 sts; rim rounds have 48 sc.
- Dispenser edge has 24 sc.
- Tab is centered on the back, on sts 32–41.
- Ring is round, firm, and not twisted.
- Shells line up in tidy staggered columns.
- All ends are woven in on the inside.
Troubleshooting
The tube is twisting. The join is drifting. Place a marker in the first stitch of each round and always join to that stitch.
Shells look crowded or ruffled. You may have missed a skip. Count 72 sts after each shell round, and check that every shell sits in a sc.
The bottom taper flares or cups. Flaring usually means tight tension in Rnds 1–3, and cupping means loose tension there. Redo those rounds with a hook 0.5 mm smaller or larger.
Bags fall out of the bottom. Your dispenser edge is too loose. Rework it with a smaller hook, or add a second sc round.
The ring stretches. Work it over a plastic ring, or add a round of sl sts around the outer edge.
The holder leans to one side. The tab is off-center. Recount sts 25–48 and rejoin at st 32.
Care
Machine wash cool on a gentle cycle in a laundry bag, or hand wash. Lay flat to dry and reshape while damp.
Final Notes
Here is the full measurement chain. The 24-st bottom band is 3″ (7.6 cm) across. By Rnd 5, the taper grows to 72 sts and a 9″ (22.9 cm) wide body, about 2″ (5.1 cm) tall. Sixteen shell rounds add 10″ (25.4 cm) to reach 12″ (30.5 cm). The small-shell round brings the count to 48 and the height to 12.5″ (31.8 cm). The rim adds 0.75″ (1.9 cm) and the dispenser edge adds 0.25″ (0.6 cm), for a 13.5″ (34.3 cm) body. The tab and ring bring the holder to about 18.25″ (46.4 cm) hanging length.
Check your gauge after Rnd 5 and count your 72 sts in every shell round. If those are right, the rest of the measurements will follow.
Happy crocheting!