

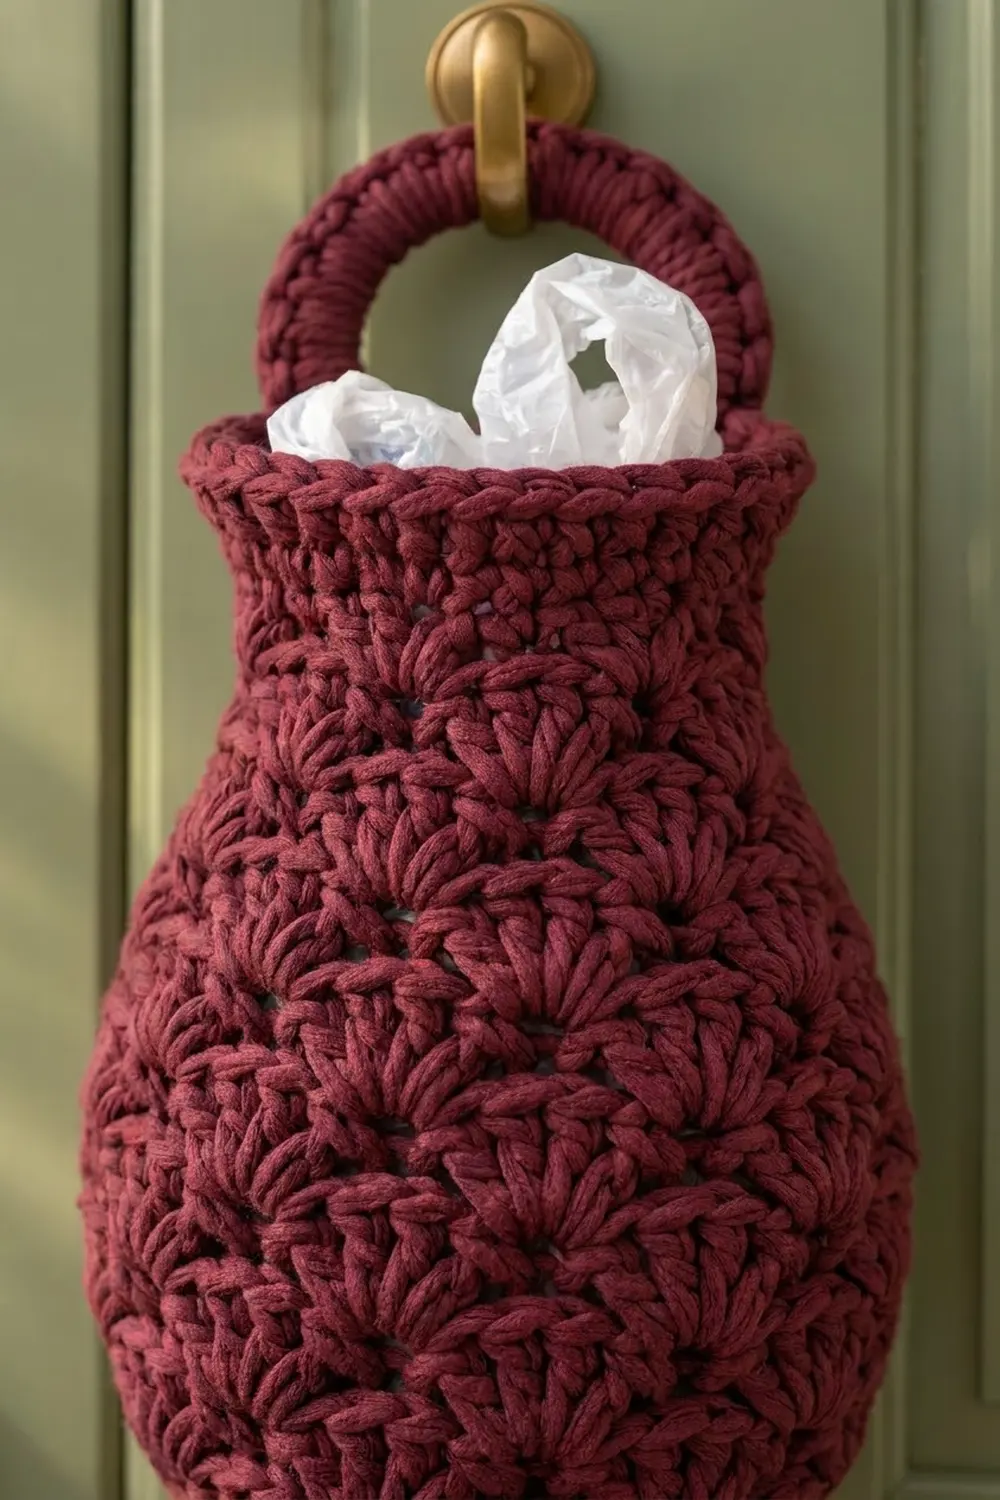
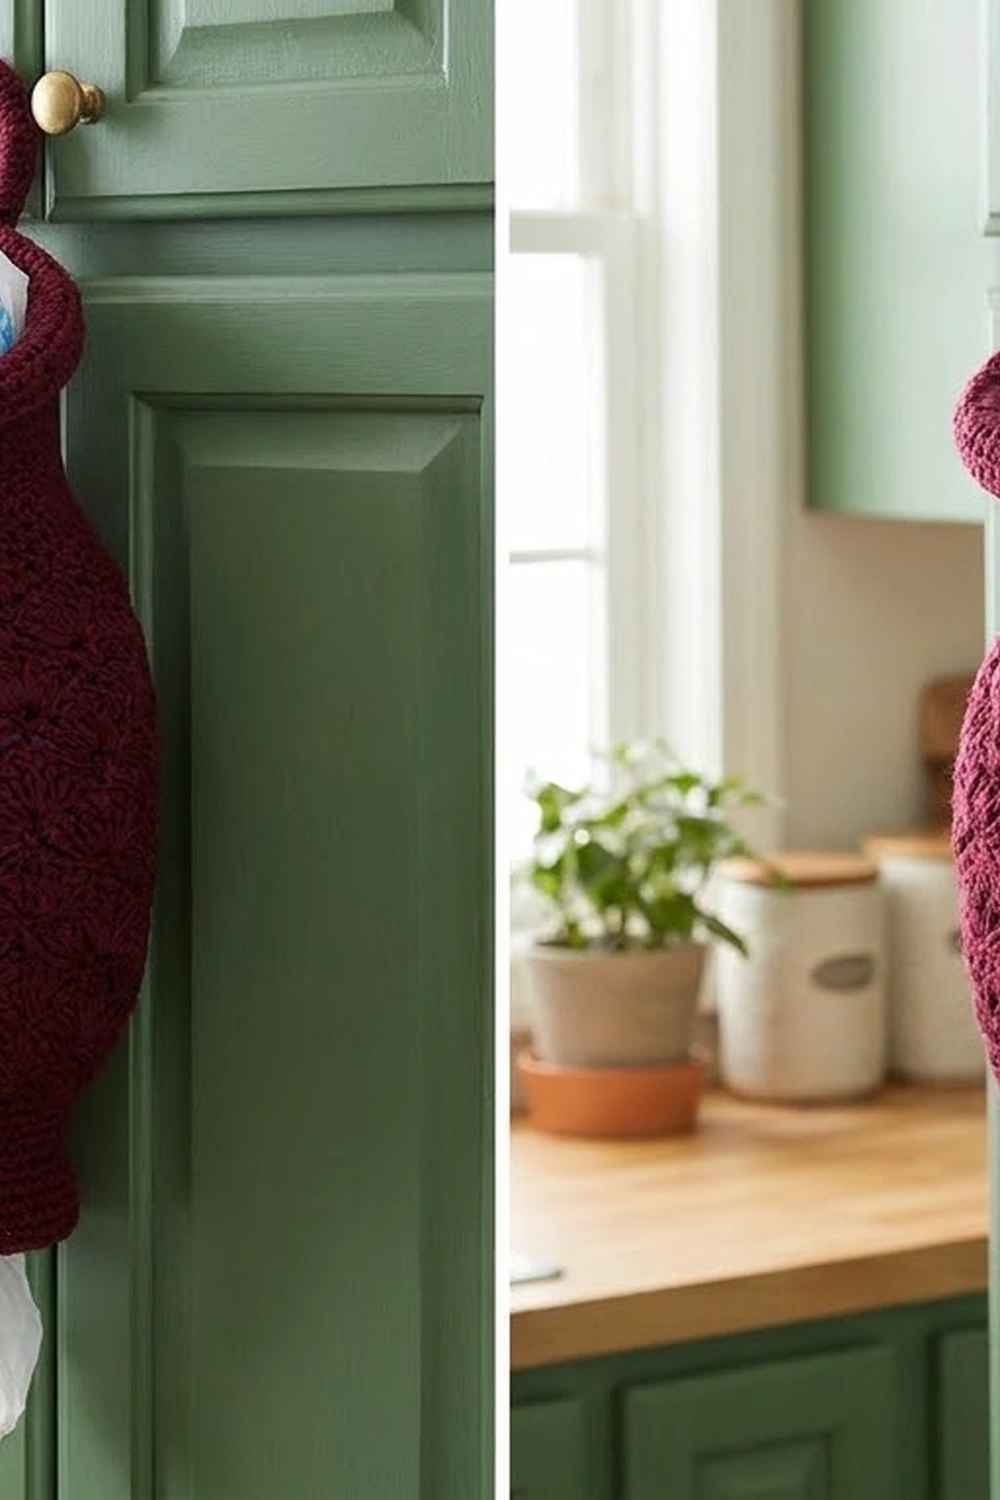
This plastic bag holder looks like a small ceramic vase that someone happened to make out of yarn. Its body is covered in staggered fan shells that open up across the belly and close in toward the neck. A plain neck, a firm rolled rim and a thick covered ring finish the top, so the holder hangs neatly from a knob, hook or door handle.
The sample is made in one solid deep burgundy, a warm wine shade that reads well against painted cabinets and natural wood. Because there’s only one color, the texture of the shells does all the work. You stuff bags in the top and pull them out of the small cuff at the bottom.
This pattern uses US crochet terms throughout. The finished body is about 15.25 in (38.7 cm) tall and 8 in (20.3 cm) wide at the belly when laid flat. With the ring attached, the holder hangs about 19 in (48.3 cm) from the top of the ring to the bottom cuff.
The construction is simple. You start at the bottom opening with a chain ring and work upward in joined rounds, with no seams. The shape comes from changing the shell size instead of adding repeats, so there are always 6 shell repeats around. The rim works as the top border. You crochet the ring separately over a plastic or metal ring and sew it to the inside back of the rim.
Finished Size and Construction
- Finished size: body 15.25 in (38.7 cm) tall; 8 in (20.3 cm) wide flat at the belly; 19 in (48.3 cm) total hanging length
- Skill level: Easy / Advanced Beginner
- Terminology: US crochet terms
- Yarn weight: Bulky (#5)
- Hook: 6.0 mm (US J-10)
- Number of pieces: 2 components (body + hanging ring), assembled into 1 item
- Layout: the ring is centered on the back of the rim, rising 3.75 in (9.5 cm) above it
- Piece size: body 4 in (10.2 cm) wide flat at the cuff, 8 in (20.3 cm) at the belly, 4 in (10.2 cm) at the neck; ring 3.5 in (8.9 cm) across once covered
- Size before border: 13.75 in (34.9 cm) tall after Round 20
- Border depth: 1.5 in (3.8 cm) of neck and rolled rim (Rounds 21–26)
Materials
Yarn: Use a bulky (#5) yarn with good stitch definition. A smooth acrylic or cotton blend works best because the shells need clear edges. Avoid fuzzy or very splitty yarn, since it hides the fan texture. Cotton makes a stiffer holder; acrylic is a little softer and stretchier.
- Deep burgundy (wine): 200 g, about 260 m
Tools:
- 6.0 mm (US J-10) crochet hook
- 1 plastic or metal ring, 3 in (7.6 cm) outer diameter
- Stitch marker
- Tapestry needle
- Scissors
- Tape measure
- Rust-proof pins and a spray bottle for blocking
The yarn quantity includes a margin of about 15% for your gauge swatch and small differences in tension.
Abbreviations (US Terms)
- ch – chain
- sl st – slip stitch
- sc – single crochet
- dc – double crochet
- st(s) – stitch(es)
- sk – skip
- rep – repeat
- rnd(s) – round(s)
Special stitches:
- 3-dc shell: 3 dc in the same st. The center dc is the 2nd dc.
- 5-dc shell: 5 dc in the same st. The center dc is the 3rd dc.
- 7-dc shell: 7 dc in the same st. The center dc is the 4th dc.
At the start of a Type B round, the ch-3 counts as the first dc of the first shell.
Shell round types: The shells are offset, so every round places an sc in the center dc of each shell below and a shell in each sc below.
- Type A round (even rounds): sl st across to the center dc of the first shell, ch 1, sc in the same st, shell in next sc, sc in center dc of next shell; rep from * around, ending with a shell in the last sc. Join with a sl st to the first sc.
- Type B round (odd rounds): ch 3 in the joining sc and complete the first shell in that same sc, sc in center dc of next shell, shell in next sc; rep from * around, ending with an sc in the center dc of the last shell. Join with a sl st to the top of the ch-3.
Each repeat is 1 sc + 1 shell, so a round always has 6 × (shell size + 1) stitches.
Gauge and Checkpoints
Single crochet gauge: 12 sc and 13 rnds = 4 in (10.2 cm), so 3 sts = 1 in (2.5 cm).
Shell gauge: one 5-dc repeat (6 sts) = 2 in (5.1 cm) wide; 4 shell rnds = 3 in (7.6 cm) tall, so each shell rnd is about 0.75 in (1.9 cm).
Before you commit to the full holder, work Rounds 1–9 as your test piece. It takes about 20 minutes and checks both gauges at once.
Checkpoints (flat width = half the circumference):
- After Rnd 3: 24 sts, 4 in (10.2 cm) flat, 1 in (2.5 cm) tall
- After Rnd 6: 24 sts, 4 in (10.2 cm) flat, 3.25 in (8.3 cm) tall
- After Rnd 9: 36 sts, 6 in (15.2 cm) flat, 5.5 in (14.0 cm) tall
- After Rnd 15: 48 sts, 8 in (20.3 cm) flat, 10 in (25.4 cm) tall
- After Rnd 18: 36 sts, 6 in (15.2 cm) flat, 12.25 in (31.1 cm) tall
- After Rnd 20: 24 sts, 4 in (10.2 cm) flat, 13.75 in (34.9 cm) tall
If your piece is too big, go down 0.5 mm in hook size. If it’s too small, go up 0.5 mm. If only the height is off, check your dc. Pulling up a taller loop makes taller shells, and you can usually fix that by changing how you hold the yarn, not by changing hooks.
Body
Work in joined rounds with the right side always facing you. Don’t turn.
Bottom Cuff
Rnd 1: Ch 24 and join with a sl st to the first ch to form a ring, taking care not to twist. Ch 1, sc in each ch around, join to first sc. (24 sc)
Rnds 2–3: Ch 1, sc in each st around, join to first sc. (24 sc)
The cuff is 8 in (20.3 cm) around and 4 in (10.2 cm) wide flat. This is the opening you’ll pull bags from.
Lower Body: 3-dc Shells
Rnd 4 (Type A, first shell round): Ch 1, sc in first st, sk 1, 3-dc shell in next st, sk 1, sc in next st, sk 1, 3-dc shell in next st, sk 1; rep from * 4 more times. Join to first sc. (6 repeats; 6 sc + 18 dc = 24 sts)
Rnd 5 (Type B): Work Type B with 3-dc shells. (24 sts)
Rnd 6 (Type A): Sl st in next 1 dc to reach the center of the first shell. Work Type A with 3-dc shells. (24 sts)
Swelling: 5-dc Shells
Rnd 7 (Type B): Work Type B with 5-dc shells. (6 sc + 30 dc = 36 sts)
Rnd 8 (Type A): Sl st in next 2 dc, then work Type A with 5-dc shells. (36 sts)
Rnd 9 (Type B): Work Type B with 5-dc shells. (36 sts)
The body now flares out to 6 in (15.2 cm) wide.
Belly: 7-dc Shells
Rnd 10 (Type A): Sl st in next 2 dc (the shells below are still 5-dc), then work Type A with 7-dc shells. (6 sc + 42 dc = 48 sts)
Rnd 11 (Type B): Work Type B with 7-dc shells. (48 sts)
Rnds 12–15: Alternate Type A and Type B with 7-dc shells. On each Type A round (Rnds 12 and 14), first sl st in next 3 dc. (48 sts each round)
The belly measures 8 in (20.3 cm) flat and is 4.5 in (11.4 cm) tall.
Shoulder: 5-dc Shells
Rnd 16 (Type A): Sl st in next 3 dc (the shells below are 7-dc), then work Type A with 5-dc shells. (36 sts)
Rnd 17 (Type B): Work Type B with 5-dc shells. (36 sts)
Rnd 18 (Type A): Sl st in next 2 dc, then work Type A with 5-dc shells. (36 sts)
Upper Body: 3-dc Shells
Rnd 19 (Type B): Work Type B with 3-dc shells. (24 sts)
Rnd 20 (Type A): Sl st in next 1 dc, then work Type A with 3-dc shells. (24 sts)
The body is now 13.75 in (34.9 cm) tall and 4 in (10.2 cm) wide at the top. Don’t fasten off. The border continues from here.
Hanging Ring
Rnd 1: Make a slipknot on your hook. Holding the 3 in (7.6 cm) ring, work sc around the ring until it’s completely covered, packing the sts tightly side by side, 40 sc. Join with a sl st to the first sc. (40 sc)
Rnd 2: Sl st in each sc around, working through both loops. (40 sl st) This rolls the stitch tops toward the outer edge and gives the ring its thick, corded look. Don’t fasten off.
Tab:
Row 1: Ch 1, sc in the next 6 sts along the outer edge of the ring. Turn. (6 sc)
Rows 2–4: Ch 1, sc in each st across. Turn. (6 sc)
The tab is 2 in (5.1 cm) wide and 1.25 in (3.2 cm) long. Fasten off and leave a 12 in (30.5 cm) tail for sewing.
Border: Neck and Rolled Rim
Border gauge: same as the sc gauge, 3 sts = 1 in (2.5 cm). The counts are given per round and per half (front or back) when the holder is laid flat.
Rnd 21: Ch 1, sc in each st around (each sc and each dc of Rnd 20), join. (24 sc; 12 per half)
Rnd 22: Ch 1, sc in each st around, join. (24 sc; 12 per half)
Rnd 23 (flare): Ch 1, sc in next 3 sts, 2 sc in next st; rep from * 5 more times, join. (24 worked 1-per-stitch + 6 added = 30 sc; 15 per half)
Rnds 24–25: Ch 1, sc in each st around, join. (30 sc; 15 per half)
Rnd 26: Sl st loosely in each st around, join. (30 sl st; 15 per half)
Fasten off and weave in ends.
Why the math works: Rnd 20 has 6 repeats of 4 sts (24), so Rnd 21 picks up exactly 24 sc. That’s 8 in (20.3 cm) around and a 4 in (10.2 cm) neck. The 6 increases in Rnd 23 fall once per shell repeat, so the flare is even all the way around: 30 sts ÷ 3 = 10 in (25.4 cm) around, or 5 in (12.7 cm) flat. Six border rounds add 1.5 in (3.8 cm), so the body is 13.75 + 1.5 = 15.25 in (38.7 cm) tall. The final sl st round firms up the edge and makes it roll outward a little.
Attaching the Ring
Lay the body flat with the beginning-of-round join at the center back. Place the tab inside the back of the rim, centered over the join, so its lower 1 in (2.5 cm) overlaps Rnds 21–24 on the inside. About 0.25 in (0.6 cm) of the tab shows above the rim, and the ring rises 3.75 in (9.5 cm) above the top edge.
Using the tail, whipstitch all four edges of the overlapping part of the tab to the inside of the neck. Catch only the back loops so the stitches don’t show on the outside. Knot and weave in the end.
Checkpoint: total hanging length 15.25 + 3.75 = 19 in (48.3 cm).
Final Blocking
- Fill the body loosely with plastic bags or a rolled towel so it takes on its vase shape.
- Spray it lightly with water until it’s damp but not soaked.
- Shape the belly so it measures 8 in (20.3 cm) flat, and make sure the neck is 4 in (10.2 cm).
- Roll the rim outward with your fingers. Pin it if it curls in.
- Lay the ring flat and pin it into a true circle 3.5 in (8.9 cm) across.
- Leave everything to dry completely, usually 12–24 hours, before you remove the filling.
Final Quality-Control Checklist
- Rnd 15 has 48 sts and the belly is 8 in (20.3 cm) flat
- The shells line up in offset columns with no drifting
- The cuff is 4 in (10.2 cm) flat and opens easily
- The neck is 4 in (10.2 cm) and the rim flares to 5 in (12.7 cm)
- The ring is fully covered with no plastic or metal showing
- The tab is sewn on securely and centered on the back
- The total hanging length is close to 19 in (48.3 cm)
- All ends are woven in on the inside
Troubleshooting
Shells drift diagonally: Check that every Type A round starts with the correct number of sl sts for the shell size below it.
Wrong stitch count: Count sc + shells per repeat. You should have 6 repeats every round.
The belly ruffles: Your dc are too loose. Use a hook 0.5 mm smaller for Rnds 10–15 only.
Bags fall out of the bottom: Work a 4th cuff round with a 5.5 mm hook.
The rim curls inward: Work Rnd 26 more loosely, or block the rim over a jar.
The ring looks gappy: Add a few more sc on Rnd 1. The exact count matters less than full coverage, but the tab still uses 6 sts.
Care
Hand wash cool and lay flat to dry, reshaping while damp. Don’t tumble dry, especially if the ring is plastic.
Final Notes
The measurement chain is short and easy to check. Your sc gauge of 3 sts per in (2.5 cm) gives a 4 in (10.2 cm) cuff. The shells then grow from 24 to 36 to 48 sts for the 8 in (20.3 cm) belly and shrink back to 24 for a 4 in (10.2 cm) neck at 13.75 in (34.9 cm). The 1.5 in (3.8 cm) border brings the body to 15.25 in (38.7 cm), and the ring adds 3.75 in (9.5 cm) for a 19 in (48.3 cm) hanging holder. Check each stage as you go and the finished vase will hold its shape for years.
Happy crocheting!