

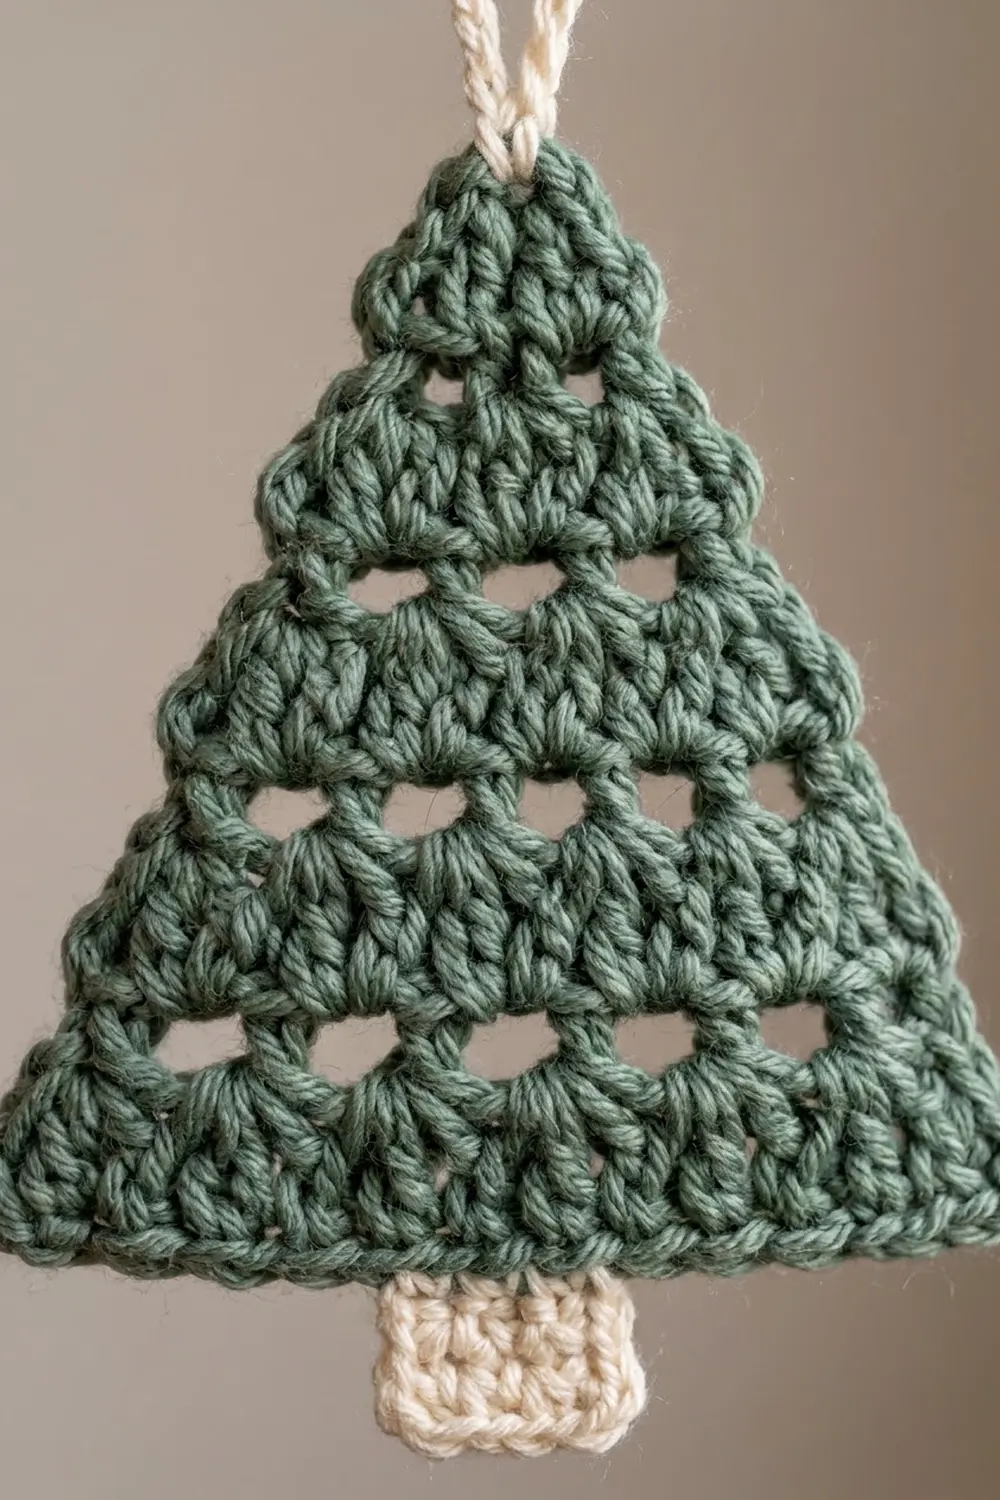
This little evergreen is a quiet, cozy ornament with lots of texture. A solid triangle of sage green double crochet is broken up by three rows of small eyelet holes. A cream trunk sits under the base, and a matching cream loop at the top lets you hang it.
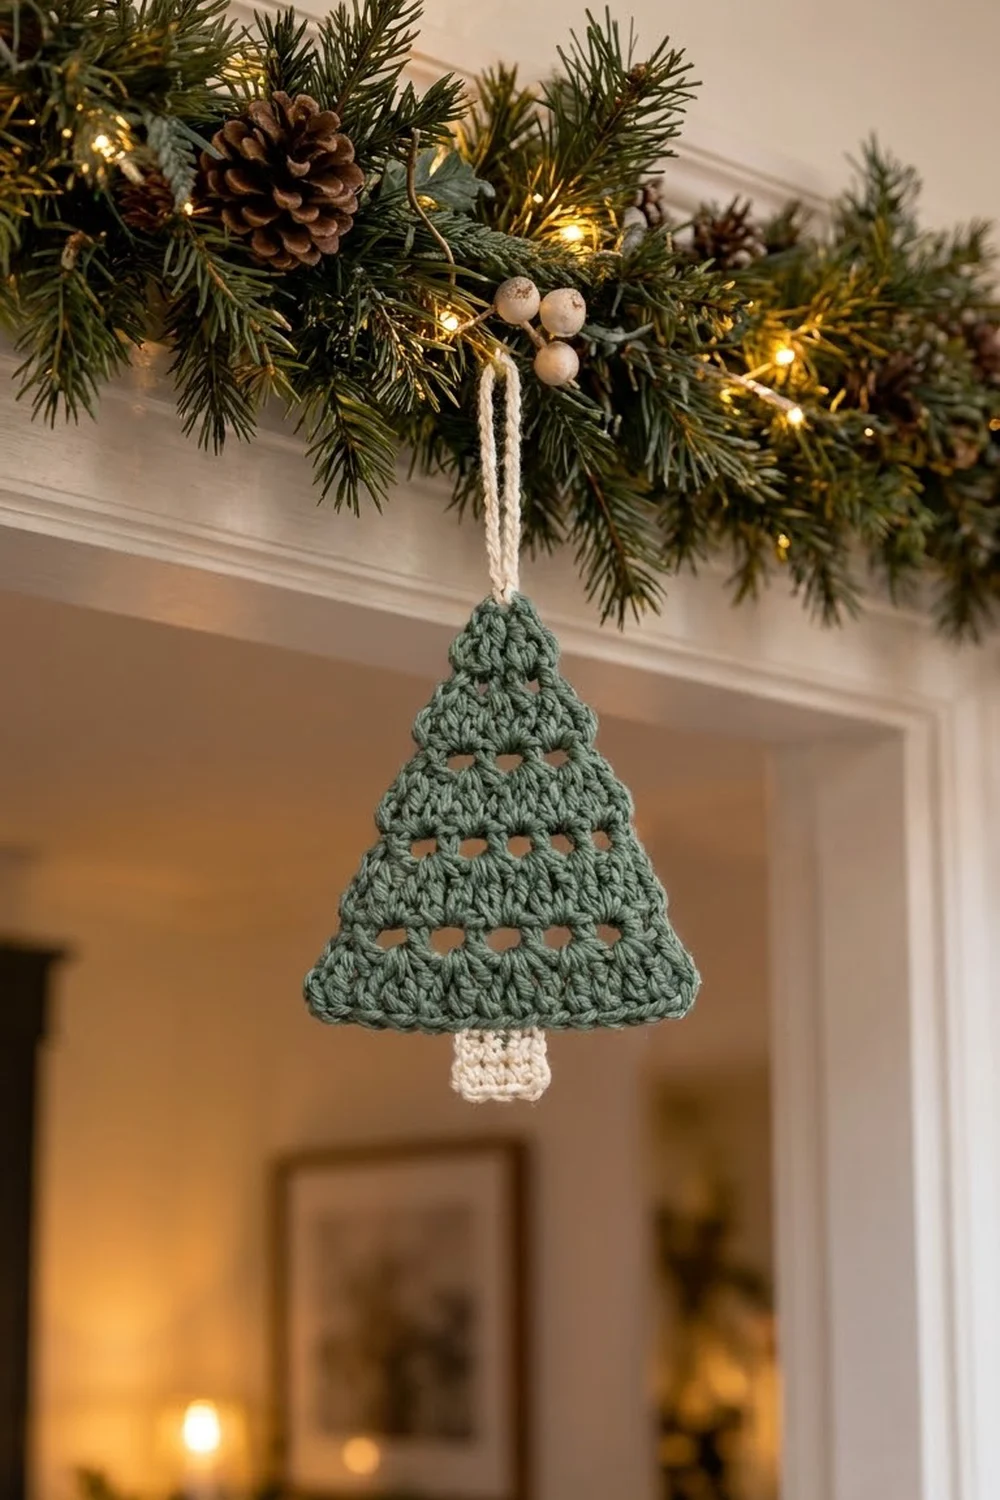
The palette is soft and natural: a muted sage for the tree and a warm cream for the trunk and hanger. It looks right on a tree branch, a garland, a gift tag, or a doorknob, and it suits a rustic or Scandinavian-style holiday room.
The pattern uses US crochet terms. The finished tree body measures 5 in (12.7 cm) wide by 4.75 in (12.1 cm) tall after the border. With the trunk, the ornament is 5.75 in (14.6 cm) tall, not counting the loop.
You start the tree at the top point and work down in turned rows, adding one stitch at each edge on every row. That builds the triangle. A single crochet border neatens the edges. Then you work the trunk directly off the bottom edge and add the hanging loop at the tip, so there is nothing to sew on.
Finished Size and Construction
- Finished size (tree body with border): 5 in (12.7 cm) wide x 4.75 in (12.1 cm) tall
- Height with trunk: 5.75 in (14.6 cm)
- Skill level: Easy
- Terminology: US crochet terms
- Yarn weight: Worsted (#4 medium)
- Hook: 4.5 mm (US 7)
- Number of pieces: 1 (the trunk and loop are worked directly onto the tree)
- Layout: Single triangle motif with a centered trunk
- Size before border: 4.75 in (12.1 cm) wide x 4.5 in (11.4 cm) tall
- Border depth: 0.125 in (0.3 cm) per edge, 1 round of sc
- Trunk: 1.25 in (3.2 cm) wide x 1 in (2.5 cm) tall
Materials
Yarn: Use a smooth worsted-weight cotton or cotton blend. Cotton shows the eyelets clearly and holds a crisp triangle. Acrylic also works, but the edges may need more blocking.
- Sage green (tree and border): 15 g / about 30 m (33 yd)
- Cream (trunk and hanging loop): 5 g / about 10 m (11 yd)
These quantities include a safety margin for your gauge swatch and weaving in ends.
Tools:
- 4.5 mm (US 7) crochet hook
- Tapestry needle
- Scissors
- Stitch markers (2)
- Ruler or tape measure
- Blocking mat and rust-proof pins
- Spray bottle with water
Abbreviations (US Terms)
- ch: chain
- sl st: slip stitch
- sc: single crochet
- dc: double crochet
- sk: skip
- sp: space
- st(s): stitch(es)
- RS / WS: right side / wrong side
- rep: repeat
Special stitch, eyelet: ch 1, sk next st, dc in next st. Each ch-1 space forms one small round hole. Each ch-1 space counts as 1 stitch in all counts.
Turning chain: The ch-3 at the start of each row counts as 1 dc.
Gauge and Checkpoints
Gauge: 16 dc and 8 rows = 4 in (10.2 cm). That is 4 dc per 1 in (2.5 cm) and 1 dc row = 0.5 in (1.3 cm).
Border gauge: 4 sc = 1 in (2.5 cm), and 4 sc rows = 1 in (2.5 cm).
You don’t need a separate swatch, because this piece is small enough to work as its own test. Work Rows 1 to 5, then measure before continuing.
Measurement checkpoints (unblocked, measured across the last row and from the tip down):
| After Row | Stitches | Width | Height |
|---|---|---|---|
| 3 | 7 | 1.75 in (4.4 cm) | 1.5 in (3.8 cm) |
| 5 | 11 | 2.75 in (7.0 cm) | 2.5 in (6.4 cm) |
| 7 | 15 | 3.75 in (9.5 cm) | 3.5 in (8.9 cm) |
| 9 | 19 | 4.75 in (12.1 cm) | 4.5 in (11.4 cm) |
Too big? Switch to a 4 mm (US G-6) hook. Too small? Switch to a 5 mm (US H-8) hook. If the width matches but the height doesn’t, your dc may be too tall or too short. Relax or firm up the yarn-over pull-through instead of changing the hook.
The Tree
Work with sage green. Turn at the end of every row. Every row adds 2 stitches: 1 at each end.
Row 1 (tip): Ch 4, 2 dc in 4th ch from hook. (3 sts; the skipped 3 ch count as 1 dc)
Place a marker in the ch at the base of these dc. This is the tip of the tree, and you’ll work into it again during the border.
Row 2 (solid): Ch 3, turn, dc in first st, dc in next dc, 2 dc in top of turning ch. (5 sts)
Row 3 (eyelet): Ch 3, turn, dc in first st, ch 1, sk next st, dc in next st; rep from * until 2 sts remain, ch 1, sk next st, 2 dc in top of turning ch. (7 sts: 5 dc + 2 ch-1 sps; 2 eyelets)*
Row 4 (solid): Ch 3, turn, dc in first st, dc in each dc and each ch-1 sp across to the turning ch, 2 dc in top of turning ch. (9 sts)
Row 5 (eyelet): Work as Row 3. (11 sts: 7 dc + 4 ch-1 sps; 4 eyelets)
Row 6 (solid): Work as Row 4. (13 sts)
Row 7 (eyelet): Work as Row 3. (15 sts: 9 dc + 6 ch-1 sps; 6 eyelets)
Row 8 (solid): Work as Row 4. (17 sts)
Row 9 (solid): Work as Row 4. (19 sts)
Don’t fasten off.
Why the eyelet row grows correctly: The eyelet row starts with 2 dc in the first stitch and ends with 2 dc in the last stitch. In between, it works over the middle stitches of the previous row. That middle count is always odd (3, 7, 11), so the pattern starts and ends with a ch-1 space. That gives (middle + 1) ÷ 2 eyelets: 2, 4, and 6. Every eyelet row is the previous count + 2, just like the solid rows.
Check your work against the Row 9 checkpoint: 4.75 in (12.1 cm) wide and 4.5 in (11.4 cm) tall.
Border
Border gauge: 4 sc = 1 in (2.5 cm). This matches the dc width of 4 sts per 1 in (2.5 cm) along the bottom edge. Along the sides, each dc row-end is 0.5 in (1.3 cm) tall, so 2 sc per row-end matches it.
Border Round: Ch 1, turn. Now work all the way around the triangle:
- Bottom edge: 3 sc in first st, sc in each of the next 17 sts, 3 sc in last st. (23 sc, including both corner groups)
- First side: Rotate the piece. Work 2 sc into the end of each row, from Row 9 up to Row 1. (18 sc)
- Tip: 3 sc in the marked ch at the tip. Remove the marker and place it in the center sc of this group. (3 sc)
- Second side: Work 2 sc into the end of each row, from Row 1 down to Row 9. (18 sc)
Sl st to the first sc to join. (62 sc total: 23 + 18 + 3 + 18)
Fasten off and weave in the sage tail.
Why the math works: The bottom edge has 19 sts. You work 1 sc into each, plus 2 extra sc at each corner (19 + 4 = 23). Each side has 9 rows, and 9 x 2 = 18 sc. The tip gets its own 3 sc so it stays sharp, and those 3 aren’t counted with either side. Nothing is counted twice. The finished size is 4.75 in + 0.25 in = 5 in (12.7 cm) wide and 4.5 in + 0.25 in = 4.75 in (12.1 cm) tall.
Trunk
Work with cream, keeping the same side facing as during the border round.
Number the 23 bottom-edge sc from the right-hand corner group: sc 1 to 3 are the first corner (sc 2 is its center), and sc 21 to 23 are the second corner (sc 22 is its center). The 19 sc between the two corner centers are sc 3 to 21. The center 5 of those are sc 10 to 14. That leaves 7 sc on each side of the trunk.
Turn the tree upside down so the bottom edge is on top.
Row 1: Join cream with a sl st in sc 10, ch 1, sc in the same st and in the next 4 sts. (5 sc)
Rows 2 to 4: Ch 1, turn, sc in each st across. (5 sc)
Fasten off. The trunk measures 1.25 in (3.2 cm) wide and 1 in (2.5 cm) tall. Weave in the ends along the trunk edges so no cream shows on the green.
Hanging Loop
Work with cream.
Join cream with a sl st in the marked center sc at the tip. Ch 14 (about 3.5 in / 8.9 cm of chain). Sl st into the same tip st to form the loop. The loop hangs about 1.75 in (4.4 cm) above the tip.
Fasten off. Weave the tails into the green border at the back, one on each side of the tip, so the loop sits straight.
Optional sturdier loop: After closing the loop, sl st into each ch back around the loop and finish with a sl st in the tip st. This gives the firmer, rope-like look you see in the photo.
Final Blocking
- Lightly spray the ornament with water until it’s damp, not dripping.
- Lay it RS up on a blocking mat.
- Pin the 3 corners first: the two bottom corners 5 in (12.7 cm) apart, and the tip 4.75 in (12.1 cm) above the bottom edge.
- Check that the two sides are the same length, and adjust the tip until they match.
- Pin the trunk square so it hangs straight down from the center: 1.25 in (3.2 cm) wide and 1 in (2.5 cm) deep.
- Use a pin tip to open each eyelet into a small round hole.
- Straighten the hanging loop above the tip.
- Let it dry completely, at least 4 to 6 hours, before unpinning.
Final Quality-Control Checklist
- Tree is 5 in (12.7 cm) wide and 4.75 in (12.1 cm) tall.
- There are 9 rows, with eyelet rows on Rows 3, 5, and 7.
- The eyelet rows have 2, 4, and 6 holes, evenly spaced and centered.
- The border has 62 sc with a crisp 3-sc point at each corner.
- Both side edges lie flat, without ruffling or pulling in.
- The trunk is 5 sc wide, 4 rows tall, and centered with 7 border sc on each side.
- The loop is attached at the exact center of the tip.
- All ends are woven in and invisible from the front.
Troubleshooting
Triangle leans to one side: You probably missed the 2 dc in the turning ch on some rows. Count each row: 3, 5, 7, 9, 11, 13, 15, 17, 19.
Eyelets are off-center: Recount the previous row. The middle stitches must be an odd number for the eyelets to balance.
Side edges ruffle: Use 2 sc per row-end, not 3. If they still ruffle, work the border with a 4 mm (US G-6) hook.
Side edges pull in: Your border is too tight. Loosen your sc or go up a hook size for the border only.
Tip is rounded: Make sure you work exactly 3 sc into the tip ch, and pin the tip firmly while blocking.
Trunk is off-center: Pull out the trunk and count again from the corner centers: 7 sc on each side of the trunk.
Holes are hard to see: Use a smoother yarn, or open the eyelets with a pin while the piece is damp.
Care
Hand wash in cool water, press out the water gently in a towel, and dry flat. Reshape and pin if the triangle loses its points.
Final Notes
The measurement chain is simple. At 4 dc per 1 in (2.5 cm) and 0.5 in (1.3 cm) per row, 9 rows give a 19-st base, which makes a tree 4.75 in (12.1 cm) wide and 4.5 in (11.4 cm) tall. One round of sc adds 0.125 in (0.3 cm) per edge, for a finished size of 5 in (12.7 cm) by 4.75 in (12.1 cm). The 5-st trunk adds 1 in (2.5 cm) of height, and the cream loop finishes it.
If your Row 5 checkpoint is right, the rest of the ornament will follow. Each tree takes well under an hour, so this is a satisfying piece to make for the season.
Happy crocheting!