

This little tree is made to hang from a rearview mirror, a hook, or a branch. It has three stepped tiers in soft sage green, a small brown trunk, and a sturdy loop at the top. The herringbone half double crochet gives the surface a woven look, with slanted ridges that read like pine needles from a short distance.
The style is simple and modern: one main color, one accent, and a clean edge. It suits a car, a backpack zipper, a gift tag, or a tree branch.
The pattern uses US crochet terms. The finished tree measures about 3 in (7.6 cm) wide and 3.7 in (9.4 cm) tall from tip to the bottom of the trunk. The hanger adds about 2.5 in (6.4 cm) of drop.
The tree is worked flat in one piece, from the tip down. Each tier grows by 2 stitches per row. A short slip-stitch step at the start of each new tier narrows the piece, and that narrowing forms the overhanging edge. The trunk is worked straight off the last row in brown, then a single crochet edging and a chain-and-sc hanger finish the piece.
Finished Size and Construction
- Finished size: 3 in (7.6 cm) wide x 3.7 in (9.4 cm) tall, not counting the hanger
- Hanger drop: about 2.5 in (6.4 cm)
- Skill level: Easy / advanced beginner
- Terminology: US crochet terms
- Yarn weight: Sport weight (#2 fine) cotton or cotton blend
- Hook: 3.0 mm
- Number of pieces: 1 (single flat piece)
- Layout: 3 stacked tiers + trunk, worked continuously top to bottom
- Tree body before edging: 2.8 in (7.1 cm) wide x 3 in (7.6 cm) tall
- Trunk: 0.8 in (2.0 cm) wide x 0.6 in (1.5 cm) tall
- Edging depth: about 0.1 in (0.3 cm) per side
Materials
Pick a smooth, tightly plied cotton. Herringbone stitches look best in yarn with crisp stitch definition, and cotton holds its flat shape well when it hangs in a warm car. Avoid fuzzy or very splitty yarn.
- Sage green (tree, edging, hanger): 8 g, about 25 m (27 yd)
- Brown (trunk): 2 g, about 6 m (7 yd)
These amounts include a margin for swatching and tails.
Tools:
- 3.0 mm crochet hook
- Tapestry needle
- Scissors
- 2 removable stitch markers
- Ruler or tape measure
- Pins and a foam board for blocking
- Spray bottle with water
Abbreviations (US Terms)
- ch – chain
- sl st – slip stitch
- sc – single crochet
- st(s) – stitch(es)
- HBhdc – herringbone half double crochet
- RS – right side
Special stitch – Herringbone half double crochet (HBhdc): Yarn over, insert hook into the stitch, yarn over and pull the loop through the stitch and through the first loop on the hook (2 loops remain), yarn over and pull through both loops.
Increase: Work 2 HBhdc in the same stitch.
Turning chain: Ch 1 at the start of each row does not count as a stitch.
Gauge and Checkpoints
Gauge: 20 HBhdc and 16 rows = 4 in (10.2 cm). That is 5 sts and 4 rows per 1 in (2.5 cm).
The tree is small, so it works as its own swatch. Make it once, check it against the checkpoints below, and change the hook if needed before you make more.
Checkpoints:
- After Row 4 (top tier): 8 sts, 1.6 in (4.1 cm) wide, 1 in (2.5 cm) tall
- After Row 8 (middle tier): 12 sts, 2.4 in (6.1 cm) wide, 2 in (5.1 cm) tall
- After Row 12 (bottom tier): 14 sts, 2.8 in (7.1 cm) wide, 3 in (7.6 cm) tall
- After trunk: 0.8 in (2.0 cm) wide, 0.6 in (1.5 cm) tall
- After edging: 3 in (7.6 cm) wide, 3.7 in (9.4 cm) tall
If your tree is too big: Go down to a 2.75 mm hook, or pull the first loop of each HBhdc a little shorter.
If your tree is too small or stiff: Go up to a 3.25 mm hook.
A difference of 0.2 in (0.5 cm) at Row 12 is fine for an ornament. A larger difference will change the yarn amounts and the hanger proportions.
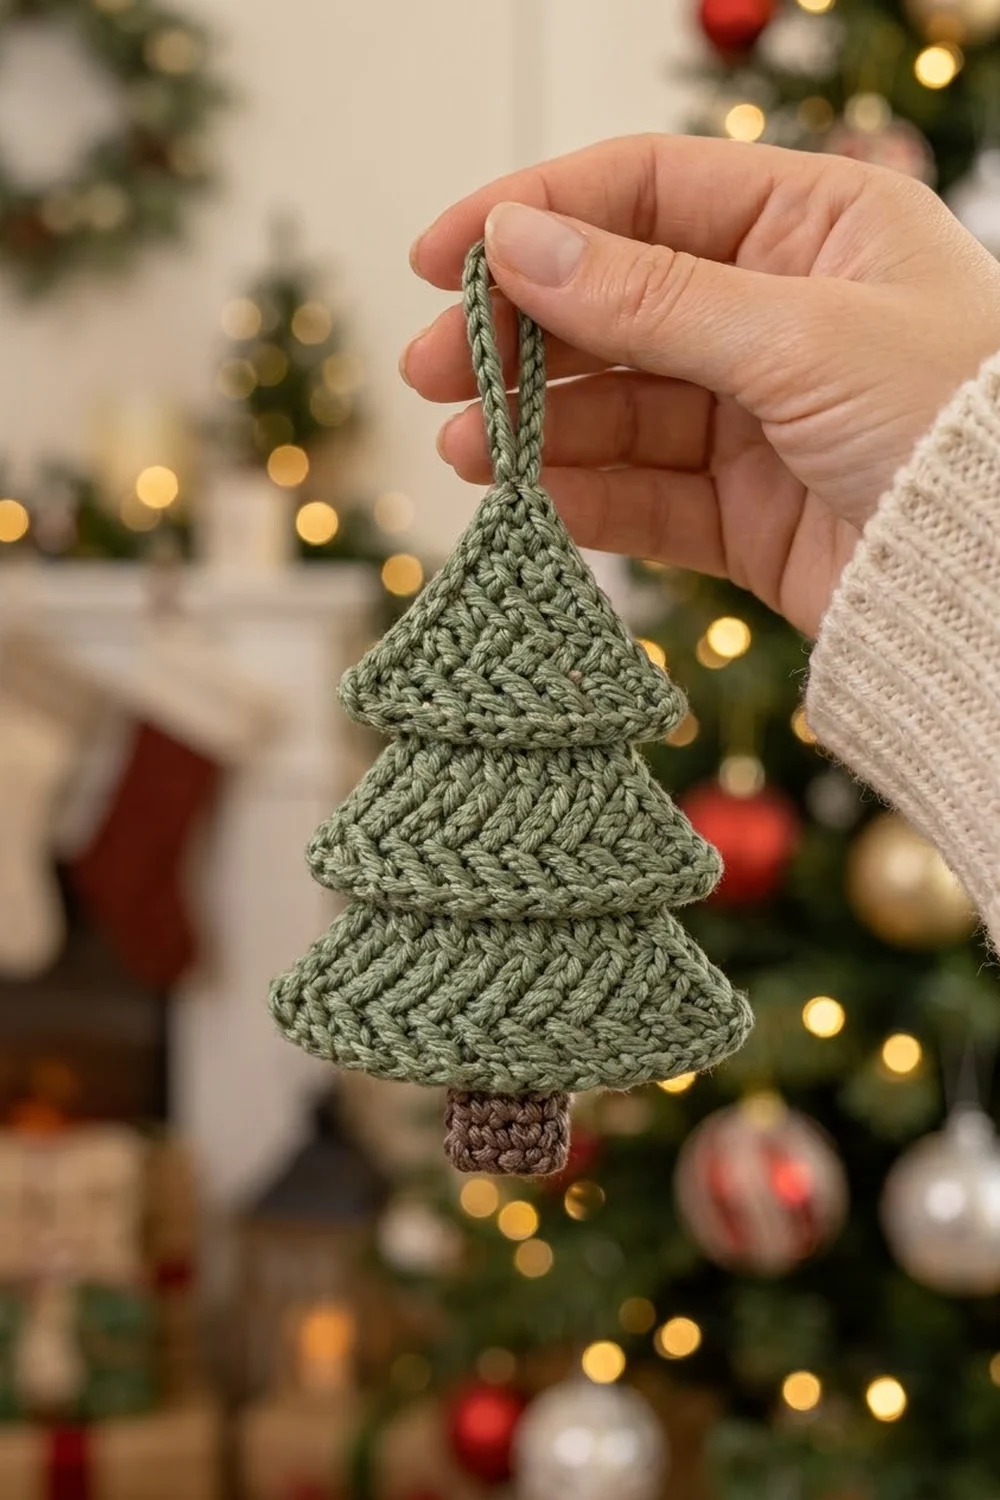
Tree Body
Work with sage green. Every row is turned. The ch 1 at the start of each row does not count as a stitch.
Top Tier
Row 1: Ch 3. HBhdc in the 2nd ch from the hook and in the next ch. (2 sts)
Row 2: Ch 1, turn. 2 HBhdc in each st. (4 sts)
Row 3: Ch 1, turn. 2 HBhdc in the first st, HBhdc in the next 2 sts, 2 HBhdc in the last st. (6 sts)
Row 4: Ch 1, turn. 2 HBhdc in the first st, HBhdc in the next 4 sts, 2 HBhdc in the last st. (8 sts)
Check: the top tier is a small triangle, 1.6 in (4.1 cm) across the bottom.
Middle Tier
Row 5 (step row): Turn, no ch. Sl st in the first st, ch 1, HBhdc in the next 6 sts. Leave the last st unworked. (6 sts)
The outer stitch on each side of Row 4 now sticks out past Row 5. These two stitches form the overhanging lip of the top tier.
Row 6: Ch 1, turn. 2 HBhdc in the first st, HBhdc in the next 4 sts, 2 HBhdc in the last st. (8 sts)
Row 7: Ch 1, turn. 2 HBhdc in the first st, HBhdc in the next 6 sts, 2 HBhdc in the last st. (10 sts)
Row 8: Ch 1, turn. 2 HBhdc in the first st, HBhdc in the next 8 sts, 2 HBhdc in the last st. (12 sts)
Check: 2.4 in (6.1 cm) wide, 2 in (5.1 cm) tall from the tip.
Bottom Tier
Row 9 (step row): Turn, no ch. Sl st in the first st, ch 1, HBhdc in the next 10 sts. Leave the last st unworked. (10 sts)
Row 10: Ch 1, turn. 2 HBhdc in the first st, HBhdc in the next 8 sts, 2 HBhdc in the last st. (12 sts)
Row 11: Ch 1, turn. 2 HBhdc in the first st, HBhdc in the next 10 sts, 2 HBhdc in the last st. (14 sts)
Row 12: Ch 1, turn. HBhdc in each st across. (14 sts)
Row 12 has no increases, so the bottom of the tier drops straight down and the corners stay soft and rounded.
Fasten off with a 6 in (15.2 cm) tail.
Check: 2.8 in (7.1 cm) wide, 3 in (7.6 cm) tall. Choose the neater face as the RS and mark it.
Trunk
The trunk sits on the 4 center stitches of Row 12. There are 5 sts on each side of it: 5 + 4 + 5 = 14.
Row 1: With the RS facing, count 5 sts in from the right edge of Row 12. Join brown in the 6th st. Ch 1, sc in the same st and in the next 3 sts. (4 sc)
Rows 2–3: Ch 1, turn. Sc in each st across. (4 sc)
Fasten off with a 6 in (15.2 cm) tail.
Check: 0.8 in (2.0 cm) wide, 0.6 in (1.5 cm) tall, centered under the tree.
Edging
Edging gauge: 1 sc per HBhdc row end. Each row end is about 0.25 in (0.6 cm) tall, and a single sc fills that height without ruffling or pulling.
Edging round (sage green): With the RS facing, join green in the first free st of Row 12 to the left of the trunk. Work as follows.
- Bottom, left section: Sc in the same st and in the next 4 sts to the corner. (5 sc)
- Side 1 (going up): 1 sc in each row end of Rows 12, 11, 10, and 9 (4 sc). 1 sc in the free outer st of Row 8 (1 sc). 1 sc in each row end of Rows 8, 7, 6, and 5 (4 sc). 1 sc in the free outer st of Row 4 (1 sc). 1 sc in each row end of Rows 4, 3, 2, and 1 (4 sc). (14 sc on this side)
- Tip: 1 sc in each of the 2 free loops of the foundation ch under Row 1. (2 sc)
- Side 2 (going down): Work as Side 1 in reverse. 4 row-end sc for Rows 1–4, 1 sc in the free st of Row 4, 4 row-end sc for Rows 5–8, 1 sc in the free st of Row 8, 4 row-end sc for Rows 9–12. (14 sc)
- Bottom, right section: Sc in each of the 5 sts of Row 12 up to the trunk. (5 sc)
Sl st in the first sc to join. (40 sc total)
Why the math works: Each side has 12 row ends and 2 free lip stitches, so 12 + 2 = 14. The bottom has 14 sts minus the 4 trunk sts, so 5 + 5 = 10. The tip adds 2. That gives 14 + 14 + 10 + 2 = 40. There are no corner increases, so the bottom corners keep their rounded shape. Working into the free lip stitches outlines each tier’s overhang, so the steps stay crisp.
Fasten off and weave in the end.
Hanger
Join green in the space between the 2 tip sc. Ch 30, then sl st into the same space to form a loop. Turn and work 1 sc in each ch around the loop. (30 sc) Sl st into the tip again. Fasten off.
The sc layer makes the loop thick and round, so it won’t twist into a thin string. Folded flat, the loop drops about 2.5 in (6.4 cm), which gives a total hanging length of about 6.2 in (15.7 cm). For a longer drop, add chains in multiples of 5. Each 5 ch adds about 0.5 in (1.3 cm) of drop.
Final Blocking
- Weave in all tails. Work green tails into green stitches and the brown tail into the trunk.
- Lightly mist the tree with water until it is damp but not wet.
- Lay it RS up on a foam board.
- Pin the tip, the outer point of each tier lip, and the two bottom corners.
- Measure to confirm 3 in (7.6 cm) at the widest point and 3.7 in (9.4 cm) from tip to trunk.
- Pin the trunk straight and centered.
- Let it dry completely, at least 6 hours.
- Unpin it and pinch the tier lips gently so they lie flat and sharp.
Final Quality-Control Checklist
- Stitch counts: Rows 1–4 = 2, 4, 6, 8; Rows 5–8 = 6, 8, 10, 12; Rows 9–12 = 10, 12, 14, 14
- Trunk is 4 sc wide, 3 rows tall, with 5 sts free on each side
- Edging round totals 40 sc
- Width is 3 in (7.6 cm) and height is 3.7 in (9.4 cm)
- Both sides match in shape and lip size
- Hanger is firmly anchored at the tip and centered
- All tails are hidden, with nothing showing on either face
Troubleshooting
The tiers lean to one side. You probably skipped an increase or the step-row sl st on one edge. Count each row against the list above.
The edges ripple. You worked 2 sc into some row ends. Use 1 sc per row end.
The edges pull in or cup. Your edging is too tight. Loosen your tension, or work the edging with a 3.25 mm hook.
The lips aren’t visible. Check that you left exactly 1 st unworked on each side in Rows 5 and 9, and that the edging sc went into those stitches.
The trunk is off-center. Count 5 sts in from the edge before joining brown.
The hanger twists. Steam it lightly and hang it with a small weight overnight.
Care
Hand wash in cool water with mild soap, press out the water, reshape, and dry flat. Keep it away from long periods of direct, hot sun on the dashboard to reduce fading.
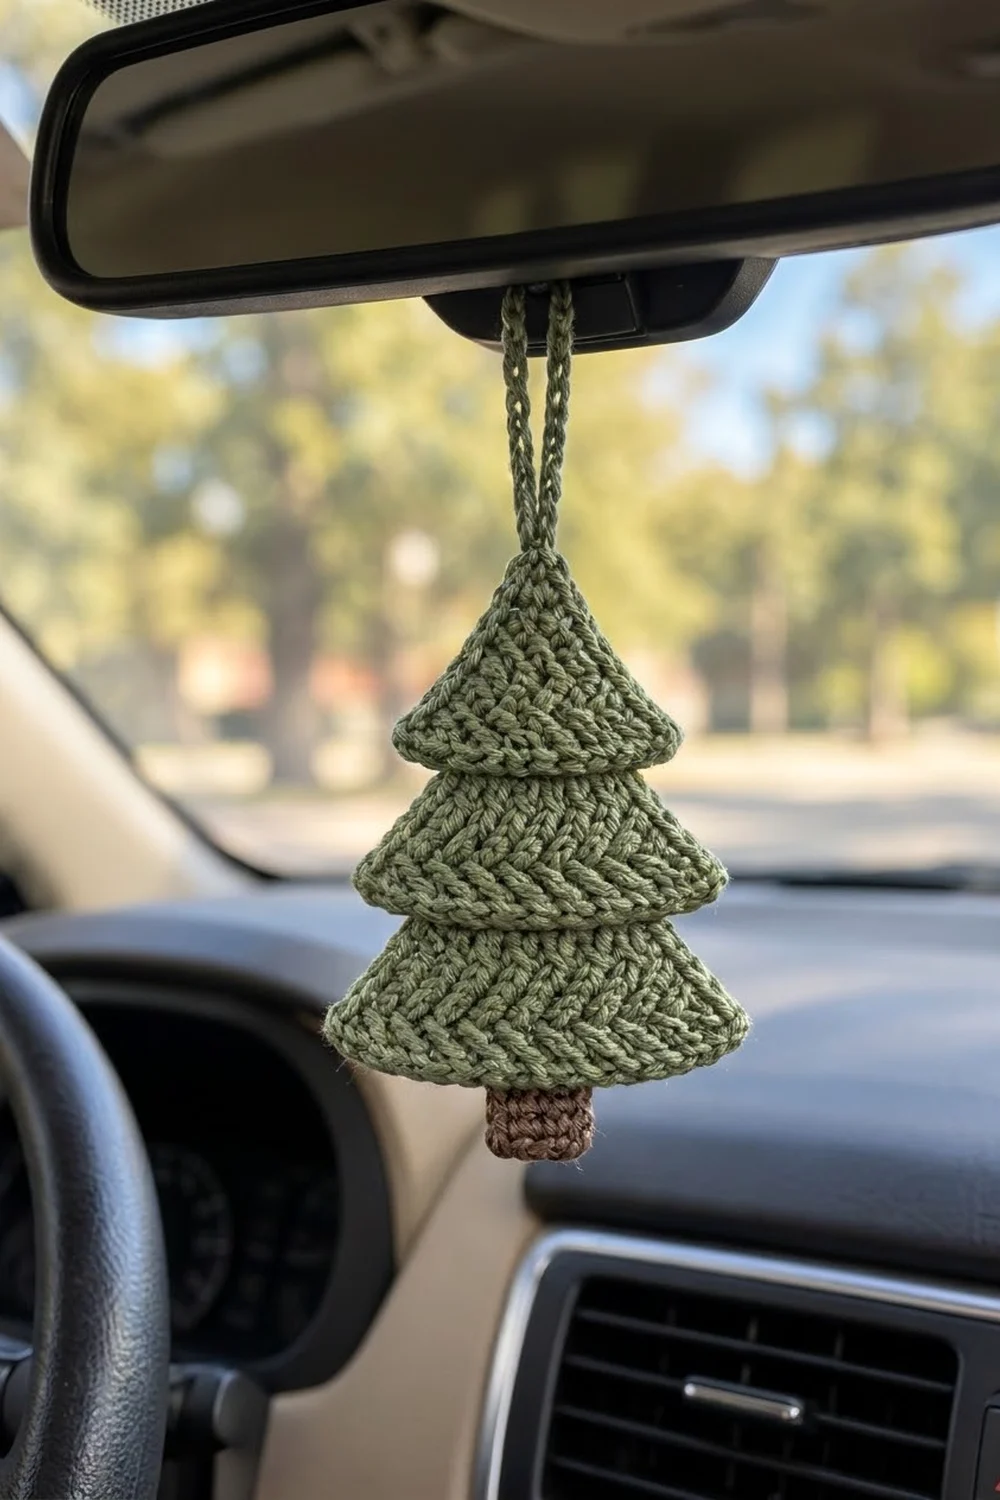
Final Notes
The measurement chain is short and easy to track. The top tier reaches 1.6 in (4.1 cm), the middle tier 2.4 in (6.1 cm), and the bottom tier 2.8 in (7.1 cm) at 3 in (7.6 cm) tall. The trunk adds 0.6 in (1.5 cm), and the edging brings the finished tree to 3 in x 3.7 in (7.6 cm x 9.4 cm). If each checkpoint matches, the finished ornament will too. Once you have the rhythm, one tree takes well under an hour, which makes it a quick gift or stocking stuffer.
Happy crocheting!