

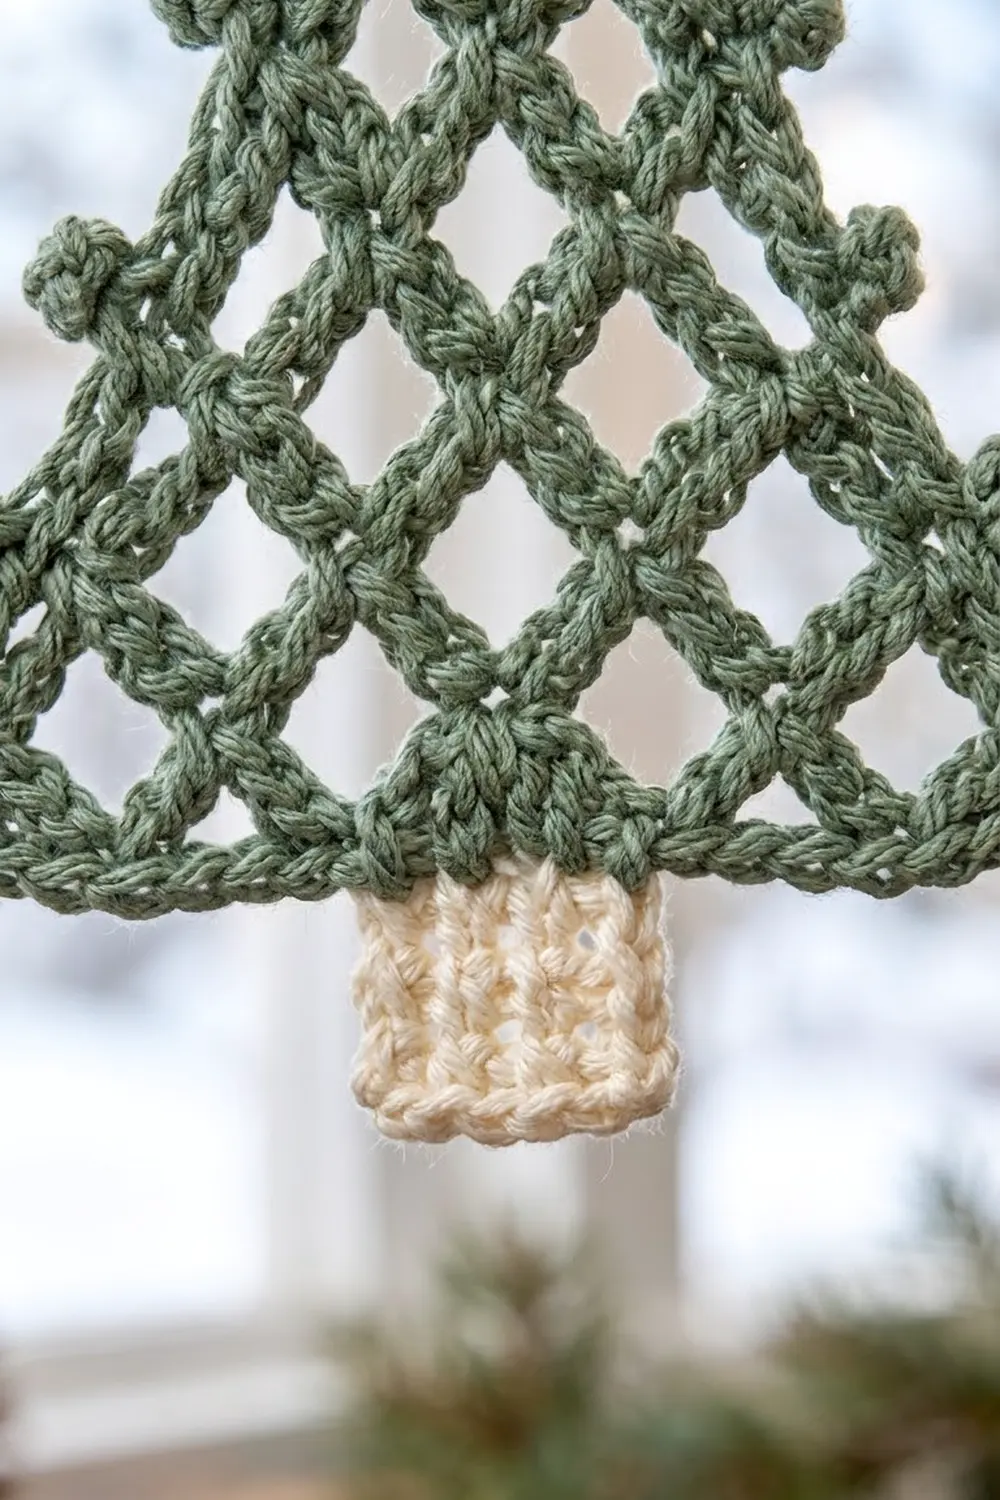
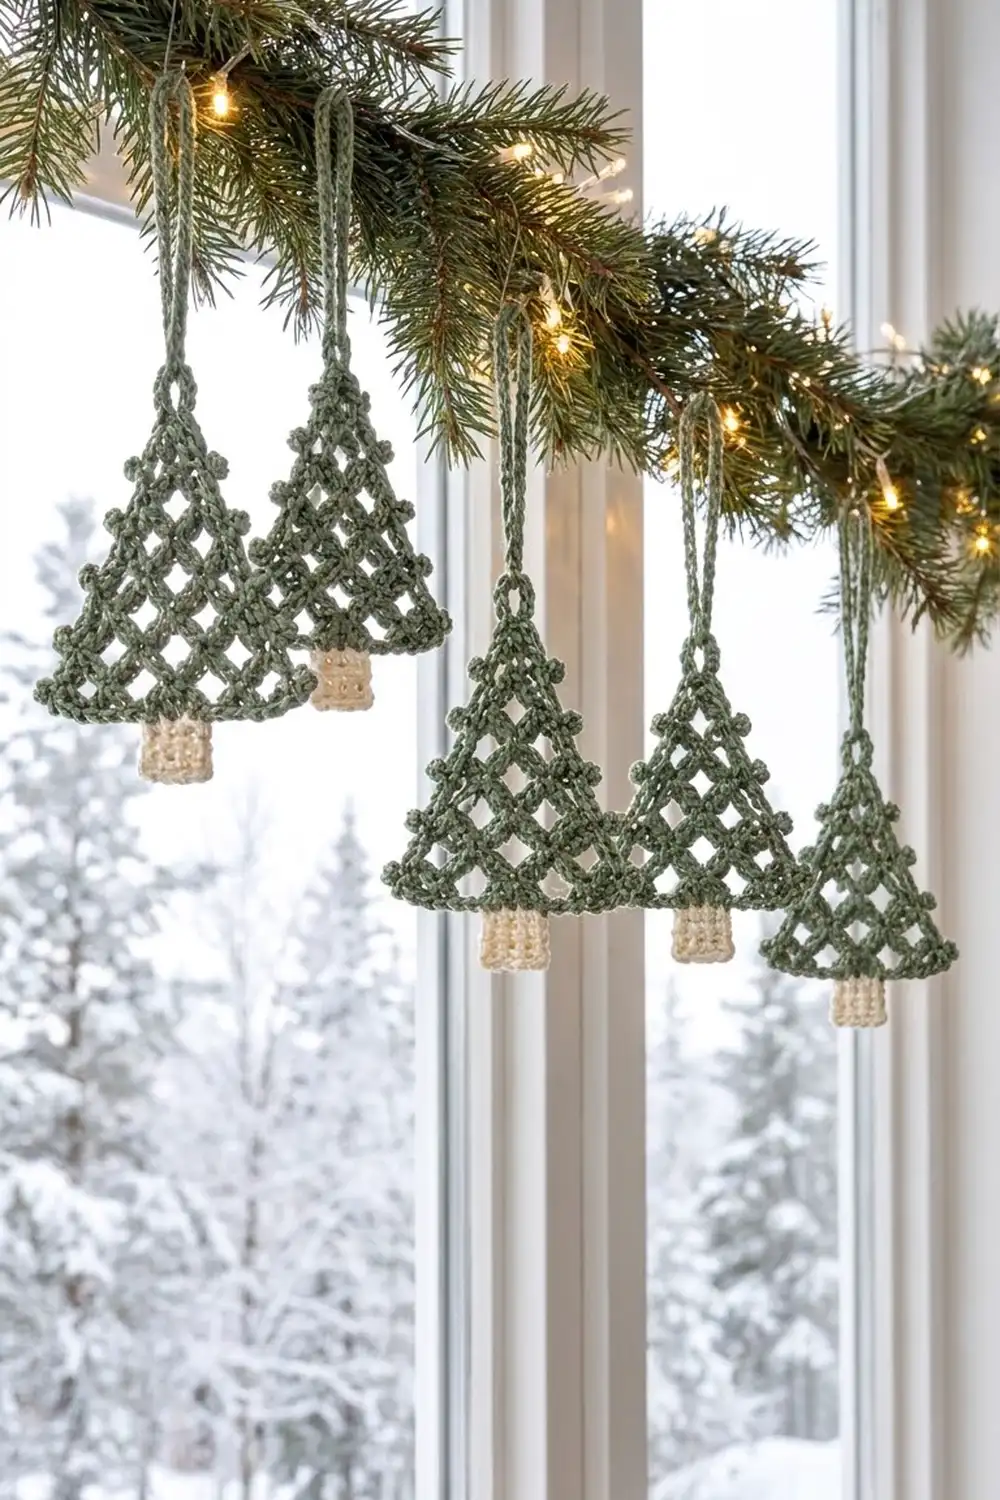
The Frosted Lattice Tree is a small, flat Christmas tree ornament. It has an open diamond mesh body, tiny picot “baubles” along both slanted edges, a sturdy covered hanging loop at the tip and a neat cream trunk. You can read its shape from across a room when it hangs in a window, and up close the lattice lets the light through.
The tree is sage green and the trunk is cream. The style is calm and Scandinavian, with no glitter or beads, just texture and open space. A group of these trees looks lovely on a garland, a bare branch or a window frame. One tree also makes a quick gift topper.
This pattern uses US crochet terms. The finished ornament is 4 in (10.2 cm) wide at the base and 4.5 in (11.4 cm) tall from the tip to the bottom of the trunk, plus a 1.5 in (3.8 cm) hanging loop.
Construction is simple. You work the triangle from the bottom up: one row of single crochet, then rows of chain-4 mesh. Each mesh row has one loop fewer than the row before, until the rows meet at a point. One edging round adds the picots, shapes the corners and builds the hanging loop. Last, you work the trunk in short rows straight off the center of the bottom edge.
Finished Size and Construction
- Finished size: 4 in (10.2 cm) wide x 4.5 in (11.4 cm) tall, plus a 1.5 in (3.8 cm) loop
- Skill level: Easy / Advanced Beginner
- Terminology: US crochet terms
- Yarn weight: DK (light worsted, weight 3), cotton or cotton blend
- Hook: 3.5 mm (E-4)
- Number of pieces: 1 (the trunk is worked directly onto the tree)
- Layout: one flat triangle with the trunk centered below it
- Piece size (tree triangle with edging): 4 in (10.2 cm) wide x 3.75 in (9.5 cm) tall
- Size before edging: 3.5 in (8.9 cm) wide x 3.25 in (8.3 cm) tall
- Edging depth: about 0.25 in (0.6 cm) on each side, not counting picots
- Trunk: 0.9 in (2.3 cm) wide x 0.75 in (1.9 cm) tall
Materials
Choose a smooth, tightly plied DK cotton. Mercerized or matte cotton both work, as long as the stitches look crisp and rounded like the ones on this tree. Avoid fuzzy or brushed yarns, because the halo fills the diamond openings and blurs the lattice. Acrylic also works, but it does not block as sharply.
- Color A, Sage Green: 10 g, about 25 m (27 yd)
- Color B, Cream: 2 g, about 5 m (5.5 yd)
These quantities include a margin for a gauge swatch and for weaving in ends. For a set of six trees, multiply each amount by six and you will still have a little to spare.
Tools:
- 3.5 mm (E-4) crochet hook
- Tapestry needle
- Scissors
- Stitch marker
- Rust-proof pins and a blocking mat or folded towel
- Spray bottle with water
- Optional: fabric stiffener or diluted white glue
Abbreviations (US Terms)
- ch – chain
- sc – single crochet
- sl st – slip stitch
- st(s) – stitch(es)
- sk – skip
- sp – space
- RS – right side
- WS – wrong side
Special stitch:
- Picot: ch 3, sl st into the 3rd ch from the hook. A picot never counts as a stitch, and you never work into it.
Gauge and Checkpoints
Gauge: 11 sc and 13 rows = 2 in (5.1 cm) in sc, using a 3.5 mm hook.
This ornament is small, so your first tree is the real test piece. Finish one complete tree before you start a set, and check it at each stage below.
- Checkpoint 1, after Row 1: the sc row is 3.5 in (8.9 cm) wide.
- Checkpoint 2, after Row 4: the piece is about 1.5 in (3.8 cm) tall from the foundation edge.
- Checkpoint 3, after Row 8: the triangle is 3.5 in (8.9 cm) wide x 3.25 in (8.3 cm) tall.
- Checkpoint 4, after the edging: 4 in (10.2 cm) wide at the corners x 3.75 in (9.5 cm) tall.
- Checkpoint 5, after the trunk: 4.5 in (11.4 cm) total height, not counting the loop.
Too big? Go down to a 3.25 mm hook, or tighten your chains. Loose mesh chains are the most common reason for an oversized tree.
Too small? Go up to a 3.75 mm hook. Do not add chains to the mesh loops, because that changes the slope of the tree.
Tree Body (Color A, Sage Green)
You work the body flat in rows from the bottom edge to the tip. Each mesh row starts with slip stitches to the center of the first loop and ends in the last loop, so it has one loop fewer than the row before. Stepping in on both sides like this creates the slanted tree outline.
Foundation: With Color A, ch 20.
Row 1 (RS): Sc in the 2nd ch from the hook and in each ch across, turn. (19 sc)
Row 2: Ch 1 (does not count as a st), sc in the first sc, ch 4, sk 2 sts, sc in the next sc; repeat from * 5 more times, turn. (6 ch-4 loops, 7 sc)
Check the math: 1 sc + 6 repeats of 3 sts = 19 sts, so you end exactly in the last sc of Row 1.
Row 3: Sl st in each of the first 2 ch of the first loop, ch 1, sc in the same loop, ch 4, sc in the next ch-4 loop; repeat from * 4 more times, leaving the rest of the last loop unworked, turn. (5 ch-4 loops, 6 sc)
Each sc lands in the middle of a loop below, and each new ch-4 crosses over an sc below. This offset turns the loops into diamond-shaped openings.
Row 4: Sl st in each of the first 2 ch of the first loop, ch 1, sc in the same loop, ch 4, sc in the next ch-4 loop; repeat from * 3 more times, turn. (4 ch-4 loops, 5 sc)
Row 5: Work as Row 4, but repeat from * 2 more times. (3 ch-4 loops, 4 sc)
Row 6: Work as Row 4, but repeat from * 1 more time. (2 ch-4 loops, 3 sc)
Row 7: Sl st in each of the first 2 ch of the first loop, ch 1, sc in the same loop, ch 4, sc in the next ch-4 loop, turn. (1 ch-4 loop, 2 sc)
Row 8 (tip): Sl st in each of the first 2 ch of the loop, ch 1, sc in the same loop. (1 sc) Fasten off.
Put a stitch marker in this tip sc. Count the openings: there should be 6 rows of diamonds, going from 6 across at the bottom to 1 at the top.
Edging Round with Picots and Hanging Loop (Color A)
The edging is one round worked all the way around the triangle. It firms up the mesh edges, squares off the bottom corners, adds the picot baubles and builds the hanging loop at the tip.
Edging gauge: 1 sc per st along the bottom, 3 sc per mesh row-end along the sides, and 3 sc in each bottom corner. These ratios keep the edges flat, without ruffling or cupping.
Row-ends: On each slanted side you will find 6 row-end spaces, one for each of Rows 2–7. Each one is the open half-loop where a mesh row began or ended. Work your sc around the chain or into the space, not into a single strand.
With RS facing, join Color A with a sl st in the first sc of Row 1. This is the bottom corner where the foundation chain began.
Bottom edge: Ch 1, then work (2 sc, picot, 1 sc) in the same corner st. Sc in each of the next 17 sts. Work (2 sc, picot, 1 sc) in the last st.
Bottom count: 19 sts worked 1 per stitch + 4 extra corner sc = 23 sc, with 2 picots.
First slanted side: Work 1 sc in the row-end of Row 1. Then work (2 sc, picot, 1 sc) into each row-end of Rows 2 through 7.
Side count: 1 sc + (6 row-ends x 3 sc) = 19 sc, with 6 picots.
Tip and hanging loop: Sc in the marked tip sc. Ch 16, then sl st in the same tip sc to form a loop. Work 20 sc into the ch-16 loop to cover it completely, then sl st in the same tip sc.
Tip count: 1 sc for the edging. The 20 sc covering the loop are not part of the edging total.
Second slanted side: Work (1 sc, picot, 2 sc) into each row-end of Rows 7 down to 2. Work 1 sc in the row-end of Row 1.
Side count: (6 row-ends x 3 sc) + 1 sc = 19 sc, with 6 picots.
Sl st to the first sc of the round to join. Fasten off, leaving a 4 in (10.2 cm) tail.
Round total: 23 + 19 + 1 + 19 = 62 sc, plus 14 picots and a loop covered with 20 sc.
Why the math works: The bottom edge keeps all 19 foundation sts and adds only 4 corner sts, so the base stays 3.5 in (8.9 cm) plus the edging depth on each side, for 4 in (10.2 cm). Each mesh row is about 0.45 in (1.1 cm) tall. At this gauge, 3 sc measure about 0.5 in (1.3 cm), which matches each diagonal row-end, because the slope makes it a little longer than the row height. That gives one picot per row step, in line with the diamond rows.
On the second side the picot moves to a different place in the group: (1 sc, picot, 2 sc) instead of (2 sc, picot, 1 sc). Because you are now working down the tree instead of up, this puts each picot at the same height as its partner on the first side.
Trunk (Color B, Cream)
You work the trunk in rows straight off the bottom edge, centered under the tree.
Count the 23 sc of the bottom edging. The center st is the 12th. The trunk uses the 5 sts centered on it, which are sts 10 through 14.
Hold the tree upside down with RS facing, so the bottom edge is at the top. Join Color B with a sl st in st 10, counting from the right-hand corner. Check that it is centered: there should be 9 bottom sts free on each side.
Row 1 (RS): Ch 1, sc in the same st and in each of the next 4 sts, turn. (5 sc)
Rows 2–5: Ch 1, sc in each st across, turn. (5 sc)
Fasten off after Row 5. The trunk should be 0.9 in (2.3 cm) wide x 0.75 in (1.9 cm) tall.
Weave in all ends along the edging or inside the trunk rows, so nothing shows through the open mesh. Weave the cream ends only through cream stitches so they don’t peek through the green.
Final Blocking
Blocking matters a lot for lace pieces. It opens the diamonds and straightens the slanted sides.
- Mist the ornament with water until it is damp but not soaked.
- Lay it RS up on a blocking mat or folded towel.
- Pin the two bottom corners first, 4 in (10.2 cm) apart.
- Pin the tip so the tree measures 3.75 in (9.5 cm) from the bottom edge to the tip, with the loop lying flat above it.
- Pin each of the 14 picots so it points outward.
- Gently open each diamond with a fingertip or pin so the rows sit level.
- Pin the trunk square at 0.9 in (2.3 cm) wide.
- Optional: dab a light coat of fabric stiffener onto the green mesh for a crisper hanging shape.
- Let it dry completely, for at least 6 hours, before you remove the pins.
Final Quality-Control Checklist
- The bottom edge measures 4 in (10.2 cm) from corner to corner.
- The tree is 3.75 in (9.5 cm) tall, and the total height with the trunk is 4.5 in (11.4 cm).
- There are six rows of diamond openings, going evenly from 6 to 1.
- Each slanted side has 6 picots, at matching heights.
- Each bottom corner has 1 picot.
- The hanging loop is fully covered with sc and stands about 1.5 in (3.8 cm) tall.
- The trunk is 5 sc wide and 5 rows tall, with 9 sts free on each side.
- No ends show through the mesh.
- The ornament hangs straight and does not twist to one side.
Troubleshooting
The sides look jagged or stepped. You may be working too few sc into the row-ends. Use the full 3 sc per row-end.
The sides ruffle. Your sc may be looser than your mesh. Go down a hook size for the edging only.
The diamonds look like squares or slits. Your ch-4 loops are too tight or too loose. Block firmly, and keep your chains even on the next tree.
The tree leans. Check that every mesh row starts with exactly 2 sl sts into the first loop. One sl st too many or too few shifts the row sideways.
There are too many or too few loops. Count the loops after each row against the counts given. Each row must have exactly one loop fewer than the row before.
The trunk is off-center. Count the bottom edging sts again. There should be 9 free sts on each side of the trunk.
The loop twists or flops. Pack the 20 sc tightly over the chain and push them together until the chain is completely hidden.
The picots lie flat. Pin them outward while blocking, or add a touch of stiffener to each one.
Care
Hand wash in cool water with mild soap, press out the water in a towel and dry flat. Re-block if the mesh loses its shape in storage.
Final Notes
The measurement chain is short and easy to check:
- Row 1 sets the 3.5 in (8.9 cm) base with 19 sc.
- Six mesh rows step in to a single tip sc, at 3.25 in (8.3 cm) tall.
- The 62-sc edging round brings the tree to 4 in (10.2 cm) x 3.75 in (9.5 cm).
- The 5-row trunk brings the total height to 4.5 in (11.4 cm).
- The covered loop adds 1.5 in (3.8 cm) for hanging.
If every checkpoint matches, each tree in your set will come out the same size, and a row of them in a window will look calm and even.
Happy crocheting!