

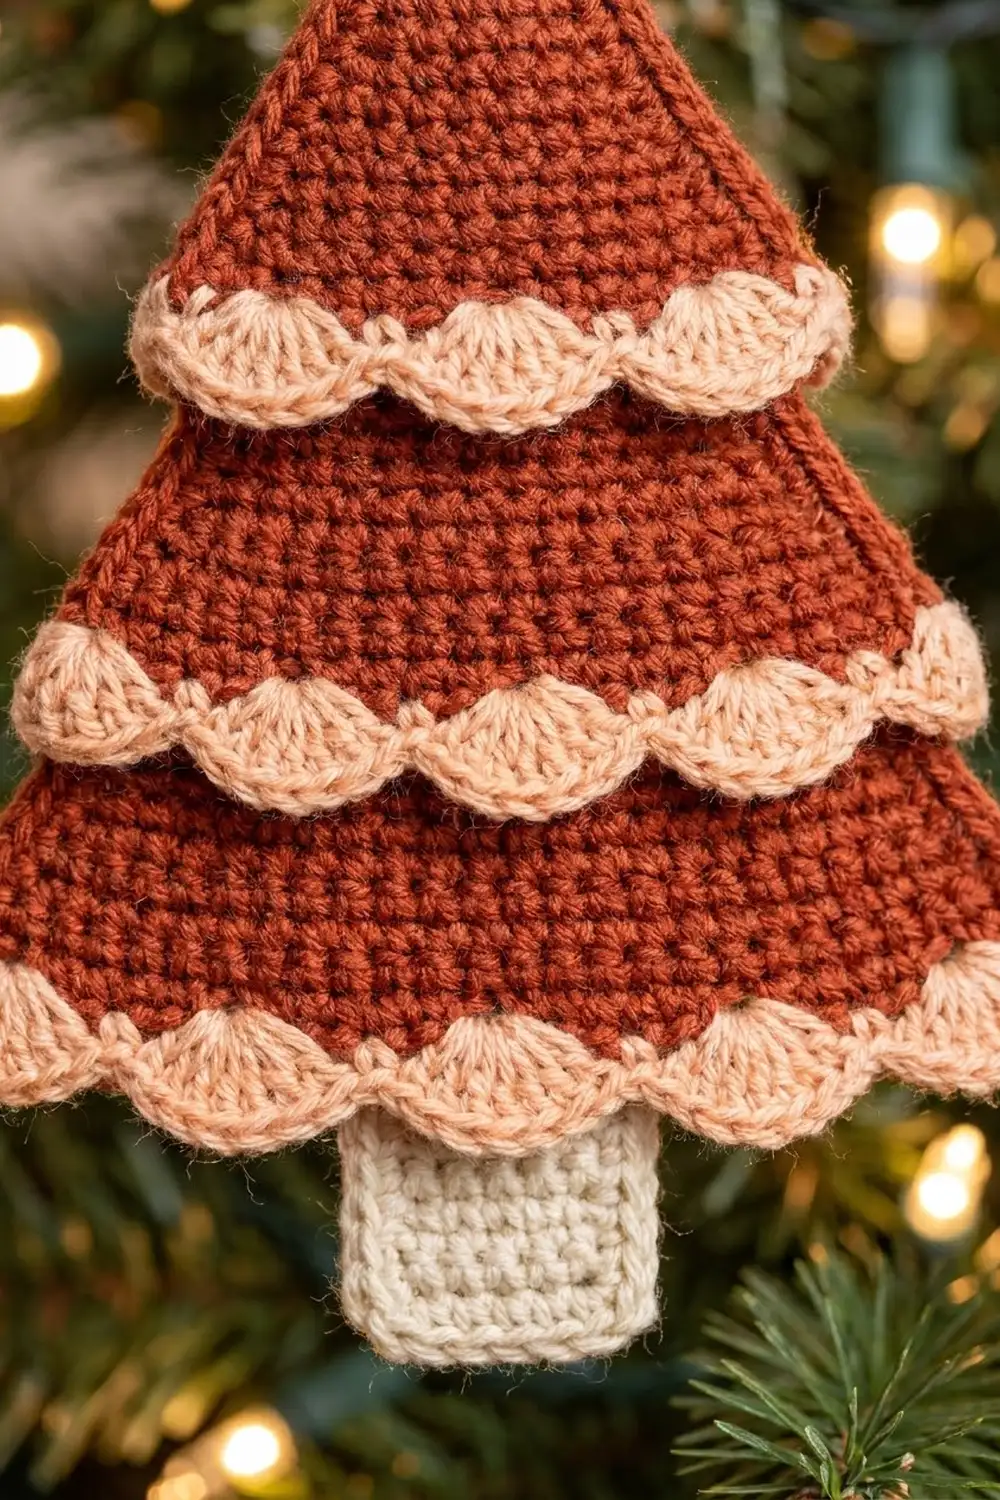
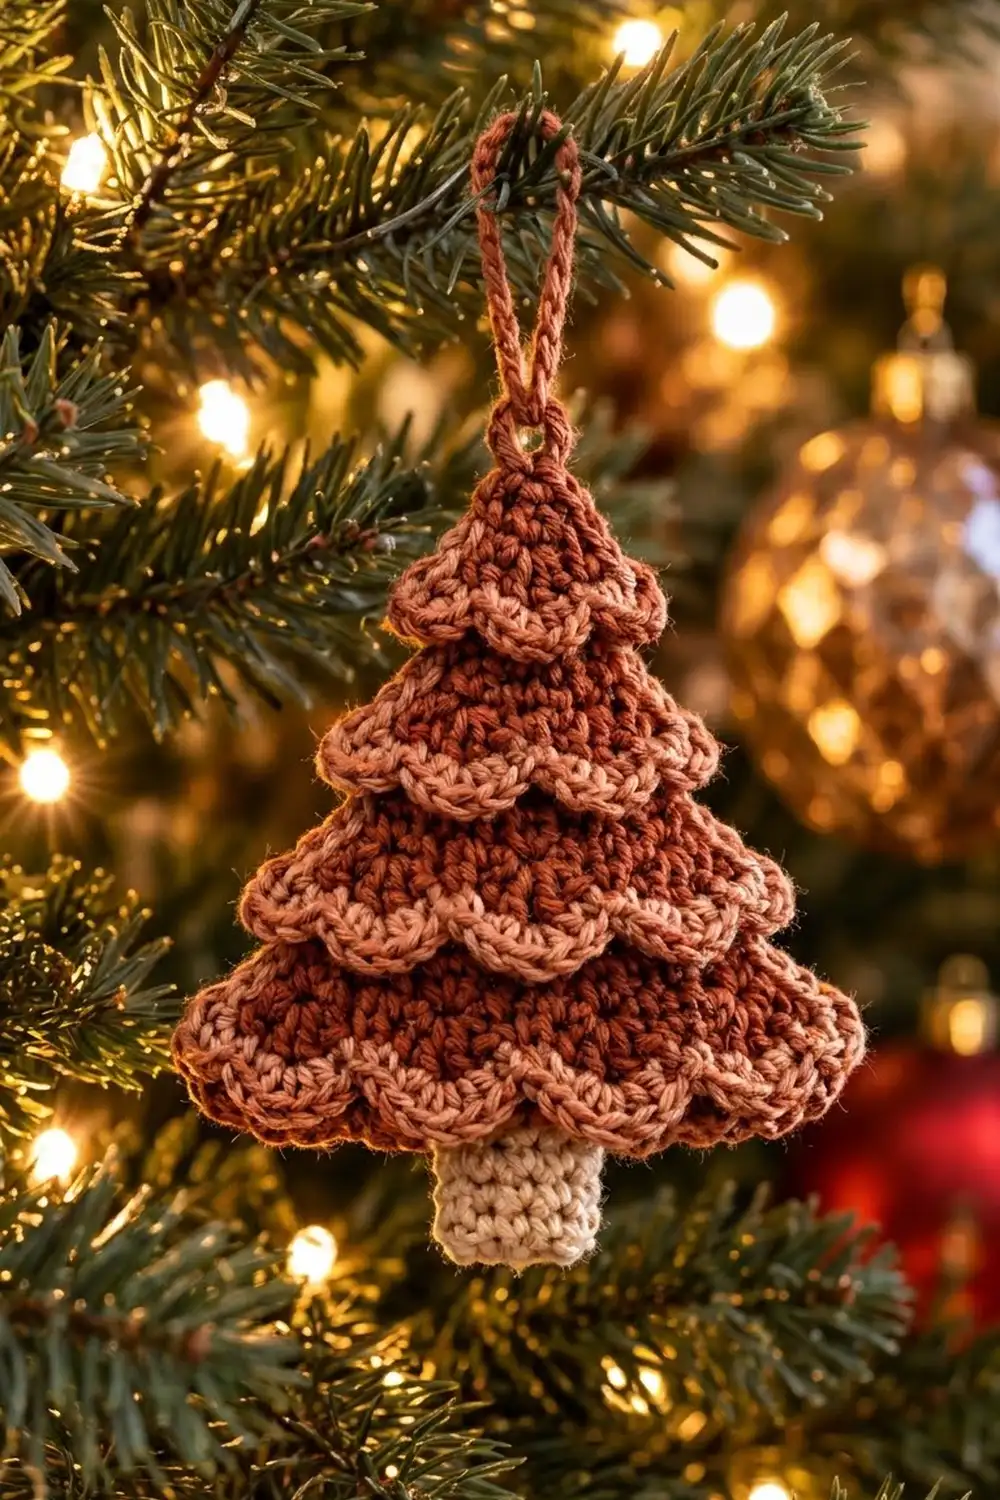
This small tree ornament has four tiers of warm rust single crochet. Each tier ends in a soft peach scalloped edging, and a short cream trunk sits at the base. The edgings hang over the tier below like layered branches, so the flat tree looks dimensional on the branch.
The palette is rust, peach and cream. It suits a cozy, natural Christmas tree and works well as a gift topper. The style is tidy and textured, without any fuss.
This pattern uses US crochet terms. The finished ornament is about 4.6 in (11.7 cm) wide across the widest scallops and 5 in (12.7 cm) tall from the top point to the bottom of the trunk. The hanging loop adds about 1.2 in (3.0 cm).
You work the tree body in one piece from the top down, in rows of single crochet. At three points you work a row in back loops only. That leaves a line of free front loops for the scalloped edgings. Then you add the four peach edgings and work the cream trunk straight off the last row. Nothing needs sewing.
Finished Size and Construction
- Finished size: 4.6 in (11.7 cm) wide x 5 in (12.7 cm) tall, plus a 1.2 in (3.0 cm) loop
- Skill level: Advanced beginner
- Terminology: US crochet terms
- Yarn weight: DK (light worsted / #3)
- Hook: 3.5 mm (E-4)
- Number of pieces: 1 (the trunk and loop are worked onto the body)
- Layout: one stepped triangle with four tiers
- Body size: 3.8 in (9.7 cm) wide at Row 24 x 4 in (10.2 cm) tall
- Size before edging: 3.8 in x 4 in (9.7 cm x 10.2 cm)
- Edging depth: scallops hang about 0.4 in (1.0 cm) and flare about 0.4 in (1.0 cm) past each side at the bottom tier
Materials
Use a smooth DK yarn with good stitch definition. Cotton or a cotton blend shows the scallops best and holds its shape on the tree. Wool blends also work but look softer and fuzzier.
- Color A, Rust: 10 g, about 23 m (tree body and hanging loop)
- Color B, Peach: 5 g, about 12 m (four scalloped edgings)
- Color C, Cream: 2 g, about 5 m (trunk)
Quantities include a margin for swatching and weaving in ends.
Tools:
– 3.5 mm (E-4) crochet hook
– Tapestry needle
– 2 locking stitch markers
– Scissors
– Rustproof pins and a blocking mat or folded towel
– Spray bottle or steam iron
Abbreviations (US Terms)
- ch – chain
- sl st – slip stitch
- sc – single crochet
- dc – double crochet
- sk – skip
- st(s) – stitch(es)
- BLO – back loop only
- FLO – front loop only
- RS / WS – right side / wrong side
- inc – 2 sc in the same st
Special stitch: Scallop shell. Work 5 dc in the same st. Each shell sits between 2 sc, with 1 st skipped on each side of the shell.
Gauge and Checkpoints
Gauge: 20 sc and 24 rows = 4 in (10.2 cm) in rust. That is 5 sc and 6 rows per inch (2.54 cm).
This ornament is small, so the body is your test piece. Check it at the end of every tier, with the fabric laid flat and unstretched. Measure the width straight across the last row.
| After Row | Stitches | Width | Height from point |
|---|---|---|---|
| 6 | 7 | 1.4 in (3.6 cm) | 1 in (2.5 cm) |
| 12 | 11 | 2.2 in (5.6 cm) | 2 in (5.1 cm) |
| 18 | 15 | 3 in (7.6 cm) | 3 in (7.6 cm) |
| 24 | 19 | 3.8 in (9.7 cm) | 4 in (10.2 cm) |
A difference of 1/8 in (0.3 cm) is fine.
- If the piece is too big: go down to a 3.25 mm (D-3) hook and restart.
- If the piece is too small: go up to a 3.75 mm (F-5) hook.
Do not change the stitch counts. The edgings depend on exact counts.
Tree Body
Use Color A (rust). Row 1 is the RS. Every odd row is a RS row, and every even row is a WS row.
Turning ch-1 does not count as a stitch in any row.
Increase rule: increases happen only on rows divisible by 3 (Rows 3, 6, 9 and so on, up to 24). On each of these rows:
– ch 1, turn
– 2 sc in the first st
– sc in each st to the last st
– 2 sc in the last st
Each increase row adds 2 sts. All other rows are worked even, with 1 sc in each st.
Tier 1 (Top)
Row 1 (RS): Ch 2, 3 sc in 2nd ch from hook. (3 sts) Place a marker on the RS.
Row 2: Ch 1, turn, sc in each st. (3 sts)
Row 3: Increase row. (5 sts)
Rows 4–5: Ch 1, turn, sc in each st. (5 sts)
Row 6: Increase row. (7 sts)
Checkpoint: 1.4 in (3.6 cm) wide.
Tier 2
Row 7 (RS): Ch 1, turn, sc in BLO of each st. (7 sts) This leaves 7 free front loops from Row 6 on the RS.
Row 8: Ch 1, turn, sc in each st. (7 sts)
Row 9: Increase row. (9 sts)
Rows 10–11: Ch 1, turn, sc in each st. (9 sts)
Row 12: Increase row. (11 sts)
Checkpoint: 2.2 in (5.6 cm) wide.
Tier 3
Row 13 (RS): Ch 1, turn, sc in BLO of each st. (11 sts) This leaves 11 free front loops from Row 12.
Row 14: Ch 1, turn, sc in each st. (11 sts)
Row 15: Increase row. (13 sts)
Rows 16–17: Ch 1, turn, sc in each st. (13 sts)
Row 18: Increase row. (15 sts)
Checkpoint: 3 in (7.6 cm) wide.
Tier 4 (Bottom)
Row 19 (RS): Ch 1, turn, sc in BLO of each st. (15 sts) This leaves 15 free front loops from Row 18.
Row 20: Ch 1, turn, sc in each st. (15 sts)
Row 21: Increase row. (17 sts)
Rows 22–23: Ch 1, turn, sc in each st. (17 sts)
Row 24 (WS): Increase row. (19 sts)
Fasten off, leaving a 6 in (15.2 cm) tail.
Checkpoint: 3.8 in (9.7 cm) wide x 4 in (10.2 cm) tall.
The BLO rows are always RS rows (7, 13 and 19). This keeps every line of free loops on the front of the tree.
Trunk
Use Color C (cream). Hold the tree with the RS facing and the point down, so Row 24 is at the top. Count the 19 sts of Row 24 and mark sts 8 and 12. These are the center 5 sts.
You work the trunk into the back loops only of these 5 sts. The front loops stay free for the bottom edging.
Row 1 (RS): Join C with sl st in the BLO of st 8. Ch 1, sc in the same BLO, then sc in the BLO of the next 4 sts. (5 sts)
Rows 2–6: Ch 1, turn, sc in each st. (5 sts)
Fasten off. Checkpoint: the trunk is 1 in (2.5 cm) wide and 1 in (2.5 cm) long.
Hanging Loop
Use Color A (rust). Join A with sl st in the tip of Row 1, at the top point. Ch 12, then sl st in the same spot. Fasten off.
The loop stands about 1.2 in (3.0 cm) tall.
Border: Scalloped Tier Edgings
There are four edgings, all in Color B (peach). Work each one with the RS facing and the point up, from right to left. Each one goes into its own line of free front loops:
- Edging 1: the 7 free loops of Row 6
- Edging 2: the 11 free loops of Row 12
- Edging 3: the 15 free loops of Row 18
- Edging 4: the 19 front loops of Row 24 (the trunk occupies only the back loops of sts 8–12)
Border gauge: one full repeat (sk 1, shell, sk 1, sc) uses 4 loops. That is 0.8 in (2.0 cm) wide, and each shell hangs about 0.4 in (1.0 cm).
Edging formula:
1. Join B with sl st in the first loop.
2. Ch 3 (counts as dc), 2 dc in the same loop. This is the corner half-shell.
3. Sc in the next loop.
4. Repeat [sk 1, 5 dc in next, sk 1, sc in next] the number of times given for that tier.
5. 3 dc in the last loop. This is the corner half-shell.
6. Fasten off.
Edging 1: 1 repeat. 7 loops used: 1 + 1 + 4 + 1. (13 sts: 3 + 1 + 6 + 3)
Edging 2: 2 repeats. 11 loops used: 1 + 1 + 8 + 1. (19 sts: 3 + 1 + 12 + 3)
Edging 3: 3 repeats. 15 loops used: 1 + 1 + 12 + 1. (25 sts: 3 + 1 + 18 + 3)
Edging 4: 4 repeats. 19 loops used: 1 + 1 + 16 + 1. (31 sts: 3 + 1 + 24 + 3)
Why the math works: each edging needs a loop count of 4k + 3. That is one loop at each end for the half-shells, one sc loop, and 4 loops per full repeat.
The body rows were designed to fit this formula:
– Row 6: 7 = 4(1) + 3
– Row 12: 11 = 4(2) + 3
– Row 18: 15 = 4(3) + 3
– Row 24: 19 = 4(4) + 3
The BLO rows have no increases, so the free-loop counts match the rows below them exactly.
The 3-dc half-shells at each end fan outward past the side edges. They create the stepped tree silhouette, and the bottom tier reaches about 4.6 in (11.7 cm) across.
Final Blocking
- Weave in all ends on the WS. Keep each color behind its own color.
- Lay the tree RS up on a blocking mat or folded towel.
- Pin the Row 24 body edge to 3.8 in (9.7 cm) wide. Pin the point so the body is 4 in (10.2 cm) tall.
- Fan each scallop shell open so it hangs evenly over the tier below. Lift any shell that has curled under.
- Pin the trunk straight, 1 in (2.5 cm) wide.
- Mist lightly with water, or hover steam 1 in (2.5 cm) above the piece. Do not press the scallops flat.
- Leave it to dry completely before unpinning. For a crisper ornament, spray lightly with fabric starch before drying.
Final Quality-Control Checklist
- Body is 3.8 in (9.7 cm) wide at Row 24 and 4 in (10.2 cm) tall.
- Rows 6, 12, 18 and 24 have 7, 11, 15 and 19 sts.
- All three BLO ledges are on the RS.
- Edgings have 13, 19, 25 and 31 sts.
- Each tier ends with a half-shell at both sides.
- The trunk is centered on sts 8–12 and sits behind Edging 4.
- The hanging loop is at the exact top point.
- No ends are visible on the RS.
Troubleshooting
Free loops are on the back. A BLO row was worked on a WS row. Recount from Row 1 and make sure Rows 7, 13 and 19 face RS.
An edging ends with a loop left over or one short. Recount the free loops. Each line must have 4k + 3 loops. Fix the body row count before redoing the edging.
Shells cup or ruffle. Your dc tension is tighter than your sc tension. Use a 3.75 mm (F-5) hook for the edgings only.
Shells look sparse or floppy. Use a 3.25 mm (D-3) hook for the edgings.
Tree leans to one side. You missed an increase at one end. Check that each increase row grew by exactly 2 sts.
Trunk looks off-center. Check that it starts in st 8 and ends in st 12 of 19.
Care
Hand wash in cool water and lay flat to dry, pinning the scallops back into shape. Store flat or hanging so the edgings don’t crush.
Final Notes
Here is the measurement chain for the whole ornament:
– The body grows to 7, 11, 15 and 19 sts at 1, 2, 3 and 4 in (2.5, 5.1, 7.6 and 10.2 cm).
– Each 4k + 3 loop count produces a clean scalloped edging with a half-shell at each side.
– The bottom tier reaches 4.6 in (11.7 cm) wide.
– The 1 in (2.5 cm) trunk brings the height to 5 in (12.7 cm).
If you check each tier as you go, the finished tree will match.
Happy crocheting!