

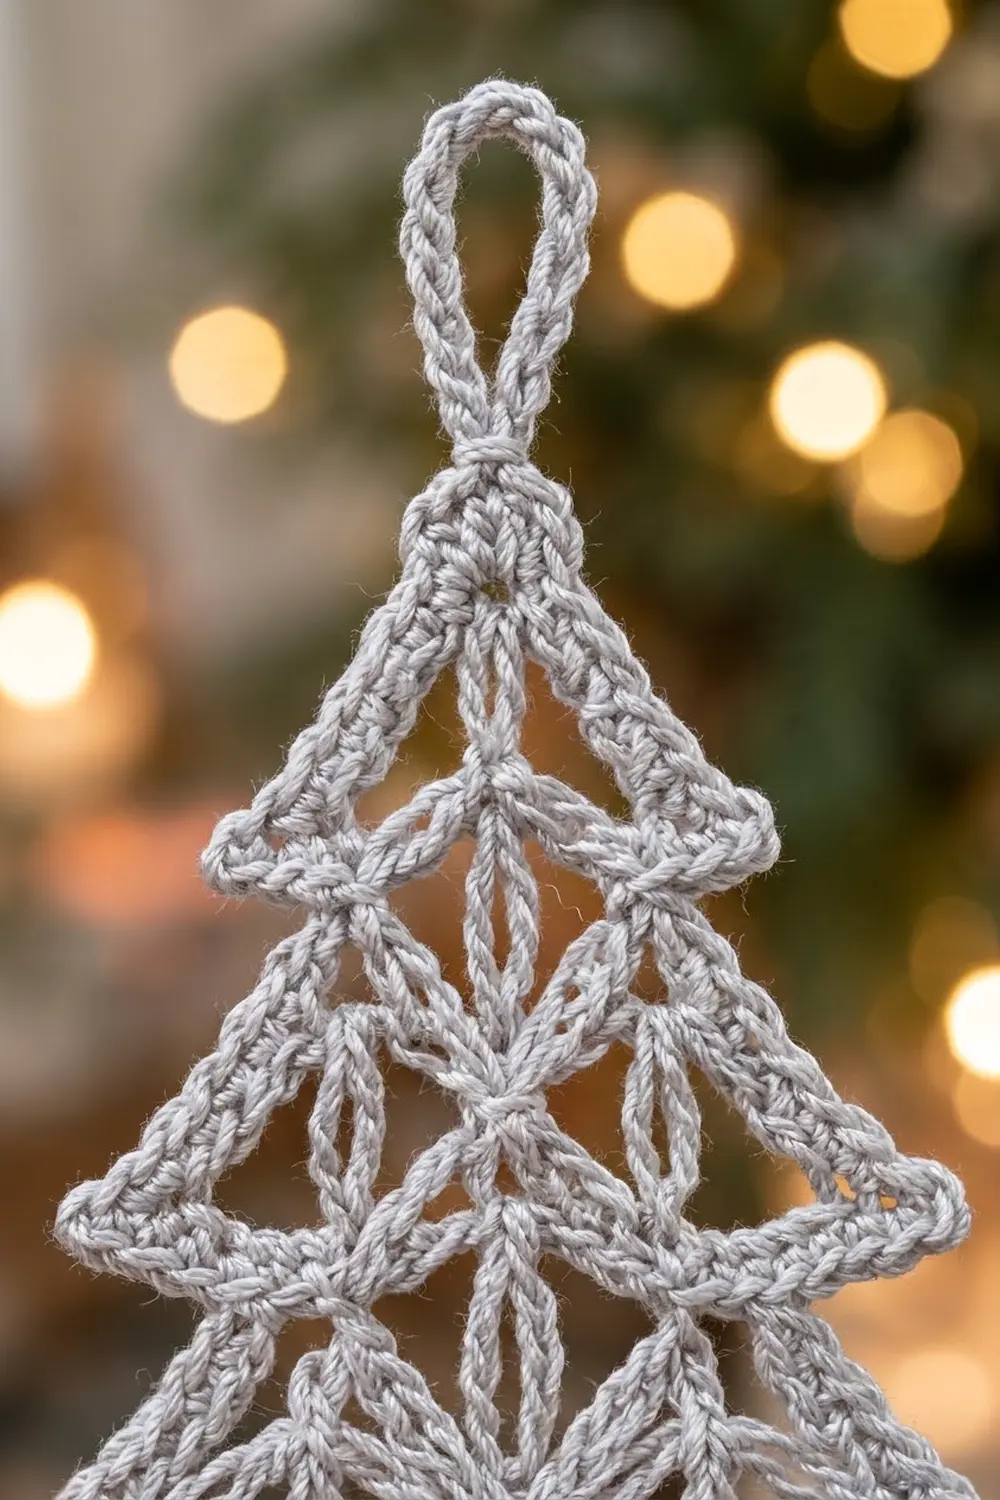
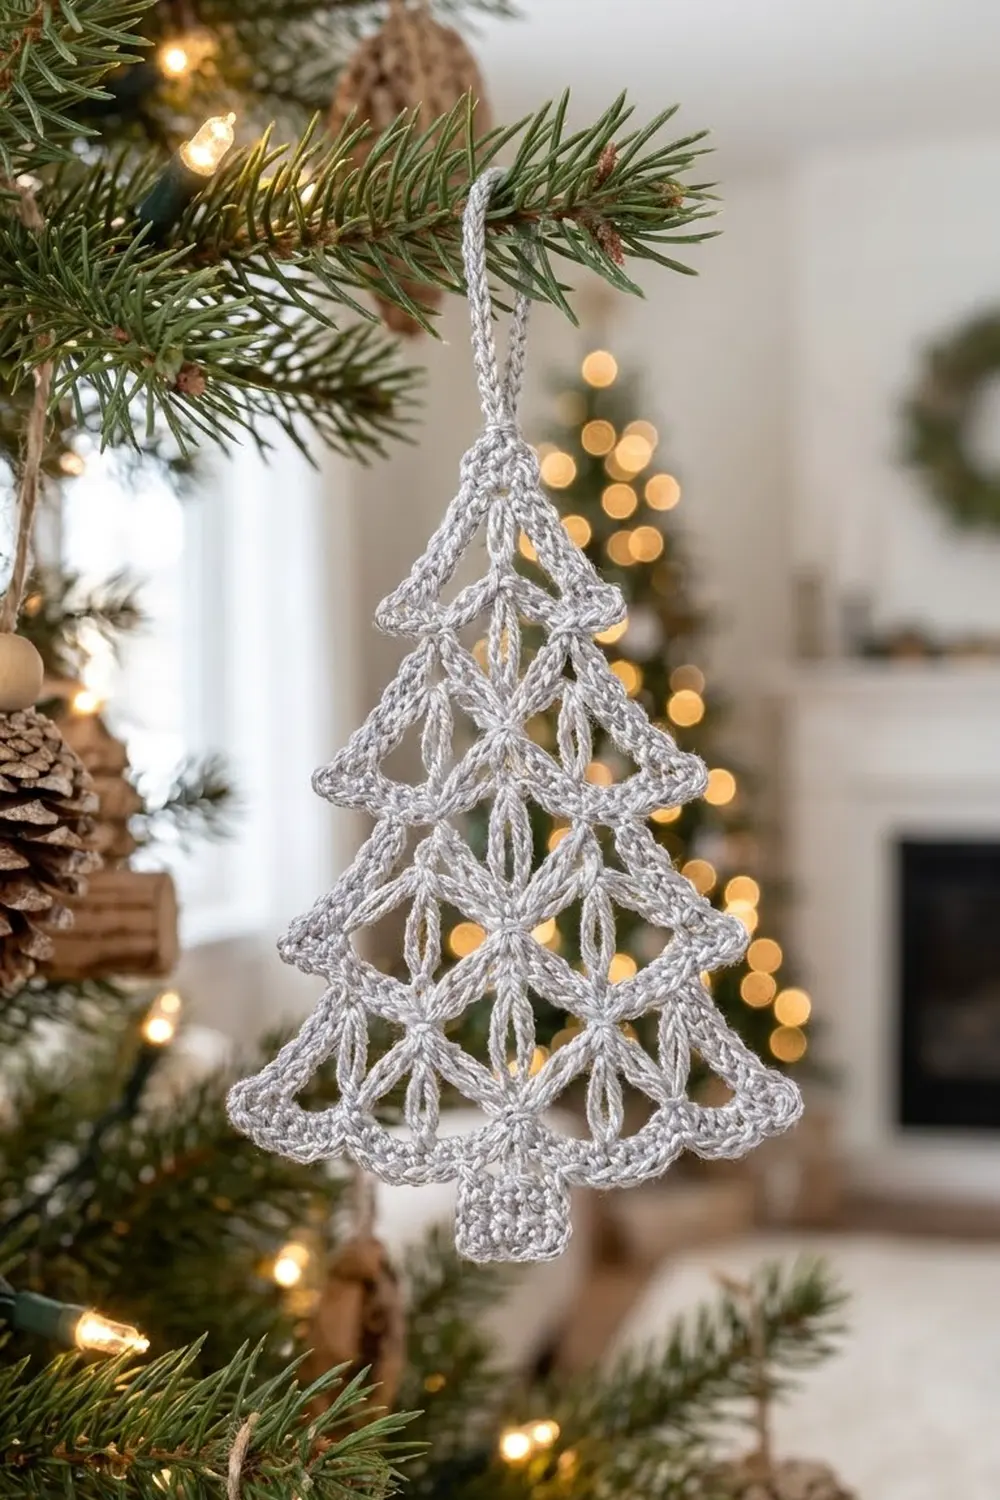
The Silver Frost Lace Tree is a single openwork Christmas tree ornament in light silver-gray cotton. Three stacked tiers of airy chain-arch lattice give it the look of frosted lace. Each tier ends in a solid scalloped hem, a small solid square forms the trunk, and a covered loop at the tip lets it hang straight from a branch.
The look is simple and Scandinavian: one soft gray color with no beads or appliqués, so the lace does all the work. It suits a tree, a window, a gift tag or a wooden dowel hung with a row of matching ornaments.
This pattern uses US crochet terms. The finished ornament measures 4.25 in (10.8 cm) wide at the bottom tier and 5.25 in (13.3 cm) tall from tip to trunk base. The hanging loop adds 1.25 in (3.2 cm), for 6.5 in (16.5 cm) overall.
You’ll work the tree in one piece from the top down. Start with the hanging loop, then work a widening net of chain arches in rows. A solid scalloped sc band closes each tier. The next tier flares out from that band using longer edge posts. After the last tier, work the trunk in sc rows from the center of the bottom hem. One outline round then covers the side edges, the hem tips, the trunk and the loop.
Finished Size and Construction
- Finished size: 4.25 in (10.8 cm) wide x 5.25 in (13.3 cm) tall, plus a 1.25 in (3.2 cm) loop
- Skill level: Intermediate
- Terminology: US
- Yarn weight: Super fine (#1) fingering-weight cotton
- Hook: 2.25 mm (B-1)
- Number of pieces: 1
- Layout: Single ornament, three tiers plus trunk, worked top-down in rows
- Piece size: Tree body 4 in (10.2 cm) wide x 4.25 in (10.8 cm) tall; trunk 0.75 in (1.9 cm) square
- Size before border: 4 in (10.2 cm) wide x 5 in (12.7 cm) tall
- Border depth: about 0.125 in (0.3 cm) on every outer edge
Materials
Use a mercerized cotton or cotton blend in fingering weight. Mercerized cotton gives crisp stitch definition and holds its shape after starching, which matters for open lace. Skip fuzzy or very stretchy fibers, because they blur the lattice and let the tiers sag.
- Light silver-gray: 10 g, about 34 m (37 yd)
The amount includes a safety margin of roughly 4 g for your gauge swatch, weaving in ends and any frogging. One ornament uses about 6 g.
Tools:
- 2.25 mm (B-1) crochet hook
- Tapestry needle
- Scissors
- 2 stitch markers
- Blocking mat and rust-proof pins
- Spray starch or a fabric stiffener
- Ruler or tape measure
Abbreviations (US Terms)
- ch – chain
- sl st – slip stitch
- sc – single crochet
- tr – treble crochet (yo twice)
- dtr – double treble crochet (yo three times)
- sp(s) – space(s)
- st(s) – stitch(es)
- RS / WS – right side / wrong side
- yo – yarn over
Special terms:
- Arch: a ch-7 sp hanging between two sc anchors.
- Half sp: the short ch-3 (or ch-4) sp at each row end, between the edge post and the first or last anchor.
- Edge post: the tr (or dtr) at each row end. The turning chain counts as one edge post.
- Sc between sts: insert the hook into the gap between two sc, not into the top loops.
Gauge and Checkpoints
Gauge: 11 sc and 11 rows = 1 in (2.5 cm). A ch-7 arch covered with 8 sc forms a scallop about 0.42 in (1.1 cm) across.
Make a 2 in (5.1 cm) square of sc first. If you get more than 11 sc per inch, go up a hook size. If you get fewer, go down a size. Lace hides gauge problems until the tiers stop lining up, so this swatch is worth the five minutes.
Checkpoints while working (measure flat, unblocked):
- After Row 5: 1.5 in (3.8 cm) wide x 1.25 in (3.2 cm) tall from the loop base
- After Row 9: 2.75 in (7.0 cm) wide x 2.75 in (7.0 cm) tall
- After Row 13: 4 in (10.2 cm) wide x 4.25 in (10.8 cm) tall
- After the trunk: 5 in (12.7 cm) tall
- After the border: 4.25 in (10.8 cm) wide x 5.25 in (13.3 cm) tall
If a hem band comes out more than 0.25 in (0.6 cm) too wide, your chains are loose. Rework that tier with tighter chains, or switch to a smaller hook. If the hem cups or ripples, your chains are too tight compared with your sc, so relax your chains a little.
Pattern
Hanging Loop
Ch 24, sl st in first ch to form a ring. The sl st is the tip of the tree, and every row starts from it.
Tier 1
Row 1 (RS): Ch 4 (counts as tr), ch 3, tr in same sl st. Turn. (2 tr, 1 ch-3 sp)
Row 2: Ch 7 (counts as tr + ch 3), sc in ch-3 sp, ch 3, tr in top of turning ch. Turn. (2 edge posts, 1 sc, 2 half sps, 0 arches)
Row 3: Ch 7 (counts as tr + ch 3), sc in first half sp, ch 7, sc in next half sp, ch 3, tr in 4th ch of turning ch. Turn. (2 edge posts, 2 sc, 2 half sps, 1 arch)
Row 4: Ch 7 (counts as tr + ch 3), sc in first half sp, ch 7, sc in next arch, ch 7, sc in last half sp, ch 3, tr in 4th ch of turning ch. Turn. (2 edge posts, 3 sc, 2 half sps, 2 arches)
Each net row grows by one arch, because every sp in the previous row becomes an anchor. Count anchors = sps in the row below, so arches = anchors minus 1.
Row 5 (scalloped hem band, RS): Ch 1, sc in first tr, 4 sc in ch-3 half sp, 8 sc in each arch across, 4 sc in last half sp, sc in 4th ch of turning ch. Turn. (1 + 4 + 16 + 4 + 1 = 26 sc)
Stitch map for Row 5: 1 edge sc, a 4-sc half scallop, two 8-sc scallops, a 4-sc half scallop and 1 edge sc.
Tier 2
The first row of each lower tier uses dtr edge posts and ch-4 half sps. This pushes the tier out past the hem above and creates the stepped tree silhouette.
Row 6 (WS): Ch 9 (counts as dtr + ch 4), sc between 2nd and 3rd sc of first half scallop, [ch 7, sc between 4th and 5th sc of next scallop] twice, ch 7, sc between 2nd and 3rd sc of last half scallop, ch 4, dtr in last sc. Turn. (2 dtr, 4 sc, 2 ch-4 half sps, 3 arches)
Row 7: Ch 7 (counts as tr + ch 3), sc in first half sp, [ch 7, sc in next arch] 3 times, ch 7, sc in last half sp, ch 3, tr in 5th ch of turning ch. Turn. (2 tr, 5 sc, 2 half sps, 4 arches)
Row 8: Ch 7 (counts as tr + ch 3), sc in first half sp, [ch 7, sc in next arch] 4 times, ch 7, sc in last half sp, ch 3, tr in 4th ch of turning ch. Turn. (2 tr, 6 sc, 2 half sps, 5 arches)
Row 9 (hem band): Ch 1, sc in first tr, 4 sc in half sp, 8 sc in each arch across, 4 sc in last half sp, sc in 4th ch of turning ch. Turn. (1 + 4 + 40 + 4 + 1 = 50 sc)
Tier 3
Row 10: Ch 9 (counts as dtr + ch 4), sc between 2nd and 3rd sc of first half scallop, [ch 7, sc between 4th and 5th sc of next scallop] 5 times, ch 7, sc between 2nd and 3rd sc of last half scallop, ch 4, dtr in last sc. Turn. (2 dtr, 7 sc, 2 ch-4 half sps, 6 arches)
Row 11: Ch 7 (counts as tr + ch 3), sc in first half sp, [ch 7, sc in next arch] 6 times, ch 7, sc in last half sp, ch 3, tr in 5th ch of turning ch. Turn. (2 tr, 8 sc, 2 half sps, 7 arches)
Row 12: Ch 7 (counts as tr + ch 3), sc in first half sp, [ch 7, sc in next arch] 7 times, ch 7, sc in last half sp, ch 3, tr in 4th ch of turning ch. Turn. (2 tr, 9 sc, 2 half sps, 8 arches)
Row 13 (hem band): Ch 1, sc in first tr, 4 sc in half sp, 8 sc in each arch across, 4 sc in last half sp, sc in 4th ch of turning ch. (1 + 4 + 64 + 4 + 1 = 74 sc)
Fasten off. Check the 4 in (10.2 cm) width now, before you add the trunk.
Trunk
Count along Row 13 and put markers in the 34th and 41st sc. These 8 sts sit at the exact center, with 33 sc left on each side (33 + 8 + 33 = 74).
Row 1: With RS facing, join yarn in the 34th sc, ch 1, sc in same st and in each of next 7 sts. Turn. (8 sc)
Rows 2–8: Ch 1, sc in each st across. Turn. (8 sc)
At the end of Row 8, do not fasten off. Rows 1–8 measure about 0.75 in (1.9 cm) tall and 0.75 in (1.9 cm) wide. The trunk joins at the point where the two center scallops meet, and it flattens them slightly into a neat shoulder.
Border
Border gauge: 11 sc = 1 in (2.5 cm), the same as the body. The outline round should lie flat and firm without pulling the posts into curves.
Outline Round: Ch 1. Turn the work so you can go up the trunk side to the hem.
- Trunk side 1: 8 sc evenly up the trunk (1 per row end).
- Hem, side 1: sl st in each of the 32 hem sc between the trunk and the edge sc.
- Side edge 1, working up: 2 sc around Row 13 edge sc; 3 sc around each tr post of Rows 12 and 11; 4 sc around dtr of Row 10; 2 sc around Row 9 edge sc; 3 sc around each tr post of Rows 8 and 7; 4 sc around dtr of Row 6; 2 sc around Row 5 edge sc; 3 sc around each tr post of Rows 4, 3, 2 and 1. (38 sc)
- Hanging loop: 30 sc around the ch-24 ring.
- Side edge 2, working down: mirror Side edge 1. (38 sc)
- Hem, side 2: sl st in each of the 32 hem sc between the edge sc and the trunk.
- Trunk side 2: 8 sc down the trunk row ends.
- Trunk bottom: 3 sc in first st, sc in next 6 sts, 3 sc in last st. (12 sc)
Sl st in first sc. Fasten off. (Totals: 38 + 38 + 30 + 8 + 8 + 12 = 134 sc, plus 32 + 32 = 64 sl st, for 198 sts.)
Why the math works: Each side has 8 tr posts (Rows 1, 2, 3, 4, 7, 8, 11, 12), 2 dtr posts (Rows 6, 10) and 3 hem ends (Rows 5, 9, 13): 8 x 3 + 2 x 4 + 3 x 2 = 24 + 8 + 6 = 38 sc. A tr post is about 0.27 in (0.7 cm) long, and 3 sc at 11 sc per inch cover the same 0.27 in. A dtr is about 0.36 in (0.9 cm) long, which matches 4 sc. Each hem side has 74 − 8 trunk sts − 2 edge sc = 64 sts, split 32 per side. Those get sl sts so the scallops stay crisp and no width is added. The trunk sides get 1 sc per row for 8 rows, and the bottom gets 8 sts plus 2 extra sc at each corner, so the square stays square.
Final Blocking
- Weave in all ends along the hem bands, where they hide best.
- Soak the ornament in cool water for 10 minutes, then press out the water in a towel. Don’t wring it.
- Pin it flat on the mat, starting at the tip, then the trunk’s center bottom, so the tree is 5.25 in (13.3 cm) tall.
- Pin the three hem tips on each side. The bottom tips should be 4.25 in (10.8 cm) apart.
- Pin the center of each arch so the diamonds open evenly and the scallops curve downward.
- Square the trunk with 1 pin at each corner.
- Spray with starch, let it dry completely, and spray again for a firmer ornament.
- Unpin and check the measurements once more.
Final Quality-Control Checklist
- Hem band counts are 26, 50 and 74 sc.
- Every net row has exactly one more arch than the net row before it.
- The trunk is centered, with 33 hem sc on each side.
- The border has 38 sc on each side and 30 sc around the loop.
- The tree measures 4.25 in (10.8 cm) wide x 5.25 in (13.3 cm) tall.
- Both sides are symmetrical, and the tiers step out evenly.
- The loop stands straight up from the tip.
- No ends show on the RS.
Troubleshooting
Tree leans to one side: You probably anchored into the wrong ch of a turning chain. Check that each row ends in the 4th ch of a ch-7 or the 5th ch of a ch-9.
Arch count is off: Count the sps in the row below, not the sc. The new row has one fewer arch than that number of anchors.
Tiers don’t step out: Make sure Rows 6 and 10 use dtr posts and ch-4 half sps.
Hem ripples: Use 7 sc per arch instead of 8 in that hem, and keep the anchor in the center of each scallop.
Hem cups upward: Loosen your ch-7 arches, or go up half a hook size for the net rows only.
Border puckers the sides: Use one fewer sc around each post, and keep the counts the same on both sides.
Trunk off center: Recount Row 13 from the edge sc, then place the markers again.
Care
Hand wash in cool water and lay flat or pin to dry. Starch again after washing, and store the ornament flat between sheets of tissue paper.
Final Notes
The measurement chain is short and easy to check. Your 11 sc per inch gauge gives 0.42 in (1.1 cm) scallops. The 26, 50 and 74 sc hems give tiers 1.5 in (3.8 cm), 2.75 in (7.0 cm) and 4 in (10.2 cm) wide. The 8-row trunk brings the tree to 5 in (12.7 cm), and the 198-st outline finishes it at 4.25 in (10.8 cm) x 5.25 in (13.3 cm). Make one, check it against these numbers, and the rest of your set will match.
Happy crocheting!