

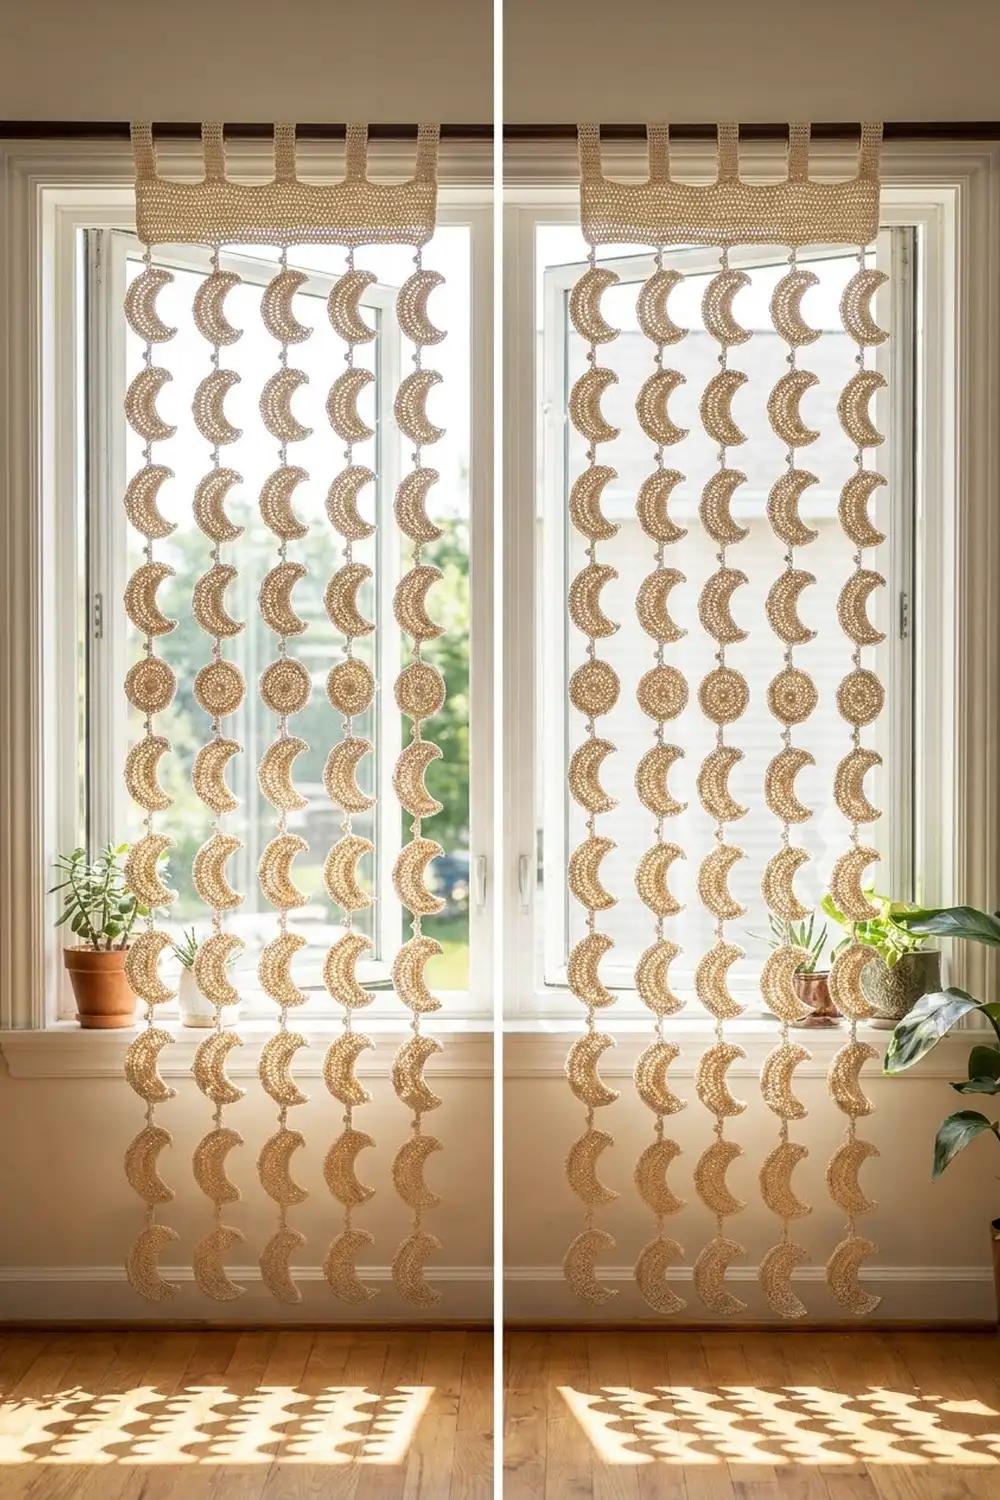
Moonlit Strands is a pair of airy curtain panels made entirely from small crocheted crescent moons. A short chain with a tiny picot knot links each moon to the next. The strands hang in neat columns from a solid header band, and tab loops on the header slide onto a curtain rod. Light comes through the gaps, and the moons cast soft, patterned shadows across the floor.
The design uses only one color, a warm natural cream cotton. The single shade keeps the look calm and boho and lets the texture of each moon stand out. The pattern uses US crochet terms.
Each finished panel is 20 in (50.8 cm) wide and 79.5 in (201.9 cm) long, measured from the top of the header to the tip of the lowest moon. The tabs rise 2 in (5.1 cm) above the header.
The construction is simple and repetitive:
- Crochet each moon in three short rows.
- Join the moons as you go into vertical strands.
- Make a header band and attach the strands to its bottom edge.
- Add tabs to the top of the header.
Finished Size and Construction
- Finished size per panel: 20 in x 79.5 in (50.8 cm x 201.9 cm), plus 2 in (5.1 cm) tabs
- Skill level: Easy to intermediate (the stitches are easy, but the project is very long and repetitive)
- Terminology: US crochet terms
- Yarn weight: Worsted (#4) cotton
- Hook: 4.0 mm (G-6)
- Number of pieces: 2 panels. Each panel has 170 crescent moons, 1 header band and 5 tabs.
- Layout per panel: 10 strands across x 17 moons down
- Piece size (one moon): 3.5 in (8.9 cm) tall x 1.75 in (4.4 cm) wide
- Size before border (strand field): 20 in x 76.5 in (50.8 cm x 194.3 cm)
- Border depth (header band): 3 in (7.6 cm), plus tabs
Materials
Use a smooth mercerized or combed worsted-weight cotton. Cotton holds the crescent shape, stretches very little under its own weight and stands up well to sunlight. Avoid acrylic for a piece that hangs this long, because it can grow in length over time.
- Natural cream: 900 g (about 1,620 m), which is 9 skeins of 100 g / 180 m each
These amounts include a margin of about 25 percent for gauge differences and test pieces. Buy all the skeins from the same dye lot.
This is a big project: 340 moons for the pair. Keep finished moons in batches of 17 (one strand each) in a bag or basket so you can track your progress at a glance.
Tools:
- 4.0 mm (G-6) crochet hook
- Tapestry needle
- Locking stitch markers
- Measuring tape
- Blocking mats, rustproof pins and a spray bottle
- A curtain rod up to 1.25 in (3.2 cm) in diameter
Abbreviations (US Terms)
- ch: chain
- sl st: slip stitch
- sc: single crochet
- hdc: half double crochet
- dc: double crochet
- tr: treble crochet
- st(s): stitch(es)
- RS / WS: right side / wrong side
Special stitches
- Picot: ch 3, sl st in 3rd ch from hook.
- Link: ch 3, picot, ch 3. A link measures about 1 in (2.5 cm) when hanging.
Gauge and Checkpoints
Header gauge: 16 dc and 8 dc rows = 4 in (10.2 cm). One dc row is 0.5 in (1.3 cm) tall, and one sc row is about 0.25 in (0.6 cm) tall.
Test one moon first. Make a single moon and measure it at each stage:
- After Row 1: 3 in (7.6 cm) from tip to tip in a straight line, and 1 in (2.5 cm) deep at the widest point.
- After Row 2: 1.5 in (3.8 cm) wide at the center.
- After Row 3 (finished): 3.5 in (8.9 cm) tall x 1.75 in (4.4 cm) wide.
- One moon plus one link: 4.5 in (11.4 cm).
- Four moons plus four links: 18 in (45.7 cm).
If your moon is too big, go down to a 3.75 mm hook. If it is too small, go up to a 4.5 mm hook.
Don’t skip this test. Any error repeats 17 times down each strand. For example, an extra 0.25 in (0.6 cm) per moon adds 4.25 in (10.8 cm) to every strand.
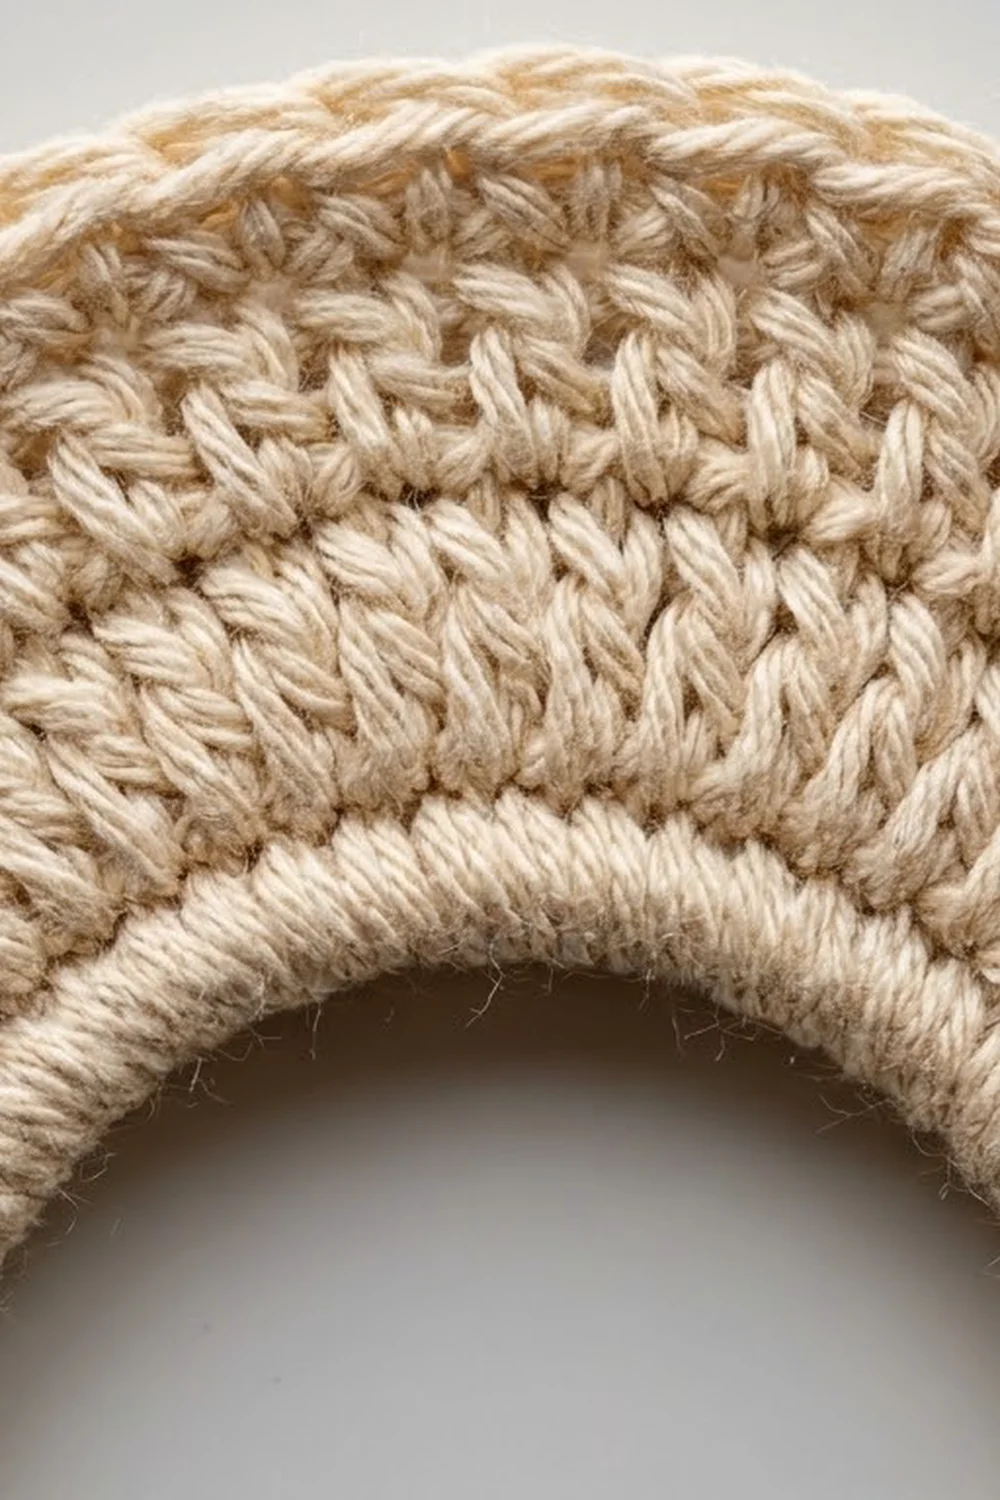
Crescent Moon
You work the moon along a foundation chain. The tall stitches and increases in the middle make the outer edge longer than the inner edge, so the chain naturally bends into a crescent. Tip A is the top of the moon and Tip B is the bottom.
Foundation: Ch 17.
Row 1 (RS): Start in the 2nd ch from the hook (this end is Tip A). Sl st, sc in next ch, hdc in next ch, dc in next ch, 2 dc in next ch, [2 tr in next ch] 7 times, 2 dc in next ch, dc in next ch, hdc in next ch, sc in next ch, sl st in last ch (this end is Tip B). (26 sts)
Check: you used 16 chains. The 17th chain, skipped at Tip A, stays empty. The 26 sts are 1 sl st + 1 sc + 1 hdc + 1 dc + 2 dc + 14 tr + 2 dc + 1 dc + 1 hdc + 1 sc + 1 sl st.
Row 2 (growth row): Ch 1, turn. Sl st in first st, sc in next 3 sts, hdc in next 2 sts, [2 hdc in next st, hdc in next st] 7 times, hdc in next 2 sts, sc in next 3 sts, sl st in last st. (33 sts)
Check: 26 sts worked one per stitch + 7 extra stitches = 33 sts. All the increases sit over the tr section, which deepens the curve and forms the firm outer edge.
Row 3 (inner-edge trim): Do not turn. Ch 1, then rotate the piece so the inner curve is on top. Working from Tip A to Tip B, sc in the remaining loop of each of the 16 used foundation chains (16 sc). Sl st in the first st of Row 2 at Tip B. (16 sc + 1 joining sl st)
This row gives the inner curve a clean edge to match the outer hdc edge. You finish at Tip B, the bottom of the moon, ready to work the link.
Make All Pieces
Each panel needs 170 moons, so the pair needs 340 moons, all in natural cream. Work every moon with the RS facing the front of the curtain so all the crescents open toward the same side.
Per panel:
- 170 crescent moons (10 strands x 17 moons)
- 1 header band
- 5 tabs
Layout of one panel (C = crescent moon, | = link):
HEADER BAND (80 sts)
 |  |  |  |  |  |  |  |  |  |
 C  C  C  C  C  C  C  C  C  C   moon 1
 |  |  |  |  |  |  |  |  |  |
 C  C  C  C  C  C  C  C  C  C   moon 2
 ...repeat moon + link...
 C  C  C  C  C  C  C  C  C  C   moon 17
Joining (Building the Strands)
Join the moons as you go, from the bottom of the strand upward.
- Moon 17 (bottom moon): Work Rows 1–3. After the joining sl st at Tip B, fasten off and weave in the ends. The very bottom of the strand needs no link.
- Every moon after that: Work Rows 1–3. After the joining sl st at Tip B, work a link (ch 3, picot, ch 3). Hold both moons RS facing you and opening to the same side. Sl st into the empty foundation ch at Tip A of the previous moon. Fasten off and weave in the ends.
- Repeat until the strand has 17 moons with 16 links between them.
Stitch-to-stitch logic: Every link runs from one exact stitch (the Tip B join of the upper moon) to one exact stitch (the Tip A foundation ch of the lower moon). Never work into the side of a tr. This keeps every moon hanging straight down from its tips.
Tension: Work the link chains at the same tension as your foundation chain. Tight links pull the tips inward, and loose links make the strands uneven. Count every chain instead of judging by eye.
Size checkpoint: Before you attach it, a strand measures 17 x 3.5 in + 16 x 1 in = 75.5 in (191.8 cm). The top link to the header adds 1 in (2.5 cm), so each hanging strand is 76.5 in (194.3 cm). Lay the finished strands side by side. They should match within 0.5 in (1.3 cm).
Make 10 strands per panel.
Header Band (Border)
The header band is this curtain’s border. It is worked at the header gauge of 16 dc = 4 in (10.2 cm), so 4 sts = 1 in (2.5 cm).
Row 1 (RS): Ch 81. Sc in 2nd ch from hook and in each ch across. (80 sc)
Rows 2–6: Ch 3 (counts as first dc), turn. Dc in each st across. (80 sts)
Row 7: Ch 1, turn. Sc in each st across. (80 sc) Fasten off.
Header checkpoint: 20 in x 3 in (50.8 cm x 7.6 cm). The height is 1 sc row (0.25 in) + 5 dc rows (2.5 in) + 1 sc row (0.25 in) = 3 in.
Why the math works: The bottom edge has exactly 80 foundation loops. There are 10 strands and each one gets 8 loops: 10 x 8 = 80. No stitches are added or skipped between strands. Each 8-loop group is 2 in (5.1 cm) wide, so 10 groups make 20 in (50.8 cm).
Attaching the strands: Hold the header RS facing, with the foundation edge at the bottom. Count the loops in groups of 8 and place a marker after every 8th loop. For each group:
- Join the yarn with a sl st worked through the 4th and 5th loops of the group together. This centers the strand in its 2 in (5.1 cm) column.
- Work a link: ch 3, picot, ch 3.
- Sl st into the empty foundation ch at Tip A of the top moon of one strand, RS facing. Fasten off.
The outer strands are centered 1 in (2.5 cm) from each side edge, and the strand centers are 2 in (5.1 cm) apart.
Tabs (5 per panel): Work the tabs into Row 7 on these stitches: 7–10, 23–26, 39–42, 55–58 and 71–74. That leaves 6 sts at each edge and 12 sts between tabs: 6 + (5 x 4) + (4 x 12) + 6 = 80.
To make each tab:
- Join the yarn in the first st of the tab position. Ch 1, sc in the same st and the next 3 sts (4 sc).
- Ch 1, turn, sc in each st across (4 sc). Repeat until the tab measures 5 in (12.7 cm), about 20 rows.
- Fold the tab to the WS and whipstitch the last row to the back of the header, 1 in (2.5 cm) below the top edge.
The loop rises 2 in (5.1 cm) above the header: 2 in up + 2 in down + 1 in overlap = 5 in.
Repeat everything for the second panel.
Final Blocking
- Before you attach the strands, spray-block the moons in batches. Pin each moon flat on a mat, RS up, easing it to 3.5 in x 1.75 in (8.9 cm x 4.4 cm).
- Mist until damp, not soaked, and let the moons dry completely.
- Pin the header to 20 in x 3 in (50.8 cm x 7.6 cm), mist it and let it dry.
- After assembly, hang the panel on the rod.
- Mist the strands lightly from top to bottom, and gently straighten any twisted links with your fingers.
- Let the panel dry while hanging. Gravity evens out the strand lengths.
- Measure the panel. It should be 79.5 in (201.9 cm) from the top of the header to the bottom tip of moon 17.
Final Quality-Control Checklist
- Every moon is 3.5 in (8.9 cm) tall and opens to the same side.
- Every strand has 17 moons and 17 links (16 between moons and 1 to the header).
- Every strand hangs 76.5 in (194.3 cm).
- Every row of the header has 80 sts, and the header measures 20 in (50.8 cm).
- Strand centers are 2 in (5.1 cm) apart, and the outer strands are centered 1 in (2.5 cm) from each edge.
- Each panel has 5 evenly placed tabs that slide freely over the rod.
- All ends are woven in securely, with no loose tails showing in the sunlight.
Troubleshooting
- The moon ruffles or cups: The tr section is too loose, or you added extra increases. Recount Row 1 (26 sts) and Row 2 (33 sts).
- The moon is too straight instead of curved: The foundation chain is too loose. Chain more tightly, or use a smaller hook for the chain only.
- The tips curl backward: Block flat with a pin in each tip.
- The strands twist: One moon was joined with the WS facing. Check that every RS faces the front.
- The strands are different lengths: The link chains vary. Redo any link that is longer or shorter than 1 in (2.5 cm).
- The bottom of the header ripples: The strand anchors are pulled too tight. Loosen the joining sl sts.
- The tabs are too tight for the rod: Add 2–4 rows to each tab.
Care
Hand wash in cool water with mild soap, roll in a towel to remove the water, and dry hanging or flat. Do not tumble dry, because the strands can tangle.
Final Notes
The whole curtain depends on a short chain of measurements:
- One moon is 3.5 in (8.9 cm).
- One moon plus one link is 4.5 in (11.4 cm).
- Seventeen moons with their links make a 76.5 in (194.3 cm) strand.
- Ten strands of 8 sts each fill the 80-stitch, 20 in (50.8 cm) header.
- The 3 in (7.6 cm) header brings each panel to 79.5 in (201.9 cm), with 2 in (5.1 cm) tabs above.
Check your first moon and keep your links even. After that, the rest is calm, steady repetition, and you end up with two panels of moonlight.
Happy crocheting!