

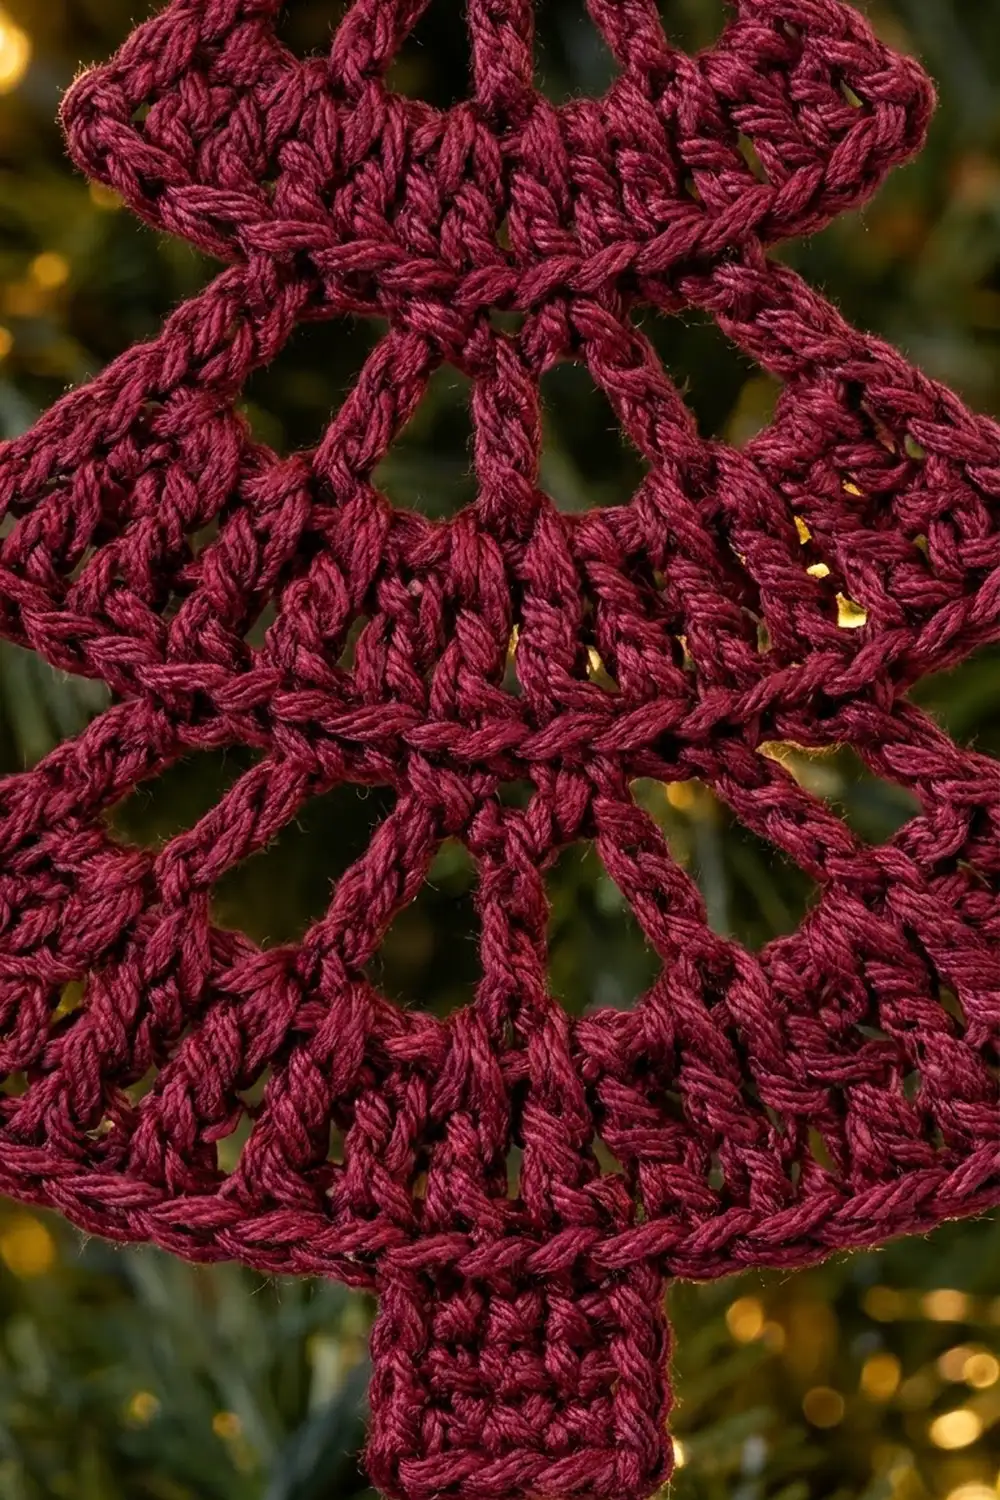
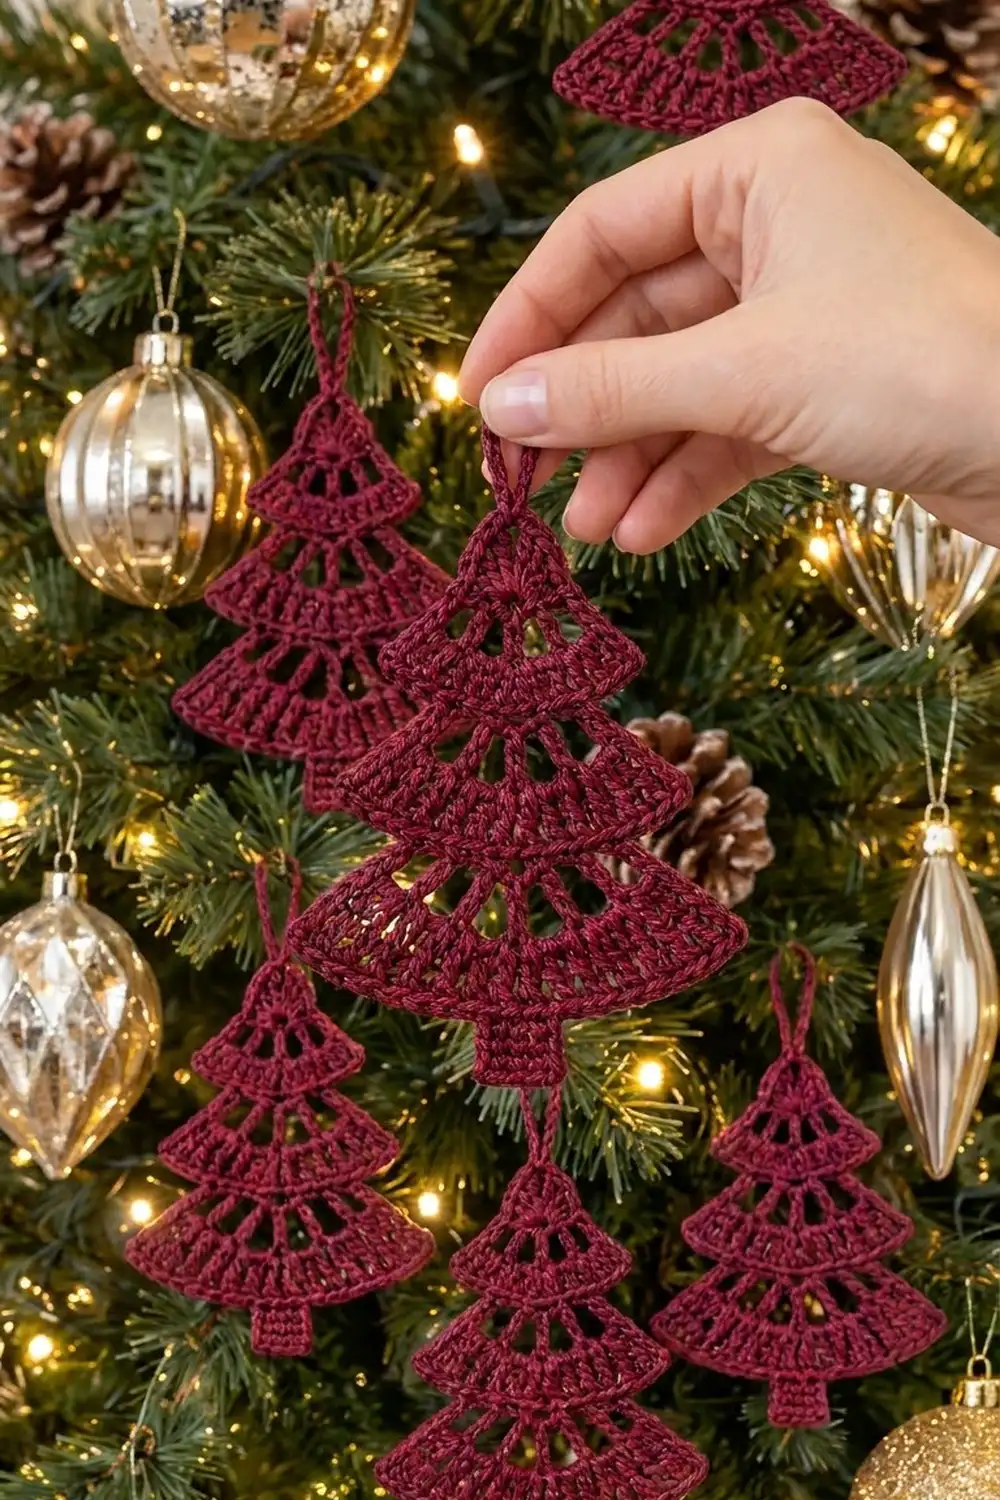
This little lace Christmas tree is a single flat ornament made in one deep burgundy thread. It has three stacked tiers. Each tier is a small fan with a row of tall open windows, a solid band, and a crisp ridge along its curved lower edge. A short, solid trunk sits under the bottom tier, and a hanging loop rises from the top point.
The look is classic and quiet: one rich wine color, airy openings, and clean outlines that stand out against green branches and gold lights. You can make just one, or make several in the same color for a matching set.
This pattern uses US crochet terms. The finished ornament is about 4.5 in (11.4 cm) wide at the bottom tier and 5 in (12.7 cm) tall from the top point to the bottom of the trunk. The hanging loop adds about 1 in (2.5 cm), for 6 in (15.2 cm) overall.
Construction is simple. You start at the top point with a magic ring and work back and forth in rows. Each tier grows like a fan. Each new tier begins with a “cinch” row worked into the back loops, so the ridge of the tier above sticks out as a lip. The trunk is worked in rows off the center of the bottom ridge. A side edging finishes the outline and forms the hanging loop.
Finished Size and Construction
- Finished size: 4.5 in (11.4 cm) wide × 5 in (12.7 cm) tall, plus a 1 in (2.5 cm) loop
- Skill level: Easy to intermediate
- Terminology: US crochet terms
- Yarn weight: Size 3 cotton crochet thread (or a smooth fingering-weight cotton)
- Hook: 2.25 mm (B-1)
- Number of pieces: 1 (single ornament, no joining)
- Layout: Three tiers stacked vertically, trunk centered below
- Piece size before edging: 4.25 in (10.8 cm) wide × 5 in (12.7 cm) tall
- Edging depth: about 0.125 in (0.3 cm) on each slanted side
Materials
Choose a mercerized cotton thread with a firm twist. It gives sharp stitch definition, holds the window shapes, and blocks crisply. Acrylic or soft wool will also work, but the lace will look rounder and less defined.
- Burgundy / wine (main color): 10 g, about 40 m (44 yd)
Tools:
- 2.25 mm (B-1) crochet hook
- Tapestry needle
- Scissors
- Stitch markers (2)
- Blocking mat and rust-proof pins
- Spray bottle with water; optional light spray starch
The quantity includes a margin of about 25% for a gauge swatch and weaving in ends.
Abbreviations (US Terms)
- ch: chain
- sl st: slip stitch
- sc: single crochet
- dc: double crochet
- tr: treble crochet
- BLO: back loop only
- sp: space
- st(s): stitch(es)
- dc2tog: double crochet 2 together
Special stitch (dc2tog): [Yarn over, insert hook in next st, yarn over and pull up a loop, yarn over and pull through 2 loops] twice, then yarn over and pull through all 3 loops on the hook. This uses 2 sts and makes 1 st. In the cinch rows, work both legs in the back loops only.
Magic ring: Wrap the thread around two fingers to form a loop, insert the hook, and pull up a loop to begin. Pull the tail to close the ring after Row 1.
Gauge and Checkpoints
Gauge: 8 dc = 1 in (2.5 cm); 7 dc rows = 2 in (5.1 cm) with a 2.25 mm hook.
To swatch, ch 17, then work 7 rows of 16 dc. The swatch should measure about 2 in (5.1 cm) square. For an ornament, even tension matters more than exact gauge, but the checkpoints below keep the tiers in proportion.
Measure flat, without stretching:
- After Row 4 (Tier 1): 2.25 in (5.7 cm) across the ridge; 1.25 in (3.2 cm) tall from the ring
- After Row 8 (Tier 2): 3.25 in (8.3 cm) across the ridge; 2.75 in (7.0 cm) tall
- After Row 12 (Tier 3): 4.25 in (10.8 cm) across the ridge; 4.25 in (10.8 cm) tall
- After the trunk: 5 in (12.7 cm) tall overall
If Tier 1 comes out too big, switch to a 2.0 mm hook. If it comes out too small, switch to a 2.5 mm hook. Check Tier 1 before going further, because every later tier builds on it.
Pattern
Work back and forth in rows, turning at the end of every row. Turning chains count as stitches where noted.
Tier 1 (Top)
Row 1: Make a magic ring. Ch 3 (counts as dc), 5 dc in ring. Pull the ring closed. Turn. (6 dc)
The 6 dc form a small half-circle with the ring at the top point.
Row 2 (windows): Ch 4 (counts as tr), ch 2, [tr in next dc, ch 2] 4 times, tr in top of turning ch-3. Turn. (6 tr, 5 ch-2 sps)
The tr posts fan outward like spokes and make 5 tall windows.
Row 3 (band): Ch 3 (counts as dc), dc in same st, [3 dc in next ch-2 sp, dc in next tr] 5 times (the last dc goes in the top of the turning ch-4), 1 more dc in that same st. Turn. (23 dc)
Count check: 2 + (5 × 4) + 1 = 23 dc.
Row 4 (ridge): Ch 1 (does not count), sc in each dc across. Turn. (23 sc)
Checkpoint: 2.25 in (5.7 cm) across, 1.25 in (3.2 cm) tall.
Tier 2 (Middle)
Row 5 (cinch): Work this whole row in BLO. Ch 3 (counts as dc), dc in next 2 sts, [dc2tog over next 2 sts, dc in next st] 6 times, dc in last 2 sts. Turn. (17 dc)
Conversion count: you use 1 + 2 + (6 × 3) + 2 = 23 sts and make 1 + 2 + (6 × 2) + 2 = 17 dc. The unused front loops of Row 4 stay on the front as a neat line. Because Row 5 is narrower, the Tier 1 ridge sticks out as a lip.
Row 6 (windows): Ch 4 (counts as tr), ch 2, skip next st, [tr in next st, ch 2, skip next st] 7 times, tr in last st (top of turning ch-3). Turn. (9 tr, 8 ch-2 sps)
Count check: 1 + 1 skipped + (7 × 2) + 1 = 17 sts used.
Row 7 (band): Ch 3 (counts as dc), dc in same st, [3 dc in next ch-2 sp, dc in next tr] 8 times (the last dc goes in the top of the turning ch-4), 1 more dc in that same st. Turn. (35 dc)
Count check: 2 + (8 × 4) + 1 = 35 dc.
Row 8 (ridge): Ch 1, sc in each dc across. Turn. (35 sc)
Checkpoint: 3.25 in (8.3 cm) across, 2.75 in (7.0 cm) tall.
Tier 3 (Bottom)
Row 9 (cinch): Work this whole row in BLO. Ch 3 (counts as dc), dc in next 2 sts, [dc2tog over next 2 sts, dc in next st] 10 times, dc in last 2 sts. Turn. (25 dc)
Conversion count: you use 1 + 2 + (10 × 3) + 2 = 35 sts and make 1 + 2 + (10 × 2) + 2 = 25 dc.
Row 10 (windows): Ch 4 (counts as tr), ch 2, skip next st, [tr in next st, ch 2, skip next st] 11 times, tr in last st. Turn. (13 tr, 12 ch-2 sps)
Count check: 1 + 1 skipped + (11 × 2) + 1 = 25 sts used.
Row 11 (band): Ch 3 (counts as dc), dc in same st, [3 dc in next ch-2 sp, dc in next tr] 12 times (the last dc goes in the top of the turning ch-4), 1 more dc in that same st. Turn. (51 dc)
Count check: 2 + (12 × 4) + 1 = 51 dc.
Row 12 (ridge): Ch 1, sc in each dc across. (51 sc) Fasten off.
Checkpoint: 4.25 in (10.8 cm) across, 4.25 in (10.8 cm) tall.
Trunk
Lay the tree right side up with the Row 12 ridge at the bottom. Count in 22 sts from either end and place markers in sts 23 and 29. These mark the center 7 sts (22 + 7 + 22 = 51).
Row 1: Join thread with a sl st in marked st 23. Ch 1, sc in same st and in next 6 sts. Turn. (7 sc)
Rows 2–6: Ch 1, sc in each sc across. Turn. (7 sc)
Fasten off. The trunk is about 0.9 in (2.3 cm) wide × 0.75 in (1.9 cm) tall, which brings the ornament to 5 in (12.7 cm) tall.
Border (Side Edging and Hanging Loop)
The edging is one continuous pass: up the left slanted side, around a hanging loop at the top point, and down the right side. The bottom ridge and the trunk are not edged.
Border gauge: Work into the row ends according to row height: 1 sc per sc row end, 2 sc per dc row end, 3 sc per tr row end.
Left side: With the right side facing, join thread with a sl st at the bottom left corner of Row 12. Ch 1, then work up the row ends:
- Tier 3, Rows 12, 11, 10, 9: 1 + 2 + 3 + 2 = 8 sc
- Tier 2, Rows 8, 7, 6, 5: 1 + 2 + 3 + 2 = 8 sc
- Tier 1, Rows 4, 3, 2, 1: 1 + 2 + 3 + 2 = 8 sc
(24 sc on the left side)
Hanging loop: At the top point, ch 18, then sl st into the top of the ring at the same point to form a loop. Work 26 sc over the ch-18 loop, then sl st into the same point at the top. (26 sc on loop)
Right side: Work down the row ends in reverse order (Tier 1, then Tier 2, then Tier 3), with 8 sc per tier. (24 sc on the right side) Sl st into the corner of Row 12. Fasten off.
Total border: 24 + 26 + 24 = 74 sc.
Why the math works: An sc row is about 1 unit tall, a dc row about 2, and a tr row about 3. Matching the sc count to the row height gives each side as many stitches as it is long, so the edge neither ruffles nor pulls in. Each tier’s four rows always add up to 8 sc, so all three tiers match. The edging also steps in at each cinch row, following the lip of the tier above. Covering the 18 chains with 26 sc pads the loop so it holds its shape at about 1 in (2.5 cm) long.
Final Blocking
- Weave in all ends along the solid bands, not through the windows.
- Mist the ornament with water until it is damp, not soaked.
- Lay it right side up on the blocking mat.
- Pin the top point first, then the two bottom corners of Row 12. The bottom should measure 4.5 in (11.4 cm) including the edging.
- Pin the ridge corners of the upper tiers so the lips sit evenly: 2.25 in (5.7 cm) for Tier 1 and 3.25 in (8.3 cm) for Tier 2.
- Gently open each window by nudging the tr posts until they fan out evenly.
- Square the trunk to 0.9 in (2.3 cm) wide and pin its bottom corners.
- Pin the hanging loop pointing straight up.
- For extra stiffness, mist lightly with spray starch.
- Let it dry completely before you unpin it.
Final Quality-Control Checklist
- Tier 1 has 5 windows, Tier 2 has 8, and Tier 3 has 12
- The ridge counts are 23, 35, and 51 sc
- Each tier’s ridge sits as a visible lip over the next tier
- The trunk is centered, with 22 sts free on each side
- Each slanted side has 24 sc of edging
- The tree is 4.5 in (11.4 cm) wide and 5 in (12.7 cm) tall, not counting the loop
- The loop is about 1 in (2.5 cm) long and stands upright
- All ends are woven in and can’t be seen from the front
Troubleshooting
The tiers cup or curl upward. Your band rows are too tight. Relax your tension, or go up one hook size for the band rows only.
The tiers ruffle. The band rows are too loose, or there are extra dc in the ch-2 spaces. Recount: 3 dc per space, no more.
There’s no visible lip between tiers. Make sure the cinch rows are worked in BLO and that you worked every dc2tog. Without the decreases, the tiers blend together.
The windows look uneven. Keep your ch-2 chains the same size and pull each tr to the same height. Blocking will even out small differences.
The trunk is off center. Recount Row 12 and move the markers to sts 23 and 29 before joining.
The edging ruffles or puckers. Recheck the row-end rule: 1 sc per sc row, 2 per dc row, 3 per tr row.
Care
Hand wash in cool water with mild soap. Press out the water in a towel and dry flat, re-pinning if needed. Store flat between seasons to keep the tiers crisp.
Final Notes
The measurement chain is short and easy to follow. Tier 1 should reach 2.25 in (5.7 cm) across and 1.25 in (3.2 cm) tall. Tier 2 brings the piece to 3.25 in (8.3 cm) across and 2.75 in (7.0 cm) tall. Tier 3 ends at 4.25 in (10.8 cm) across and 4.25 in (10.8 cm) tall. The trunk adds 0.75 in (1.9 cm), for 5 in (12.7 cm) total. The edging brings the width to 4.5 in (11.4 cm), and the loop adds 1 in (2.5 cm), for 6 in (15.2 cm) overall.
Check each measurement as you go, and every ornament will come out the same size.
Happy crocheting!