

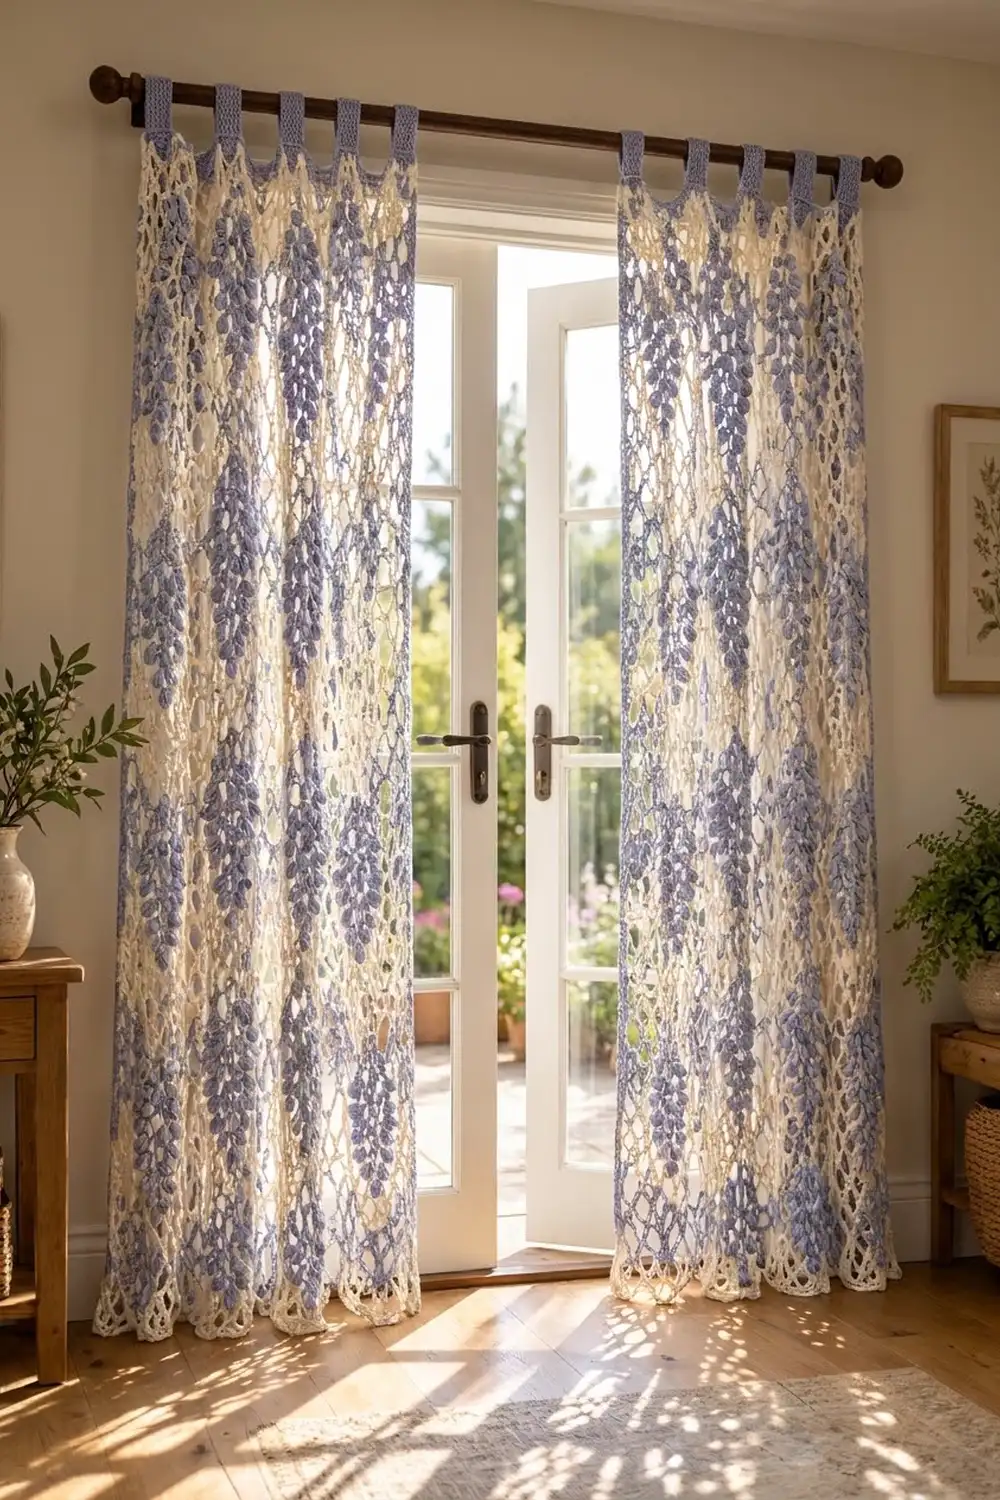
These curtain panels look like wisteria in bloom. Each one is a light cream net covered in cascading lavender flower clusters. In daylight the open mesh glows, and the lavender puffs form a soft diagonal rhythm down the length of the curtain.
The palette is two colors: cream for the net and lavender-blue for the flowers, top band and tabs. The style is cottage lace with a modern, bold scale, so it suits French doors, patio doors or a tall window.
This pattern uses US crochet terms. Each panel measures 40.5 in wide x 84 in long (102.9 x 213.4 cm) from the top of the band to the tips of the hem. The tab loops add another 3 in (7.6 cm) above the band.
The construction is straightforward. You work the net in one piece from the bottom up, add pointed edging along the foundation, then work a lavender band and tabs across the top. A single-crochet edge goes down each side. Finally, you make 25 puff-stitch clusters and sew them on. Make two panels for a pair.
Finished Size and Construction
- Finished panel size: 40.5 x 84 in (102.9 x 213.4 cm), plus 3 in (7.6 cm) tab loops
- Skill level: Intermediate
- Terminology: US
- Yarn weight: Worsted (#4) cotton
- Hook: 5.0 mm (H-8)
- Pieces per panel: 1 mesh panel + 25 wisteria clusters
- Layout: Clusters in 7 staggered columns, alternating tiers of 4 and 3
- Cluster size: 2.5 x 7 in (6.4 x 17.8 cm)
- Size before border: Mesh body 40 x 80 in (101.6 x 203.2 cm)
- Border depth: Pointed hem 2.5 in (6.4 cm); top band 1.5 in (3.8 cm); side edge 0.25 in (0.6 cm) each side
Materials
Choose a smooth mercerized or combed cotton, or a cotton blend. Cotton keeps the net crisp, resists stretching on the rod and holds up to sunlight. Avoid fuzzy or very stretchy yarns, because the mesh will sag.
Per panel:
– Cream (MC): 500 g / 850 m
– Lavender (CC): 200 g / 340 m
For a pair: Cream 1000 g / 1700 m; Lavender 400 g / 680 m.
These quantities include roughly a 15% margin for swatching and blocking.
Tools:
– 5.0 mm (H-8) crochet hook
– Tapestry needle
– Stitch markers (at least 30)
– Rust-proof pins and blocking mats, or a clean floor covered with towels
– Measuring tape
– Scissors
Abbreviations (US Terms)
- ch – chain
- sl st – slip stitch
- sc – single crochet
- dc – double crochet
- sp – space
- sk – skip
- RS / WS – right side / wrong side
- MC / CC – main color (cream) / contrast color (lavender)
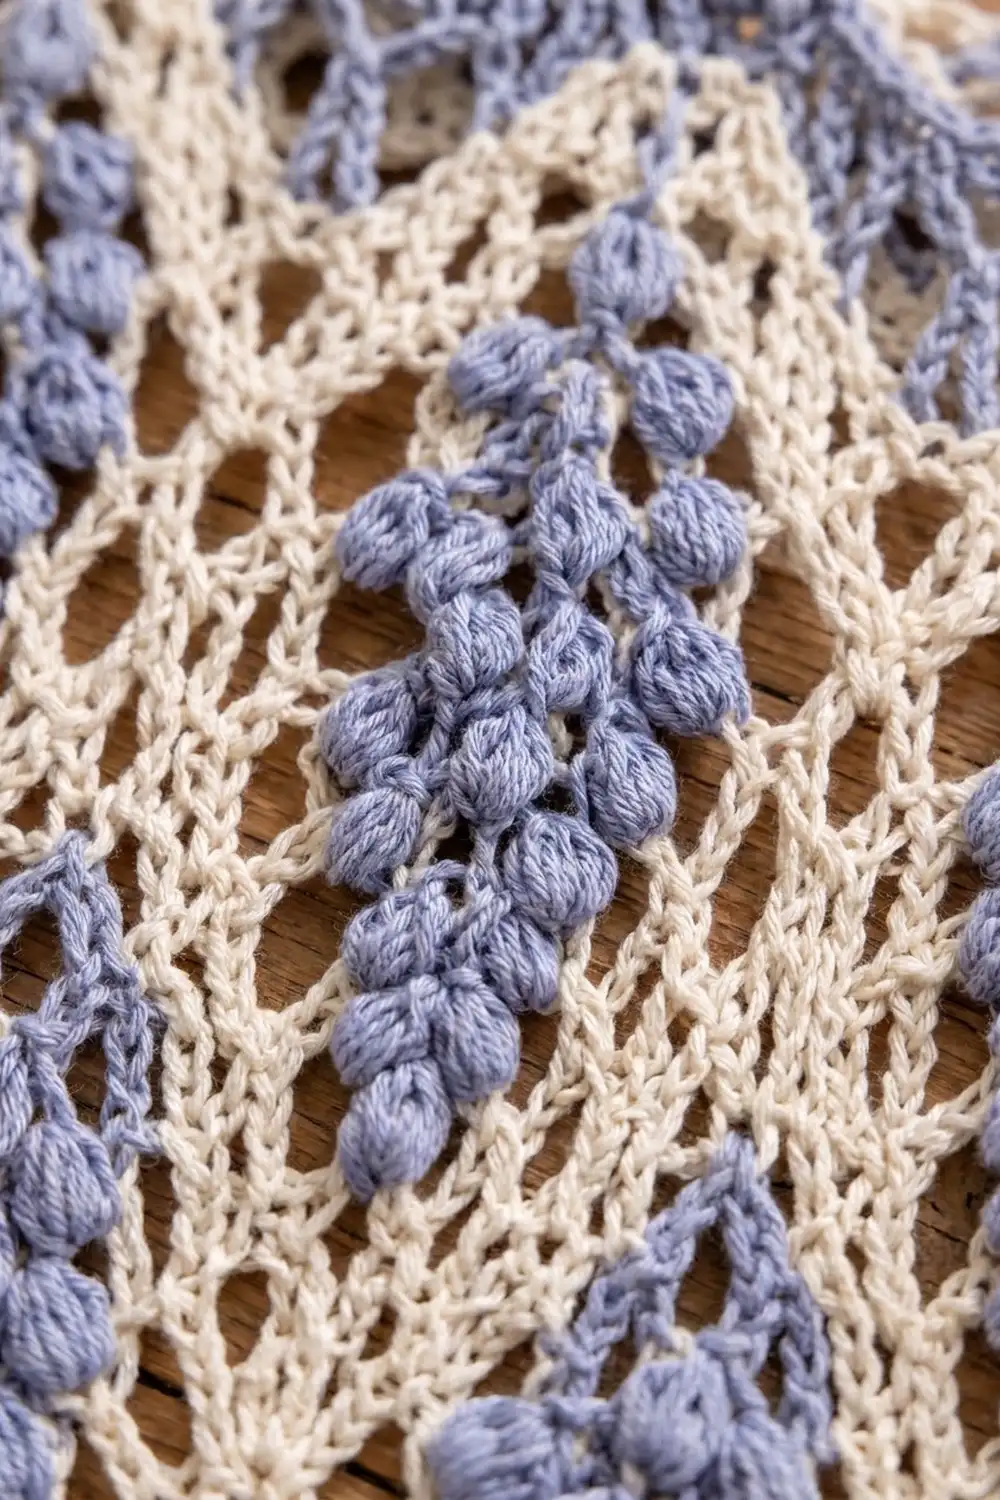
Puff stitch (puff): (Yarn over, insert hook in the stitch or space, yarn over and pull up a loop to about 0.5 in) 3 times. Yarn over and pull through all 7 loops on the hook, then ch 1 to close. The closing ch 1 is part of the puff and is never counted as a separate stitch.
Gauge and Checkpoints
Mesh gauge: 4 mesh loops = 5 in (12.7 cm) wide, and 8 mesh rows = 5 in (12.7 cm) tall, measured after a damp pin-out. One loop is 1.25 in (3.2 cm) wide and one row is 0.625 in (1.6 cm) tall.
Band gauge: 16 sc and 16 rows = 4 in (10.2 cm).
Test first. Ch 34 and work Rows 1–16 of the mesh pattern below. This gives 8 loops and should measure 10 x 10 in (25.4 x 25.4 cm) once wet, pinned without stretching and dried. Then make one wisteria cluster and check that it measures 2.5 x 7 in (6.4 x 17.8 cm).
Checkpoints:
– After Row 1: about 40 in (101.6 cm) wide, relaxed.
– After Row 64: about 40 in (101.6 cm) tall.
– After Row 128: 80 in (203.2 cm) tall.
– After the pointed hem: 82.5 in (209.6 cm).
– After the top band: 84 in (213.4 cm).
– After the side edges: 40.5 in (102.9 cm) wide.
If the swatch is too big, go down to a 4.5 mm hook. If it is too small, go up to a 5.5 mm hook. Check row height separately: if rows run tall, pull each sc snug against its loop. Don’t change the loop counts; change the hook instead.
Mesh Panel
With MC, ch 130.
Row 1 (RS): Sc in the 2nd ch from the hook. Ch 5, sk 3 ch, sc in the next ch. Repeat from * 32 times in total. Turn. (33 sc, 32 ch-5 loops)
Row 2: Ch 5 (counts as dc + ch 2). Sc in the first ch-5 loop. Ch 5, sc in the next loop. Repeat from * to the end (32 sc in total). Ch 2, dc in the last sc. Turn. (31 full loops + 2 half-loops)
Row 3: Ch 1, sc in the dc. Ch 5, sc in the next ch-5 loop. Repeat from * 31 times. Ch 5, sc in the 3rd ch of the turning ch. Turn. (33 sc, 32 loops)
Rows 4–128: Repeat Rows 2 and 3, ending after an even (Row 2 type) row. Don’t fasten off yet.
Checkpoint: The panel should measure 40 x 80 in (101.6 x 203.2 cm) when gently pinned. Odd rows always have 32 full loops. Even rows always have 31 full loops plus 2 half-loops.
Fasten off MC.
Make All Pieces
Per panel:
– 1 mesh panel (Rows 1–128, MC)
– 25 wisteria clusters (CC)
For a pair: 2 mesh panels and 50 clusters.
Wisteria Cluster (make 25 per panel)
The cluster is worked from the bottom tip upward. Begin every row with “ch 2, turn” (this ch 2 does not count as a stitch). Put a ch 1 between puffs within a row.
Row 1: With CC, ch 3. Puff in the 3rd ch from the hook. (1 puff)
Row 2 (increase): (Puff, ch 1, puff) in the puff. (2 puffs)
Row 3: Puff in the first puff, ch 1, puff in the last puff. (2 puffs)
Row 4 (increase): Puff in the first puff, ch 1, puff in the ch-1 sp, ch 1, puff in the last puff. (3 puffs)
Rows 5–6: Puff in each puff, with ch 1 between. (3 puffs)
Row 7 (increase): Puff in the first puff, (ch 1, puff in the next ch-1 sp) twice, ch 1, puff in the last puff. (4 puffs)
Rows 8–9: Puff in each puff, with ch 1 between. (4 puffs)
Row 10 (trim row): Ch 1, turn. Sc in each puff and each ch-1 sp. (4 sc worked into puffs + 3 sc worked into spaces = 7 sc)
Fasten off, leaving a 16 in (40.6 cm) tail. Checkpoint: 2.5 x 7 in (6.4 x 17.8 cm), widest at Row 10 and tapering to a single puff at the tip.
Layout Grid
Clusters are attached along odd mesh rows, which have 33 sc. Number those sc from 1 to 33, counting from either edge; the layout is symmetrical. Each cluster’s center (the 4th sc of its Row 10) is attached to the sc marked below.
Attach row   sc5  sc9  sc13 sc17 sc21 sc25 sc29
Row 121       A    .    A    .    A    .    A
Row 105       .    B    .    B    .    B    .
Row 89        A    .    A    .    A    .    A
Row 73        .    B    .    B    .    B    .
Row 57        A    .    A    .    A    .    A
Row 41        .    B    .    B    .    B    .
Row 25        A    .    A    .    A    .    A
- A tiers: 4 tiers x 4 clusters = 16
- B tiers: 3 tiers x 3 clusters = 9
- Total: 25 clusters per panel
The columns are 4 loops, or 5 in (12.7 cm), apart. The tiers are 16 rows, or 10 in (25.4 cm), apart. The lowest clusters end about 8 in (20.3 cm) above the mesh foundation.
Attaching the Clusters (Joining)
Attach the clusters after the hem, band and side edges are finished and the panel has been blocked once. The panels themselves are never joined to each other.
- Lay the panel RS up. Place a marker in each target sc from the grid.
- Center a cluster’s 4th sc over a marked sc, with the cluster tip hanging downward.
- Use the tail to whipstitch the 7 sc of Row 10 to the mesh. The center sc goes into the marked sc, and the 3 sc on each side are caught into the ch-5 loop strands on either side.
- Tack the cluster’s center at Row 5 and at the Row 1 tip to the mesh strand directly behind it, using 2 small stitches each. This stops the cluster from flipping on the rod.
- Weave in the ends behind the puffs.
Tension: Sew loosely enough that the mesh lies flat under each cluster. If the net puckers or a loop narrows, the stitching is too tight.
Checkpoint: After all 25 clusters are attached, the panel should still lie at 40.5 in (102.9 cm) wide.
Border
The border has three parts: a pointed hem, the top band with tabs, and the side edges. Band gauge is 16 sc = 4 in (10.2 cm).
Pointed Hem (bottom edge)
Turn the panel so the foundation chain is at the top, RS facing.
Row E1: Join MC in the ch at the base of the first Row 1 sc. Ch 1, sc in the same ch. Ch 5, sc in the ch at the base of the next Row 1 sc. Repeat from * 32 times. (33 sc, 32 loops)
Divide the 32 loops into 8 groups of 4, one group per point.
Point 1:
– P1: Turn, sl st in the first 3 ch of the first loop. Ch 1, sc in the same loop, (ch 5, sc in the next loop) 3 times. (3 loops)
– P2: Turn, sl st in the first 3 ch of the first loop. Ch 1, sc in the same loop, (ch 5, sc in the next loop) twice. (2 loops)
– P3: Turn, sl st in the first 3 ch of the first loop. Ch 1, sc in the same loop, ch 5, sc in the next loop. (1 loop)
– Tip: Turn, sl st in the first 3 ch. Ch 1, (sc, ch 5, sc) in the same loop. Fasten off.
Points 2–8: Join MC with a sl st in the 3rd ch of the first loop of the next group of 4. Ch 1, sc in the same loop, (ch 5, sc in the next loop) 3 times. (3 loops) Finish with P2, P3 and the Tip as above.
Count: 8 points x 4 loops = 32 loops, which matches Row 1 exactly. Each point is 5 in (12.7 cm) wide and 2.5 in (6.4 cm) deep (Row E1 + P1, P2 and P3 = 4 rows x 0.625 in).
Top Band (top edge)
With RS facing, join CC to the last dc of Row 128.
Band Row 1 (conversion row): Ch 1, sc in the dc, sc in the ch-2 sp, sc in the sc. 4 sc in the next ch-5 loop, sc in the next sc. Repeat from * 31 times. Sc in the ch-2 sp, sc in the 3rd ch of the turning ch.
The count is 34 stitches worked one-per-stitch (32 sc + 2 row ends), plus 124 sc worked into the 31 loops (4 each), plus 2 sc worked into the 2 half-loops (1 each). Total: 34 + 124 + 2 = 160 sc.
Band Rows 2–6: Ch 1, turn, sc in each sc. (160 sc) Don’t fasten off.
Checkpoint: 40 x 1.5 in (101.6 x 3.8 cm).
Tabs (7)
The 160 sc on Band Row 6 divide as follows: 3 sc at the start, then (10 tab sc, 14 gap sc) 6 times, then 10 tab sc, then 3 sc at the end. Check: 3 + 144 + 10 + 3 = 160.
Tab Row 1: Join CC in the 4th sc of Band Row 6. Ch 1, sc in the same sc and the next 9 sc. (10 sc)
Tab Rows 2–24: Ch 1, turn, sc in each sc. (10 sc)
Fasten off with a long tail. Skip 14 sc and repeat for the remaining 6 tabs.
Fold each tab, which is 2.5 x 6 in (6.4 x 15.2 cm), to the WS. Whipstitch its last row directly behind its first row. This makes a 3 in (7.6 cm) loop that fits rods up to 1.75 in (4.4 cm) in diameter.
Side Edges
With RS facing, join MC at the Row 1 end on the right-hand side. Work 2 sc in each row end of Rows 1–128 (around the dc post on even rows), then 1 sc in each of the 6 band row ends. Total: 256 + 6 = 262 sc. Fasten off, and repeat on the other side.
Why the Math Works
Each 1.25 in (3.2 cm) loop becomes exactly 5 band sc at 4 sc per inch, and 32 loops x 5 = 160 sc, or 40 in (101.6 cm). The band therefore matches the mesh width and neither ruffles nor pulls in.
On the sides, 2 sc per 0.625 in (1.6 cm) row is 3.2 sc per inch. That slightly eased rate stops a lace edge from flaring. The side edges add 0.25 in (0.6 cm) on each side, which brings the width to 40.5 in (102.9 cm).
Final Blocking
- Weave in all the ends before you block.
- Soak the panel in cool water with a little wool wash for 15 minutes.
- Press out the water by rolling the panel in towels. Don’t wring it.
- Lay it flat on mats or on towels on the floor. Pin the band straight at 40 in (101.6 cm). Pin the sides to 84 in (213.4 cm), measuring from the top of the band to the hem tips.
- Pin each hem point at its tip, 5 in (12.7 cm) apart.
- Open each mesh diamond gently with your fingers. Fluff each puff so it sits rounded.
- Let the panel dry completely.
- As an alternative to steps 4–7, hang the damp panel on its rod and tug the hem points down evenly so it dries straight.
Final Quality-Control Checklist
- Every odd mesh row has 32 loops; every even row has 31 loops + 2 half-loops
- Mesh body measures 40 x 80 in (101.6 x 203.2 cm)
- There are 8 even hem points, each 4 loops wide
- The band has 160 sc and 6 rows
- There are 7 tabs of 10 sc each, evenly spaced and folded to the same depth
- Each side edge has 262 sc
- There are 25 clusters per panel, each with 26 puffs, matching the layout grid
- Both panels match in length to within 0.5 in (1.3 cm)
Troubleshooting
Mesh slants or the edges wave: You probably missed a turning ch-5 or the final dc. Count the loops on every 8th row.
The panel grows longer when hung: This is normal for cotton. Block it on the rod, and if needed tighten your gauge by one hook size for the second panel.
Puffs look flat: Pull up taller loops (about 0.5 in) and close each puff firmly with the ch 1.
The band ruffles: Use 3 sc instead of 4 in a few evenly spaced loops, and keep the total count recorded.
Clusters twist: Add another tack at Row 8 of the cluster.
The two panels differ in length: Add or remove mesh rows in pairs before you work the band.
Care
Hand wash cool or machine wash on a gentle cycle inside a mesh bag, then reshape and dry flat or on the rod. Avoid tumble drying, which stretches the net.
Final Notes
The measurement chain is simple to follow. One loop is 1.25 in (3.2 cm), so 32 loops make 40 in (101.6 cm). One row is 0.625 in (1.6 cm), so 128 rows make 80 in (203.2 cm). The 2.5 in (6.4 cm) points and the 1.5 in (3.8 cm) band bring the length to 84 in (213.4 cm). The side edges bring the width to 40.5 in (102.9 cm), and 25 clusters of 2.5 x 7 in (6.4 x 17.8 cm) finish each panel. Check the swatch, count often, and both panels will match.
Happy crocheting!