

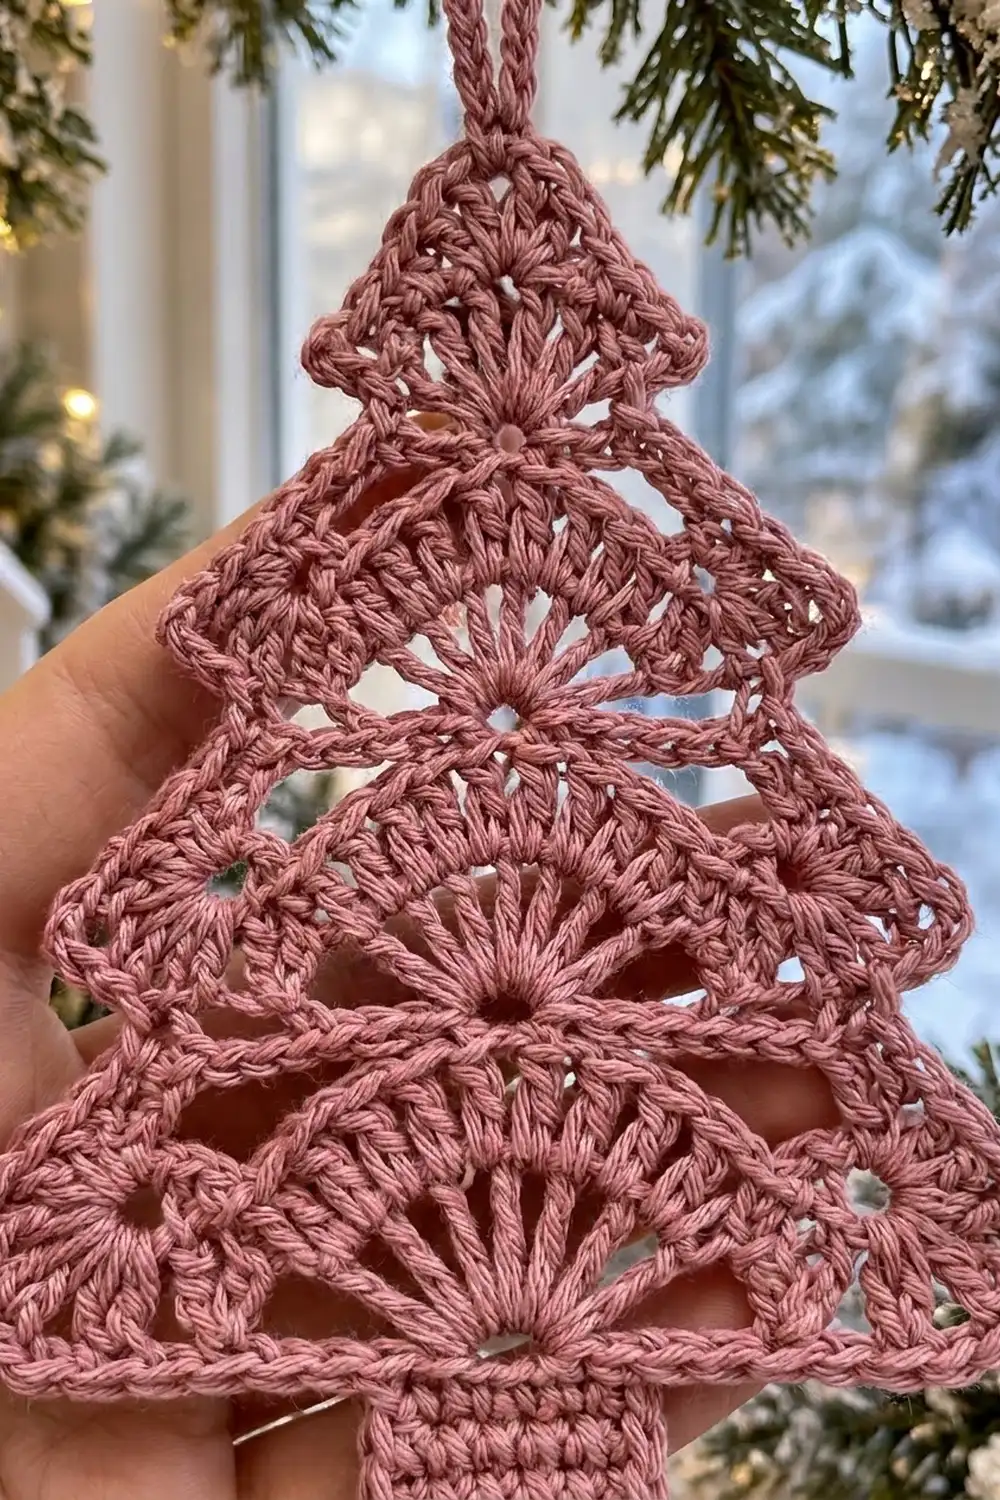
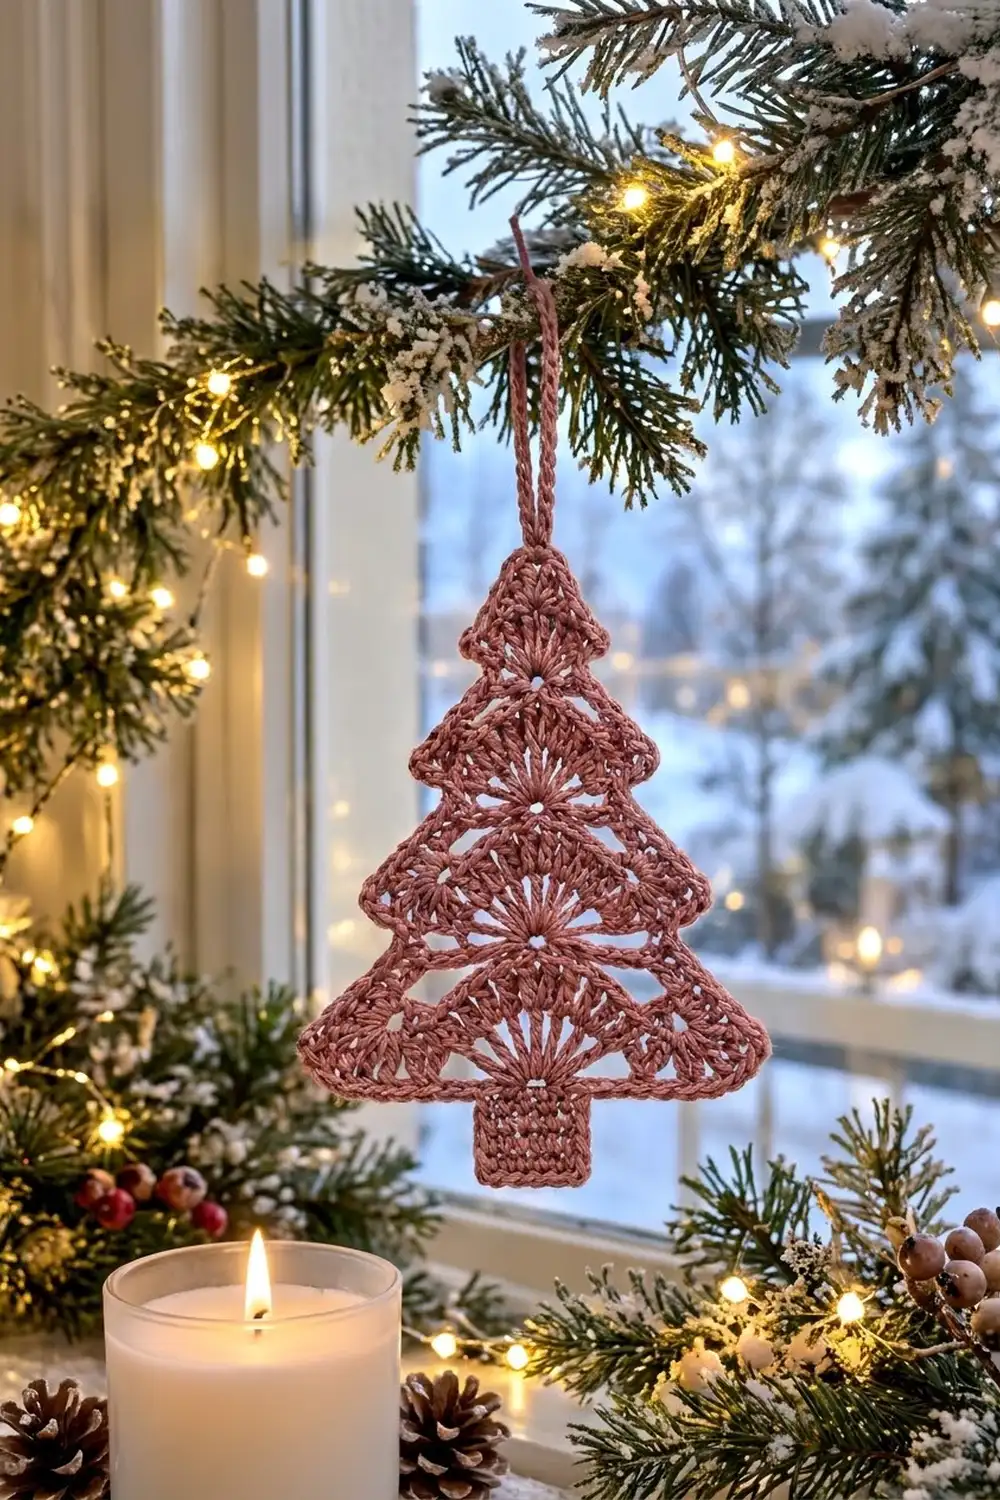
The Rosewood Fan Tree is a lacy, flat Christmas tree ornament made in one dusty rose color. It has four sloped tiers that step outward like evergreen branches. Each tier has a tall fan in the center, a short graded half fan at each corner, and an open V-shaped gap (the “valley”) on each side of the center fan. A small solid point sits on top, a square trunk sits below, and a crisp single crochet outline finishes the edges.
The style is soft and vintage. Because the ornament is one color, the stitches carry the design. The fans show up clearly whether you hang it on a branch, tie it to a gift, or put it in a window.
This pattern uses US crochet terms. After the border and blocking, the ornament measures about 4.9 in (12.4 cm) wide and 6.2 in (15.7 cm) tall, not counting the hanging loop. The loop adds about 1.5 in (3.8 cm).
You work the tree from the bottom up in turned rows, one tier at a time. Each new tier is 2 stitches narrower on each side. The trunk is worked down from the foundation chain. One round of single crochet outlines the whole shape, and a covered chain loop goes at the tip.
Finished Size and Construction
- Finished size: 4.9 in (12.4 cm) wide x 6.2 in (15.7 cm) tall, plus a 1.5 in (3.8 cm) loop
- Skill level: Advanced beginner to intermediate
- Terminology: US crochet terms
- Yarn weight: Sport (#2), mercerized cotton
- Hook: 2.75 mm (US C-2)
- Number of pieces: 1 (single flat ornament)
- Layout: Single piece; no joining
- Piece size before border: 4.5 in (11.4 cm) wide x 5.8 in (14.7 cm) tall (tree 4.8 in / 12.2 cm + trunk 1.0 in / 2.5 cm)
- Border depth: about 0.2 in (0.5 cm) on every edge
Materials
Choose a smooth, mercerized sport-weight cotton. It gives the fans sharp definition and holds its blocked shape well. Avoid fuzzy or very soft acrylics, which blur the lace and let the tiers droop.
- Dusty rose (only color): 15 g, about 45 m (49 yd)
Tools:
- 2.75 mm (US C-2) crochet hook
- Tapestry needle
- Scissors
- Stitch markers (2)
- Blocking mat and rust-proof pins
- Spray bottle; spray starch (optional)
The yarn amount includes a margin of about 30 percent for your gauge test and differences in tension. One ornament uses roughly 10 to 11 g.
Abbreviations (US Terms)
- ch – chain
- sl st – slip stitch
- sc – single crochet
- hdc – half double crochet
- dc – double crochet
- tr – treble crochet
- sc2tog – single crochet 2 together
- sc3tog – single crochet 3 together
- sk – skip
- st(s) – stitch(es)
- RS – right side
Special stitches:
- Graded half fan (start of row): all worked into 1 stitch, going from short to tall. Size 5 = (sc, hdc, dc, tr, tr). Size 4 = (sc, hdc, dc, tr). Size 3 = (sc, hdc, dc). Size 2 = (sc, hdc).
- Graded half fan (end of row): the mirror image, worked into the last stitch from tall to short. Size 5 = (tr, tr, dc, hdc, sc), and so on.
- Fan: the stated number of tr worked into 1 stitch.
The ch 1 at the start of a row never counts as a stitch.
Gauge and Checkpoints
Gauge: 11 sc and 10 rows = 2 in (5.1 cm) square. One tr row is about 0.55 in (1.4 cm) tall, and one sc row is about 0.2 in (0.5 cm) tall.
Test one piece first: work Rows 1 to 3 of the tree, then measure before you go on.
- After Row 1: 4.5 in (11.4 cm) wide.
- After Row 3 (Tier 1): about 0.9 in (2.3 cm) tall, still 4.5 in (11.4 cm) wide.
- After Row 12 (all four tiers): about 3.8 in (9.7 cm) tall.
- After Row 17 (tree complete): about 4.8 in (12.2 cm) tall.
- After the trunk: about 5.8 in (14.7 cm) total height.
- After border and blocking: 4.9 in (12.4 cm) x 6.2 in (15.7 cm).
If Row 1 is wider than 4.5 in (11.4 cm), go down a hook size. If it is narrower, go up a hook size. If the width is right but the tiers are too tall, your tr are loose. Snug up each loop before the next yarn over.
Tree Body
Ch 26.
Tier 1
Row 1: Sc in 2nd ch from hook and in each ch across, turn. (25 sc)
Row 2 (fan row): Ch 1, size 5 graded half fan (sc, hdc, dc, tr, tr) in first st, sk 5, sc in next st, sk 5, 9 tr in next st (center fan), sk 5, sc in next st, sk 5, size 5 graded half fan (tr, tr, dc, hdc, sc) in last st, turn. (21 sts: 5 + 1 + 9 + 1 + 5)
Check: 1 + 5 + 1 + 5 + 1 + 5 + 1 + 5 + 1 = all 25 stitches of Row 1.
The half fans make the tier slope down toward the outer corners. The short sc between the fans forms the V valleys.
Row 3 (conversion row): Ch 1, sc in each of first 5 sts, 3 tr in valley sc, sc in each of next 9 tr, 3 tr in valley sc, sc in each of last 5 sts, turn. (25 sts: 21 worked 1-per-stitch + 4 extra)
The 3 tr in each valley fill the V and add 2 stitches each, which brings the row back to full width.
Tier 2
Row 4 (step row): Sl st in each of first 2 sts, ch 1, sc in each of next 21 sts, leave last 2 sts unworked, turn. (21 sc)
Check: 2 sl st + 21 sc + 2 unworked = 25. The 2 stitches left at each end make the step where Tier 1 sticks out.
Row 5 (fan row): Ch 1, size 4 graded half fan in first st, sk 4, sc in next st, sk 4, 7 tr in next st, sk 4, sc in next st, sk 4, size 4 graded half fan in last st, turn. (17 sts: 4 + 1 + 7 + 1 + 4)
Check: 1 + 4 + 1 + 4 + 1 + 4 + 1 + 4 + 1 = all 21 stitches.
Row 6 (conversion row): Ch 1, sc in each of first 4 sts, 3 tr in valley sc, sc in each of next 7 tr, 3 tr in valley sc, sc in each of last 4 sts, turn. (21 sts: 17 + 4 extra)
Tier 3
Row 7 (step row): Sl st in each of first 2 sts, ch 1, sc in each of next 17 sts, leave last 2 sts unworked, turn. (17 sc)
Row 8 (fan row): Ch 1, size 3 graded half fan in first st, sk 3, sc in next st, sk 3, 5 tr in next st, sk 3, sc in next st, sk 3, size 3 graded half fan in last st, turn. (13 sts: 3 + 1 + 5 + 1 + 3)
Check: 1 + 3 + 1 + 3 + 1 + 3 + 1 + 3 + 1 = all 17 stitches.
Row 9 (conversion row): Ch 1, sc in each of first 3 sts, 3 dc in valley sc, sc in each of next 5 tr, 3 dc in valley sc, sc in each of last 3 sts, turn. (17 sts: 13 + 4 extra)
The valleys use dc instead of tr here because the smaller half fans are shorter.
Tier 4
Row 10 (step row): Sl st in each of first 2 sts, ch 1, sc in each of next 13 sts, leave last 2 sts unworked, turn. (13 sc)
Row 11 (fan row): Ch 1, size 2 graded half fan in first st, sk 2, sc in next st, sk 2, 3 tr in next st, sk 2, sc in next st, sk 2, size 2 graded half fan in last st, turn. (9 sts: 2 + 1 + 3 + 1 + 2)
Check: 1 + 2 + 1 + 2 + 1 + 2 + 1 + 2 + 1 = all 13 stitches.
Row 12 (conversion row): Ch 1, sc in each of first 2 sts, 3 dc in valley sc, sc in each of next 3 tr, 3 dc in valley sc, sc in each of last 2 sts, turn. (13 sts: 9 + 4 extra)
Checkpoint: the piece is about 3.8 in (9.7 cm) tall. From bottom to top, the tiers are about 4.5 in (11.4 cm), 3.8 in (9.7 cm), 3.1 in (7.9 cm), and 2.4 in (6.1 cm) wide.
Top Point
Row 13 (step row): Sl st in each of first 2 sts, ch 1, sc in each of next 9 sts, leave last 2 sts unworked, turn. (9 sc)
Row 14: Ch 1, sc2tog, sc in next 5 sts, sc2tog, turn. (7 sts)
Row 15: Ch 1, sc2tog, sc in next 3 sts, sc2tog, turn. (5 sts)
Row 16: Ch 1, sc2tog, sc in next st, sc2tog, turn. (3 sts)
Row 17: Ch 1, sc3tog. (1 st) Fasten off.
The tree is now about 4.8 in (12.2 cm) tall and 4.5 in (11.4 cm) wide at the base.
Trunk
Turn the tree upside down so the foundation chain faces you. There are 25 free loops. The trunk uses the center 7 (loops 10 to 16), which leaves 9 loops on each side.
Row T1: Join yarn in loop 10, ch 1, sc in same loop and in each of next 6 loops, turn. (7 sc)
Rows T2–T5: Ch 1, sc in each st across, turn. (7 sc)
Fasten off. The trunk is about 1.3 in (3.3 cm) wide and 1.0 in (2.5 cm) tall. Weave in all tails before you start the border.
Border
Border gauge: Work 1 sc in the end of each sc row. Every fan row starts and ends with a graded half fan whose outer stitch is an sc, so those row ends are also sc height and take 1 sc. Each outer point gets 3 sc so it turns sharply without cupping.
Border Round (RS): Join yarn in the single stitch of Row 17 (the tip). Work 3 sc in the tip. Then work down Side A:
- Top Point: 1 sc in the end of each of Rows 16, 15, 14, and 13. (4 sc)
- Tier 4: 1 sc in each of the 2 exposed stitches of Row 12 (the step), 1 sc in the end of Row 12, 1 sc in the end of Row 11, 3 sc in the end of Row 10 (outer point). (7 sc)
- Tier 3: Same as Tier 4, using Rows 9, 8, and 7. (7 sc)
- Tier 2: Same, using Rows 6, 5, and 4. (7 sc)
- Tier 1: 1 sc in each of the 2 exposed stitches of Row 3, 1 sc in the end of Row 3, 1 sc in the end of Row 2, 3 sc in free loop 1 (bottom corner). (7 sc)
- Base: 1 sc in each of free loops 2 to 9. (8 sc)
Side A total: 4 + 7 + 7 + 7 + 7 + 8 = 40 sc.
Trunk:
- 1 sc in the end of each of Rows T1 to T4. (4 sc)
- 3 sc in first st of Row T5, sc in next 5 sts, 3 sc in last st. (11 sc)
- 1 sc in the end of each of Rows T4 to T1. (4 sc)
Trunk total: 19 sc.
Work Side B as a mirror of Side A, from free loop 17 up to the tip: 8 sc along the base, then Tiers 1 to 4 at 7 sc each, then 4 sc in the ends of the Top Point rows. On this side, the 3-sc outer point comes first in each tier. (40 sc) Sl st to the first sc.
Round total: 3 + 40 + 19 + 40 = 102 sc.
Why the math works: Each tier is exactly 2 stitches narrower per side than the one below it. That means every step leaves 2 stitches exposed, and each step takes 2 sc. Each side has 4 tiers of 7 sc, a 4-row point, and an 8-loop base. Both sides match stitch for stitch, so the tree stays symmetrical and flat.
Hanging Loop
Sl st over to the center sc of the 3-sc tip group. Ch 20, sl st in the same sc. Work 24 sc into the ch-20 loop, then sl st in the tip sc. Fasten off and weave in. The loop stands about 1.5 in (3.8 cm) tall.
Final Blocking
- Weave in any remaining ends along the back of the border.
- Soak the ornament in cool water for 10 minutes, then press the water out in a towel. Do not wring.
- Lay it RS up on the blocking mat.
- Pin the tip first, then the two bottom corners, so the base measures 4.9 in (12.4 cm) across.
- Pin the outer points of each tier, keeping the left and right points level.
- Pin the trunk square, with its bottom edge 6.2 in (15.7 cm) below the tip.
- Gently open each fan with your fingertips so the spokes are evenly spaced.
- Spray with starch if you want a stiff ornament. Let it dry fully before you unpin it.
Final Quality-Control Checklist
- The ornament is 4.9 in (12.4 cm) x 6.2 in (15.7 cm), plus the 1.5 in (3.8 cm) loop.
- There are four tiers, with center fans of 9, 7, 5, and 3 tr from bottom to top.
- The V valleys are open and equal on both sides of each center fan.
- Each tier steps in by 2 stitches per side.
- The trunk is centered under the bottom fan, with 9 loops on each side.
- The border has 102 sc: 40 per side and 19 around the trunk.
- All tier points are sharp and level.
- The loop is firm, centered, and fully covered.
- No ends show on the RS.
Troubleshooting
- Tree leans to one side: A step row is off. On every step row, count 2 sl st, the center sc, and 2 unworked stitches.
- Fans ruffle: Your tension is loose or the hook is too large. Go down a hook size.
- Fans pull the tier narrow: Your tr are tight. Go up a hook size, or loosen up on the fan rows only.
- Valleys look closed: Make sure you skipped the full count before and after each valley sc.
- Border ruffles: Use 1 sc per row end, not 2.
- Border pulls in: Make sure every outer point has 3 sc.
- Trunk is off-center: Recount the free loops. The trunk starts in loop 10.
Care
Hand wash in cool water with mild soap, press dry in a towel, and reblock flat. Store flat or hanging, out of direct sun so the rose color doesn’t fade.
Final Notes
Your measurement chain is simple. Row 1 sets the width at 4.5 in (11.4 cm). Each tier adds about 0.9 to 1.0 in (2.3 to 2.5 cm) of height and steps in by 2 stitches per side. The tree reaches about 4.8 in (12.2 cm), and the trunk brings the piece to 5.8 in (14.7 cm). The 102-stitch border and blocking take it to 4.9 in (12.4 cm) x 6.2 in (15.7 cm), with a 1.5 in (3.8 cm) loop on top.
Happy crocheting!