

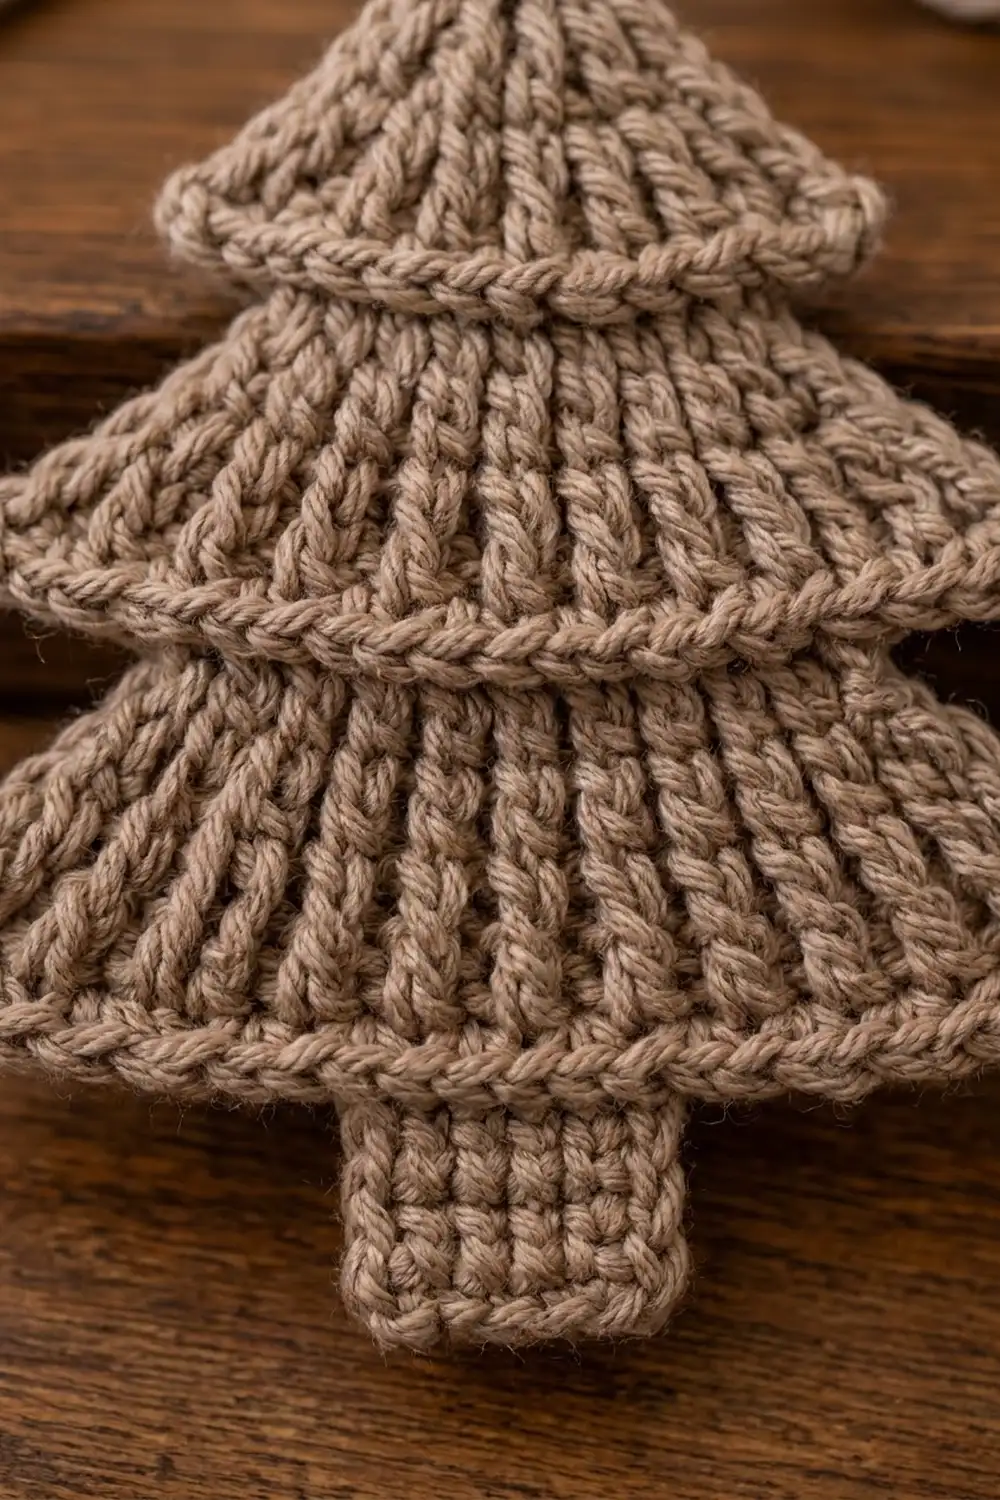
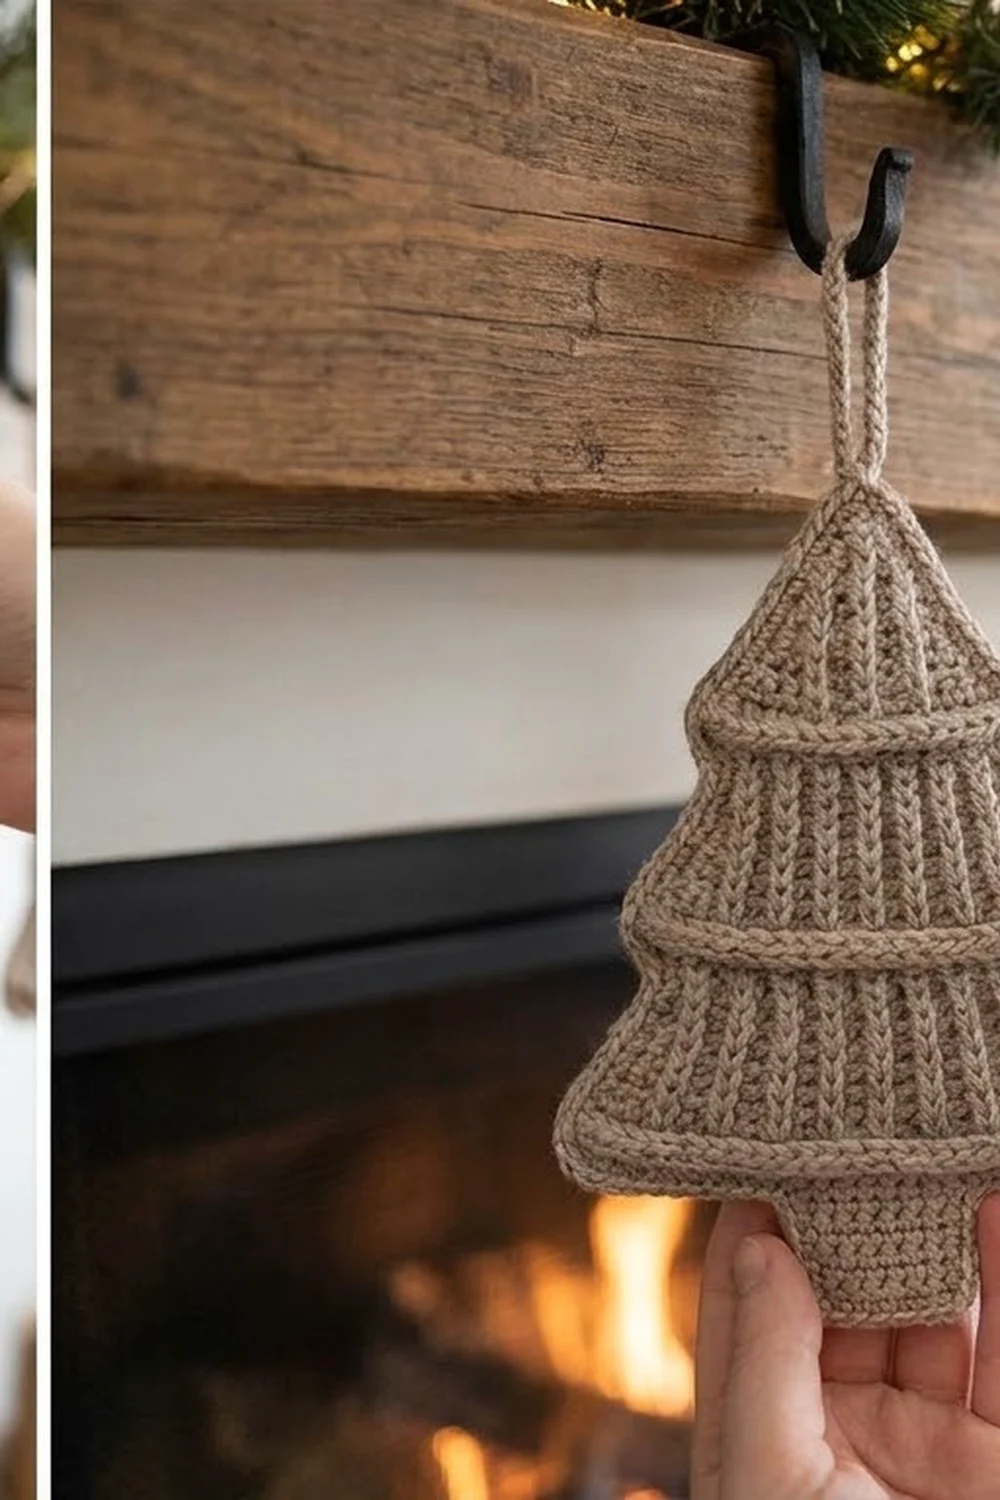
The Hearthside Pine is a flat, three-tier Christmas tree ornament with a quiet, rustic look. Each tier is made of fanned double crochet columns that look like ribs. A raised single crochet ridge runs along the bottom of each tier and makes it hang slightly over the tier below. A neat single crochet trunk and a slim hanging loop finish the tree.
The sample uses one color, a warm taupe or mushroom beige. That keeps the focus on texture and suits natural, farmhouse, or Scandinavian décor. It also looks lovely in cream, sage, or deep forest green.
This pattern uses US crochet terms. The finished ornament is about 4.6 in (11.7 cm) wide and 5.2 in (13.2 cm) tall, not counting the loop. With the loop it is about 6.7 in (17.0 cm) tall.
You work the tree as one piece from the top down. Each tier grows in rows of double crochet. A ridge row is then worked into the front loops of the tier’s last row. The next tier starts from the free back loops, so it sits slightly behind the tier above. The trunk is worked the same way. A single crochet border and a slip stitch round tidy the outline, and the hanging loop goes on last.
Finished Size and Construction
- Finished size: 4.6 in (11.7 cm) wide x 5.2 in (13.2 cm) tall; 6.7 in (17.0 cm) tall with the loop
- Skill level: Easy
- Terminology: US
- Yarn weight: DK (#3)
- Hook: 3.5 mm (E-4)
- Number of pieces: 1 (a single continuous piece)
- Layout: Three stacked tiers plus a trunk, worked top-down
- Piece size before border: 4.2 in (10.7 cm) wide x 4.8 in (12.2 cm) tall
- Border depth: about 0.2 in (0.5 cm) on each edge
Materials
Yarn: A smooth DK yarn in cotton, a cotton blend, or acrylic. Choose one with good stitch definition so the ribs and ridges stand out. Fuzzy or brushed yarns will hide the texture.
- Taupe/beige: 15 g, about 35 m (38 yd)
The quantity includes a margin. One ornament uses about 12 g.
Tools:
– 3.5 mm (E-4) crochet hook
– Tapestry needle
– Scissors
– Stitch markers (2)
– Blocking mat and rust-proof pins
– Spray bottle with water
Abbreviations (US Terms)
- ch – chain
- sl st – slip stitch
- sc – single crochet
- dc – double crochet
- FLO – front loop only
- st(s) – stitch(es)
- RS / WS – right side / wrong side
Special technique – Ridge row: With the RS facing, work sc in the FLO of the tier’s last dc row. The back loops stay free, and the next tier is worked into them. The ridge row sits on the front of the work like a rolled edge, so it adds almost no height.
Gauge and Checkpoints
Gauge: 18 dc and 10 dc rows = 4 in (10.2 cm). That is 4.5 sts per inch, and each dc row is 0.4 in (1.0 cm) tall. Single crochet rows are 0.2 in (0.5 cm) tall.
Before you work the whole ornament, crochet Tier 1 as a test and measure it.
Checkpoints:
– After Tier 1: 2.4 in (6.1 cm) wide at the bottom, 1.2 in (3.0 cm) tall
– After Tier 2: 3.3 in (8.4 cm) wide at the bottom, 2.4 in (6.1 cm) total height
– After Tier 3: 4.2 in (10.7 cm) wide at the bottom, 3.6 in (9.1 cm) total height
– After the trunk: trunk 1.1 in (2.8 cm) wide x 1.2 in (3.0 cm) tall; whole piece 4.8 in (12.2 cm) tall
– After the border: 4.6 in (11.7 cm) x 5.2 in (13.2 cm)
If Tier 1 is too big (wider than 2.6 in / 6.6 cm), go down half a hook size to 3.25 mm. If it’s too small (narrower than 2.2 in / 5.6 cm), go up to 3.75 mm. Small differences are fine for an ornament, but large ones will change the yarn amount and the proportions.
Pattern
Turning chains: In the tier rows, ch 3 counts as the first dc. In the sc rows, ch 1 does not count as a stitch.
Tier 1 (Top)
Row 1 (WS): Ch 5, dc in 4th ch from hook, dc in next ch. (3 sts) The 3 skipped chains count as the first dc.
Row 2 (RS): Ch 3, turn, 2 dc in the first st (the st at the base of the ch-3), dc in next st, 3 dc in last st. (7 sts)
Row 3 (WS): Ch 3, turn, 2 dc in first st, dc in next 5 sts, 3 dc in last st. (11 sts)
Each row adds 2 sts at each edge, so the dc columns fan outward like ribs.
Ridge Row (RS): Ch 1, turn, sc in FLO of each st across. (11 sc)
Tier 2
Row 1 (WS): Turn. Work into the free loops of Tier 1 Row 3, the loops now nearest you, behind the ridge. Sl st in the first 3 sts. Ch 3 (counts as dc in the 3rd st), then dc in the next 6 sts. (7 sts) Two Tier 1 sts are left unworked at each edge. These become the overhang.
Row 2 (RS): Ch 3, turn, 2 dc in first st, dc in next 5 sts, 3 dc in last st. (11 sts)
Row 3 (WS): Ch 3, turn, 2 dc in first st, dc in next 9 sts, 3 dc in last st. (15 sts)
Ridge Row (RS): Ch 1, turn, sc in FLO of each st across. (15 sc)
Tier 3 (Bottom)
Row 1 (WS): Turn. Working into the free loops of Tier 2 Row 3, sl st in the first 3 sts. Ch 3 (counts as dc), then dc in the next 10 sts. (11 sts) Two sts are left unworked at each edge.
Row 2 (RS): Ch 3, turn, 2 dc in first st, dc in next 9 sts, 3 dc in last st. (15 sts)
Row 3 (WS): Ch 3, turn, 2 dc in first st, dc in next 13 sts, 3 dc in last st. (19 sts)
Ridge Row (RS): Ch 1, turn, sc in FLO of each st across. (19 sc)
Trunk
Row 1 (WS): Turn. Working into the free loops of Tier 3 Row 3, sl st in the first 8 sts. Ch 1, then sc in the same (8th) st and in the next 4 sts. (5 sc) Seven sts are left unworked on each side.
Rows 2–6: Ch 1, turn, sc in each st across. (5 sc)
Fasten off. The piece should now measure 4.2 in (10.7 cm) wide x 4.8 in (12.2 cm) tall. The slip stitches sit behind the ridges and can’t be seen from the RS.
Border
Border gauge: Work 2 sc into the side of each dc row (0.4 in / 1.0 cm), which gives 5 sc per inch. Work 1 sc into the side of each sc row (0.2 in / 0.5 cm), which also gives 5 sc per inch. Both match the sc gauge, so the edges stay flat without ruffling or cupping.
Round 1 (RS): With the RS facing, join the yarn at the top, in the first free loop of the foundation chain. Work along each segment as follows:
- Top: sc in each of the 3 foundation ch. (3)
- Tier 1 left side: 2 sc in each dc row end. (6)
- Tier 1 left overhang: working into the ridge sc tops, 2 sc in the outer st, then sc in the next st. (3)
- Tier 2 left side: (6)
- Tier 2 left overhang: 2 sc in the outer st, sc in the next st. (3)
- Tier 3 left side: (6)
- Tier 3 left bottom: 2 sc in the outer ridge st, sc in the next 6 sts. (8)
- Trunk left side: 1 sc in each row end. (6)
- Trunk bottom: 2 sc in the first st, sc in the next 3 sts, 2 sc in the last st. (7)
- Trunk right side: (6)
- Tier 3 right bottom: sc in the next 6 sts, 2 sc in the outer st. (8)
- Tier 3 right side, Tier 2 overhang, Tier 2 side, Tier 1 overhang, Tier 1 side: (6, 3, 6, 3, 6)
Sl st to the first sc. (86 sc total)
Why the math works: Each side of the tree has 38 sc: 6 + 3 + 6 + 3 + 6 + 8 + 6. Add 3 sc at the top and 7 at the trunk bottom, and you get 38 + 38 + 3 + 7 = 86. Each overhang count is the 2 unworked sts plus 1 extra sc at the tier tip, which rounds the point. The Tier 3 bottom count is the 7 unworked sts plus 1 tip sc. The trunk bottom is 5 sts plus 1 extra sc at each corner. No corner is counted twice.
Round 2: Sl st loosely in each sc around. (86 sl sts) Sl st to the first sl st. This makes the thin corded edge.
Hanging loop: Sl st to the center top sc. Ch 14, then sl st in the same st. Sl st into the back bump of each of the 14 ch, then sl st to the center top sc. Fasten off. The loop stands about 1.5 in (3.8 cm) tall.
Weave in all ends along the WS of the trunk and tiers.
Final Blocking
- Lightly spritz the ornament with water until it is damp but not soaked.
- Lay it RS up on the blocking mat.
- Pin the trunk bottom corners 1.1 in (2.8 cm) apart.
- Pin the Tier 3 tips 4.6 in (11.7 cm) apart, including the border.
- Pin the Tier 2 tips and the Tier 1 tips, centered above Tier 3.
- Check the height: 5.2 in (13.2 cm) from the top to the trunk bottom.
- Gently press each ridge so it rolls forward over the tier below.
- Straighten the loop so it sits centered at the top.
- Let it dry completely before you unpin it.
Final Quality-Control Checklist
- Tier rows count 3/7/11, 7/11/15, and 11/15/19 sts
- Ridge rows count 11, 15, and 19 sc
- Each ridge sits on the RS and overlaps the tier below
- The trunk is 5 sc wide and 6 rows tall
- Border Round 1 has 86 sc, with 38 on each side
- The tier tips are rounded, not pulled into sharp points
- The loop is centered and secure
- All ends are hidden on the WS
- Final size is 4.6 in (11.7 cm) x 5.2 in (13.2 cm)
Troubleshooting
The tiers curl or cup: Your dc tension is tight compared with the increases. Go up a hook size, or block more firmly.
The tier edges ruffle: Check that you worked 3 dc (not 4) into each end st.
The ridge isn’t showing on the front: You worked the ridge row with the WS facing. Each tier’s Row 3 must be a WS row, so the ridge row is a RS row.
There are gaps where the tiers meet: Pull the first sl st snug, and keep the ch-3 tight at the start of Row 1.
The border waves: Your sc border may be loose. Work Round 1 with a 3.25 mm hook.
The trunk is off-center: Recount the 8 sl sts. Each side should have 7 sts left unworked.
Care
Hand wash in cool water, press out the moisture in a towel, and dry flat, reshaping as needed. Store flat or hanging so the ridges keep their shape.
Final Notes
The size of this ornament follows from your gauge, step by step. At 4.5 sts per inch, the tier rows give bottom widths of 2.4 in (6.1 cm), 3.3 in (8.4 cm), and 4.2 in (10.7 cm). Nine dc rows plus six trunk rows make the piece 4.8 in (12.2 cm) tall before the border. The 86-sc border adds 0.2 in (0.5 cm) all around, for a finished size of 4.6 in (11.7 cm) x 5.2 in (13.2 cm). Check your gauge on Tier 1, check the size again after each tier, and the rest of the tree will come out right. Make one for your mantel, a few for the tree, or one to tie onto a gift.
Happy crocheting!