

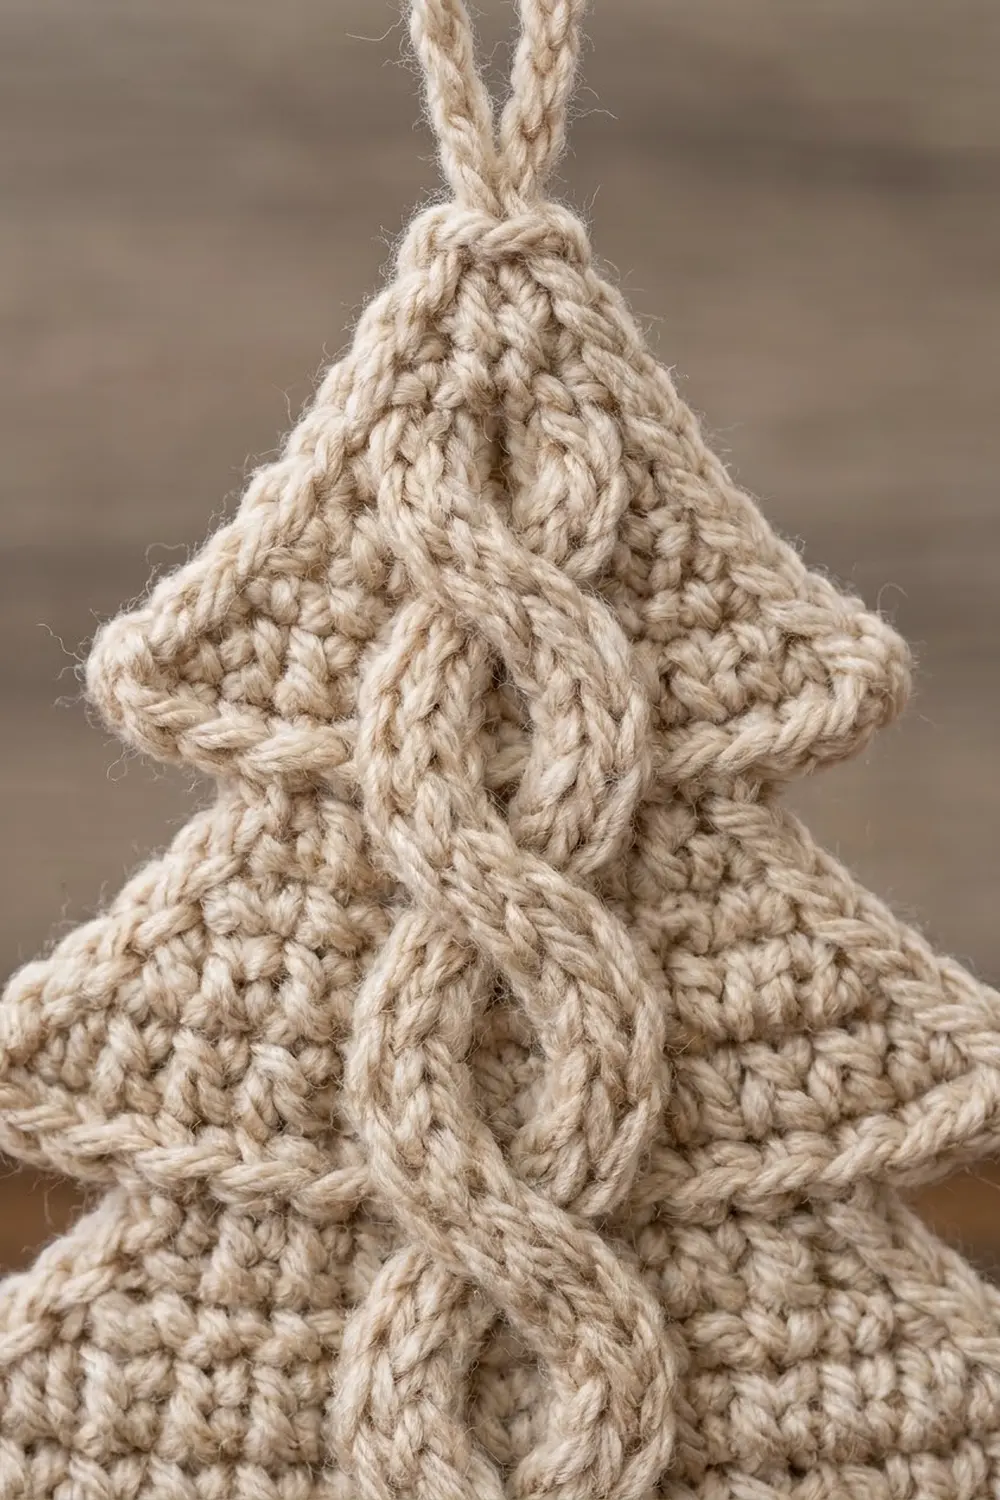
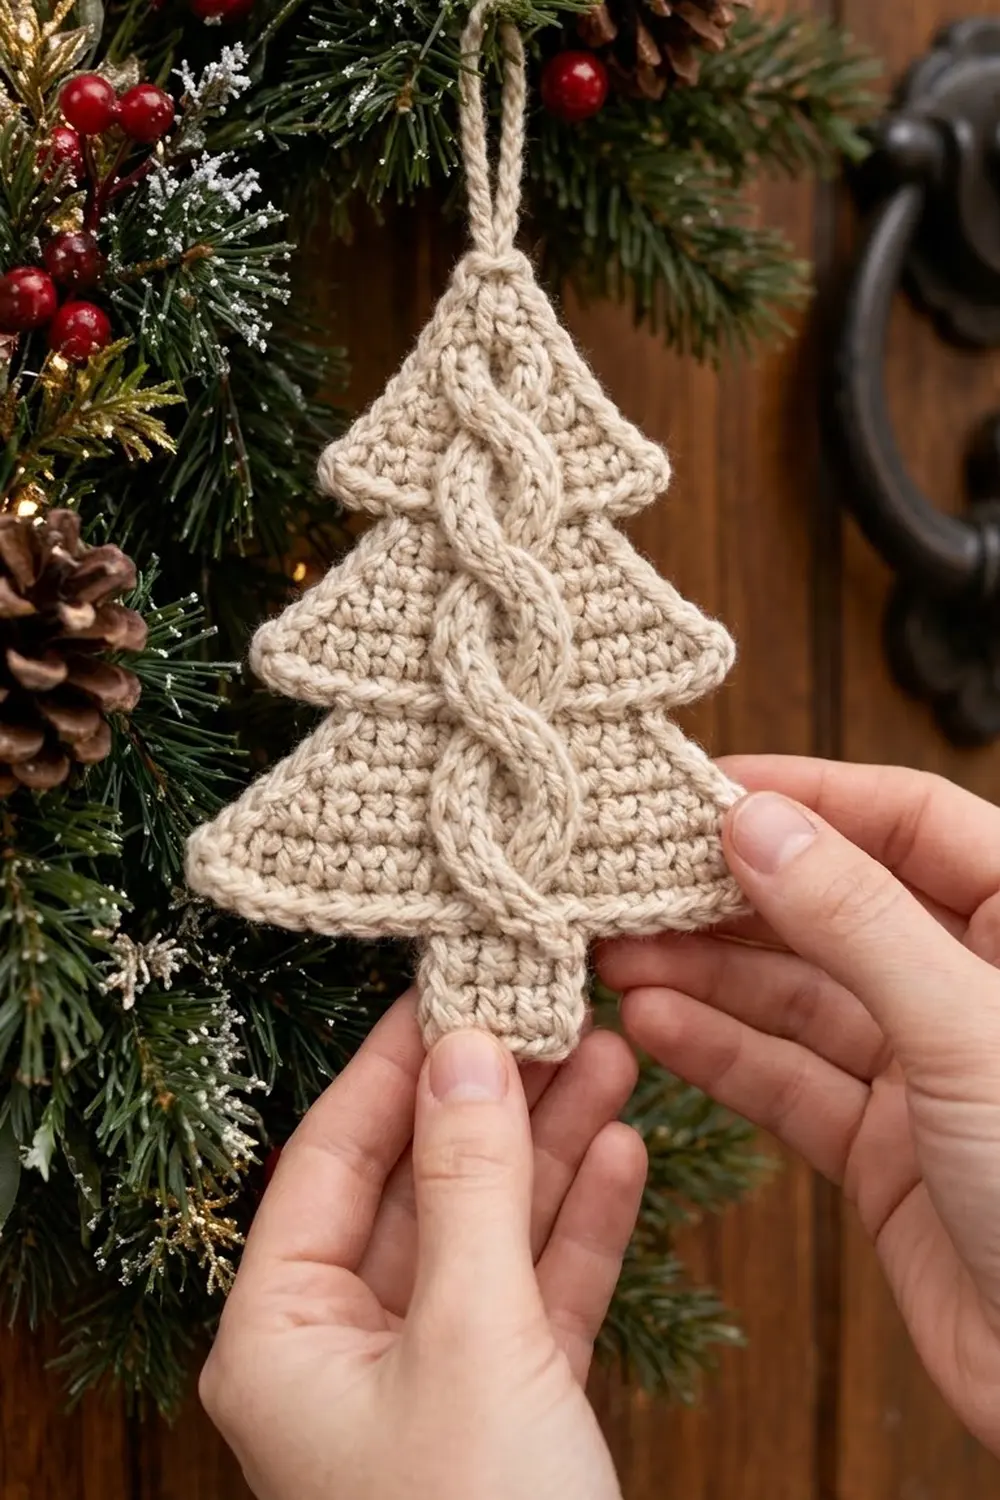
This little tree is a single flat ornament with three stacked tiers. Each tier sits a step wider than the one above it. A rope-like rolled edge runs around every tier, so the layers stand out even in a soft cream yarn. A twisted two-strand cable runs down the center from the tip to the trunk.
The tree is worked in one oatmeal-cream color. The style is cozy and rustic, so it suits a wreath, a door knob, a gift box, or a tree branch. All instructions use US crochet terms.
The finished ornament measures about 5.1 in (13.0 cm) wide and 5.3 in (13.5 cm) tall. The hanging loop adds about 1.6 in (4.1 cm), for a total hanging height of about 6.9 in (17.5 cm).
You work the tree top-down in single crochet rows, starting at the tip:
- Each tier increases at both edges.
- To start the next tier, you slip stitch across a few stitches, so the tier above overhangs the one below.
- Two slip-stitch cords are twisted into a cable and sewn down the center.
- A round of single crochet and a round of reverse single crochet finish the edge.
- A slip-stitched chain loop goes on top.
Finished Size and Construction
- Finished size: 5.1 in x 5.3 in (13.0 cm x 13.5 cm), plus a 1.6 in (4.1 cm) loop
- Skill level: Advanced beginner
- Terminology: US crochet terms
- Yarn weight: Worsted (#4)
- Hook: 3.75 mm (US F-5)
- Number of pieces: 1 tree body, plus 2 cords for the cable
- Layout: Single flat ornament, no joining
- Piece size before border: 4.6 in (11.7 cm) wide x 4.8 in (12.2 cm) tall
- Border depth: about 0.25 in (0.6 cm) on every edge
Materials
Yarn: Use a smooth worsted-weight yarn with good stitch definition. Cotton, a cotton blend, or a firm acrylic will keep the cable crisp. Fuzzy or loosely plied yarn blurs the twist and the rope edge.
- Cream / oatmeal (main color): about 15 g, roughly 30 m (33 yd)
These quantities include a margin for your gauge swatch and for weaving in ends.
Tools:
- 3.75 mm (US F-5) crochet hook
- Tapestry needle
- Scissors
- Rust-proof pins
- Blocking mat or folded towel
- Spray bottle with cool water
- Ruler or measuring tape
Abbreviations (US Terms)
- ch: chain
- sl st: slip stitch
- sc: single crochet
- sc2tog: single crochet 2 together
- rev sc: reverse single crochet (crab stitch)
- st(s): stitch(es)
- RS / WS: right side / wrong side
Special stitch: reverse single crochet (rev sc). If you crochet right-handed, work from left to right:
- Insert the hook in the next stitch to the right.
- Yarn over and pull up a loop.
- Yarn over and pull through both loops.
This makes the twisted, rope-like edge.
Special stitch: sc2tog at an inside corner. Insert the hook in the first spot and pull up a loop. Insert it in the second spot and pull up a loop. Yarn over and pull through all 3 loops.
Gauge and Checkpoints
Gauge: 10 sc x 10 rows = 2 in (5.1 cm) in sc rows. That is 5 sts and 5 rows per inch.
Make a test square before you start. Ch 11, then sc in 2nd ch from hook and in each ch across (10 sc). Work 9 more rows. The square should measure 2 in (5.1 cm) on each side. Ornament fabric should be firm, so it’s fine if it feels a little tight.
Checkpoints (measured flat, before blocking):
- After Row 6 (Tier 1): 2.6 in (6.6 cm) wide, 1.2 in (3.0 cm) tall
- After Row 12 (Tier 2): 3.4 in (8.6 cm) wide, 2.4 in (6.1 cm) tall
- After Row 19 (Tier 3): 4.6 in (11.7 cm) wide, 3.8 in (9.7 cm) tall
- After Row 24 (trunk): 4.8 in (12.2 cm) total height, trunk 1 in (2.5 cm) wide
- Each cord: about 4.6 in (11.7 cm) long
- After the border: 5.1 in x 5.3 in (13.0 cm x 13.5 cm)
Too big? Use a hook 0.25 mm smaller. Too small? Use a hook 0.25 mm larger. Check after Tier 1. A difference of 0.2 in (0.5 cm) there grows to more than 0.4 in (1.0 cm) by the bottom tier.
Tree Body
You work the body top-down in rows and turn at the end of each row. A ch 1 at the start of a row does not count as a stitch.
Tier 1 (Top)
Row 1: Ch 4, sc in 2nd ch from hook and in next 2 ch. Turn. (3 sc)
Row 2: Ch 1, 2 sc in first st, sc in next st, 2 sc in last st. Turn. (5 sc)
Row 3: Ch 1, 2 sc in first st, sc in each st to last st, 2 sc in last st. Turn. (7 sc)
Row 4: Repeat Row 3. (9 sc)
Row 5: Repeat Row 3. (11 sc)
Row 6: Repeat Row 3. (13 sc)
Check: 2.6 in (6.6 cm) wide and 1.2 in (3.0 cm) tall. Each edge steps out 1 st per row, which gives the tier its triangle shape.
Tier 2 (Middle)
Row 7 (step row): Do not ch 1. Sl st in each of first 3 sts, ch 1, sc in next 7 sts, leave last 3 sts unworked. Turn. (7 sc)
Check: 3 sl st + 7 sc + 3 unworked = 13, which matches Row 6. The 3 outer stitches on each side of Row 6 now hang free and form the overhang of Tier 1.
Row 8: Ch 1, 2 sc in first st, sc in each st to last st, 2 sc in last st. Turn. (9 sc)
Row 9: Repeat Row 8. (11 sc)
Row 10: Repeat Row 8. (13 sc)
Row 11: Repeat Row 8. (15 sc)
Row 12: Repeat Row 8. (17 sc)
Check: 3.4 in (8.6 cm) wide and 2.4 in (6.1 cm) total height.
Tier 3 (Bottom)
Row 13 (step row): Do not ch 1. Sl st in each of first 3 sts, ch 1, sc in next 11 sts, leave last 3 sts unworked. Turn. (11 sc)
Check: 3 + 11 + 3 = 17, which matches Row 12.
Row 14: Ch 1, 2 sc in first st, sc in each st to last st, 2 sc in last st. Turn. (13 sc)
Row 15: Repeat Row 14. (15 sc)
Row 16: Repeat Row 14. (17 sc)
Row 17: Repeat Row 14. (19 sc)
Row 18: Repeat Row 14. (21 sc)
Row 19: Repeat Row 14. (23 sc)
Check: 4.6 in (11.7 cm) wide and 3.8 in (9.7 cm) total height.
Trunk
Row 20 (step row): Do not ch 1. Sl st in each of first 9 sts, ch 1, sc in next 5 sts, leave last 9 sts unworked. Turn. (5 sc)
Check: 9 + 5 + 9 = 23, which matches Row 19.
Rows 21–24: Ch 1, sc in each st across. Turn. (5 sc each row)
Fasten off and weave in the tail. The body is 24 rows, or 4.8 in (12.2 cm) tall. The trunk is 1 in (2.5 cm) wide and 1 in (2.5 cm) tall.
Lay the body flat and choose the neater face as the RS. The cable and the border both go on this face.
Center Cable
The cable is two slip-stitch cords crossed over each other to make three oval “eyes,” one centered on each tier.
Cords (make 2)
- Ch 24, leaving a 10 in (25.4 cm) tail.
- Sl st in the back bump of the 2nd ch from hook and of each ch across. (23 sl st)
- Fasten off, leaving another 10 in (25.4 cm) tail.
Each cord should be about 4.6 in (11.7 cm) long and round, like a thin rope. If a cord spirals, roll it between your palms to relax it.
Placing the Cable
- Mark the center stitch column with a pin at Row 2 and at Row 20 (top of the trunk). The straight distance is 18 rows, or 3.6 in (9.1 cm).
- Lay both cords together at Row 2. Tuck about 0.2 in (0.5 cm) of each end under so the ends meet at the center.
- Curve the cords apart until they are about 0.6 in (1.5 cm) apart at the middle of Tier 1. Bring them together at Row 7 and cross them with the left cord on top.
- Make the second eye over Tier 2 the same way. Cross the cords at Row 13 with the right cord on top, so the twist alternates.
- Make the third eye over Tier 3. Bring the ends together at Row 20 and tuck them under at the top of the trunk.
- Pin every 0.4 in (1.0 cm). Thread a cord tail on the tapestry needle and sew each cord down with small stitches through its underside and the top loops of the body. Pull firmly, but don’t pucker the body.
Each eye is about 6 rows tall, so the crossings line up with the tier steps. Weave all tails into the back.
Border
Border gauge: 5 sc per inch along straight edges, the same as the body gauge.
Work the border in rounds with the RS facing. Along each overhang, work into the free tops of the stitches in Rows 6, 12, and 19. On one side of each step, those stitches hold the sl sts from the step row. Work into those sl sts.
Rnd 1: Join yarn with a sl st in the center foundation ch at the top of Row 1. Ch 1 and work 3 sc in the same ch for the tip. Then work down the first side:
- Sc in next foundation ch (1)
- Tier 1 diagonal: 7 sc across the ends of Rows 1–5, with 2 sc in the ends of Rows 2 and 4 (7)
- Tier 1 corner: 3 sc in the outer st of Row 6 (3)
- Overhang: sc in next st (1)
- Inside corner: sc2tog over the next st and the end of Row 7 (1)
- Tier 2 diagonal: 6 sc across the ends of Rows 8–11, with 2 sc in the ends of Rows 9 and 11 (6)
- Tier 2 corner: 3 sc in the outer st of Row 12 (3)
- Overhang: sc in next st (1)
- Inside corner: sc2tog over the next st and the end of Row 13 (1)
- Tier 3 diagonal: 7 sc across the ends of Rows 14–18, with 2 sc in the ends of Rows 15 and 17 (7)
- Tier 3 corner: 3 sc in the outer st of Row 19 (3)
- Overhang: sc in each of next 7 sts (7)
- Inside corner: sc2tog over the next st and the end of Row 20 (1)
- Trunk side: sc in the ends of Rows 21–23 (3)
That gives 45 sts for the first side.
Trunk bottom: 3 sc in the first st of Row 24, sc in next 3 sts, 3 sc in the last st. (9)
Second side: Work up the other side in mirror order:
- 3 trunk sc
- sc2tog
- 7 overhang sc
- 3 corner sc
- 7 diagonal sc
- sc2tog
- 1 overhang sc
- 3 corner sc
- 6 diagonal sc
- sc2tog
- 1 overhang sc
- 3 corner sc
- 7 diagonal sc
- 1 sc in the last foundation ch
That gives 45 sts. Join with a sl st to the first sc.
Rnd 1 total: 3 (tip) + 45 + 9 (trunk) + 45 = 102 sc
Rnd 2: Ch 1, rev sc in each st around. Join with a sl st to the first rev sc. (102 rev sc) Fasten off and weave in the ends.
Why the math works:
- Diagonals: Each row steps out 0.2 in (0.5 cm) and down 0.2 in (0.5 cm), so a diagonal edge is about 1.4 times longer than a straight one. About 3 sc for every 2 row ends (7 sc over 5 rows, 6 sc over 4 rows) matches that extra length.
- Outer corners: 3 sc in each outer corner give the edge room to turn.
- Inside corners: The sc2tog removes the stitch that would otherwise bunch up where an overhang meets the tier below.
- Rnd 2: Rev sc goes 1 per st, so it keeps all 102 sts and adds the rope edge without changing the shape.
Hanging Loop
- Join yarn with a sl st in the center rev sc at the tip.
- Ch 16, then sl st in the same st to form a loop.
- Sl st in each ch around the loop. (16 sl st)
- Sl st in the tip st again and fasten off.
The 16 ch measure about 3.2 in (8.1 cm), so the folded loop stands about 1.6 in (4.1 cm) tall.
Final Blocking
- Lay the ornament RS up on a blocking mat or folded towel.
- Mist it with cool water until it is damp but not soaked.
- Pin the tip, the six outer tier corners, and the four trunk corners.
- Check the size: 5.1 in (13.0 cm) across Tier 3 and 5.3 in (13.5 cm) from tip to trunk bottom.
- Press each overhang flat over the tier below it.
- Shape the cable eyes so each one is about 0.6 in (1.5 cm) wide.
- Let the ornament dry completely, at least 6 hours, before you unpin it.
- Straighten the loop so it stands upright.
Final Quality-Control Checklist
- Stitch counts: Row 6 = 13 sts, Row 12 = 17, Row 19 = 23, trunk = 5
- Body is 4.6 in x 4.8 in (11.7 cm x 12.2 cm) before the border
- Both cords are about 4.6 in (11.7 cm) long and sewn down securely
- Crossings sit at Rows 7 and 13, with a different cord on top at each crossing
- Rnd 1 has 102 sc, and Rnd 2 has 102 rev sc
- Tier edges lie flat with no ruffling or cupping
- Finished size is 5.1 in x 5.3 in (13.0 cm x 13.5 cm)
- Loop is centered and firmly attached
- All ends are woven in on the WS
Troubleshooting
Diagonal edges ruffle: There are too many border stitches. Work exactly 7 sc over 5 row ends.
Diagonal edges pull in: The border is too tight. Use a hook 0.25 mm larger for Rnd 1 only.
Overhangs curl upward: Steam them lightly and pin them flat while they dry.
Inside corners look bulky: Work a sc2tog at each inside corner, not 2 separate sc.
Rev sc edge looks flat: Pull each loop up a little taller before you finish the stitch.
Cable eyes are uneven: Unpin, measure 6 rows per eye, and pin again before sewing.
Body cups at the tip: Your tension is too tight for the hook. Check your gauge again.
Care
Hand wash in cool water with mild soap, press the water out in a towel, and dry flat. Store the ornament flat or hanging so the tiers keep their shape.
Final Notes
Here is the measurement chain:
- Gauge is 5 sts and 5 rows per inch.
- Tier 1 grows to 2.6 in (6.6 cm), Tier 2 to 3.4 in (8.6 cm), and Tier 3 to 4.6 in (11.7 cm).
- The trunk brings the body to 4.8 in (12.2 cm) tall.
- Two 4.6 in (11.7 cm) cords fill the 3.6 in (9.1 cm) center line with three eyes.
- The 102-stitch border adds 0.25 in (0.6 cm) all around, for a finished size of 5.1 in x 5.3 in (13.0 cm x 13.5 cm).
Check each checkpoint as you go, and your tree will match.
Happy crocheting!