

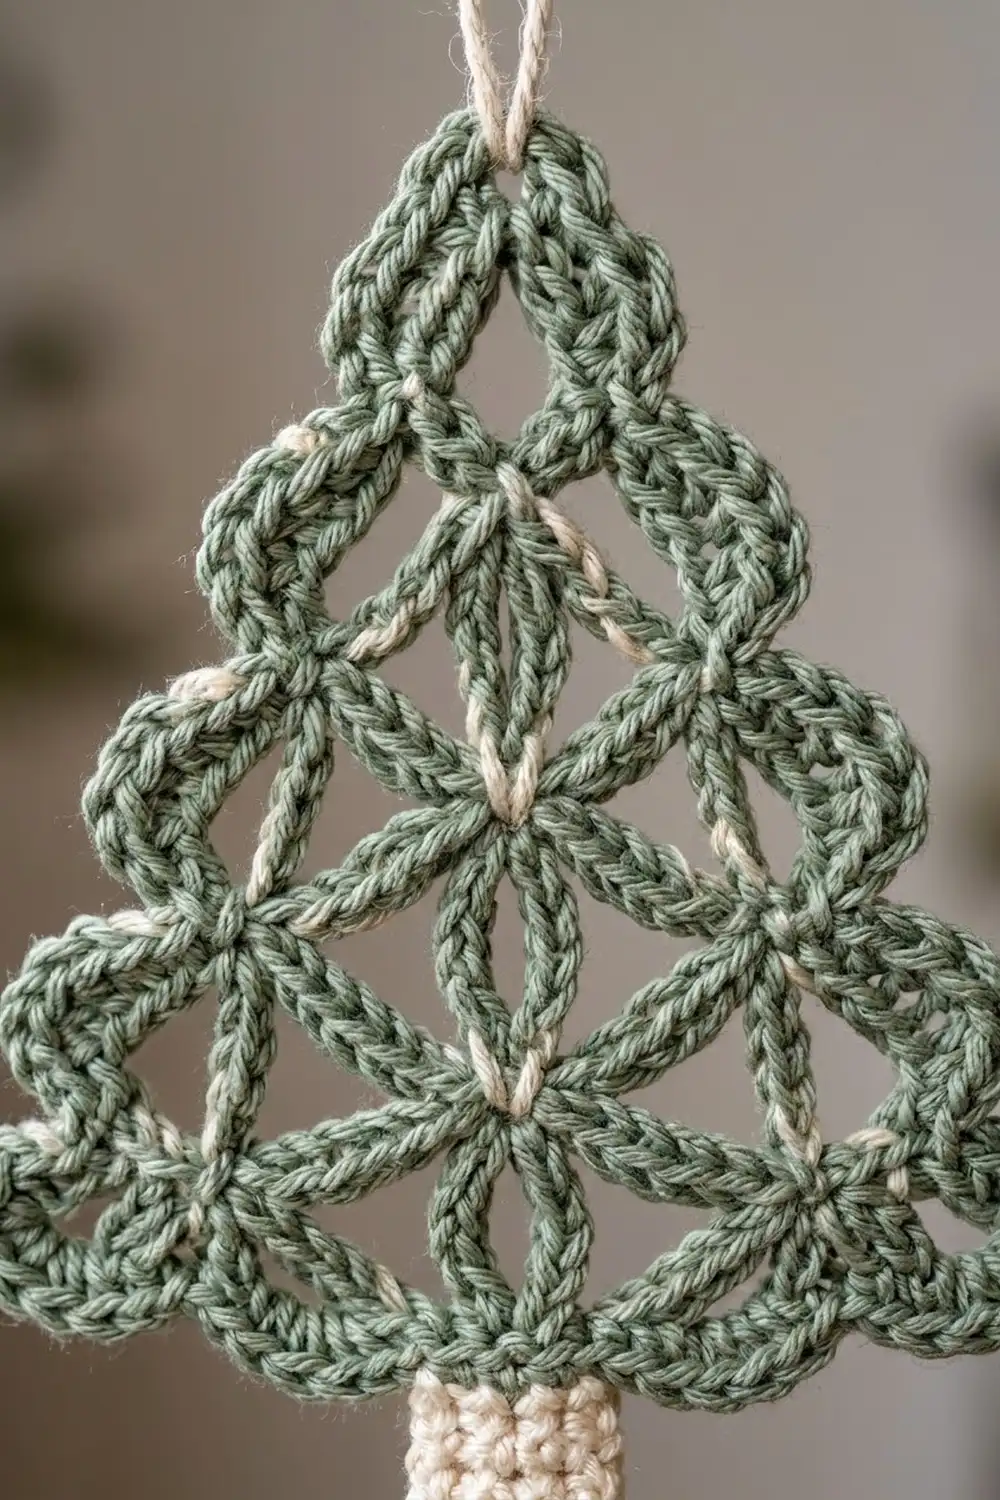
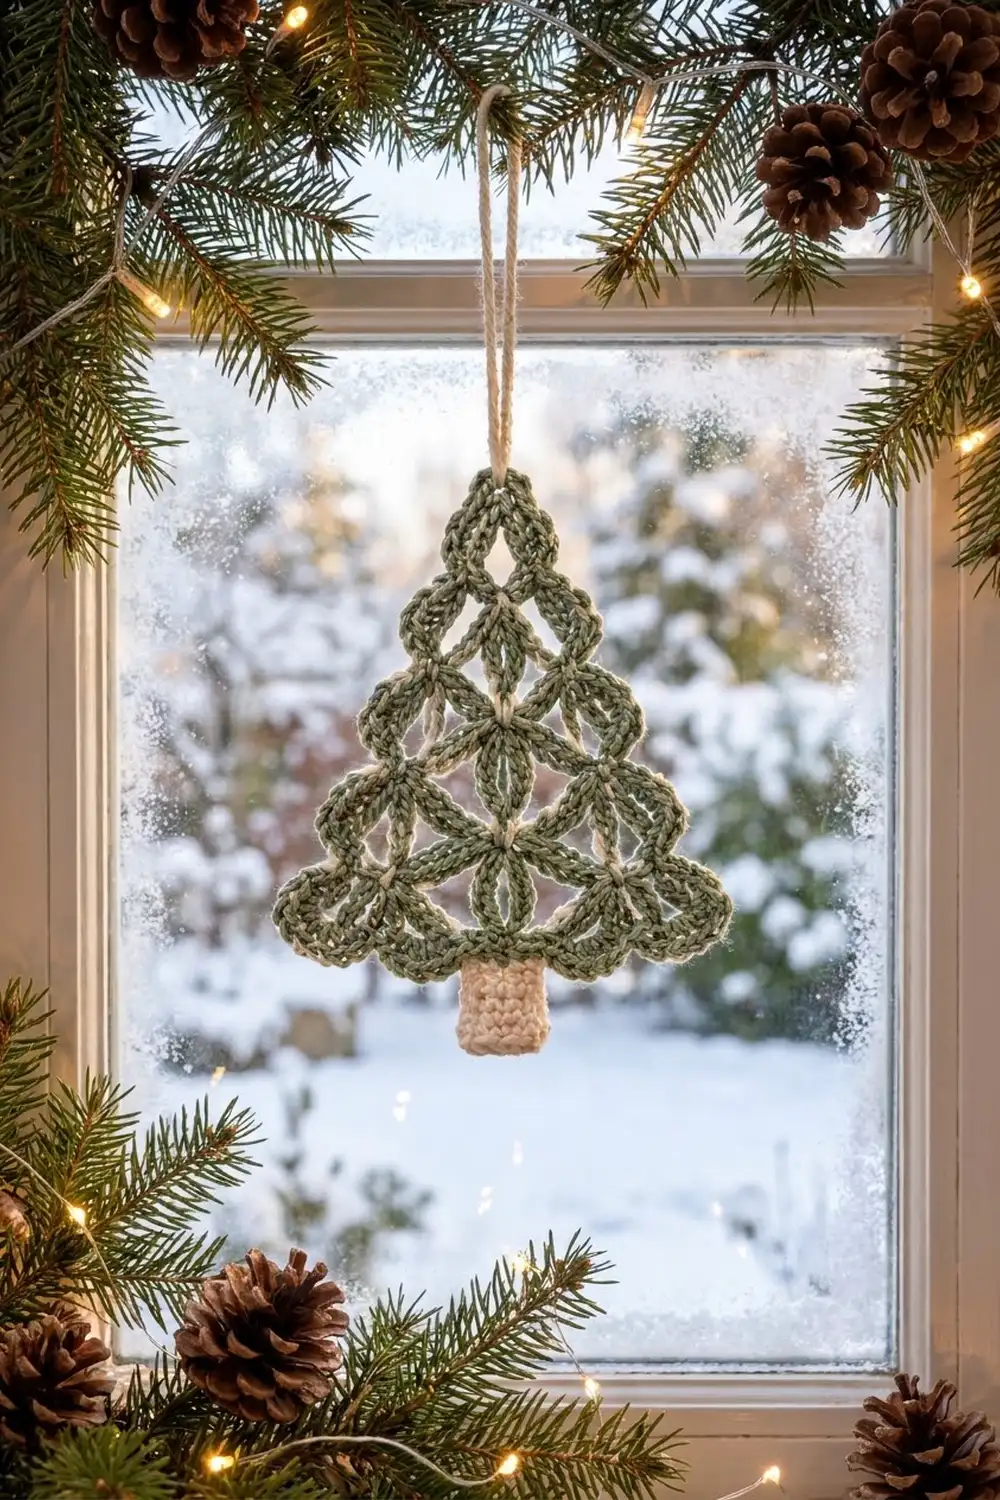
This lacy little tree is made from a simple chain-loop lattice. Rows of chain-5 arches stack into long diamonds, and every anchoring single crochet becomes a tiny star where four arches meet. When the ornament hangs, light shows through the openings, so it looks great in a window or on a tree.
The palette is soft and wintry: sage green for the tree and cream for the trunk. A thick single-crochet outline frames the lattice and gives the tree a clear silhouette with three stepped tiers. A row of small scallops finishes the bottom hem.
The pattern uses US crochet terms. The finished tree measures 5.8 in (14.7 cm) wide by 5.8 in (14.7 cm) tall. With the trunk, the total height is 6.8 in (17.3 cm), not counting the hanging loop.
Construction is simple. You work the tree flat from the bottom up in net rows that decrease to a point, with two “step” rows that create the tiers. Then you work a two-round border all the way around, adding the scallops and the hanging loop in the last round. Finally, you crochet a small cream trunk and sew it to the back.
Finished Size and Construction
- Finished size: 5.8 in x 5.8 in (14.7 cm x 14.7 cm) for the tree; 6.8 in (17.3 cm) tall with trunk
- Skill level: Easy-intermediate
- Terminology: US
- Yarn weight: DK (light worsted, #3)
- Hook: 3.5 mm (E-4)
- Number of pieces: 1 ornament (tree body plus a small trunk sewn on)
- Layout: single standalone tree, three stepped tiers
- Body size before border: 5.2 in (13.2 cm) wide x 5.0 in (12.7 cm) tall
- Border depth: 0.3 in (0.8 cm) on the sides and apex; 0.5 in (1.3 cm) at the scalloped bottom
- Trunk: 1.2 in x 1.5 in (3.0 cm x 3.8 cm), with 1 in (2.5 cm) showing below the tree
Materials
Choose a smooth DK cotton or cotton blend. Cotton gives the chain arches crisp definition and holds its shape when blocked. Fuzzy yarns blur the lattice, so avoid them.
- Sage green: 12 g, about 29 m (32 yd)
- Cream: 3 g, about 7 m (8 yd)
Quantities include a margin for a gauge test and weaving in ends.
Tools:
- 3.5 mm (E-4) crochet hook
- Tapestry needle
- Scissors
- Rust-proof pins and a blocking mat or folded towel
- Spray bottle
- Optional: 10 in (25.4 cm) of cream twine to use as a hanger instead of the chain loop
Abbreviations (US Terms)
- ch – chain
- sl st – slip stitch
- sc – single crochet
- dc – double crochet
- sk – skip
- st(s) – stitch(es)
- RS / WS – right side / wrong side
- loop – a ch-5 arch from the previous row
Special stitch – shell: 3 dc in the same stitch.
Net-row start: Turn, sl st in each of the first 3 ch of the first loop, ch 1, then work the first sc in that same loop. This moves the edge inward by half a loop, which keeps the sides diagonal.
Gauge and Checkpoints
Net gauge: In Row 1, the distance from one anchoring sc to the next is 0.4 in (1.0 cm). That means 13 loops measure 5.2 in (13.2 cm). Each net row adds 0.5 in (1.3 cm) of height when the piece hangs or is lightly pinned.
Sc gauge (trunk and border): 5 sc and 6 rows = 1 in (2.5 cm).
Test before committing: work the foundation and Rows 1–3, then pin the piece flat without stretching it.
- After Row 1: 5.2 in (13.2 cm) from the first sc to the last sc.
- After Row 3: 4.4 in (11.2 cm) wide, 1.5 in (3.8 cm) tall.
- After Row 6: 2.4 in (6.1 cm) wide, 3.0 in (7.6 cm) tall.
- After Row 10: 5.0 in (12.7 cm) tall.
- After the border: 5.8 in x 5.8 in (14.7 cm x 14.7 cm).
If Row 1 is wider than 5.4 in (13.7 cm), go down to a 3.25 mm hook. If it’s narrower than 5.0 in (12.7 cm), go up to a 3.75 mm hook. If the width is right but the rows are short, your chain-5 arches are too tight. Loosen only the chains, not the sc.
Tree Body
Use sage green. The sc count drops by 1 on normal net rows and by 3 on step rows. The loop count is always one less than the sc count.
Foundation: Ch 41.
Row 1 (RS): Sc in 2nd ch from hook, ch 5, sk 2 ch, sc in next ch; repeat from * 12 more times. (14 sc, 13 loops)*
The 2-ch gaps under each arch matter. Keeping the base short while the arches are long is what stretches each opening into a tall diamond.
Row 2: Net-row start, ch 5, sc in next loop; repeat from * across. (13 sc, 12 loops)*
Row 3: Repeat Row 2. (12 sc, 11 loops)
Checkpoint: Tier 1 is complete, 4.4 in (11.2 cm) across the top sc and 1.5 in (3.8 cm) tall.
Row 4 (step row): Turn, sl st in each of the 5 ch of the first loop, sl st in next sc, sl st in each of the first 3 ch of the 2nd loop, ch 1, sc in same loop. Ch 5, sc in next loop; repeat from * until you have worked into the 10th loop. Leave the 11th loop unworked. (9 sc, 8 loops)*
Skipping the first and last loop pulls the edge in by a full loop on each side. This makes the visible ledge between tiers. Width is now 3.2 in (8.1 cm).
Row 5: Repeat Row 2. (8 sc, 7 loops)
Row 6: Repeat Row 2. (7 sc, 6 loops)
Checkpoint: 2.4 in (6.1 cm) wide, 3.0 in (7.6 cm) tall.
Row 7 (step row): Work as for Row 4, into the 2nd through 5th loops only, leaving the 6th loop unworked. (4 sc, 3 loops) Width is now 1.2 in (3.0 cm).
Row 8: Repeat Row 2. (3 sc, 2 loops)
Row 9: Repeat Row 2. (2 sc, 1 loop)
Row 10 (apex): Net-row start, so the single sc sits in the only loop. (1 sc) Fasten off.
Checkpoint: 5.0 in (12.7 cm) tall from the foundation to the apex sc. The tiers have 3, 3, and 4 rows from bottom to top.
Border
The border is worked in sage green with the RS facing. It has 2 rounds. Border gauge is the sc gauge: about 5 sc per 1 in (2.5 cm) along the edges.
Edge segments (per side, bottom to top):
- Rows 1, 2, 4, 5, 7, 8, and 9: the outer half of each edge loop is exposed. Work 3 sc along each one, which gives 7 x 3 = 21 sc.
- Rows 3 and 6: these are the ledges left by the step rows, made of a full skipped loop plus the sl sts. Work 6 sc evenly along each ledge, which gives 2 x 6 = 12 sc.
- That’s 33 sc per side, not counting the corners.
Round 1: Join with a standing sc in the Row 10 apex sc, then work 2 more sc in the same st (apex group: 3 sc). Working down Side A, sc 33 along the edge segments as listed. At the bottom corner, work 3 sc in the base ch under the first sc of Row 1 (corner A: 3 sc). Now work along the underside of the foundation: sc in next 2-ch gap, sc in next base ch; repeat from * 11 more times, then sc in the last gap (25 sc). Work 3 sc in the final base ch (corner B: 3 sc)*. Sc 33 up Side B. Join with sl st to the first sc.
Round 1 count: 3 + 33 + 3 + 25 + 3 + 33 = 100 sc.
The bottom has 13 gaps and 12 middle base chains, which makes the 25 sc. That works out to about 5 sc per inch across 5.2 in (13.2 cm), so the hem lies flat.
Round 2: Ch 1, sc in the first sc (apex 1). In the apex center sc, work (sc, ch 16, sc). This is the hanging loop. Sc in apex 3. Sc in each of the next 33 sts down Side A. Sc in corner A1, then sc in corner A center. Scallops: *sk 1, shell in next st, sk 1, sc in next st; repeat from * 6 more times. The last sc lands in the corner B center. Sc in corner B3. Sc in each of the 33 sts up Side B. Join with sl st to the first sc. Fasten off.
Round 2 count: 80 sc, 7 shells (21 dc), 1 ch-16 hanging loop.
Why the math works: Round 2 uses all 100 Round 1 sts: 3 (apex) + 33 + 2 (corner A1 and center) + 28 (7 scallop repeats x 4 sts) + 1 (corner B3) + 33 = 100. The scallops start and end on a corner center, covering 29 sts. Since 29 = 7 x 4 + 1, the 7 shells fit with no leftover sts. The 3-sc corner groups in Round 1 already make the turn, so Round 2 needs no extra corner increase.
The 80 sc break down as 4 at the apex (including the 2 that form the loop), 66 on the sides, 2 at corner A, 7 scallop anchors, and 1 at corner B.
Trunk
Use cream.
Foundation: Ch 7.
Row 1: Sc in 2nd ch from hook and in each ch across. (6 sc)
Rows 2–9: Ch 1, turn, sc in each sc across. (6 sc)
Fasten off, leaving a 10 in (25.4 cm) tail for sewing. The trunk should measure 1.2 in (3.0 cm) wide by 1.5 in (3.8 cm) tall.
Attaching: Find the 4th (middle) shell of the bottom scallops. Place the trunk on the WS of the tree, centered under that shell, so its top edge lines up with the foundation chain. The top 0.5 in (1.3 cm) of the trunk sits hidden behind the border, and 1 in (2.5 cm) shows below the scallops. Whipstitch the top edge to the foundation chain and the trunk’s sides to the back of Round 1. Keep the stitches invisible from the RS.
Final Blocking
- Weave in all ends along the border on the WS. Don’t weave through the open lattice.
- Spray the ornament until it is evenly damp.
- Lay it RS up on the mat. Pin the apex and both bottom corners so the tree is 5.8 in (14.7 cm) wide and 5.8 in (14.7 cm) tall.
- Pin the 2 ledges at each tier step so they sit level and symmetrical.
- Gently open each diamond by easing the arches upward with your fingers. You can pin the center of the longest arches if needed.
- Pin the tip of each scallop so the hem curves evenly.
- Square the trunk and pin it straight below the center shell.
- Let it dry completely before unpinning.
Final Quality-Control Checklist
- Row stitch counts were 14, 13, 12, 9, 8, 7, 4, 3, 2, 1 sc.
- The body measures 5.2 in x 5.0 in (13.2 cm x 12.7 cm) before the border.
- Round 1 has exactly 100 sc, with 33 on each side and 25 along the bottom.
- There are 7 even scallops along the bottom.
- The three tiers are mirror images on the left and right.
- The finished tree is 5.8 in x 5.8 in (14.7 cm x 14.7 cm).
- The trunk is centered under the 4th shell with 1 in (2.5 cm) showing.
- The hanging loop sits exactly at the apex.
Troubleshooting
The bottom edge ruffles. You probably worked more than one sc into the 2-ch gaps. Rework the bottom with exactly 25 sc between the corner groups.
The bottom edge pulls in. Your border sc is tighter than your foundation chain. Go up half a hook size for Round 1 only.
The tiers look lopsided. One step row probably skipped the wrong loop on one side. In Row 4 you should have 8 loops, and in Row 7 you should have 3 loops. Recount and rip back if needed.
The diamonds look like flat rectangles. Your chain-5 arches are too tight, or the piece needs blocking. Loosen the chains, or pin the arches upward while the piece is damp.
The scallops don’t come out even. Check that Round 1 has exactly 3 + 25 + 3 sts across the bottom. The scallops need 29 sts from corner center to corner center.
The ornament tilts when it hangs. The hanging loop is off-center, or the trunk is heavier on one side. Re-anchor the loop at the apex center sc.
Care
Hand wash in cool water with a mild soap, press out the water in a towel, and re-block to size while damp. Store flat or hanging so the lattice doesn’t crush.
Final Notes
The measurement chain is short and easy to check. Row 1 sets the 5.2 in (13.2 cm) width with 14 sc and 13 loops. The net rows and step rows bring the body to 5.0 in (12.7 cm) tall in three tiers. Border Round 1 locks in 100 sc, Round 2 turns 29 bottom sts into 7 scallops, and the tree finishes at 5.8 in x 5.8 in (14.7 cm x 14.7 cm). The cream trunk adds 1 in (2.5 cm), for a total height of 6.8 in (17.3 cm). Check each number as you go, and your tree will hang straight and symmetrical.
Happy crocheting!