

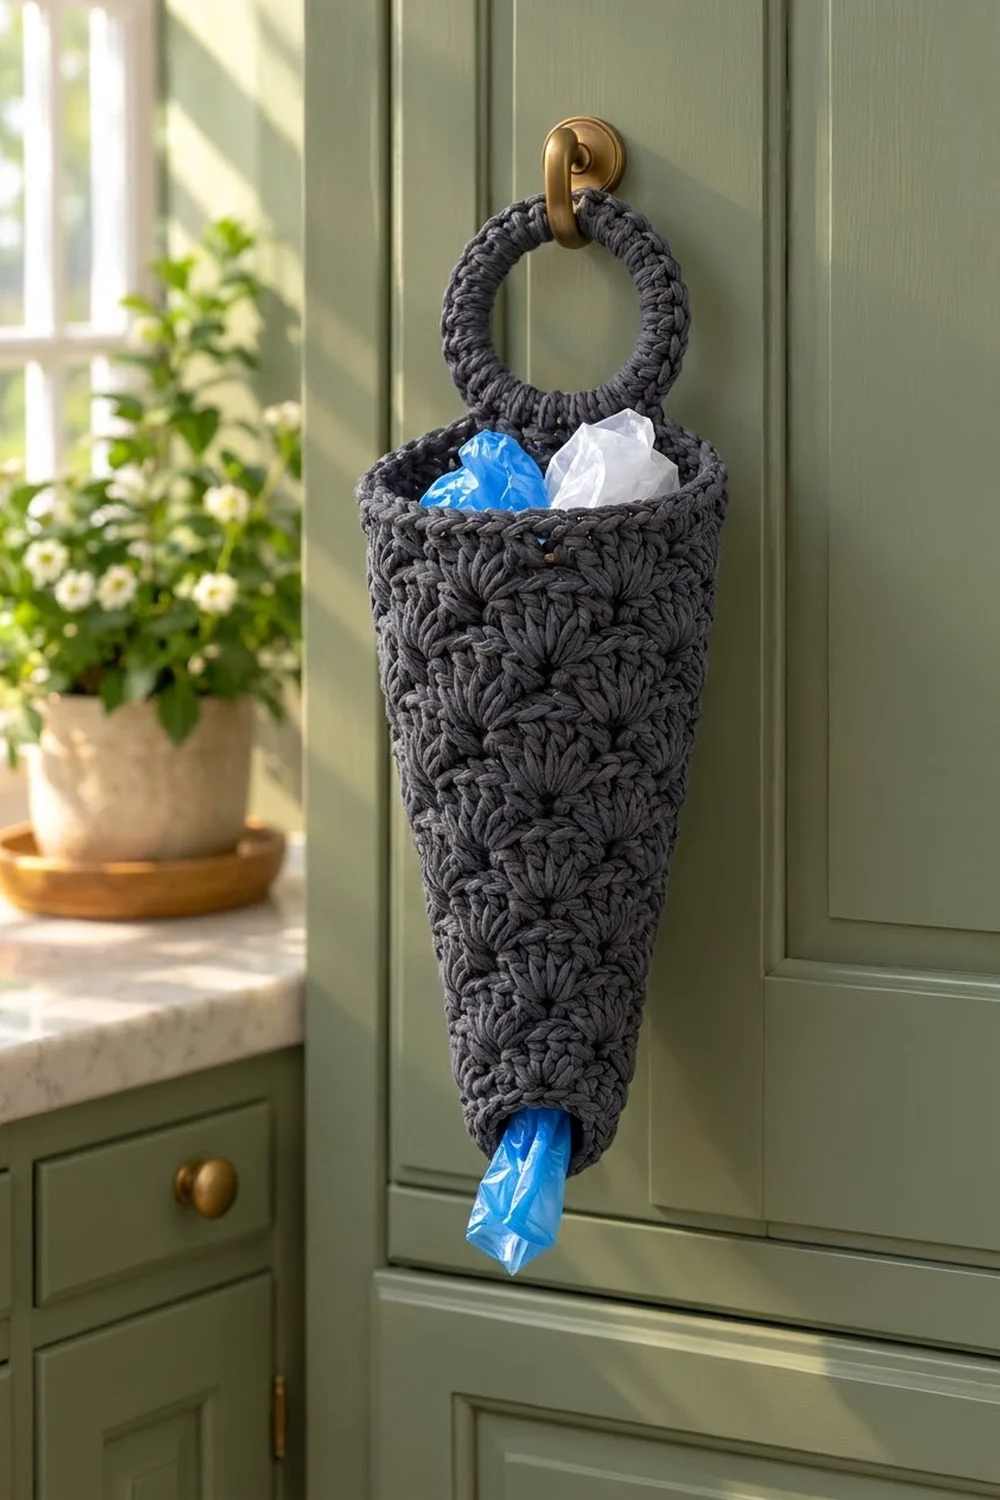
The Charcoal Cascade Plastic Bag Holder is a tapered shell-stitch dispenser that keeps loose grocery bags tidy. You stuff bags in through the wide top and pull them out one at a time through the small opening at the bottom. A round hanging ring at the back slips over a cabinet knob, door hook or pantry peg.
The holder is worked in one solid color, a deep charcoal gray. A single dark shade makes the shell texture stand out and hides everyday handling marks. The style is simple and modern, and it suits a farmhouse or neutral kitchen.
This pattern uses US crochet terms. The finished holder measures about 15.6 in (39.6 cm) from the bottom opening to the top rim. The hanging ring adds another 3 in (7.6 cm) above the rim, for a total hanging length of about 18.6 in (47.2 cm). Laid flat, the top is about 6.75 in (17.1 cm) wide.
Construction is simple. You start at the bottom opening and work upward in joined rounds without turning. The cone shape comes from changing shell size, not from adding more shells: you start with 3-dc shells, move to 5-dc shells and finish with 7-dc shells. Every round has exactly 6 shells. A single crochet rim levels the top, and the hanging ring is covered with stitches and attached in one continuous step.
Finished Size and Construction
- Finished size: 15.6 in (39.6 cm) tall body; 6.75 in (17.1 cm) flat width at the top; bottom opening about 2.2 in (5.6 cm) across
- Total hanging length: about 18.6 in (47.2 cm) including the ring
- Skill level: Easy / Advanced Beginner
- Terminology: US crochet terms
- Yarn weight: Worsted (#4), cotton or cotton blend
- Hook: 5.0 mm (H-8)
- Number of pieces: 1 (the body, with the ring attached as you go; no sewing pieces together)
- Layout: a single tapered tube that hangs vertically
- Body height before border: about 14.4 in (36.6 cm)
- Border depth: a 4-round top rim, 1.25 in (3.2 cm) deep, plus a slip stitch edge at the bottom that adds no height
Materials
Yarn: Use a smooth worsted-weight cotton or cotton blend. Cotton holds the cone shape and doesn’t stretch out when the holder is packed with bags. Avoid fuzzy or very stretchy acrylics, which blur the shell texture.
- Charcoal Gray: 110 g, about 210 m (230 yd)
This amount includes a safety margin of roughly 15–20% for gauge differences and the gauge test piece.
Tools:
– 5.0 mm (H-8) crochet hook
– One 3 in (7.6 cm) metal or plastic ring (a macramé ring or a sturdy bangle-style ring)
– 4 stitch markers
– Tapestry needle
– Scissors
– Measuring tape
– Spray bottle and a rolled towel for blocking
Abbreviations (US Terms)
- ch – chain
- sl st – slip stitch
- sc – single crochet
- hdc – half double crochet
- dc – double crochet
- st(s) – stitch(es)
- sk – skip
- rnd – round
- rep – repeat
Special stitch: Shell. Work the stated number of dc (3, 5 or 7) into the same stitch. The center dc of a shell is the middle stitch: the 2nd dc of a 3-dc shell, the 3rd dc of a 5-dc shell, and the 4th dc of a 7-dc shell.
Gauge and Checkpoints
Single crochet gauge: 14 sc and 13 rnds = 4 in (10.2 cm).
Shell gauge:
– 8 shell rnds = 5 in (12.7 cm) tall, so 1 shell rnd = 0.625 in (1.6 cm)
– One 3-dc repeat (sc + shell) = 1.25 in (3.2 cm) wide
– One 5-dc repeat = 1.75 in (4.4 cm) wide
– One 7-dc repeat = 2.25 in (5.7 cm) wide
Test piece first: Work Rounds 1–8 as your gauge test. This is the start of the real holder, so if it measures correctly you just keep going.
Checkpoints (measured flat, without stretching):
– After Rnd 2: flat width about 3.4 in (8.6 cm); height 0.625 in (1.6 cm)
– After Rnd 8: flat width 3.75 in (9.5 cm); height about 4.4 in (11.2 cm)
– After Rnd 16: flat width 5.25 in (13.3 cm); height about 9.4 in (23.9 cm)
– After Rnd 24: flat width 6.75 in (17.1 cm); height about 14.4 in (36.6 cm)
– After Rnd 28: height about 15.6 in (39.6 cm)
If your piece is too big: go down to a 4.5 mm hook. If it’s too small: go up to a 5.5 mm hook. A difference of 0.25 in (0.6 cm) in flat width at Rnd 8 grows to about 0.5 in (1.3 cm) at the top, so fix it early.
Body
Work in joined rounds with the right side facing you the whole time. Do not turn. The beginning ch 1 never counts as a stitch. Slip stitches used to move to the start of a round don’t count either.
Foundation: Ch 24, then sl st into the first ch to form a ring, taking care not to twist the chain.
Rnd 1: Ch 1, sc in each ch around, then join with a sl st to the first sc. (24 sc)
Rnd 2: Ch 1, sc in each st around, join. (24 sc)
This is the bottom opening: 24 sc make a circumference of about 6.9 in (17.5 cm).
Section 1: 3-dc Shells (Rounds 3–8)
Rnd 3 (setup): Ch 1, sc in the first st, sk 1, 3 dc in the next st, sk 1, sc in the next st. Rep from * 4 more times, then sk 1, 3 dc in the next st, sk 1, and join to the first sc. (6 shells + 6 sc = 24 sts)
Rnds 4–8: Sl st in the next 2 sts to reach the center dc of the first shell. Ch 1, sc in the same st, then 3 dc in the next sc, sc in the center dc of the next shell. Rep from * 4 more times, then 3 dc in the last sc and join to the first sc. (24 sts each round)
Each new shell sits on top of the sc below it, and each sc sits on the center of the shell below. This staggered placement creates the fan columns. The circumference is now 7.5 in (19.1 cm).
Checkpoint: flat width 3.75 in (9.5 cm), height about 4.4 in (11.2 cm).
Section 2: 5-dc Shells (Rounds 9–16)
Rnd 9 (growth round): Sl st in the next 2 sts to reach the center dc of the first 3-dc shell. Ch 1, sc in the same st, then 5 dc in the next sc, sc in the center dc of the next shell. Rep from * 4 more times, then 5 dc in the last sc and join. (6 shells of 5 dc + 6 sc = 36 sts)
Rnds 10–16: Sl st in the next 3 sts to reach the center dc. Ch 1, sc in the same st, then 5 dc in the next sc, sc in the center dc of the next shell. Rep from * 4 more times, then 5 dc in the last sc and join. (36 sts each round)
The circumference is now 10.5 in (26.7 cm).
Checkpoint: flat width 5.25 in (13.3 cm), height about 9.4 in (23.9 cm).
Section 3: 7-dc Shells (Rounds 17–24)
Rnd 17 (growth round): Sl st in the next 3 sts to reach the center dc of the first 5-dc shell. Ch 1, sc in the same st, then 7 dc in the next sc, sc in the center dc of the next shell. Rep from * 4 more times, then 7 dc in the last sc and join. (6 shells of 7 dc + 6 sc = 48 sts)
Rnds 18–24: Sl st in the next 4 sts to reach the center dc. Ch 1, sc in the same st, then 7 dc in the next sc, sc in the center dc of the next shell. Rep from * 4 more times, then 7 dc in the last sc and join. (48 sts each round)
The circumference is now 13.5 in (34.3 cm).
Checkpoint: flat width 6.75 in (17.1 cm), height about 14.4 in (36.6 cm). This is the size before the border.
Height check: Rnds 1–2 add 0.625 in (1.6 cm), and the 22 shell rounds (Rnds 3–24) add 22 × 0.625 = 13.75 in (34.9 cm), for a total of about 14.4 in (36.6 cm).
Border
Border gauge: 14 sc = 4 in (10.2 cm), the same as the body’s sc gauge.
When the holder is flattened, each round splits into a front “side” and a back “side.” The body is a tube with no corners, so no corner stitches are added anywhere.
Top Rim
Rnd 25 (leveling / conversion round): Do not sl st across. Ch 1, hdc in the same sc as the join, then sc in each of the next 7 dc, hdc in the next sc. Rep from * 4 more times, then sc in each of the last 7 dc and join to the first hdc.
Count: 48 stitches worked 1 per existing stitch (42 sc + 6 hdc) + 0 extra = 48 sts, which is 24 per flattened side.
The hdc fill the low dips between the shell tops, so the rim starts level.
Rnds 26–28: Ch 1, sc in each st around, join. (48 sc each round; 24 per side)
Why the math works: 48 sc ÷ 3.5 sc per inch = 13.7 in (34.8 cm) of circumference, which is almost exactly the 13.5 in (34.3 cm) of the 7-dc section. The rim neither ruffles nor pulls in, and it lies 6.75–7 in (17.1–17.8 cm) wide when flat. The four rim rounds add 1.25 in (3.2 cm), bringing the body to about 15.6 in (39.6 cm).
Do not fasten off.
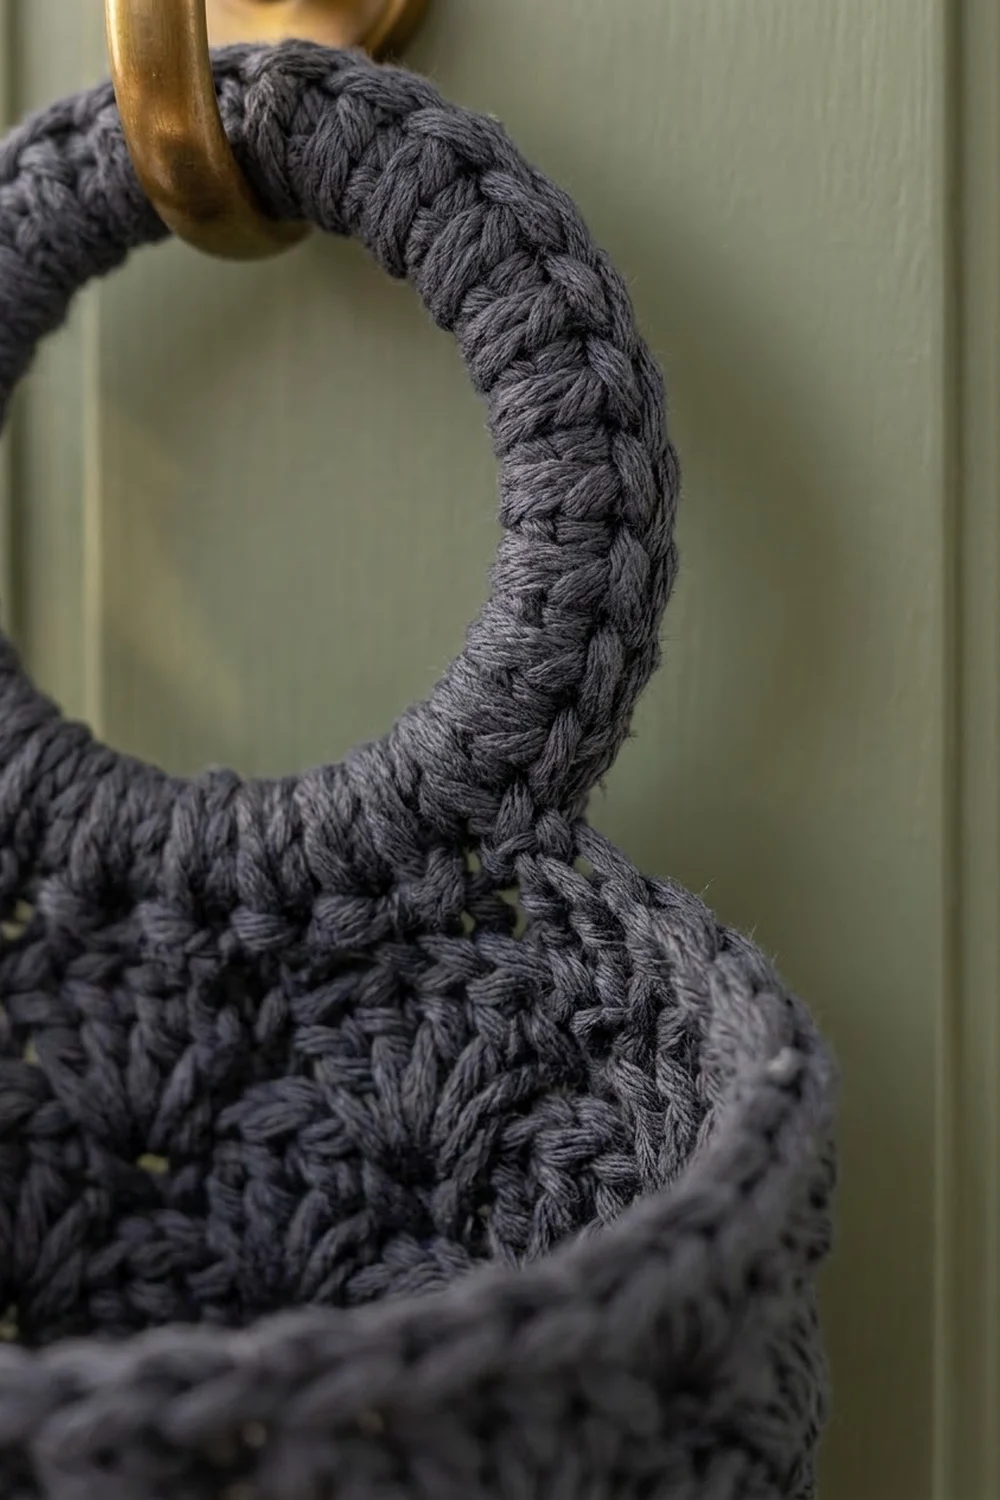
Hanging Ring (attached as part of the rim)
- Flatten the holder so the join of each round runs along one side fold. Find the center of the back side, which is the 12th of its 24 rim stitches, and place markers in the 3 stitches on each side of that center line, so 6 stitches are marked.
- Sl st along Rnd 28 to the first marked stitch.
- Hold the ring behind the back rim so its lower edge overlaps the rim by 0.75 in (1.9 cm).
- Insert the hook through the center of the ring, yarn over, pull up a loop and finish a sc around the ring. Repeat to work 44 sc around the ring, packing them tightly so no ring shows.
- Sl st into the last marked rim stitch. Fasten off and leave a 12 in (30.5 cm) tail.
- With the tapestry needle, sew the lowest 6 ring sc to the 6 marked rim stitches, going through both layers twice for strength. Weave in the end.
The covered ring measures about 3.75 in (9.5 cm) across and rises 3 in (7.6 cm) above the rim.
Bottom Edge
Turn the holder upside down. Join the yarn to the free loop of any foundation chain. Sl st loosely in each of the 24 free loops around, then join. (24 sl st; 12 per flattened side) Fasten off with an 8 in (20.3 cm) tail and weave it in.
This round firms up the opening so it holds its shape after bags are pulled through it many times, and it adds no measurable height.
Final Blocking
- Weave in all remaining ends along the inside of the shell columns.
- Mist the whole holder with water until it is damp but not soaked.
- Roll a towel into a cone, or use a cone of rolled cardboard, and slide it inside so the holder is gently filled out.
- Shape the body to 6.75 in (17.1 cm) flat width at the top and 3.4 in (8.6 cm) at the bottom, with a smooth taper between them.
- Line up the shell columns so they run straight from bottom to top.
- Lay the ring flat and round, with its center 1.9 in (4.8 cm) above the top edge of the rim.
- Let it dry completely, at least 24 hours, before removing the form.
Final Quality-Control Checklist
- Every round has exactly 6 shells.
- Stitch counts are 24 (Rnds 1–8), 36 (Rnds 9–16), 48 (Rnds 17–28) and 24 sl st at the bottom edge.
- The shell columns stack and stagger evenly with no doubled or missing fans.
- The rim is level all the way around, with no dips at the hdc points.
- The body is about 15.6 in (39.6 cm) tall and about 6.75 in (17.1 cm) wide at the top.
- The ring is fully covered, centered on the back and stitched securely through 6 rim stitches.
- The bottom opening is about 2.2 in (5.6 cm) across and lets a bag pass through smoothly.
- All ends are woven in invisibly.
Troubleshooting
The shell columns slant in a spiral. You are landing in the wrong stitch at the start of each round. Count the sl sts carefully: 2 in front of 3-dc shells, 3 in front of 5-dc shells, and 4 in front of 7-dc shells.
The stitch count is off by 2 or 4. You either worked a shell into a dc instead of a sc, or skipped the last shell before joining. Each round must end with a shell worked into the last sc.
The taper looks stepped. This is normal right after Rnds 9 and 17. Blocking on a cone smooths it out. If the steps still bother you, work Rnds 9 and 17 with a hook 0.5 mm smaller.
The rim ruffles. Your hdc are too loose, or you added a stitch. Recount to 48 and tighten your tension.
The rim pulls in. Use the 5.5 mm hook for Rnds 25–28 only.
The ring sags forward. Sew through more rim stitches, or add a second row of stitches through the ring sc.
Bags drop out by themselves. The opening is too loose. Work a second sl st round at the bottom edge, more firmly.
Care
Hand wash in cool water with mild soap, press out the water in a towel, and dry flat over a rolled-towel form. Do not tumble dry, because heat can shrink cotton and change the taper.
Final Notes
The measurement chain is easy to follow once you have it in mind. Your gauge gives a 3.75 in (9.5 cm) wide bottom section after 8 rounds. Growing the shells takes the body to 5.25 in (13.3 cm), then 6.75 in (17.1 cm). A 48-stitch rim keeps the top level at about 15.6 in (39.6 cm) tall, and a covered 3 in (7.6 cm) ring finishes the holder at about 18.6 in (47.2 cm) total. Check each stage before moving on, and the finished holder will hang straight and full.
Happy crocheting!