

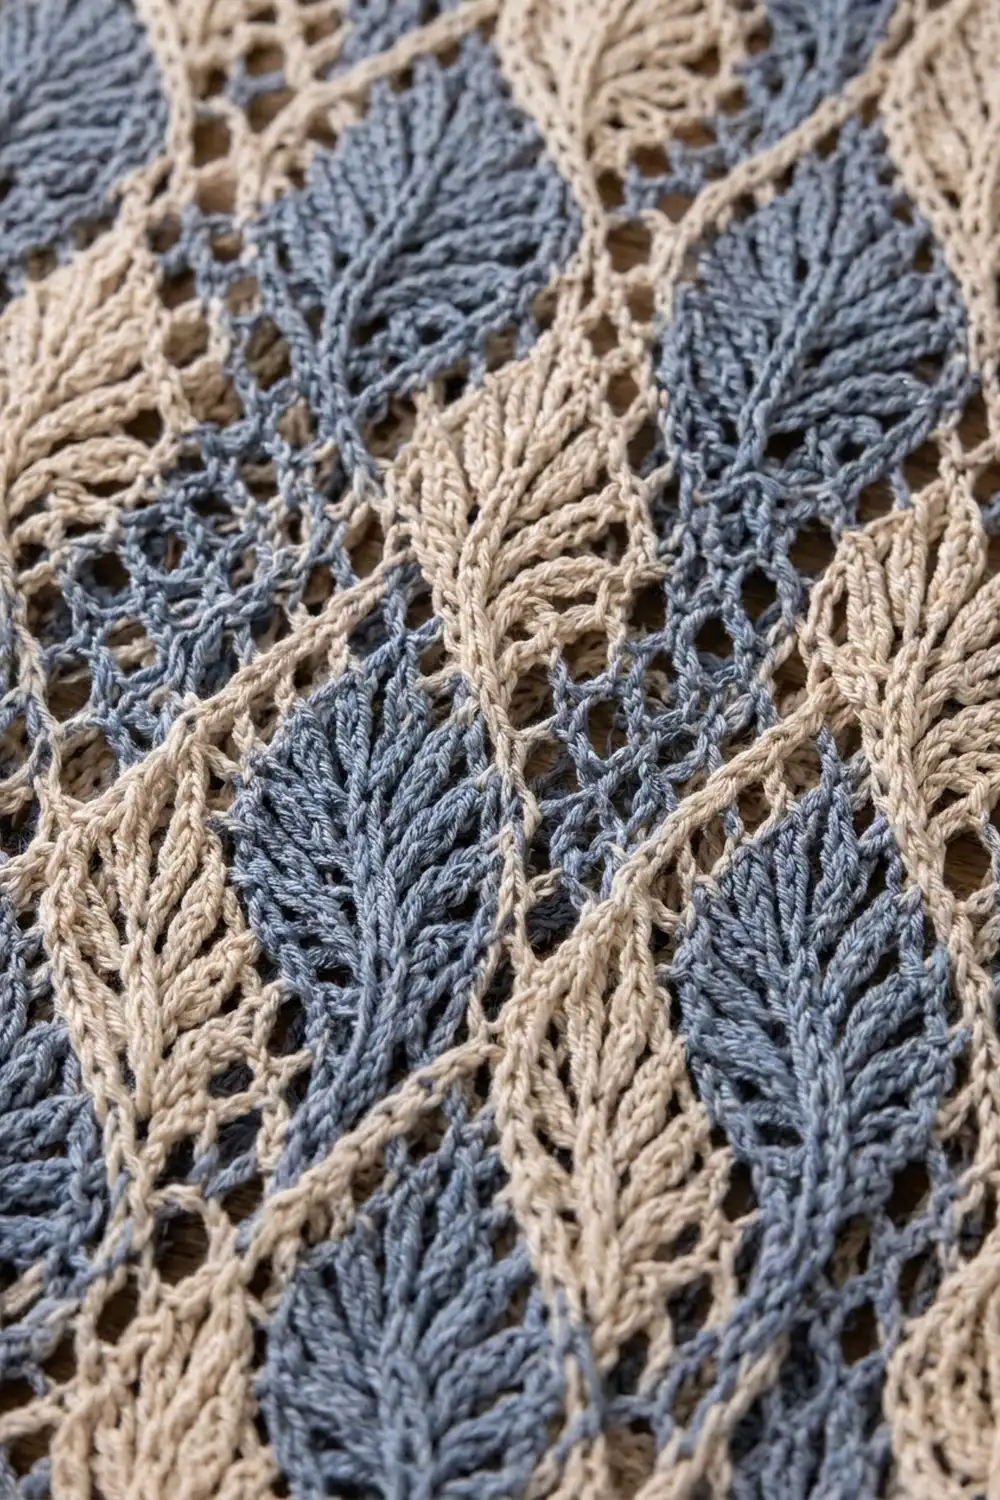
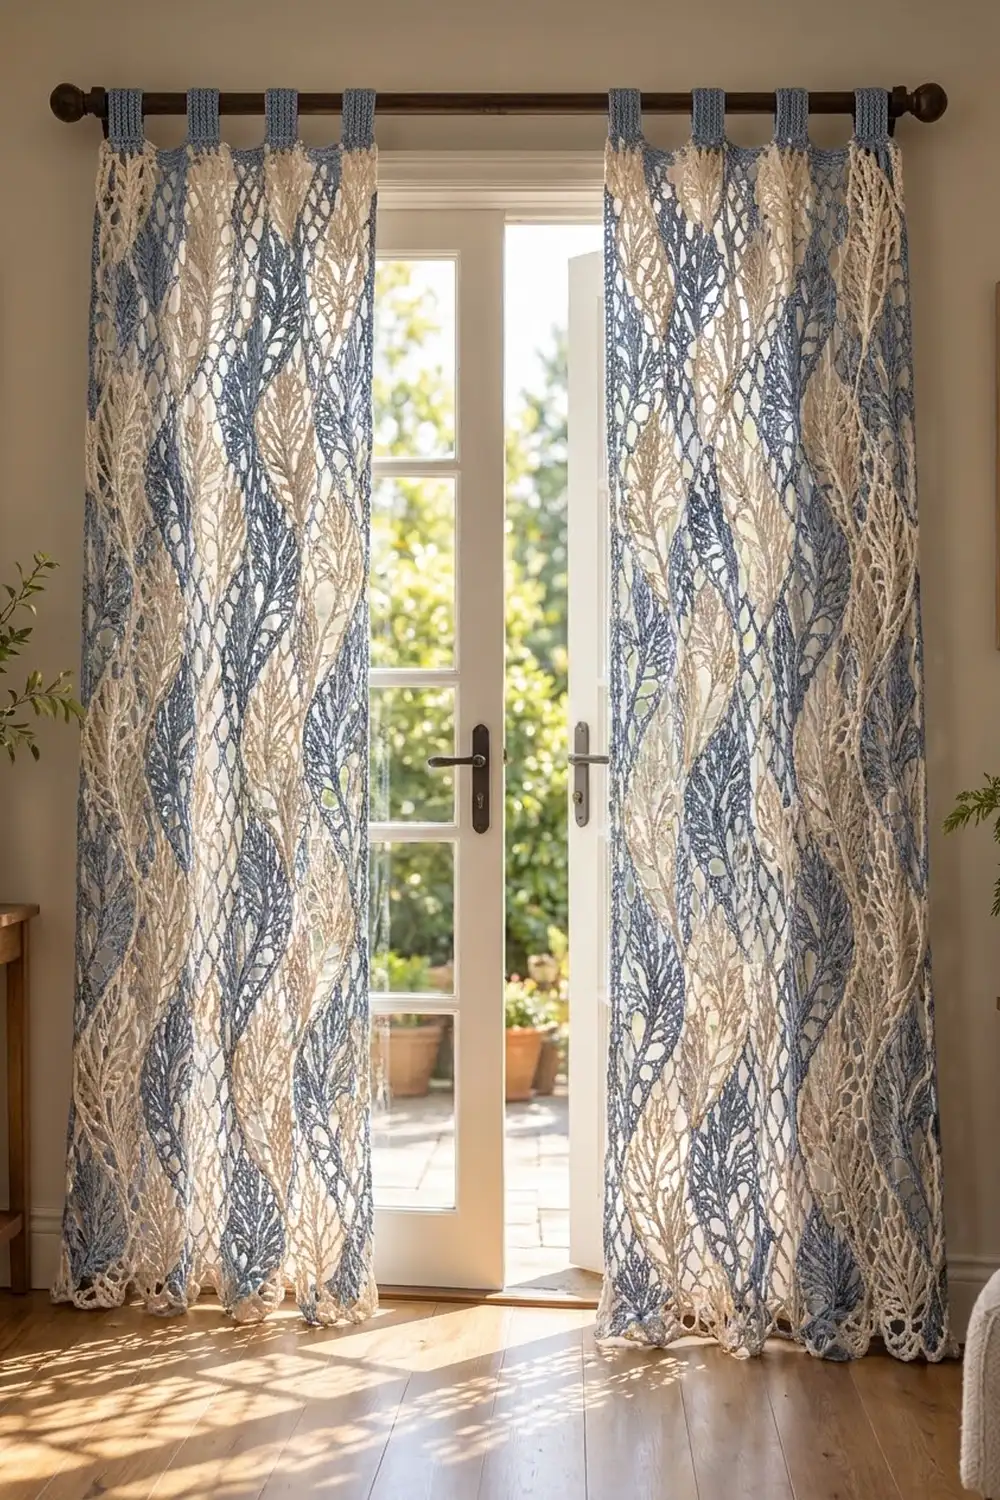
Willow Wave is a pair of lace curtain panels with tab tops. Columns of leafy bands ripple down each panel in denim blue and natural cream. The open mesh lets the light through, and the solid leaf bands give the panels enough shape and weight to hang straight.
The design is filet crochet worked in columns of color. Each column carries a wave of solid blocks with an open vein down the middle, and the wave shifts one square every two rows. The color columns alternate blue, cream, blue, cream, blue. A solid blue band, a scalloped edging and ribbed blue tabs finish each panel.
This pattern uses US crochet terms. Each finished panel measures 33 in (83.8 cm) wide by 74¼ in (188.6 cm) long without the tabs. Measured from the top of the tab loops, the drop is about 76¾ in (194.9 cm).
Each panel is worked in one piece from the bottom up, starting from a foundation chain. Next come the 4-row top band and a 2-round border. Finally, six tabs are worked straight off the top edge and folded to the back. Make two panels.
Finished Size and Construction
- Finished panel size: 33 × 74¼ in (83.8 × 188.6 cm) without the tabs
- Skill level: Intermediate (filet crochet plus intarsia color changes)
- Terminology: US
- Yarn weight: DK / light worsted (#3), cotton or cotton blend
- Hook: US G-6 (4 mm)
- Number of pieces: 2 identical panels, each worked as 1 piece, not joined
- Layout: 5 color columns per panel (A-B-A-B-A); the two panels hang side by side
- Body size: 32 × 72 in (81.3 × 182.9 cm)
- Size before border: 32 × 73 in (81.3 × 185.4 cm), including the top band
- Border depth: ½ in (1.3 cm) on the sides and top, ¾ in (1.9 cm) at the scalloped bottom
Materials
Choose a smooth, mercerized or combed cotton DK yarn, about 230 m per 100 g. Cotton holds the filet squares open and does not stretch much while hanging. Avoid fuzzy yarns, because they blur the mesh.
- Color A, Denim Blue: 800 g (1,840 m)
- Color B, Natural Cream: 500 g (1,150 m)
Tools:
- US G-6 (4 mm) crochet hook
- 5 yarn bobbins per panel
- Stitch markers
- Tapestry needle
- Tape measure
- Blocking mats or a clean carpet with a sheet, plus rust-proof pins
- Spray bottle
These amounts cover both panels and include a margin of about 10% for gauge differences and swatching.
Abbreviations (US Terms)
- ch = chain
- sc = single crochet
- dc = double crochet
- sk = skip
- sp = space
- blo = back loop only
- st(s) = stitch(es)
- RS / WS = right side / wrong side
Filet squares (rows 2 and up). Every square is 3 sts wide and ends with a “post” dc:
- Block over block: dc in next 2 dc, dc in next dc.
- Block over space: 2 dc in ch-2 sp, dc in next dc.
- Space: ch 2, sk next 2 sts (or the ch-2 sp), dc in next dc.
The ch 3 at the beginning of each row counts as the first post dc. One row has 40 squares plus the starting post, which makes 121 sts.
Intarsia change: work the last dc of a column until 2 loops remain on the hook. Drop the old color, then yarn over with the next column’s color and pull through.
Gauge and Checkpoints
Gauge: 5 filet squares measure 4 in (10.2 cm) wide, post to post, and 12 rows measure 8 in (20.3 cm) tall. Single crochet: 15 sc = 4 in (10.2 cm).
Test one column first. Ch 27 and work the 12 chart rows over 8 squares (25 sts). The swatch should measure 6.4 in (16.3 cm) wide, post to post, and 8 in (20.3 cm) tall.
- If the swatch is too big, go down to a 3.75 mm hook.
- If it is too small, go up to a 4.5 mm hook.
- If the width is right but the height is off, change how high you pull up your dc loops rather than changing the hook.
Checkpoints for the panel:
- After Row 12: 32 × 8 in (81.3 × 20.3 cm)
- After 3 repeats (Row 36): 24 in (61.0 cm) tall
- After 6 repeats (Row 72): 48 in (121.9 cm) tall
- After 9 repeats (Row 108): 72 in (182.9 cm) tall
- After the top band: 73 in (185.4 cm) tall
- After the border: 33 × 74¼ in (83.8 × 188.6 cm)
Measure while the panel lies flat. Never measure it while it hangs.
Panel Body
Wind two bobbins of Color A and one bobbin of Color B. The columns follow the working order of the RS rows:
Column 1 (A) | Column 2 (B) | Column 3 (A) | Column 4 (B) | Column 5 (A)
Each column is 8 squares (24 sts) wide. Column 1 also holds the starting post, so the panel is 1 + 5 × 24 = 121 sts.
Column chart. Each string lists a column’s 8 squares in RS working order. B = block, S = space.
- Rows 1–2:
B B S B B S S S - Rows 3–4:
S B B S B B S S - Rows 5–6:
S S B B S B B S - Rows 7–8:
S S S B B S B B - Rows 9–10:
S S B B S B B S - Rows 11–12:
S B B S B B S S
On RS (odd) rows, work each column’s string in order. On WS (even) rows, work a block over each block and a space over each space. The two solid pairs of blocks form the leaf, and the open square between them is the vein. Because the leaf band moves one square every two RS rows, the leaves form a wave.
Foundation: With A, ch 123.
Row 1 (RS): The first 3 skipped ch count as the first dc. Work dc in the 4th ch from the hook and in the next 2 ch to make the first block. Then work dc in the next 3 ch for block 2. Ch 2, sk 2 ch, dc in the next ch for a space. Work dc in the next 3 ch twice for 2 blocks. Then work (ch 2, sk 2 ch, dc in next ch) 3 times. That finishes Column 1.
Change to B. Repeat the same sequence across Columns 2–5 (block, block, space, block, block, space, space, space), changing color for each column. Each of these columns starts in the next ch. (121 sts: 40 squares)
The foundation chain is all blue. The blue first border round covers it later.
Row 2 (WS): Ch 3, turn. Work the squares block over block and space over space, ending with a dc in the top of the turning ch. Change color at each column boundary. (121 sts)
Rows 3–12: Follow the chart. Every row ends with a dc in the top of the turning ch. (121 sts in every row)
Rows 13–108: Repeat Rows 1–12 eight more times, for 9 repeats in total. From the second repeat on, work Row 1 into the stitches of Row 12 using the square definitions. Leave the column yarns attached to their bobbins. Each yarn always waits at the boundary where you need it next.
Top band
After Row 108, cut all bobbins and leave 6 in (15.2 cm) tails. Join A at the start of the row with the RS facing.
Band Row 1 (RS): Ch 1. Work sc in each dc and 2 sc in each ch-2 sp. (121 sc)
Band Rows 2–4: Ch 1, turn, sc in each sc. (121 sc)
Do not fasten off. The panel now measures 32 × 73 in (81.3 × 185.4 cm).
Make Both Panels
Work a second panel exactly like the first. Both panels are symmetric (A-B-A-B-A), so there is no left or right version. The panels are not joined; each hangs on its own.
Amounts per panel:
- Color A: about 380 g (874 m) for 3 columns, the band, border Round 1 and the tabs
- Color B: about 230 g (529 m) for 2 columns and border Round 2
Layout as hung:
[ Panel 1: A | B | A | B | A ]   window / door   [ Panel 2: A | B | A | B | A ]
  6 tabs on the rod                                 6 tabs on the rod
Border
Border gauge: 15 sc = 4 in (10.2 cm) in both directions. Along the sides, the row ends total 73 in (185.4 cm). At 3.75 sc per inch, that calls for about 274 sc, which matches the side count below.
Round 1 (A): Continue from the band without turning.
- Top: Ch 1, then sc in each of the 121 band sts. Ch 2 for the corner.
- First side: Work along the row ends. Put 1 sc in each of the 4 band row ends. For the dc rows, alternate 2 sc and 3 sc per row end across all 108 rows (54 × 5 = 270 sc). That gives 274 sc on this side. Ch 2 for the corner.
- Bottom: Work in the bases of the Row 1 sts. Put 1 sc in the base of each of the 121 sts, and work the sc for the starting post into the base of the turning ch. Ch 2 for the corner.
- Second side: 274 sc, mirroring the first side. Ch 2 and sl st to the first sc.
Round 1 totals: 121 / 274 / 121 / 274 sc, plus 4 ch-2 corners. The corners are separate spaces, so no corner stitch is counted twice. Fasten off.
Round 2 (B): Join B in any corner sp.
- Work (sc, ch 2, sc) in each corner sp.
- Work sc in each sc along the top and both sides. The top now has 123 sc and each side has 276 sc, counting the corner sc.
- Bottom scallops: Work 1 sc in the first sc. Then repeat [sk 2 sc, 7 dc in next sc, sk 2 sc, sc in next sc] 20 times. This uses exactly 1 + 20 × 6 = 121 sc, so you get 20 scallops.
Sl st to join and fasten off.
Why the math works:
- 121 = 6 × 20 + 1, so the scallops fit the bottom edge with no partial repeat.
- On the sides, the 2-3 alternation spaces the sc at the same density as the body. Both side edges and the top come out flat, without ruffling or pulling.
Tabs (A): There are 6 tabs, worked across the 123 top sts of Round 2. Each tab is 9 sts wide, which is 2.4 in (6.1 cm). The layout leaves 2 sts at each end and 13 sts between tabs: 2 + 9 + 5 × (13 + 9) + 2 = 123. The tabs sit on sts 3–11, 25–33, 47–55, 69–77, 91–99 and 113–121.
- Row 1: With the RS facing, join A in the first st of a tab position and work sc in 9 sts. (9 sc)
- Rows 2–24: Ch 1, turn, sc blo in each st. (9 sc) The tab measures 6 in (15.2 cm).
- Fasten off and leave a 12 in (30.5 cm) tail.
- Fold the tab to the WS and whipstitch the last row across the top band, 1 in (2.5 cm) below the edge. This leaves a 2½ in (6.4 cm) loop that fits rods up to 1½ in (3.8 cm) across.
Final Blocking
- Weave in all tails along the posts of the same color, so no tail crosses into another column.
- Soak the panel in cool water for 15 minutes, then press out the water. Do not wring it.
- Roll it in towels to remove more water.
- Lay it flat and pin it to 33 × 74¼ in (83.8 × 188.6 cm). Pin the side edges straight every 4 in (10.2 cm).
- Pin out each scallop, and pull the mesh squares gently square.
- Let it dry completely, about 24–48 hours. Block the second panel to the same pins.
Final Quality-Control Checklist
- Every row has 121 sts (40 squares).
- The leaf waves line up across all 5 columns at the same row.
- There are no long color floats at the column boundaries.
- Band: 121 sc. Border Round 1: 121 / 274 / 121 / 274 sc.
- There are 20 even scallops along the bottom.
- The 6 tabs are evenly spaced, 9 sts wide and 24 rows long.
- Both panels match within ½ in (1.3 cm) in width and length.
Troubleshooting
Waves drift or look jagged. You probably shifted on a WS row. Shifts only happen on odd rows.
Holes at the column boundaries. Make the color change on the last yarn-over of the post dc, and keep the new yarn snug.
Panel narrows toward the top. Your ch-2 spaces are getting tight. Loosen them, or check each row for 121 sts.
Sides ruffle or pull in. Recount the 2-3 sc alternation; each side should have 274 sc.
Scallops are uneven. Count 6 sts per repeat. Only the first sc sits on its own before the scallop repeat starts.
Panel grows longer while hanging. Re-block it flat and dry it flat. Choose a mercerized cotton if you make another pair.
Care
Hand wash in cool water with mild soap and dry flat to the blocked measurements. Do not tumble dry or hang the panels while wet.
Final Notes
The measurements build on one another:
- 5 squares = 4 in (10.2 cm), so 40 squares make a 32 in (81.3 cm) body.
- 12 rows = 8 in (20.3 cm), so 9 repeats make 72 in (182.9 cm).
- The band brings the length to 73 in (185.4 cm).
- The border adds ½ in (1.3 cm) at the sides and top and ¾ in (1.9 cm) at the bottom, for 33 × 74¼ in (83.8 × 188.6 cm).
- The tabs add a 2½ in (6.4 cm) loop for a total drop of 76¾ in (194.9 cm).
Get the swatch right and the whole panel will come out the right size. To make the panels longer, add one 12-row repeat for each extra 8 in (20.3 cm), and buy about 60 g more yarn per panel for each added repeat.
Happy crocheting!