

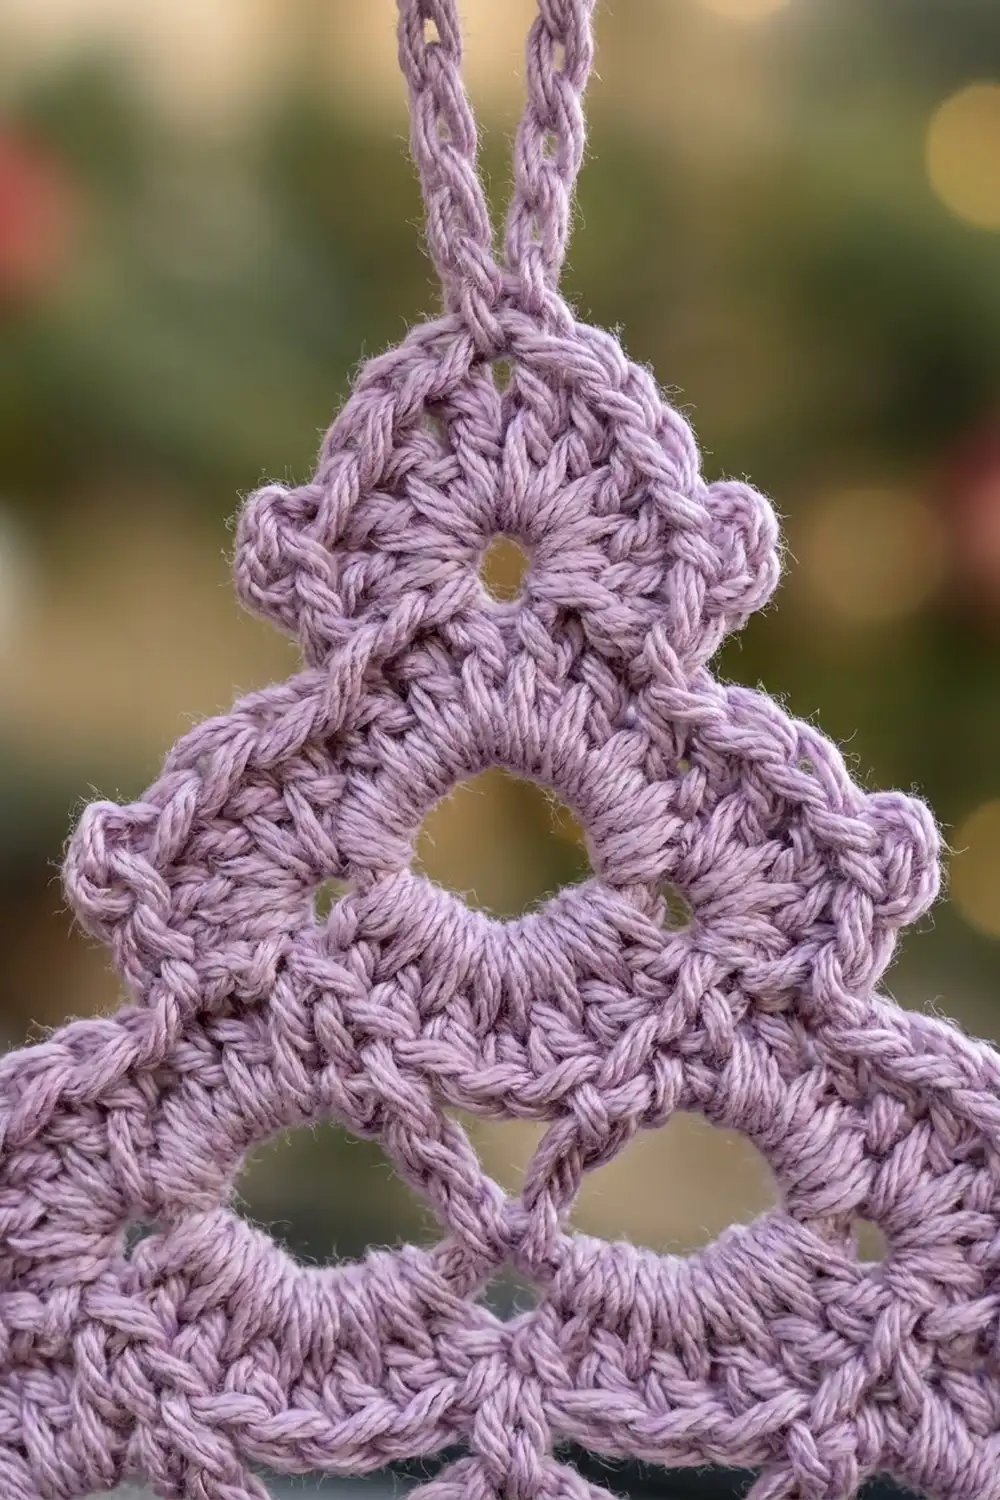
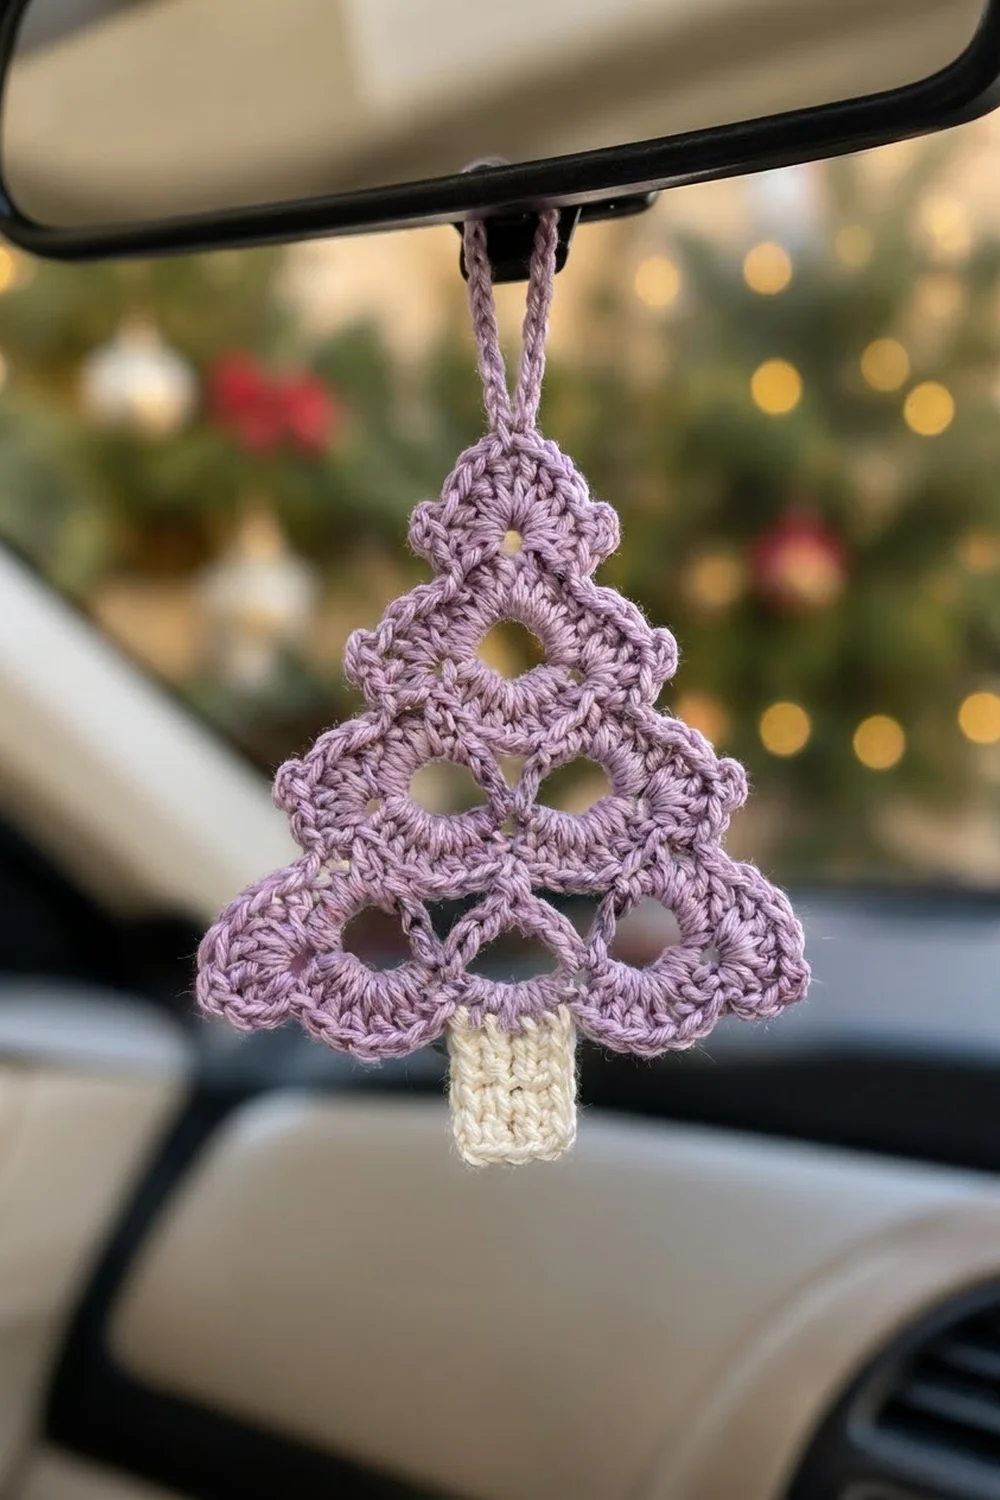
The Lilac Window Tree is a small flat lace ornament. It has three tiers of arched openings, a scalloped outline and a cream trunk. It is light enough to hang from a rearview mirror, a tree branch, a gift bag or a doorknob without pulling it out of shape.
The tree is worked in soft lavender and the trunk in cream. The openings are framed by tall treble pillars and dense single crochet. This gives each window a thick, rounded rim that keeps its shape after blocking. The style is vintage lace without being fussy. It is quick to make and looks good from across a room.
This pattern uses US crochet terms. The finished ornament measures about 3.6 in (9.1 cm) wide and 3.8 in (9.7 cm) tall including the trunk. The hanging loop adds about 2.0 in (5.1 cm).
Construction is simple. You work the tree body flat in rows from the bottom edge up, stepping in at each tier. Next you work a two-round scallop border around the whole outline. Then you make a small cream trunk sideways in rows, sew it behind the bottom edge, and add a doubled chain loop at the apex.
Finished Size and Construction
- Finished size: 3.6 in (9.1 cm) wide × 3.8 in (9.7 cm) tall, plus a 2.0 in (5.1 cm) loop
- Skill level: Easy-intermediate
- Terminology: US crochet terms
- Yarn weight: Fingering/4-ply mercerized cotton (#1 Super Fine)
- Hook: 2.5 mm (US B-1 or C-2, depending on brand)
- Number of pieces: 1 tree body (single piece) + 1 small trunk sewn on
- Layout: Three stacked tiers with 3, 2 and 1 openings
- Tree body before border: 3.0 in (7.6 cm) wide × 2.4 in (6.1 cm) tall
- Border depth: 0.3 in (0.8 cm) on each outer edge
- Trunk: 0.7 in (1.8 cm) wide × 1.0 in (2.5 cm) long, with 0.8 in (2.0 cm) showing
Materials
Choose a smooth mercerized cotton. It gives crisp stitch definition, holds the window shapes and does not fuzz on a mirror that gets touched often. Avoid fuzzy acrylic or mohair, because they blur the openings.
- Lavender (tree, border, loop): 8 g, about 34 m
- Cream (trunk): 2 g, about 9 m
- 2.5 mm crochet hook
- Tapestry needle
- Scissors
- Stitch marker
- Rustproof pins and a foam blocking mat
- Spray bottle with water
- Optional: fabric stiffener or starch spray
These quantities include a safety margin of about 25 percent for your gauge swatch and weaving in ends.
Abbreviations (US Terms)
- ch – chain
- sl st – slip stitch
- sc – single crochet
- dc – double crochet
- tr – treble crochet (yarn over twice)
- sc2tog – single crochet 2 together: (insert hook in next st, yarn over, pull up a loop) twice, yarn over, pull through all 3 loops
- blo – back loop only
- sk – skip
- sp – space
- st(s) – stitch(es)
Special stitch – Scallop: sk 1 st, 5 dc in next st, sk 1 st, sl st in next st. Each scallop uses 4 stitches of the round below.
Turning chains: In window rows, ch 4 counts as the first tr. In sc rows, ch 1 does not count as a stitch.
Gauge and Checkpoints
Gauge: 18 sc and 20 rows = 2 in (5.1 cm), which is 9 sc and 10 rows per 1 in (2.5 cm).
This ornament is small, so make one test tree body first and treat it as your swatch. Check these points as you go:
- Row 1: 27 sc should measure 3.0 in (7.6 cm).
- After Row 5 (tier 1 done): height is about 0.8 in (2.0 cm).
- After Row 9 (tier 2 done): height is about 1.5 in (3.8 cm). Tier 2 base is 19 sc, about 2.1 in (5.3 cm).
- After Row 15: body measures 3.0 in (7.6 cm) × 2.4 in (6.1 cm). Tier 3 base is 11 sc, about 1.2 in (3.0 cm).
- After border: 3.6 in (9.1 cm) × 3.0 in (7.6 cm).
If Row 1 is wider than 3.0 in (7.6 cm), go down to a 2.25 mm hook. If it is narrower, go up to a 2.75 mm hook. A difference of 0.2 in (0.5 cm) is fine for an ornament, but check that the windows stay open and do not bunch.
Tree Body
Use lavender. Work flat in rows and turn at the end of every row.
Tier 1 (Three Windows)
Row 1: Ch 28. Sc in 2nd ch from hook and in each ch across. Turn. (27 sc)
Row 2 (window row): Ch 4 (counts as tr), tr in next 2 sts, [ch 5, sk 5, tr in next 3 sts] 3 times. Turn. (12 tr + 3 ch-5 sps = 27 sts)
This makes four 3-tr pillars with three tall openings between them.
Row 3 (cover row): Ch 1, sc2tog over first 2 tr, sc in next tr, [5 sc in ch-5 sp, sc in next 3 tr] 2 times, 5 sc in last ch-5 sp, sc in next tr, sc2tog over last tr and top of turning ch. Turn. (25 sc)
The 5 sc packed into each space form the thick, rounded top of each window.
Row 4: Ch 1, sc2tog, sc in next 21 sts, sc2tog. Turn. (23 sc)
Row 5 (step): Sl st in first 3 sts, ch 1, sc in same st as last sl st and in next 18 sts. Leave the last 2 sts unworked. Turn. (19 sc)
The 2 skipped stitches on each side form the pointed step at the corner of tier 1.
Tier 2 (Two Windows)
Row 6 (window row): Ch 4 (counts as tr), tr in next 2 sts, [ch 5, sk 5, tr in next 3 sts] 2 times. Turn. (9 tr + 2 ch-5 sps = 19 sts)
Row 7 (cover row): Ch 1, sc2tog, sc in next tr, 5 sc in ch-5 sp, sc in next 3 tr, 5 sc in ch-5 sp, sc in next tr, sc2tog. Turn. (17 sc)
Row 8: Ch 1, sc2tog, sc in next 13 sts, sc2tog. Turn. (15 sc)
Row 9 (step): Sl st in first 3 sts, ch 1, sc in same st as last sl st and in next 10 sts. Leave the last 2 sts unworked. Turn. (11 sc)
Tier 3 (One Window and Apex)
Row 10 (window row): Ch 4 (counts as tr), tr in next 2 sts, ch 5, sk 5, tr in next 3 sts. Turn. (6 tr + 1 ch-5 sp = 11 sts)
Row 11 (cover row): Ch 1, sc2tog, sc in next tr, 5 sc in ch-5 sp, sc in next tr, sc2tog. Turn. (9 sc)
Row 12: Ch 1, sc2tog, sc in next 5 sts, sc2tog. Turn. (7 sc)
Row 13: Ch 1, sc2tog, sc in next 3 sts, sc2tog. Turn. (5 sc)
Row 14 (eyelet): Ch 1, sc2tog, ch 1, sk 1, sc2tog. Turn. (2 sc + 1 ch-1 sp = 3 sts)
Row 15: Ch 1, sc2tog worked over the first and last sc, skipping the ch-1 sp. (1 sc)
The skipped ch-1 sp stays open as the small eyelet just below the tip. Do not fasten off. Continue straight into the border.
Checkpoint: The body should be a stepped triangle 3.0 in (7.6 cm) wide and 2.4 in (6.1 cm) tall, with 3, 2 and 1 windows.
Border
Border gauge: One scallop uses 4 Round 1 stitches, about 0.44 in (1.1 cm) of edge.
Round 1 (Sc Trim Round)
Ch 1 and work around the whole tree with the right side facing.
- Apex: 3 sc in the Row 15 st. (3 sts)
- Left side, top to bottom (25 sc):
- Tier 3: 9 sc. That is 1 sc in each sc-row end of Rows 15 to 11 and Row 9, plus 3 sc in the Row 10 tr end.
- Tier 2 step: 2 sc across the step.
- Tier 2: 6 sc. That is 1 sc each in the row ends of Rows 8, 7 and 5, plus 3 sc in the Row 6 tr end.
- Tier 1 step: 2 sc across the step.
- Tier 1: 6 sc. That is 1 sc each in the row ends of Rows 4, 3 and 1, plus 3 sc in the Row 2 tr end.
- Bottom: Work into the free loops of the foundation chain: 3 sc in first ch, sc in next 25 ch, 3 sc in last ch. That is 27 sts worked 1 per chain, plus 4 extra at the two corners. (31 sts)
- Right side, bottom to top: Mirror the left side. (25 sc)
Join with sl st to first sc. Round 1 total: 3 + 25 + 31 + 25 = 84 sts.
The bottom count of 31 already includes both 3-sc corner groups. The side counts of 25 contain no corner stitches, and the apex group of 3 is counted separately, so no stitch is counted twice.
Round 2 (Scallop Round)
Sl st in the same st as the join. This sl st anchors the first scallop. [Sk 1, 5 dc in next st, sk 1, sl st in next st] 20 times. Then sk 1, 5 dc in next st, sk 1, and join with sl st in the first sl st. (21 scallops; 105 dc + 21 sl st = 126 sts)
Fasten off and leave a 6 in (15.2 cm) tail.
Why the math works: 84 ÷ 4 = 21 exactly, so the scallops close evenly with no leftover or crowded stitches. The 3-sc groups at the apex and bottom corners give the extra stitches the points need to flare without cupping.
Checkpoint: The tree now measures 3.6 in (9.1 cm) wide × 3.0 in (7.6 cm) tall.
Trunk
Use cream. The trunk is worked sideways, so the rows run vertically and create the ridged texture.
Row 1: Ch 10. Sc in 2nd ch from hook and in each ch across. Turn. (9 sc)
Rows 2–7: Ch 1, sc blo in each st across. Turn. (9 sc per row)
Fasten off and leave a 10 in (25.4 cm) tail for sewing.
Checkpoint: The trunk measures 0.7 in (1.8 cm) wide × 1.0 in (2.5 cm) long.
Attaching: Place the trunk behind the tree, centered under the middle window of tier 1, with 0.2 in (0.5 cm) overlapping the back of the bottom border. Whipstitch the overlap to the back of Round 1 so no stitches show on the front. The visible trunk is 0.8 in (2.0 cm), which brings the total height to 3.8 in (9.7 cm).
Hanging Loop
Join lavender with sl st in the center dc of the apex scallop. Ch 36, which is about 4.0 in (10.2 cm). Sl st in the same dc to form a loop, then sl st in each ch back around the loop to firm it up. Fasten off. The finished loop hangs about 2.0 in (5.1 cm) above the apex.
Final Blocking
- Weave in all ends along the sc rows on the wrong side, away from the windows.
- Soak the ornament in cool water for 5 minutes, then press out the water gently in a towel. Do not wring it.
- Pin it flat to a mat at 3.6 in (9.1 cm) wide. Pin the bottom edge straight first.
- Pin the tip of each tier step to make the corners crisp and pointed.
- Pin out the center of every scallop so all 21 fan evenly.
- Push a pin or a rounded tool into each window to open it into a smooth arch.
- Optional: mist with stiffener or starch for a firmer ornament that keeps its shape in a car.
- Let it dry completely before you unpin it, usually 6 to 12 hours.
Final Quality-Control Checklist
- Tiers have 3, 2 and 1 windows, and each window is open and evenly shaped.
- The eyelet below the apex is visible.
- Round 1 has 84 sts and Round 2 has 21 scallops.
- Width is 3.6 in (9.1 cm) and total height is 3.8 in (9.7 cm).
- The trunk is centered, straight, and attached invisibly from the front.
- The hanging loop is centered at the apex and the ornament hangs straight.
- All ends are secured and trimmed.
Troubleshooting
Windows close up or look slanted: Make sure you skip exactly 5 sts in each window row and work exactly 5 sc into each ch-5 sp.
Tier corners look rounded, not stepped: Check that you left 2 sts unworked on each side in Rows 5 and 9. Pin the corners firmly when blocking.
Border ruffles: Your Round 1 likely has more than 84 sts. Count each side again: 25 per side, 31 on the bottom and 3 at the apex.
Border cups or pulls in: Your dc may be too tight. Go up 0.25 mm for Round 2 only.
Ornament hangs crooked: Move the loop to the true center scallop at the apex. Check whether the trunk is off-center.
Trunk shows a seam on the front: Stitch only through the back loops of Round 1.
Care
Hand wash in cool water and lay flat to dry. Re-block and re-stiffen if the ornament softens after a season in the car or on the tree.
Final Notes
The size depends on a short measurement chain. At 9 sc per 1 in (2.5 cm), Row 1 gives a base of 3.0 in (7.6 cm). Fifteen rows build a body 2.4 in (6.1 cm) tall. The 0.3 in (0.8 cm) border brings it to 3.6 in (9.1 cm) × 3.0 in (7.6 cm). The trunk adds 0.8 in (2.0 cm) below, for a total height of 3.8 in (9.7 cm). If your Row 1 is right, everything after it will be close. Make one, then make a few more for gifts, gift tags and branches.
Happy crocheting!