

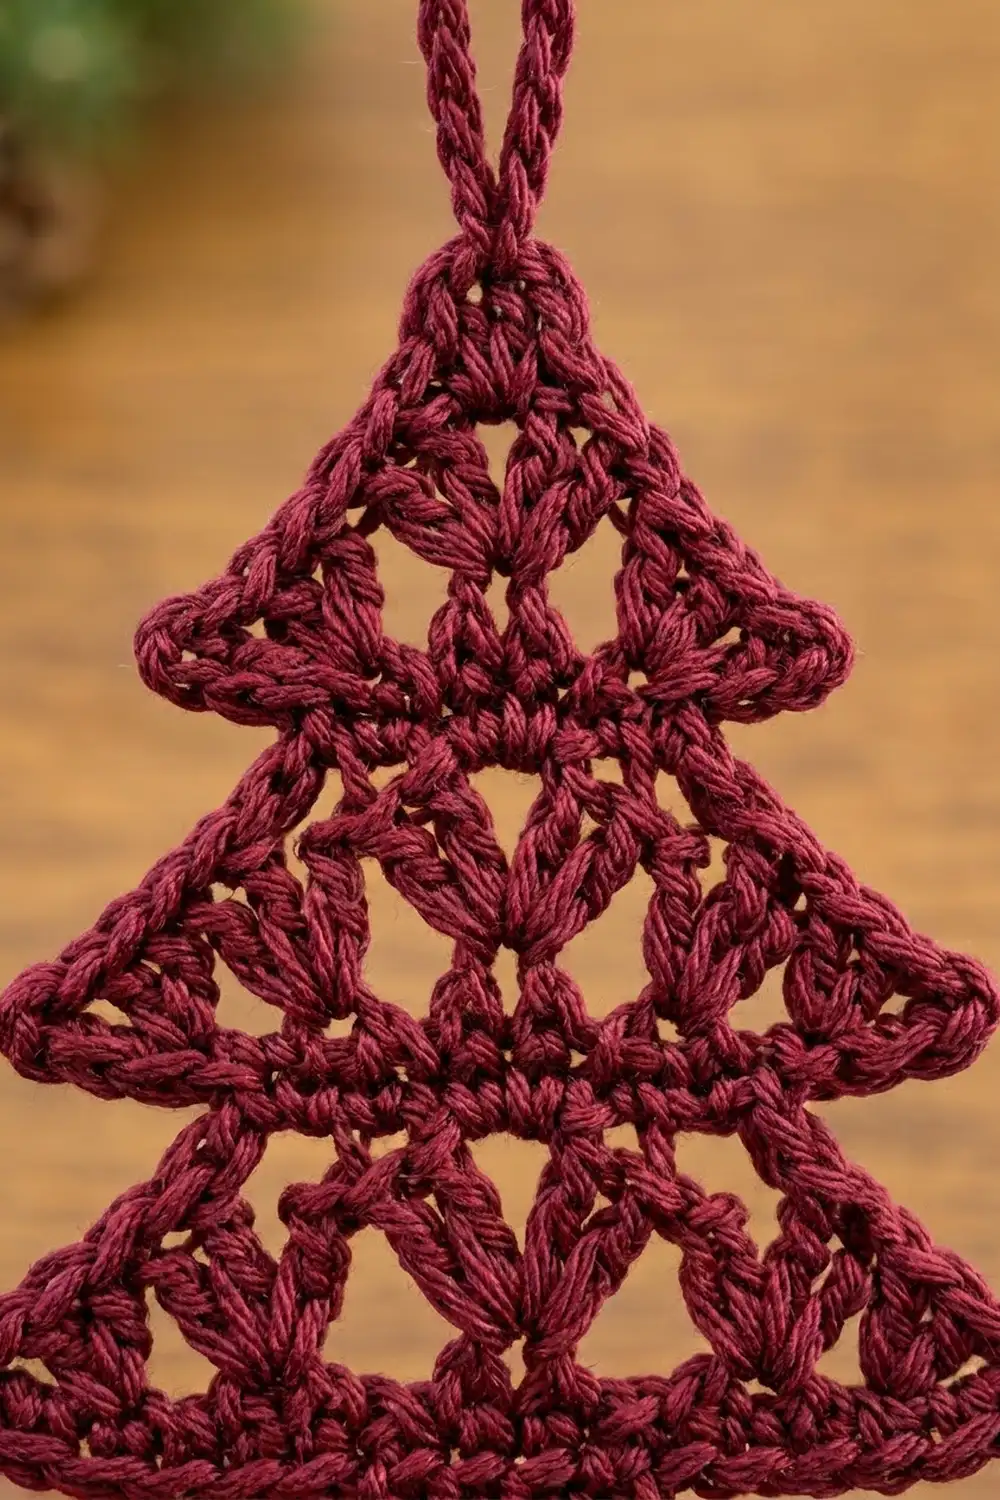
The Cranberry Lace Tree is a small, flat Christmas tree ornament made in one piece. It has three stacked tiers with crisp upturned tips, columns of open V-stitch lace, and a solid little trunk. A neat single crochet outline goes around the edge and ends in a sturdy hanging loop.
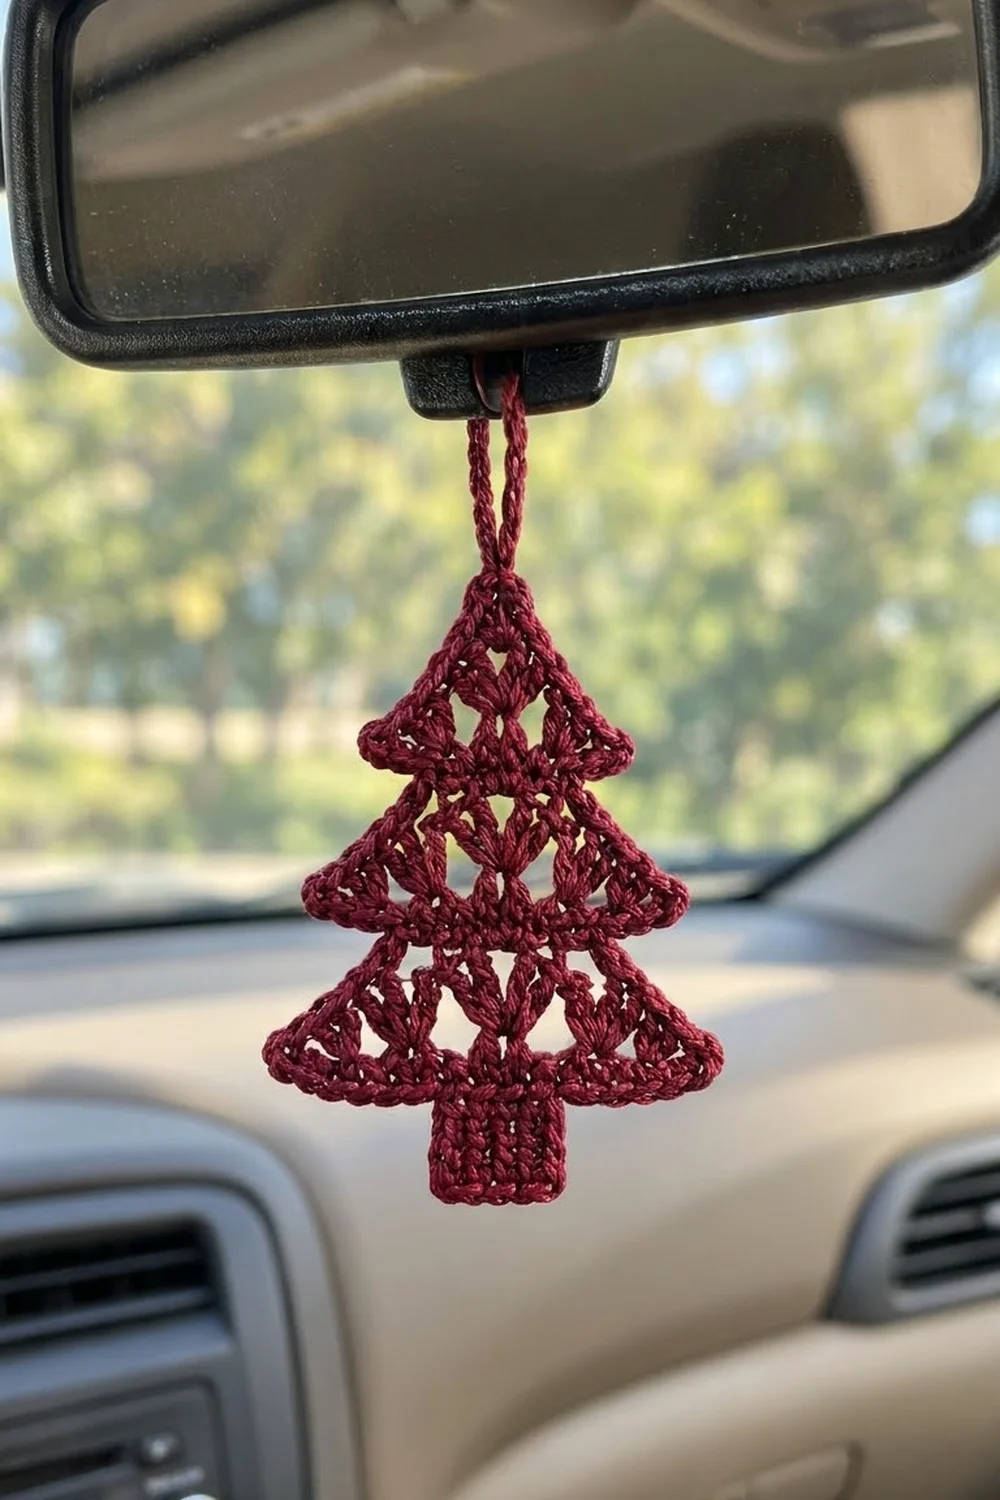
The sample uses one deep cranberry (burgundy) cotton. A single rich color shows the lace clearly. The ornament looks good on a tree branch, tied to a gift bag, or hanging from a car rear-view mirror.
This pattern uses US crochet terms. The finished ornament is 3.75 in (9.5 cm) wide by 4.25 in (10.8 cm) tall. With the 1.5 in (3.8 cm) hanging loop, the total length is 5.75 in (14.6 cm).
You work flat rows from the top point down. Each tier ends with a flared row. The next tier starts a few stitches in from the edge, and the trunk is worked off the center of the last tier. One round of single crochet outlines the whole tree and makes the loop at the top.
Finished Size and Construction
- Finished size: 3.75 in (9.5 cm) wide x 4.25 in (10.8 cm) tall, plus a 1.5 in (3.8 cm) loop
- Skill level: Easy intermediate
- Terminology: US crochet terms
- Yarn weight: Fingering / super fine (#1) cotton, or size 3 crochet thread
- Hook: 2.5 mm
- Number of pieces: 1
- Layout: Single flat piece, no joining
- Piece size before border: 3.5 in (8.9 cm) wide x 4 in (10.2 cm) tall
- Border depth: 0.125 in (0.3 cm) on each edge
Materials
Use a smooth, mercerized cotton in fingering weight. Mercerized cotton keeps the tips sharp, shows the stitches clearly, and doesn’t fuzz when the ornament swings. Avoid fuzzy or very stretchy yarns because the lace will lose its shape.
- Cranberry / burgundy: 6 g, about 20 m (22 yd)
This amount includes about 30% extra for a test swatch, tails, and any ripping back.
Tools:
- 2.5 mm crochet hook
- Tapestry needle
- Scissors
- Rustproof pins and a small blocking board or folded towel
- Spray bottle with clean water
- Optional: fabric stiffener or starch spray
Abbreviations (US Terms)
- ch – chain
- sl st – slip stitch
- sc – single crochet
- dc – double crochet
- tr – treble crochet
- sk – skip
- sp – space
- st(s) – stitch(es)
- tc – turning chain
Special stitch – V-st (V-stitch): (dc, ch 1, dc) in the same stitch or space. One V-st counts as 3 stitches: dc, ch-1, dc.
Counting note: In every row, the turning chain counts as the first stitch, and every ch-1 counts as 1 stitch. In the next row, work into a ch-1 space as if it were a stitch.
Gauge and Checkpoints
Gauge: 13 dc and 6 dc rows = 2 in (5.1 cm) with a 2.5 mm hook.
This ornament is too small to need a full 4 in swatch. Instead, make your first tree as the test piece and measure it at each checkpoint below. Measure flat without stretching, and measure flared rows from tip to tip.
- After Row 3: Tier 1 is 2.25 in (5.7 cm) from tip to tip.
- After Row 6: Tier 2 is 3 in (7.6 cm) from tip to tip.
- After Row 9: Tier 3 is 3.5 in (8.9 cm) from tip to tip, and Rows 1–9 are 3 in (7.6 cm) tall.
- After Row 12: The trunk is 0.75 in (1.9 cm) wide, and the whole tree is 4 in (10.2 cm) tall.
- After the border: 3.75 in (9.5 cm) x 4.25 in (10.8 cm), plus a 1.5 in (3.8 cm) loop.
If your tree is too big: Switch to a 2.25 mm hook. Also check that you aren’t pulling up tall loops on your dc.
If your tree is too small: Switch to a 2.75 mm hook. Tight lace also tends to cup, so a larger hook often fixes both problems.
Being off by 0.25 in (0.6 cm) at Row 9 is fine for an ornament. If you’re off by more, correct it before you go on.
Pattern
The tree is worked from the top down in rows. Turn at the end of every row. Count every row before you turn. In a piece this small, one missing stitch shows right away as a lopsided tier.
Tier 1
Row 1: Ch 4, sl st in first ch to form a ring. Ch 3 (counts as dc), 6 dc in ring. Don’t join. Turn. (7 sts)
This half-fan makes the top point of the tree.
Row 2: Ch 3 (counts as dc), dc in first st, dc in next st, ch 1, sk next st, V-st in next st (the center st), ch 1, sk next st, dc in next st, 2 dc in top of tc. Turn. (11 sts: 2 dc + 1 dc + ch 1 + V-st + ch 1 + 1 dc + 2 dc)
Row 3 (flare row): Ch 4 (counts as tr), 2 tr in first st, dc in each of next 9 sts, 3 tr in top of tc. Turn. (15 sts: 3 tr + 9 dc + 3 tr)
The 3-tr groups fan outward and make the first pair of upturned tips.
Tier 2
Row 4: Sl st in each of first 4 sts. Ch 3 (counts as dc in the 4th st), sk next st, V-st in next st, [sk next st, V-st in next st] twice, sk next st, dc in next st. Leave the last 3 sts unworked. Turn. (11 sts: 1 dc + 3 V-sts + 1 dc)
This row covers the center 9 sts of Row 3 and leaves 3 sts exposed at each end. Those exposed stitches become the underside of the Tier 1 tips.
Row 5: Ch 3 (counts as dc), dc in first st, V-st in ch-1 sp of next V-st, [ch 1, V-st in ch-1 sp of next V-st] twice, 2 dc in top of tc. Turn. (15 sts: 2 dc + 3 V-sts + 2 ch + 2 dc)
Each V-st sits directly on top of the one below it, which makes the open lace columns.
Row 6 (flare row): Ch 4 (counts as tr), 2 tr in first st, dc in each of next 13 sts, 3 tr in top of tc. Turn. (19 sts: 3 tr + 13 dc + 3 tr)
Tier 3
Row 7: Sl st in each of first 4 sts. Ch 3 (counts as dc in the 4th st), sk next 2 sts, V-st in next st, [sk next st, V-st in next st] 3 times, sk next 2 sts, dc in next st. Leave the last 3 sts unworked. Turn. (14 sts: 1 dc + 4 V-sts + 1 dc)
This row covers the center 13 sts of Row 6. Skipping 2 sts at each end keeps the four V-sts centered.
Row 8: Ch 3 (counts as dc), dc in first st, V-st in ch-1 sp of next V-st, [ch 1, V-st in ch-1 sp of next V-st] 3 times, 2 dc in top of tc. Turn. (19 sts: 2 dc + 4 V-sts + 3 ch + 2 dc)
Row 9 (flare row): Ch 4 (counts as tr), 2 tr in first st, dc in each of next 17 sts, 3 tr in top of tc. Turn. (23 sts: 3 tr + 17 dc + 3 tr)
Checkpoint: 3.5 in (8.9 cm) from tip to tip, and 3 in (7.6 cm) tall from the ring.
Trunk
Row 10: Sl st in each of first 10 sts. Ch 3 (counts as dc in the 10th st), dc in each of next 4 sts. Leave the last 9 sts unworked. Turn. (5 dc)
The trunk now sits on sts 10–14 of Row 9, with 9 exposed sts on each side.
Rows 11–12: Ch 3 (counts as dc), dc in each of next 3 sts, dc in top of tc. Turn. (5 dc)
Don’t fasten off. The trunk is 0.75 in (1.9 cm) wide and 1 in (2.5 cm) tall.
Border
Border gauge: Work 1 sc in each stitch along stitch tops and 2 sc in the end of each row. There are 3 rows per inch, so 2 sc per row end gives 6 sc per inch. That is close to the 6.5 sts per inch along the stitch tops, so the edge lies flat.
Some exposed stitches have a sl st on top of them from Rows 4, 7, and 10. Work the sc into the sl st, which counts as that stitch.
Round 1: Ch 1. Working across the tops of Row 12:
- Trunk bottom: 2 sc in first st, sc in next 3 sts, 2 sc in last st. (7 sc)
- Trunk side: 2 sc in the end of each of Rows 12, 11, and 10. (6 sc)
- Tier 3 underside: sc in each of next 8 exposed sts of Row 9, (sc, ch 3, sc) in the tip st. (10 sc + 1 ch-3 tip)
- Tier 3 slope: 2 sc in the end of each of Rows 9, 8, and 7. (6 sc)
- Tier 2 underside: sc in each of next 2 exposed sts of Row 6, (sc, ch 3, sc) in the tip st. (4 sc + 1 ch-3 tip)
- Tier 2 slope: 2 sc in the end of each of Rows 6, 5, and 4. (6 sc)
- Tier 1 underside: sc in each of next 2 exposed sts of Row 3, (sc, ch 3, sc) in the tip st. (4 sc + 1 ch-3 tip)
- Tier 1 slope: 2 sc in the end of each of Rows 3, 2, and 1. (6 sc)
- Top and loop: sc in ring, ch 22, sl st in ring to close the loop, work 30 sc into the ch-22 loop, sc in ring. (2 sc on the tree, plus the loop)
- Second side: Work the same sections in reverse order. Work 6 sc down the Tier 1 slope. Work (sc, ch 3, sc) in the tip st, then sc in next 2 sts. Work 6 sc down the Tier 2 slope. Work the tip and 2 sc. Work 6 sc down the Tier 3 slope. Work the tip and 8 sc. Work 6 sc down the trunk side.
Sl st to first sc. Fasten off, leaving a 6 in (15.2 cm) tail.
Count per section: trunk bottom 7, trunk sides 6 + 6, Tier 3 undersides 10 + 10, Tier 3 slopes 6 + 6, Tier 2 undersides 4 + 4, Tier 2 slopes 6 + 6, Tier 1 undersides 4 + 4, Tier 1 slopes 6 + 6, top 2. Total: 93 sc on the tree edge and 6 ch-3 tips, plus the loop (ch 22, 1 sl st, 30 sc).
Why the math works:
– Undersides: Each underside count comes straight from the exposed stitches. Row 9 has 23 sts and the trunk uses 5, which leaves 9 per side (8 sc + the tip). Rows 6 and 3 each leave 3 exposed sts per side (2 sc + the tip).
– Slopes: Each tier has exactly 3 row ends per side, so every slope gets 6 sc.
– Tips: The tips are the only place with extra stitches. That extra sc plus a ch-3 sharpens the upturned points without ruffling the slopes.
Weave in all ends along the border, not through the lace, so they stay hidden.
Final Blocking
- Spritz the ornament with water until it is evenly damp, or soak it and press it in a towel.
- Lay it right side up on the blocking board.
- Pin the trunk square first, 1 in (2.5 cm) wide including the border.
- Pin the bottom tier tips 3.75 in (9.5 cm) apart. Pull each ch-3 point slightly outward and upward.
- Pin the Tier 2 and Tier 1 tips the same way, keeping both sides level.
- Pin the top point so the tree is 4.25 in (10.8 cm) tall from the trunk bottom to the ring.
- Use a pin tip to open each V-st column so the lace looks even.
- Optional: spray lightly with starch or stiffener so the ornament stays crisp when it hangs.
- Let it dry completely before you remove the pins.
Final Quality-Control Checklist
- Rows 3, 6, and 9 have 15, 19, and 23 sts.
- Tiers 1 and 2 have 3 exposed underside sts per side, and Tier 3 has 9.
- The V-st columns are centered and stacked.
- The trunk is centered on sts 10–14 of Row 9.
- The border has 93 sc plus 6 ch-3 tips.
- Both sides of the tree mirror each other.
- The finished size is 3.75 in (9.5 cm) x 4.25 in (10.8 cm), plus a 1.5 in (3.8 cm) loop.
- Every tail is woven into the border and trimmed.
Troubleshooting
The tips curl under. Your tr groups may be tight. Block the tips upward and add starch, or work the flare rows a little more loosely.
The slopes ruffle. You may be working 3 sc into the row ends. Keep it at 2 sc per row end.
The slopes pucker. Your sc are too tight. Loosen your tension, or use a hook one size larger for the border only.
The tree leans. Count the sl sts at the start of Rows 4, 7, and 10. One extra sl st shifts the next tier off-center.
The trunk is off-center. Recount Row 9. You need exactly 9 unworked sts on each side of the trunk.
The loop twists. Check that the ch-22 isn’t twisted before you sl st it closed, and space the 30 sc evenly around it.
The lace looks crowded. Your dc are short. Pull up the first loop a little higher, or use a larger hook.
Care
Hand wash in cool water with mild soap, press out the water in a towel, and reblock flat to dry. Starch again if you want crisp tips.
Final Notes
The measurement chain is short and easy to check:
– Tier 1 is 2.25 in (5.7 cm) wide.
– Tier 2 is 3 in (7.6 cm) wide.
– Tier 3 is 3.5 in (8.9 cm) wide, and the tree is 3 in (7.6 cm) tall at that point.
– The trunk brings the height to 4 in (10.2 cm).
– The border brings the finished size to 3.75 in (9.5 cm) x 4.25 in (10.8 cm), plus a 1.5 in (3.8 cm) loop.
If each checkpoint matches, the finished tree will too. Make one for the tree, one for the car, and a few for gift tags.
Happy crocheting!