

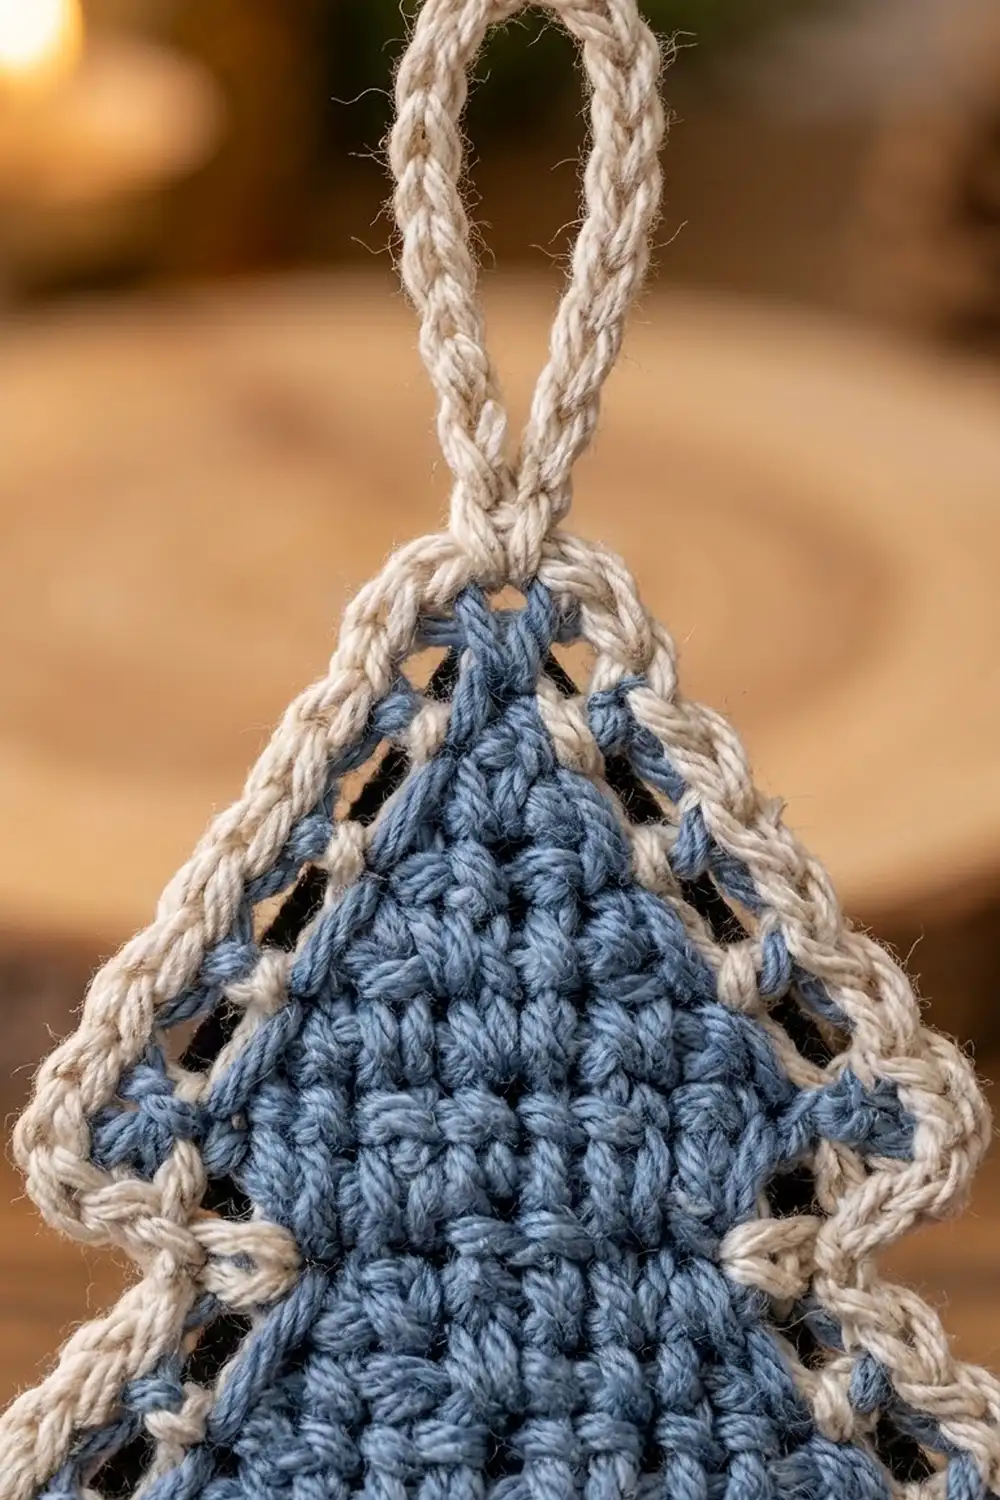
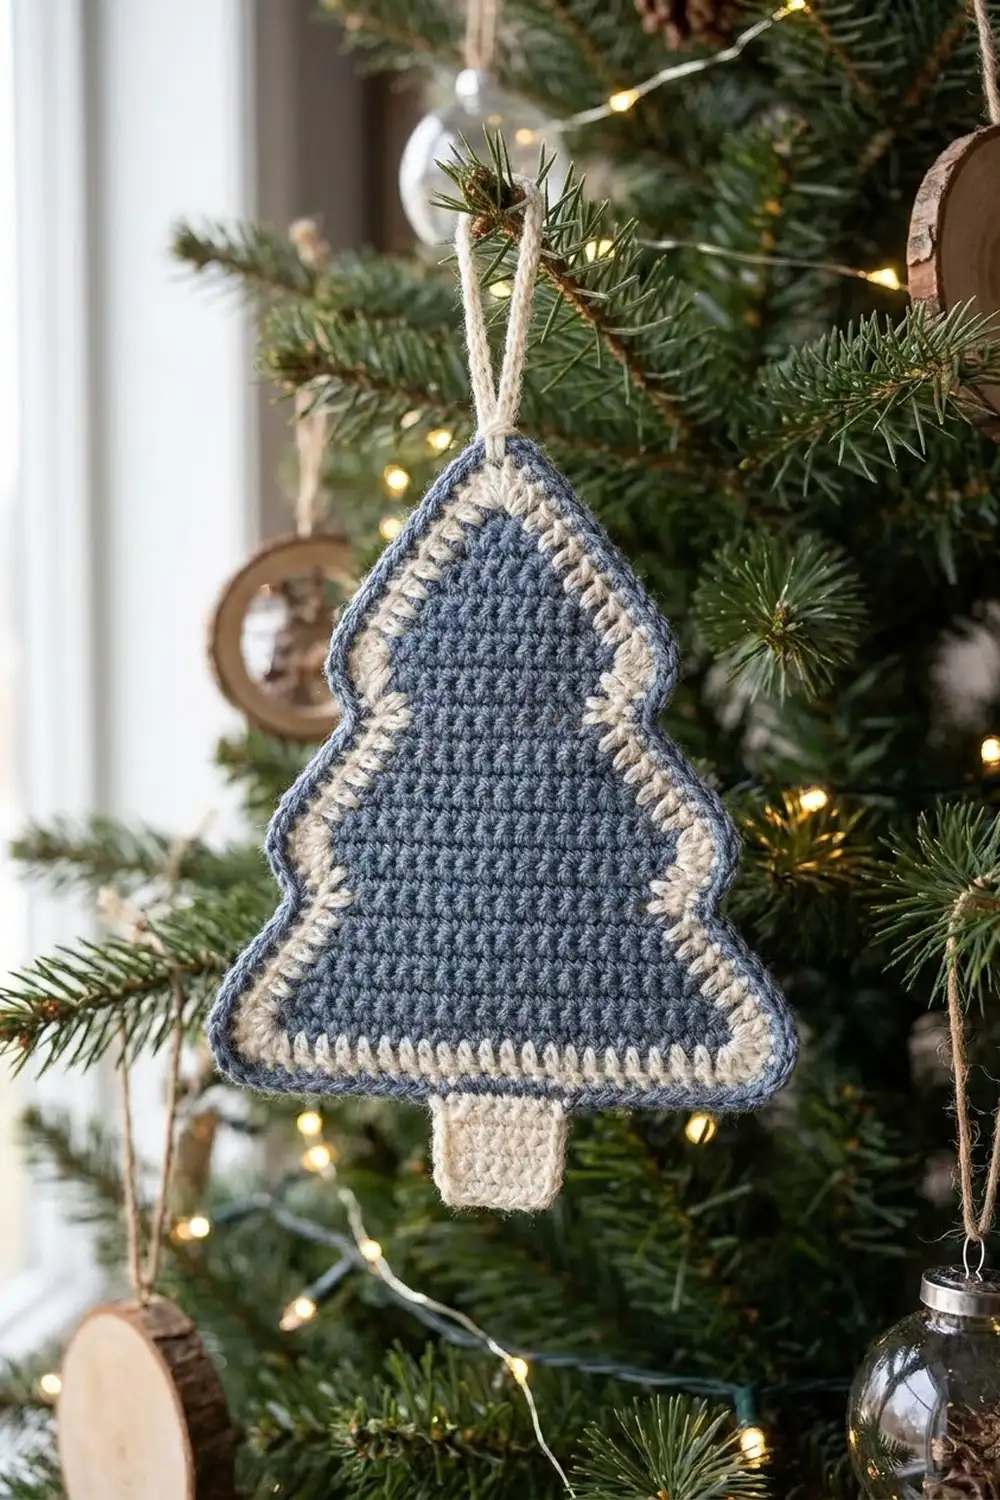
The Frosted Pine is a flat, three-tier Christmas tree ornament with a quiet Scandinavian look. The tree is worked in tight single crochet in a soft slate blue. It is framed by a cream border with an open “ladder” round, which leaves small shadow gaps all the way around the tree, and a crisp single crochet outer edge.
A short cream trunk sits under the bottom edge and a single crochet-covered loop rises from the tip. Hang it on the tree, tie it to a gift, or hang it from your car mirror for the season.
This pattern uses US crochet terms. The finished ornament measures about 4.3 in (10.9 cm) wide and 5.6 in (14.2 cm) tall from tip to trunk, plus a 1.5 in (3.8 cm) hanging loop.
Construction is simple. You work the blue body in turned rows from the tip down, with two small step-in rows that make the tiers. Then you add two cream border rounds, the trunk, and the loop. It is one piece with no sewing and no joining.
Finished Size and Construction
- Finished size: about 4.3 in (10.9 cm) wide x 5.6 in (14.2 cm) tall, without the loop
- Total hanging length: about 7.1 in (18.0 cm) with the loop
- Skill level: Easy / advanced beginner
- Terminology: US crochet terms
- Yarn weight: Sport weight (#2) cotton or cotton blend
- Hook: 3.0 mm
- Number of pieces: 1
- Layout: single motif, no joining
- Body size before border: about 3.5 in (8.9 cm) wide x 4.0 in (10.2 cm) tall
- Border depth: about 0.4 in (1.0 cm) on each edge
- Trunk: about 0.75 in (1.9 cm) wide x 0.8 in (2.0 cm) tall
Materials
Yarn: Use a smooth sport weight cotton or cotton blend for clear stitch definition and a flat finish. Mercerized cotton gives the neat, slightly glossy look shown. The yardage below assumes about 155 m per 50 g.
- Color A, slate blue (body): 6 g, about 19 m
- Color B, cream (border, trunk, loop): 5 g, about 16 m
These quantities include a margin for checking gauge and weaving in ends.
Tools:
- 3.0 mm crochet hook
- Tapestry needle
- Scissors
- 2 stitch markers
- Ruler or tape measure
- Pins and a blocking mat or folded towel
- Spray bottle with water
Abbreviations (US Terms)
- ch – chain
- sl st – slip stitch
- sc – single crochet
- dc – double crochet
- sc2tog – single crochet 2 together
- inc – 2 sc in the same stitch
- sk – skip
- sp – space
- st(s) – stitch(es)
- RS / WS – right side / wrong side
Special stitch – unit: In this pattern a “unit” is (dc, ch 1). Each unit makes 1 dc post and 1 ch-1 space. The ch-1 spaces are the small open windows in the cream ladder round.
Gauge and Checkpoints
Gauge: 22 sc x 24 rows = 4 in (10.2 cm) in sc worked in turned rows, with a 3.0 mm hook.
That works out to 5.5 sts and 6 rows per inch. Rather than a separate swatch, the body works as your test piece: crochet it, measure, and only then start the border.
Checkpoints:
- After Row 8 (Tier 1): 9 sts, about 1.6 in (4.1 cm) wide and 1.3 in (3.3 cm) tall.
- After Row 15 (Tier 2): 13 sts, about 2.4 in (6.1 cm) wide and 2.5 in (6.4 cm) tall.
- After Row 24 (full body): 19 sts, about 3.5 in (8.9 cm) wide and 4.0 in (10.2 cm) tall.
- After the border: about 4.3 in (10.9 cm) wide and 4.8 in (12.2 cm) tall, without the trunk.
- After the trunk: about 5.6 in (14.2 cm) total height.
If your body is too big: go down to a 2.75 mm hook. If it is more than 0.2 in (0.5 cm) too wide, check that you aren’t adding a stitch at the turning chain.
If your body is too small: go up to a 3.25 mm hook. Small differences are fine for an ornament, but loose or tight gauge will change how the border sits, so check the fabric. It should be firm and flat, with no holes.
Tree Body
With Color A. Work in turned rows. Ch 1 at the start of each row does not count as a stitch. Mark Row 1 as the RS.
Tier 1 (Top)
Row 1 (RS): Ch 2, 3 sc in 2nd ch from hook, turn. (3 sts)
Row 2: Ch 1, sc in each st across, turn. (3 sts)
Row 3: Ch 1, inc in first st, sc in next st, inc in last st, turn. (5 sts)
Row 4: Ch 1, sc across, turn. (5 sts)
Row 5: Ch 1, inc, sc in next 3 sts, inc, turn. (7 sts)
Row 6: Ch 1, sc across, turn. (7 sts)
Row 7: Ch 1, inc, sc in next 5 sts, inc, turn. (9 sts)
Row 8: Ch 1, sc across, turn. (9 sts)
Checkpoint: about 1.6 in (4.1 cm) wide.
Tier 2 (Middle)
Row 9 (step-in row): Ch 1, sc2tog, sc in next 5 sts, sc2tog, turn. (7 sts)
This row pulls both edges in by 1 stitch, which makes the first step in the outline.
Row 10: Ch 1, inc, sc in next 5 sts, inc, turn. (9 sts)
Row 11: Ch 1, sc across, turn. (9 sts)
Row 12: Ch 1, inc, sc in next 7 sts, inc, turn. (11 sts)
Row 13: Ch 1, sc across, turn. (11 sts)
Row 14: Ch 1, inc, sc in next 9 sts, inc, turn. (13 sts)
Row 15: Ch 1, sc across, turn. (13 sts)
Checkpoint: about 2.4 in (6.1 cm) wide and 2.5 in (6.4 cm) tall.
Tier 3 (Bottom)
Row 16 (step-in row): Ch 1, sc2tog, sc in next 9 sts, sc2tog, turn. (11 sts)
Row 17: Ch 1, inc, sc in next 9 sts, inc, turn. (13 sts)
Row 18: Ch 1, sc across, turn. (13 sts)
Row 19: Ch 1, inc, sc in next 11 sts, inc, turn. (15 sts)
Row 20: Ch 1, sc across, turn. (15 sts)
Row 21: Ch 1, inc, sc in next 13 sts, inc, turn. (17 sts)
Row 22: Ch 1, sc across, turn. (17 sts)
Row 23: Ch 1, inc, sc in next 15 sts, inc, turn. (19 sts)
Row 24: Ch 1, sc across. (19 sts) Fasten off and weave in ends.
The body is 24 rows tall, with a 19-stitch bottom edge. Each slanted side has 24 row ends.
Border
Border Gauge
The ladder round is worked at 1 unit per 2 stitches along the bottom edge and 1 unit per 2 row ends along the sides.
Two sc are about 0.36 in (0.9 cm) wide, and 2 rows are about 0.33 in (0.8 cm) tall. One (dc, ch 1) unit spans about the same distance, so the border lies flat without cupping or ruffling.
Round 1: Ladder Round
Hold the tree upside down, with the bottom edge (Row 24) at the top and the RS facing you. Join Color B with a sl st in the first st of Row 24 at the right-hand corner.
Corner 1: Ch 4 (counts as dc + ch 1), dc in same st, ch 1. (2 units)
Bottom edge: [Sk next st, dc in next st, ch 1] 8 times. Your dc go into sts 3, 5, 7, 9, 11, 13, 15, and 17. (8 units)
Corner 2: Sk st 18, (dc, ch 1) twice in st 19. (2 units)
Bottom edge total: 2 + 8 + 2 = 12 units.
Side 1: Work down the side toward the tip. Make 1 unit in every other row end: row ends 22, 20, 18, 16, 14, 12, 10, 8, 6, 4, and 2. Skip row end 23, which sits right next to the corner. (11 units)
Where the steps occur at Rows 9 and 16, keep working into the row ends as written. The dc posts will follow the notch on their own. Do not add stitches.
Tip: (Dc, ch 1) 3 times into the foundation ch at the very tip, which is the base of Row 1. (3 units)
Side 2: Work back up the other side. Make 1 unit in row ends 2, 4, 6, 8, 10, 12, 14, 16, 18, 20, and 22. (11 units)
Join with a sl st in the 3rd ch of the beginning ch-4.
Round 1 total: 12 + 11 + 3 + 11 = 37 units. That’s 37 dc and 37 ch-1 sps, or 74 sts if you count each dc and each ch-1 sp as one.
Round 2: Outer Edge
This is a trim round. You work 1 sc into every dc and every ch-1 sp, then add a few extra sc at the corners and the tip.
Ch 1.
Corner 1: Sc in same st as join, 2 sc in next ch-1 sp, sc in next dc, sc in next ch-1 sp. (5 sc)
Bottom edge: [Sc in next dc, sc in next ch-1 sp] 8 times. (16 sc)
Corner 2: Sc in next dc, 2 sc in next ch-1 sp, sc in next dc, sc in next ch-1 sp. (5 sc)
Bottom edge total: 24 sc (1 per existing st) + 2 extra = 26 sc.
Side 1: [Sc in next dc, sc in next ch-1 sp] 11 times. (22 sc)
Tip: Sc in next dc, sc in next ch-1 sp, 3 sc in next dc (the center tip dc), sc in next ch-1 sp, sc in next dc, sc in next ch-1 sp. Tip total: 6 sc (1 per existing st) + 2 extra = 8 sc. Place a marker in the center sc of the 3-sc group.
Side 2: [Sc in next dc, sc in next ch-1 sp] 11 times. (22 sc)
Join with a sl st in the first sc. Fasten off.
Round 2 total: 74 (1 per existing st) + 4 extra (1 at each bottom corner and 2 at the tip) = 78 sc. Check: 26 + 22 + 8 + 22 = 78.
Why the Math Works
The body’s bottom edge has 19 sts. Working into every other stitch, plus 2 units in each corner stitch, gives 12 units, and 12 units become 24 sc plus 2 corner extras, or 26 sc. Each side has 24 row ends. Row end 24 belongs to the corner and the tip sits on Row 1, which leaves row ends 2 through 22 (every other one) for 11 units, or 22 sc.
The only stitches added beyond 1 per existing stitch are the 4 extras in Round 2. These let the edge turn the two bottom corners and the tip without pulling.
Trunk
With the tree upright, find the bottom edge’s 26 sc. The center 4 sc are sts 12 to 15, with 11 sc on each side.
Row 1: With RS facing, join Color B with a sl st in the 12th sc. Ch 1, sc in same st and in next 3 sts, turn. (4 sts)
Rows 2–5: Ch 1, sc across, turn. (4 sts)
Fasten off. The trunk is about 0.75 in (1.9 cm) wide and 0.8 in (2.0 cm) tall.
Hanging Loop
Join Color B with a sl st in the marked center sc at the tip. Ch 18, then sl st in the same sc to form the loop. Work 24 sc into the loop, covering the chain completely, then sl st in the tip sc. Fasten off. The finished loop is about 1.5 in (3.8 cm) tall.
Final Blocking
- Weave in all ends along stitches of their own color so nothing shows through the ladder gaps.
- Spray the ornament until damp but not dripping.
- Lay it RS up on a blocking mat or folded towel.
- Pin the tip, then the two bottom corners, so the body measures 4.3 in (10.9 cm) wide.
- Pin each tier step so the notches are crisp and match on both sides.
- Straighten the ladder posts so they stand evenly, with the gaps open.
- Pin the trunk straight down and the loop straight up.
- Check the total height of about 5.6 in (14.2 cm), then let it dry completely before unpinning.
Final Quality-Control Checklist
- Body has 19 sts on Row 24 and 24 rows total.
- Both sides step in at the same rows (9 and 16).
- Round 1 has 37 units, with the ch-1 gaps evenly spaced.
- Round 2 has 78 sc, laid out 26 / 22 / 8 / 22.
- Trunk is centered, with 11 sc on each side.
- The loop sits exactly on the tip point.
- The piece lies flat with no cupping or ruffling.
- Finished size is about 4.3 in x 5.6 in (10.9 cm x 14.2 cm).
Troubleshooting
Border ruffles: Your dc are too tall or loose. Try a 2.75 mm hook for Round 1 only.
Border cups or pulls the sides inward: Your units are too tight. Loosen your ch-1s, or try a 3.25 mm hook for the border.
Tiers look lopsided: One sc2tog was probably worked one stitch in from the edge. Count Rows 9 and 16 again: you should have 7 and 11 sts.
Body edges are wavy: You may be working into the turning ch. Ch 1 never counts as a stitch.
Trunk is off-center: Count the bottom-edge sc again from either corner. The trunk starts in sc 12.
Loop twists: Work the 24 sc evenly and steam it lightly while pinned straight.
Care
Hand wash in cool water with mild soap and lay flat to dry, reshaping the tier steps while damp. Store flat or hang it so the loop doesn’t crease.
Final Notes
Here is the full measurement chain. Gauge is 22 sc x 24 rows = 4 in (10.2 cm). The 24-row body is 3.5 in x 4.0 in (8.9 cm x 10.2 cm). The two border rounds (37 units, then 78 sc) add 0.4 in (1.0 cm) on every edge, giving 4.3 in x 4.8 in (10.9 cm x 12.2 cm). The trunk brings the height to 5.6 in (14.2 cm), and the loop brings the total hanging length to 7.1 in (18.0 cm).
If your body checkpoints match, the border and trunk will fall into place. Make one in blue, then try a deep green or a red version for a matching set.
Happy crocheting!