

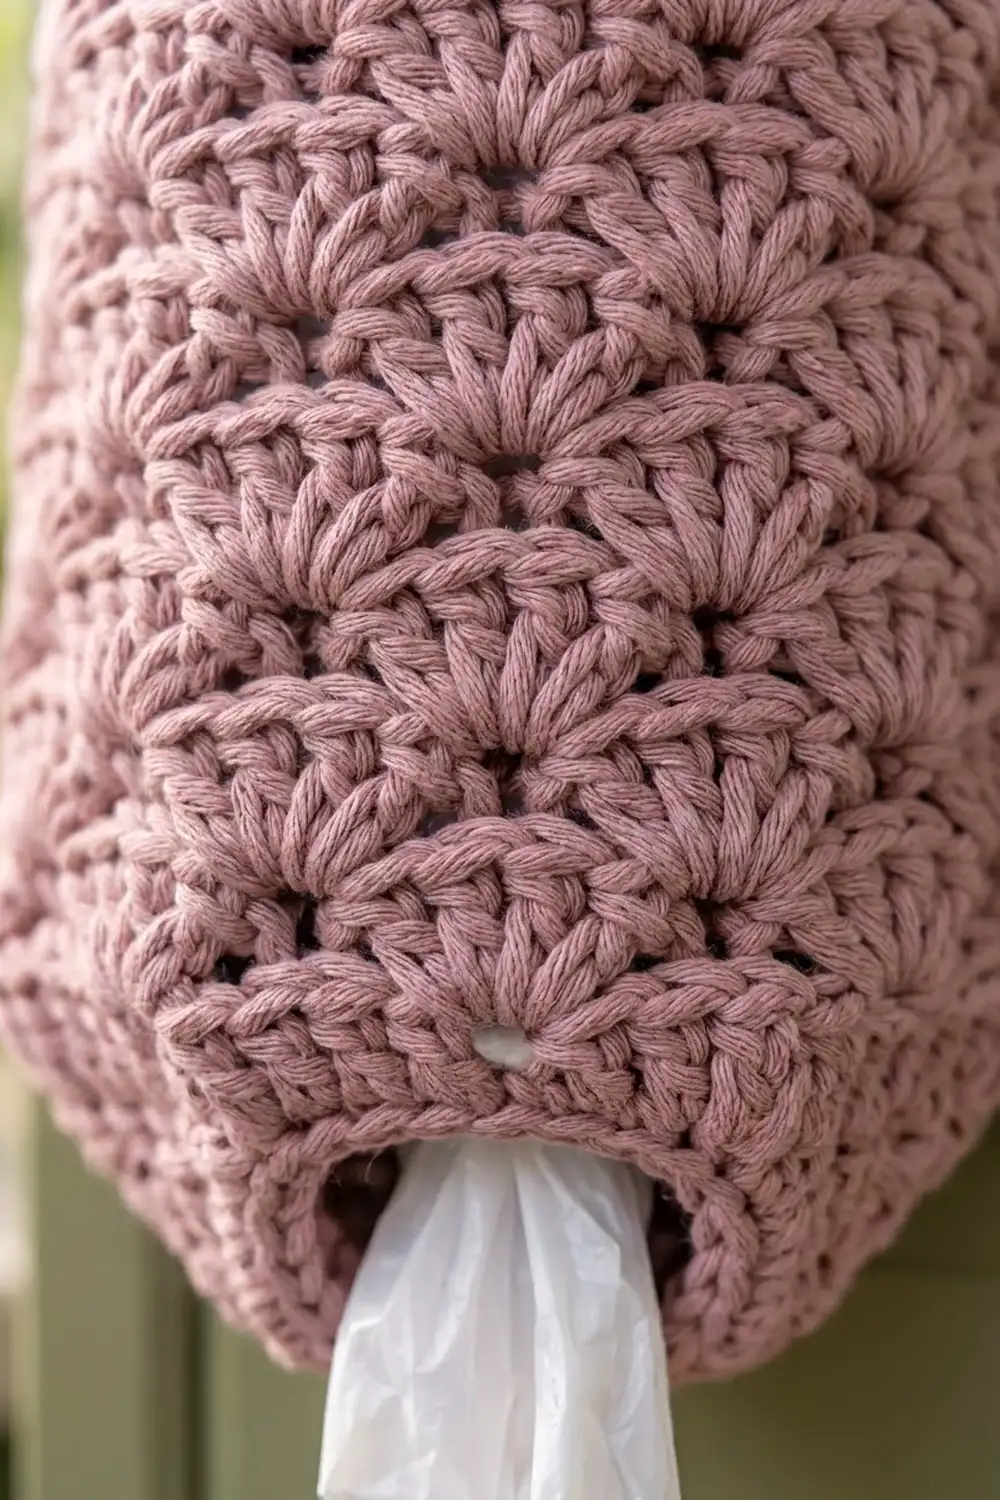
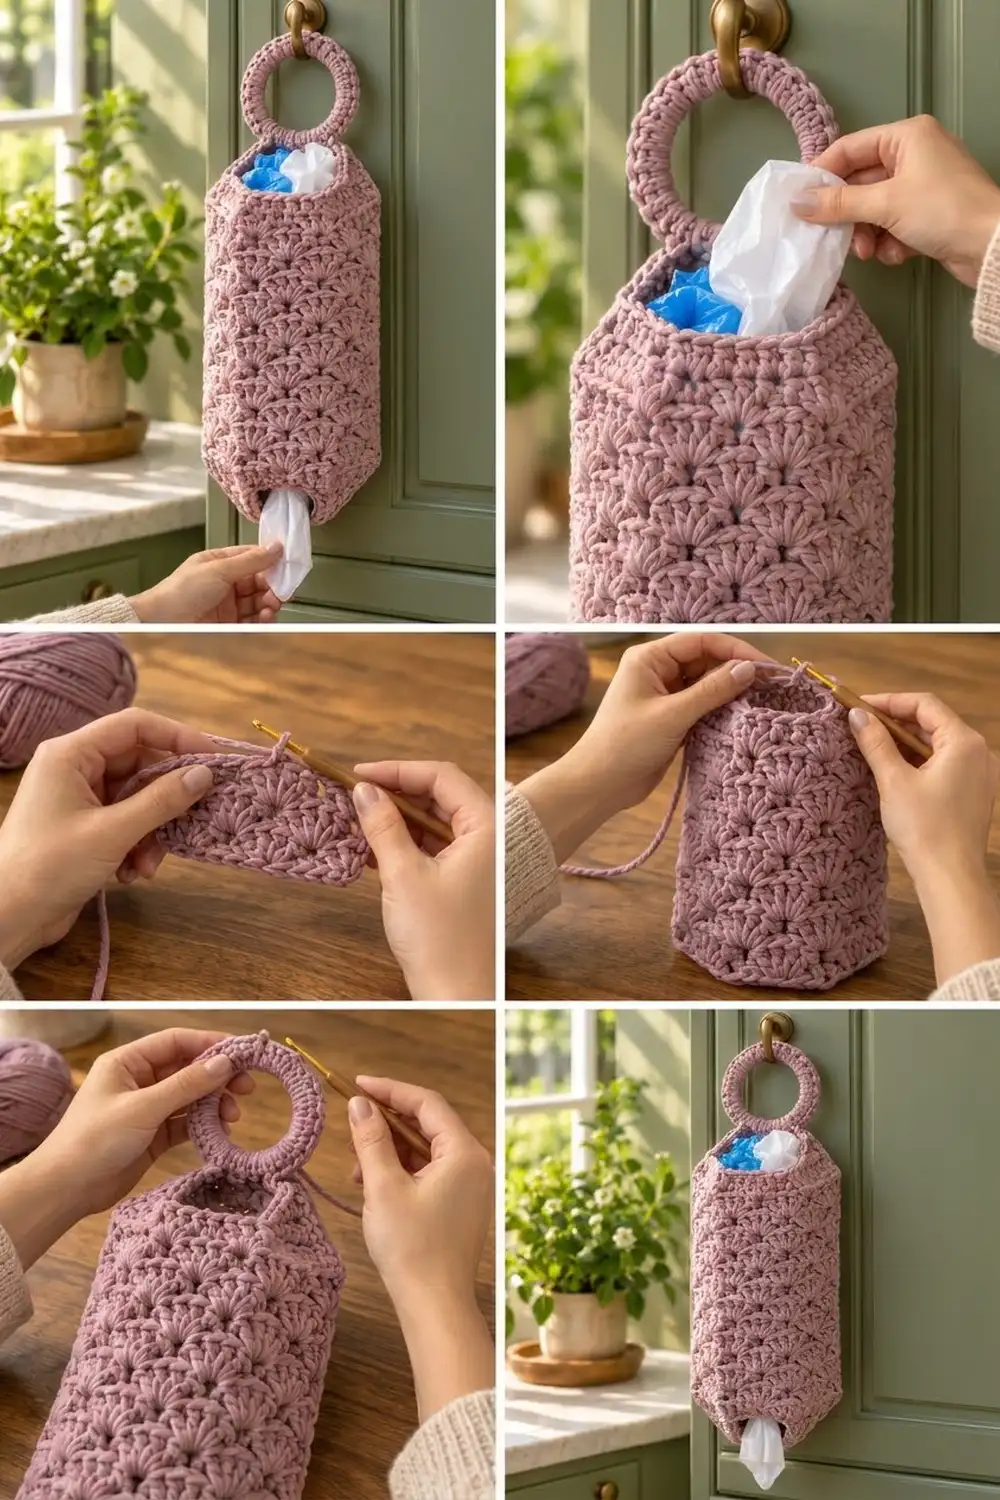
This plastic bag holder keeps grocery bags in one place. You stuff bags in through the top and pull them out one at a time through the bottom. The body is a tall six-sided tube covered in stacked fan shells. A chunky covered ring at the top lets it hang from a hook or cabinet knob.
The sample uses one dusty mauve-rose cotton, which suits a kitchen and shows the shell texture well. Any solid or lightly heathered color works. Busy variegated yarns hide the fans.
The pattern uses US crochet terms. The finished body is about 16.9 in (42.9 cm) tall and 16 in (40.6 cm) around, or about 5 in (12.7 cm) across the hexagon. With the ring, it hangs about 21 in (53.3 cm) long.
The body is worked bottom-up in joined rounds. Single crochet increase rounds form the six-sided lower taper, and 18 rounds of fan shells make the main tube. A leveling round flattens the shell tops, and single crochet decrease rounds form the upper taper. A ring covered in single crochet is attached with a short sewn tab.
Finished Size and Construction
- Finished size: 16.9 in (42.9 cm) body height; 16 in (40.6 cm) circumference; about 21 in (53.3 cm) total hanging length
- Skill level: Easy-intermediate
- Terminology: US
- Yarn weight: Worsted (#4) cotton or cotton blend
- Hook: 5.0 mm (H-8)
- Number of pieces: 1 body, 1 covered ring and 1 small tab, assembled into one holder
- Layout: Single holder; there is no grid or motif layout
- Body size before border: 16.4 in (41.7 cm) tall
- Border depth: about 0.25 in (0.6 cm) at each opening
- Openings: bottom 8 in (20.3 cm) around; top 10.7 in (27.2 cm) around
- Ring: 3 in (7.6 cm) ring, about 3.75 in (9.5 cm) across once covered
Materials
Use a smooth, firm worsted cotton. It holds the hexagon shape, doesn’t stretch much under the weight of the bags, and keeps the fans crisp. Acrylic also works, but the holder will be softer and may sag a little.
- Mauve-rose (main color): 200 g, about 340 m (372 yd)
Tools:
- 5.0 mm (H-8) crochet hook
- One 3 in (7.6 cm) metal or plastic ring
- Locking stitch markers (at least 7)
- Tapestry needle
- Scissors
- Measuring tape
- A rolled towel or a cylinder about 5 in (12.7 cm) across, for blocking
The yarn amount includes a margin of about 20 percent for gauge differences and a test start.
Abbreviations (US Terms)
- ch: chain
- sl st: slip stitch
- sc: single crochet
- hdc: half double crochet
- dc: double crochet
- sc2tog: single crochet 2 together
- sk: skip
- st(s): stitch(es)
- rnd(s): round(s)
- BLO: back loop only
Shell: Work 5 dc in the same stitch.
Split shell: At the start of a B round, ch 3 (counts as dc) and 2 dc go in the first stitch. At the end of the round, 2 more dc go into that same stitch. Together they make one 5-stitch shell, with the ch-3 at its center.
Gauge and Checkpoints
Single crochet gauge: 18 sc and 20 rnds = 4 in (10.2 cm).
Shell gauge: 18 sts (3 shell repeats) = 4 in (10.2 cm); 4 shell rnds = 3 in (7.6 cm).
The start of the body is your gauge test, so you don’t need a separate swatch. Work Rnds 1–11, then check:
- After Rnd 1: the ring measures 8 in (20.3 cm) around.
- After Rnd 7: the piece measures 16 in (40.6 cm) around and 1.4 in (3.6 cm) tall.
- After Rnd 11: the 4 shell rounds measure 3 in (7.6 cm) tall.
If your piece is too big, switch to a 4.5 mm hook. If it’s too small, switch to a 5.5 mm hook. If the circumference is off by more than 1 in (2.5 cm), rip back and change hooks. A loose holder sags and lets bags fall out.
Body
Mark the first stitch of each round and move the marker up as you go. Join every round with a sl st to the first stitch. Beginning chains don’t count as stitches unless the pattern says they do.
Lower Taper
Foundation: Ch 36, then sl st to the first ch to form a ring. Don’t twist the chain.
Rnd 1: Ch 1, sc in the back bump of each ch around, join. (36 sc) This leaves the front loops of the chain free for the border.
Place 6 markers, one in every 6th st (sts 6, 12, 18, 24, 30 and 36). Each face of the hexagon has 6 sts, including its marked corner st.
Rnd 2: Ch 1, sc in next 5 sts, 2 sc in next st 6 times, join. (42 sc)
Rnd 3: Ch 1, sc in next 6 sts, 2 sc in next st 6 times, join. (48 sc)
Rnd 4: Ch 1, sc in next 7 sts, 2 sc in next st 6 times, join. (54 sc)
Rnd 5: Ch 1, sc in next 8 sts, 2 sc in next st 6 times, join. (60 sc)
Rnd 6: Ch 1, sc in next 9 sts, 2 sc in next st 6 times, join. (66 sc)
Rnd 7: Ch 1, sc in next 10 sts, 2 sc in next st 6 times, join. (72 sc)
The increases stack in the same six places every round. That’s what makes the six angled facets of the lower taper. Each face now has 12 sts, including its corner st.
Checkpoint: 16 in (40.6 cm) around and 1.4 in (3.6 cm) tall.
Shell Section
The 72 sts divide into 12 repeats of 6 sts, which gives exactly 2 shells per face. The rounds alternate between A and B. The start of the round stays in one place, so the seam doesn’t spiral.
Rnd 8 (A): Ch 1, sc in first st, sk 2 sts, shell in next st, sk 2 sts, sc in next st 11 times, sk 2 sts, shell in next st, sk 2 sts, join to first sc. (12 shells + 12 sc = 72 sts)
Rnd 9 (B): Ch 3 (counts as dc), 2 dc in same st as join, sk 2 dc, sc in center dc of next shell, sk 2 dc, shell in next sc 11 times, sk 2 dc, sc in center dc of last shell, sk 2 dc, 2 dc in same st as beginning ch-3 to complete the split shell, join to top of ch-3. (12 shells + 12 sc = 72 sts)
Rnd 10 (A): Ch 1, sc in top of ch-3 (center of split shell), sk 2 dc, shell in next sc, sk 2 dc, sc in center dc of next shell 11 times, sk 2 dc, shell in next sc, sk 2 dc, join to first sc. (72 sts)
Rnds 11–25: Repeat Rnds 9 and 10 seven more times, then work Rnd 9 once more. That makes 18 shell rounds in total, ending with a B round. (72 sts every round)
Checkpoint: The shell section is 13.5 in (34.3 cm) tall, and the whole body is 14.9 in (37.8 cm) tall. Stuff the tube lightly with a towel and check that the fans form straight vertical columns.
Leveling Round
This is a conversion round. It fills the dips between the fans so the upper taper starts on a flat edge. Start at the ch-3 at the center of the split shell. Each 6-stitch repeat sits over a shell center, dc, dc, sc, dc, dc.
Rnd 26: Ch 1, sc in next 2 sts, hdc in next st, dc in next sc, hdc in next st, sc in next st 12 times, starting in the top of the ch-3, join. (72 sts worked 1 per existing stitch + 0 added = 72 sts)
Each dc lands on a low sc and each sc lands on a shell peak, so the edge comes out level. This round adds about 0.5 in (1.3 cm).
Upper Taper
Place a corner marker in every 12th st (sts 12, 24, 36, 48, 60 and 72).
Rnd 27: Ch 1, sc in next 10 sts, sc2tog 6 times, join. (66 sc)
Rnd 28: Ch 1, sc in next 9 sts, sc2tog 6 times, join. (60 sc)
Rnd 29: Ch 1, sc in next 8 sts, sc2tog 6 times, join. (54 sc)
Rnd 30: Ch 1, sc in next 7 sts, sc2tog 6 times, join. (48 sc)
Rnd 31: Ch 1, sc in each st around, join. (48 sc) Fasten off.
Each upper face now has 8 sts, including its corner st.
Checkpoint: Before the border, the body is 16.4 in (41.7 cm) tall and the top opening is 10.7 in (27.2 cm) around.
Hanging Ring
Join the yarn to the ring with a sl st.
Rnd 1: Ch 1, work 60 sc over the ring, packing them closely, join to the first sc. (60 sc) Fasten off and weave in the ends.
If the ring still shows, add sc in pairs until it’s fully covered. If the stitches start to ruffle, take a few out. The covered ring measures about 3.75 in (9.5 cm) across.
Tab
Foundation: Ch 9.
Row 1: Sc in 2nd ch from hook and in each ch across, turn. (8 sc)
Rows 2–8: Ch 1, sc in each st across, turn. (8 sc) Fasten off and leave a 12 in (30.5 cm) tail.
The tab measures 1.8 in (4.6 cm) wide and 1.6 in (4.1 cm) long. Choose one face of the top rim to be the back. Thread the tab through the covered ring and fold it in half around the bottom of the ring. Line up the tab’s 8 sts with the 8 sts of the back face, and place both ends inside the body. Whipstitch both layers to the inside of Rnds 30–31. The ring should stand upright, about 0.6 in (1.5 cm) above the rim.
Border
The border goes around both openings. It tidies the edges and keeps them from stretching.
Border gauge: Same as the body, 18 sc = 4 in (10.2 cm). Each border round has exactly one stitch per stitch below it.
Top Border
Join the yarn in any corner st of Rnd 31.
Rnd T1: Ch 1, sc in each st around, join. (48 sc: 8 per face × 6 faces)
Rnd T2: Sl st loosely in BLO of each st around. (48 sl st) Fasten off.
Bottom Border
Turn the body upside down. Join the yarn in a free front loop of the foundation chain, at a corner.
Rnd B1: Ch 1, sc in each free loop around, join. (36 sc: 6 per face × 6 faces)
Rnd B2: Sl st loosely in BLO of each st around. (36 sl st) Fasten off.
Why the math works: 36 ÷ 6 = 6 and 48 ÷ 6 = 8, so every face gets a whole number of stitches and the corners stay aligned. Each face count already includes its one corner stitch, so nothing is counted twice. The border adds no stitches, so the openings stay 8 in (20.3 cm) and 10.7 in (27.2 cm) around. Each border adds about 0.25 in (0.6 cm), for a finished height of 16.9 in (42.9 cm).
Final Blocking
- Weave in all ends on the inside.
- Soak the holder in cool water for 10 minutes, then gently press the water out. Don’t wring it.
- Roll it in a towel to remove more water.
- Slide it over a rolled towel or a cylinder about 5 in (12.7 cm) across.
- Pinch the six corner lines on each taper to sharpen the facets.
- Check that it measures 16.9 in (42.9 cm) tall and 16 in (40.6 cm) around. Ease it into shape if it doesn’t.
- Hang it by the ring and let it dry completely with the form still inside.
Final Quality-Control Checklist
- The bottom opening is 8 in (20.3 cm) around and the top is 10.7 in (27.2 cm) around.
- Every shell round has exactly 12 shells, 2 per face.
- The fans form straight vertical columns with no spiral.
- Both tapers show six clear facets.
- The body is 16.9 in (42.9 cm) tall after blocking.
- The ring is fully covered and the tab is sewn firmly through both layers.
- No ends show on the outside.
Troubleshooting
Shells look crowded or cupped: Your dc are too tight. Go up a hook size or pull each loop up a little taller.
Gaps between the shells are large: Your tension is loose. Go down a hook size.
The count drifts away from 72: Skip exactly 2 sts on each side of every shell. On A rounds, work into the top of the ch-3.
The tapers look round instead of faceted: Check that the increases and decreases stack over the corner markers, then block over a firm form.
Bags fall out too easily: Work Rnd B1 as sc in next 4, sc2tog 6 times (30 sc) to make the bottom opening smaller.
The ring tilts: Center the tab on the back face and sew through both layers.
Care
Machine wash cold on a gentle cycle in a laundry bag, or wash by hand. Reshape and air dry.
Final Notes
Every measurement in this pattern depends on gauge, so start by checking for 18 sc to 4 in (10.2 cm). The 36-stitch base gives an 8 in (20.3 cm) bottom opening. Six increase rounds bring the body to 72 sts and 16 in (40.6 cm) around, and 18 shell rounds add 13.5 in (34.3 cm). The leveling round and upper taper close to a 48-stitch top. The border brings the body to 16.9 in (42.9 cm), and with the ring the holder hangs about 21 in (53.3 cm) long. Check each measurement as you reach it.
Happy crocheting!