

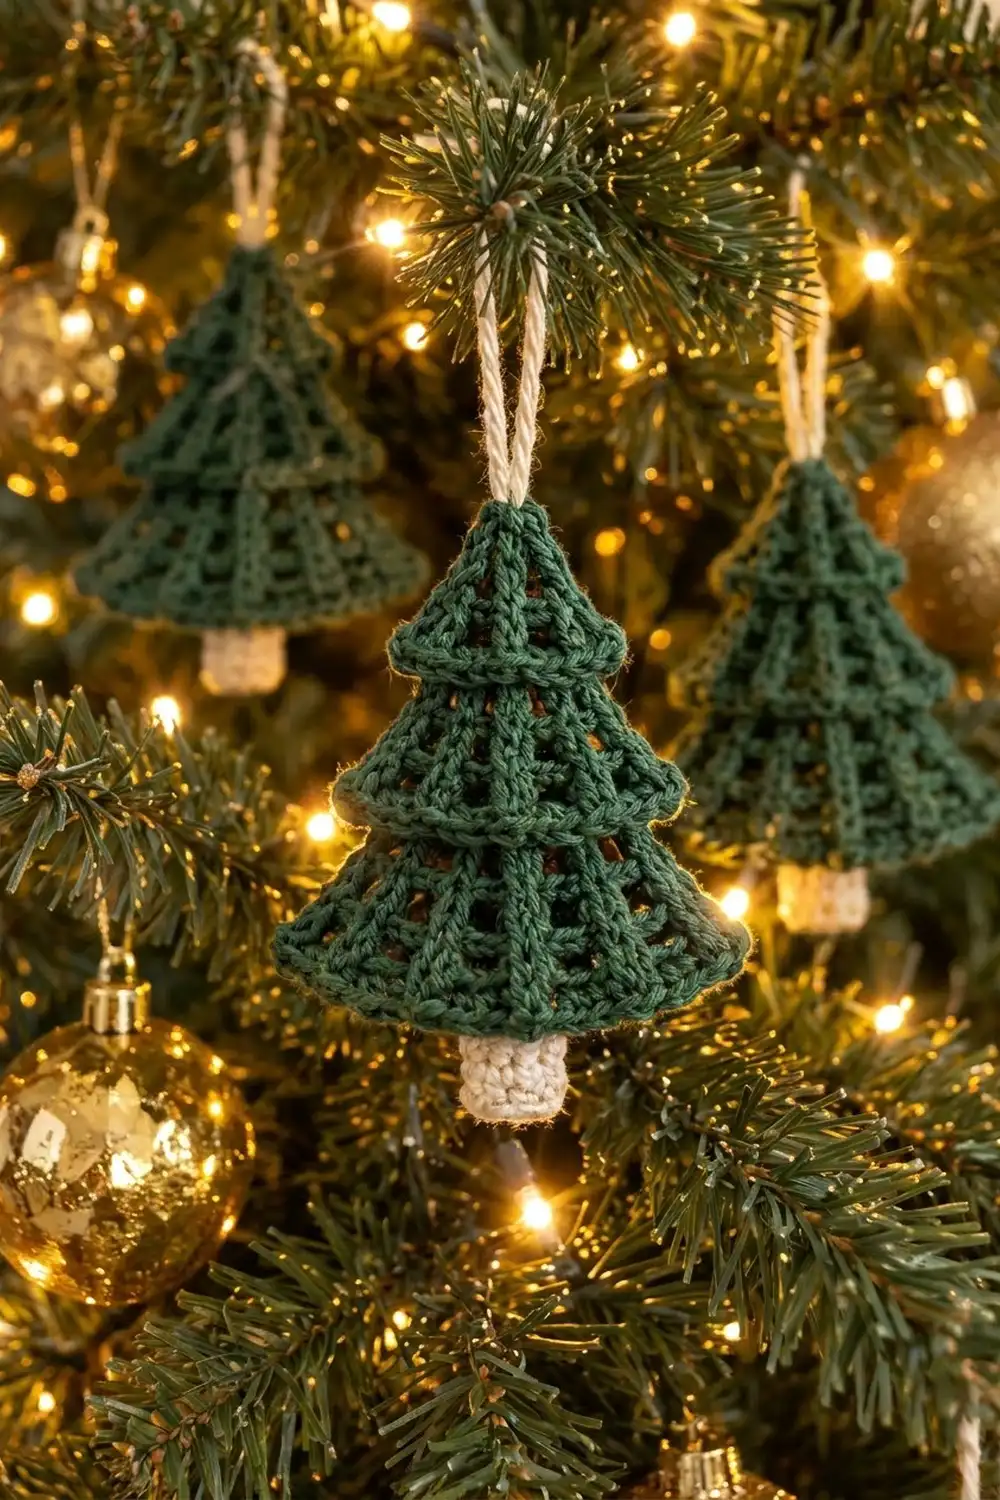
The Evergreen Lattice Tree is a small, flat Christmas ornament. It has three stepped tiers, vertical double crochet ribs with little windows between them, and a solid ledge at the bottom of each tier. When it hangs in front of tree lights, the open spaces glow and the green ribs look like branches.
The palette is simple: deep forest green for the tree and soft cream for the trunk and hanging loop. The style is classic and a little rustic. It looks best in a matte cotton, which keeps the ribs and ridges crisp.
This pattern uses US crochet terms. The finished tree body is about 4.1 in (10.4 cm) wide and 3.7 in (9.4 cm) tall. The trunk adds about 0.5 in (1.3 cm) below, so the ornament is about 4.2 in (10.7 cm) tall without the loop.
You work the body flat in rows, from the tip down, and each tier grows with increases at the edges. Each new tier starts in the back loops only, 2 stitches in from each edge, which creates the stepped ledge and the raised ridge. One round of sc edging finishes the outline. The trunk is a tiny tube that you sew on, and the loop is a crocheted chain.
Finished Size and Construction
- Finished size: body 4.1 in (10.4 cm) wide × 3.7 in (9.4 cm) tall; 4.2 in (10.7 cm) tall with the trunk
- Skill level: Easy–Intermediate
- Terminology: US crochet terms
- Yarn weight: Sport / fine (#2), cotton or cotton blend
- Hook: 2.75 mm (US C-2)
- Number of pieces: 1 ornament, made from the tree body plus a small sewn-on trunk
- Layout: Single piece, no grid
- Body before border: 3.8 in (9.7 cm) wide × 3.4 in (8.6 cm) tall
- Border depth: 1 round of sc, about 0.15 in (0.4 cm)
- Trunk: 0.8 in (2.0 cm) wide × 0.75 in (1.9 cm) long
Materials
Use a smooth sport-weight cotton. It shows the stitches clearly and holds a flat shape well after blocking. Acrylic also works, but the ribs will look softer. Avoid fuzzy yarns, because they fill in the open spaces.
- Forest green: 8 g (about 24 m)
- Cream: 3 g (about 9 m)
These amounts include extra for a gauge swatch and for weaving in ends.
Tools:
– 2.75 mm (US C-2) crochet hook
– Tapestry needle
– Scissors
– Stitch markers (2)
– A pinch of fiberfill or yarn scraps for the trunk
– Blocking mat, rustproof pins, and a spray bottle
– Optional: fabric stiffener or starch spray
Abbreviations (US Terms)
- ch – chain
- sl st – slip stitch
- sc – single crochet
- dc – double crochet
- sk – skip
- st(s) – stitch(es)
- sp – space
- BLO – back loop only
- MR – magic ring
- RS / WS – right side / wrong side
Special stitch – Rib row (worked over N sts): Ch 3 (counts as dc), dc in first st, [ch 1, sk next st, dc in next st] across, then work 1 extra dc in the last st. The row adds 2 stitches, so it ends with N + 2 sts. Each ch-1 sp counts as a stitch.
Stitch counting: In sc rows, the ch 1 does not count as a stitch. In rib rows, the ch-3 counts as a dc. In the sc row after a rib row, work 1 sc in each dc and in each ch-1 sp, and work the last sc in the top of the turning ch-3.
Gauge and Checkpoints
Gauge: 24 sc and 26 rows = 4 in (10.2 cm), so 6 sc = 1 in (2.5 cm). One rib row is about 0.3 in (0.8 cm) tall.
Make one complete tree body before you make a batch. Measure it flat, without stretching:
- After Row 5 (Tier 1): 11 sts, 1.8 in (4.6 cm) wide, 0.9 in (2.3 cm) tall
- After Row 11 (Tier 2): 17 sts, 2.8 in (7.1 cm) wide, 2.2 in (5.6 cm) tall
- After Row 17 (Tier 3): 23 sts, 3.8 in (9.7 cm) wide, 3.4 in (8.6 cm) tall
- After the border: 4.1 in (10.4 cm) wide, 3.7 in (9.4 cm) tall
If your tree is too big, go down 0.25 mm in hook size. If it is too small, go up 0.25 mm. If the width is right but the tree is too tall, your dc stitches are loose: snug each loop before the next yarn over.
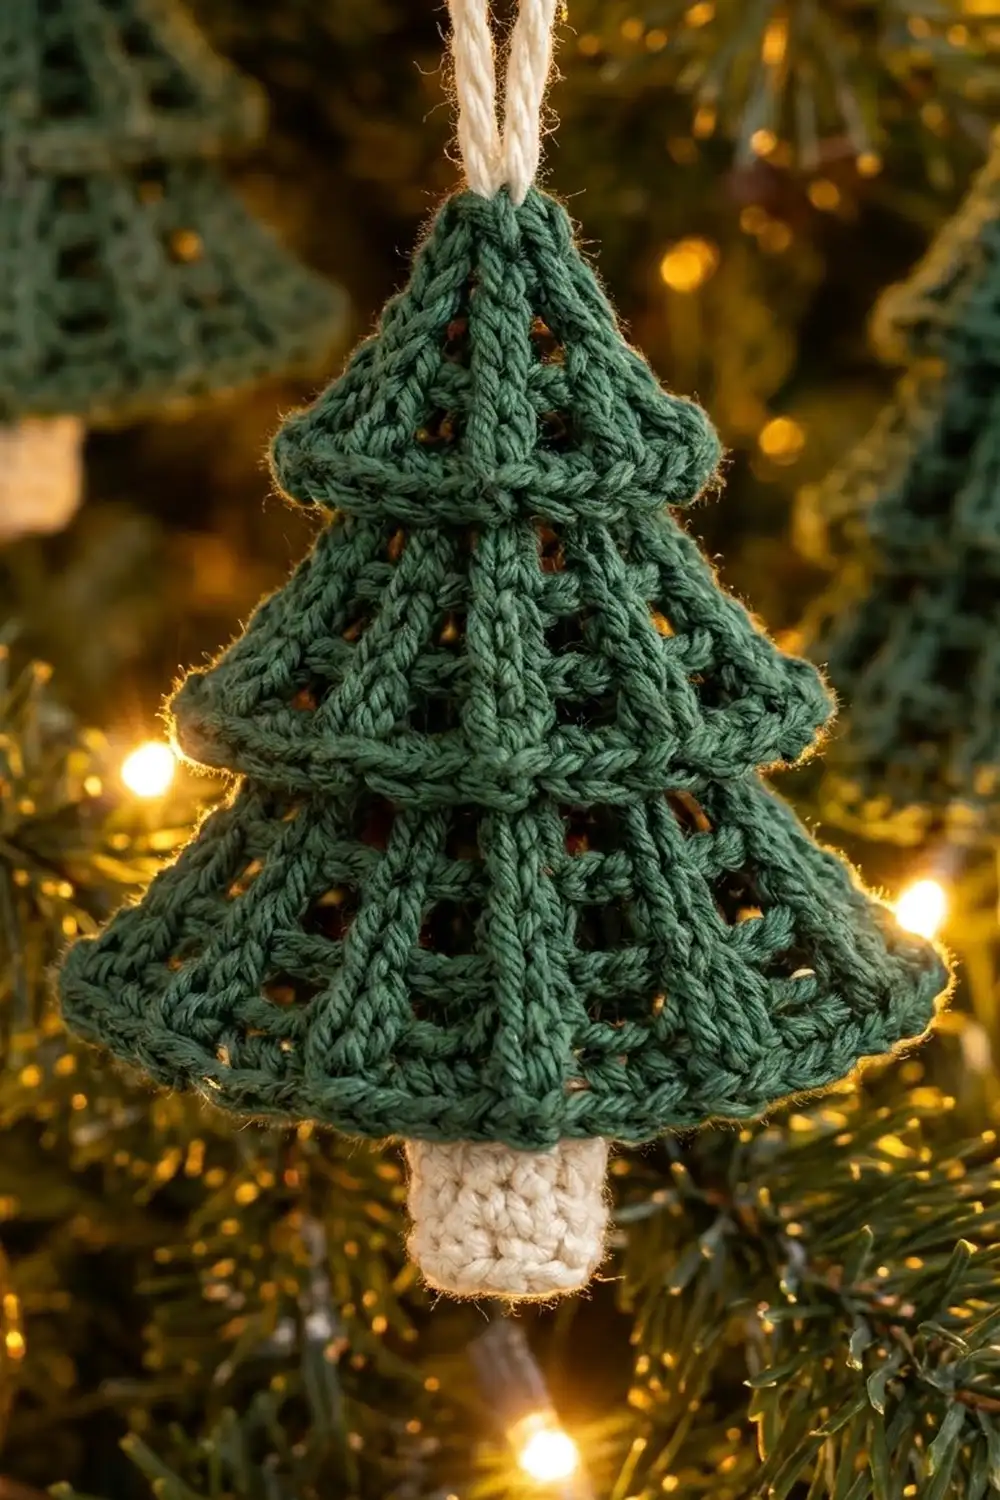
Tree Body
With forest green, ch 2. Row 1 is a WS row, and all even-numbered rows are RS rows. After Row 2, place a marker on the RS.
Tier 1
Row 1 (WS): 3 sc in 2nd ch from hook, turn. (3 sts)
Row 2 (RS): Ch 1, 2 sc in first st, sc in next st, 2 sc in last st, turn. (5 sts)
Row 3 (WS): Rib row over 5 sts: ch 3, dc in first st, ch 1, sk 1, dc in next st, ch 1, sk 1, 2 dc in last st, turn. (7 sts: 5 dc + 2 ch-1 sps)
Row 4 (RS): Ch 1, 2 sc in first st, sc in each st across to last st, 2 sc in last st, turn. (9 sts)
Row 5 (WS, ledge): Ch 1, 2 sc in first st, sc across to last st, 2 sc in last st, turn. (11 sts)
Checkpoint: 1.8 in (4.6 cm) wide.
Tier 2
Row 6 (RS, step-in): Work this row in BLO only. Sl st in first 3 sts, ch 1, sc in the same st as the 3rd sl st and in the next 6 sts. Leave the last 2 sts unworked, turn. (7 sts)
This row starts 2 stitches in from each edge. Those 2 free stitches on each side form the ledge that sticks out. The unused front loops of Row 5 stay on the RS as a raised ridge across the tree.
Row 7 (WS): Rib row over 7 sts. (9 sts: 6 dc + 3 ch-1 sps)
Row 8 (RS): Ch 1, 2 sc in first st, sc across to last st, 2 sc in last st, turn. (11 sts)
Row 9 (WS): Rib row over 11 sts. (13 sts: 8 dc + 5 ch-1 sps)
Row 10 (RS): Ch 1, 2 sc in first st, sc across, 2 sc in last st, turn. (15 sts)
Row 11 (WS, ledge): Ch 1, 2 sc in first st, sc across, 2 sc in last st, turn. (17 sts)
Checkpoint: 2.8 in (7.1 cm) wide.
Tier 3
Row 12 (RS, step-in): Work this row in BLO only. Sl st in first 3 sts, ch 1, sc in the same st as the 3rd sl st and in the next 12 sts. Leave the last 2 sts unworked, turn. (13 sts)
Row 13 (WS): Rib row over 13 sts. (15 sts: 9 dc + 6 ch-1 sps)
Row 14 (RS): Ch 1, 2 sc in first st, sc across, 2 sc in last st, turn. (17 sts)
Row 15 (WS): Rib row over 17 sts. (19 sts: 11 dc + 8 ch-1 sps)
Row 16 (RS): Ch 1, 2 sc in first st, sc across, 2 sc in last st, turn. (21 sts)
Row 17 (WS, ledge): Ch 1, 2 sc in first st, sc across, 2 sc in last st, turn. (23 sts)
Do not fasten off. Checkpoint: 3.8 in (9.7 cm) wide × 3.4 in (8.6 cm) tall.
Border
Border gauge: Keep working at 6 sc per inch. Along the sides, work 1 sc into the end of each sc row and 2 sc into the end of each rib row. A dc row is about twice as tall as an sc row, so this matches the edge length and keeps it flat.
Border round (RS): With the RS facing (you turned after Row 17):
- Bottom edge: Ch 1. Work 3 sc in the first st for the corner, sc in the next 21 sts, then 3 sc in the last st for the corner. (23 + 4 = 27 sc, corners included)
- First side: Work up the side from the Row 16 end to the Row 1 end. Work 1 sc in each sc-row end (11 rows) and 2 sc in each rib-row end (5 rows = 10 sc). When you reach Rows 11 and 5, also work 1 sc in each of the 2 free ledge sts. On the side where a step-in row started with sl sts, work these ledge sc through both the sl st and the stitch beneath it. (11 + 10 + 4 = 25 sc)
- Tip: (Sc, ch 2, sc) in the foundation ch at the top. (2 sc + ch-2 sp)
- Second side: Work down the other side the same way, from Row 1 to Row 16. (25 sc)
- Sl st to the first sc. Fasten off.
Border total: 27 + 25 + 2 + 25 = 79 sc plus 1 ch-2 sp.
Why the math works: The bottom uses each of the 23 sts once, plus 2 extra sts at each corner so the edge turns without pulling. Each side covers 16 row ends and 2 ledges. Both sides get the same count, so the tree stays symmetrical. The tip gets only the 2 sc around the ch-2 sp, which keeps the point sharp.
Trunk
With cream:
Rnd 1: 5 sc in MR. Pull the ring closed tightly. (5 sts)
Rnd 2: 2 sc in each st around. (10 sts)
Rnd 3: Sc in BLO of each st around. (10 sts) This makes a flat base for the bottom of the trunk.
Rnds 4–6: Sc in each st around. (10 sts)
Fasten off and leave a 10 in (25.4 cm) tail. Push in a pinch of stuffing so the trunk is lightly padded, then flatten the open end. The trunk should measure 0.8 in (2.0 cm) wide × 0.75 in (1.9 cm) long.
Assembly: Trunk and Loop
Attach the trunk: Center the trunk on the WS of the tree, behind the bottom edge. Let 0.25 in (0.6 cm) of the trunk overlap the tree, so 0.5 in (1.3 cm) shows below the border. Whipstitch the open edge of the trunk to the back bumps of Row 17, keeping the stitches hidden from the RS.
Hanging loop: With cream, join with a sl st in the ch-2 sp at the tip. Ch 16, then sl st in the same ch-2 sp. Fasten off. The loop should be about 1.25 in (3.2 cm) tall. For a stronger loop, work a sl st back along the chain before you fasten off.
Final Blocking
- Weave in all ends through stitches of the same color, keeping them out of the open spaces.
- Mist the ornament with water until it is damp but not soaked.
- Pin it RS up to 4.1 in (10.4 cm) wide at the bottom corners and 3.7 in (9.4 cm) from the tip to the bottom edge.
- Pin each ledge point so it sticks out evenly on both sides.
- Gently straighten each rib so the spaces are open and even.
- Optional: spray lightly with starch, or brush on diluted stiffener.
- Let it dry completely, at least 6 hours, before you unpin it.
Final Quality-Control Checklist
- Row 17 has exactly 23 sts, and the border has 79 sc plus the ch-2 sp
- Each side has 25 border sc
- All three tiers have a clear ledge, with 2 free sts on each side at the end of Tiers 1 and 2
- The front-loop ridges are on the RS
- The ribs fan out evenly, and the open spaces are all about the same size
- The body is 4.1 in (10.4 cm) wide × 3.7 in (9.4 cm) tall, plus the trunk
- The trunk is centered and firm, and its stitching doesn’t show from the front
- The loop is secure, and the ornament hangs straight
Troubleshooting
The ledges don’t stick out. You probably worked the step-in row into every stitch. Check that Rows 6 and 12 leave 2 sts free at each end.
The ridge is on the back. You worked a step-in row on the WS. Rows 6 and 12 must be RS rows.
The sides ruffle. There are too many sc on the row ends. Use only 2 per rib row, and go down a hook size for the border.
The sides pucker. There are too few sc on the row ends. Check that each rib-row end has 2 sc.
The open spaces close up. Your chains are too tight, or the yarn is too fuzzy. Make each ch-1 about as wide as a dc.
The ornament hangs crooked. Check that the loop is centered at the tip. Block again with the tip pinned straight above the trunk.
Care
Hand wash in cool water with mild soap, press out the water in a towel, and dry flat, reshaping as you go. If you stiffened the ornament, block it again after washing.
Final Notes
Here is the measurement chain. Gauge is 6 sc per inch. Tier 1 ends at 11 sts and 1.8 in (4.6 cm) wide. Tier 2 ends at 17 sts and 2.8 in (7.1 cm). Tier 3 ends at 23 sts and 3.8 in (9.7 cm) wide × 3.4 in (8.6 cm) tall. The 79-sc border brings the body to 4.1 in (10.4 cm) × 3.7 in (9.4 cm), and the trunk adds 0.5 in (1.3 cm). If every checkpoint matches, all your trees will come out the same size, which is useful when you make a set for gifts or for your own tree.
Happy crocheting!