

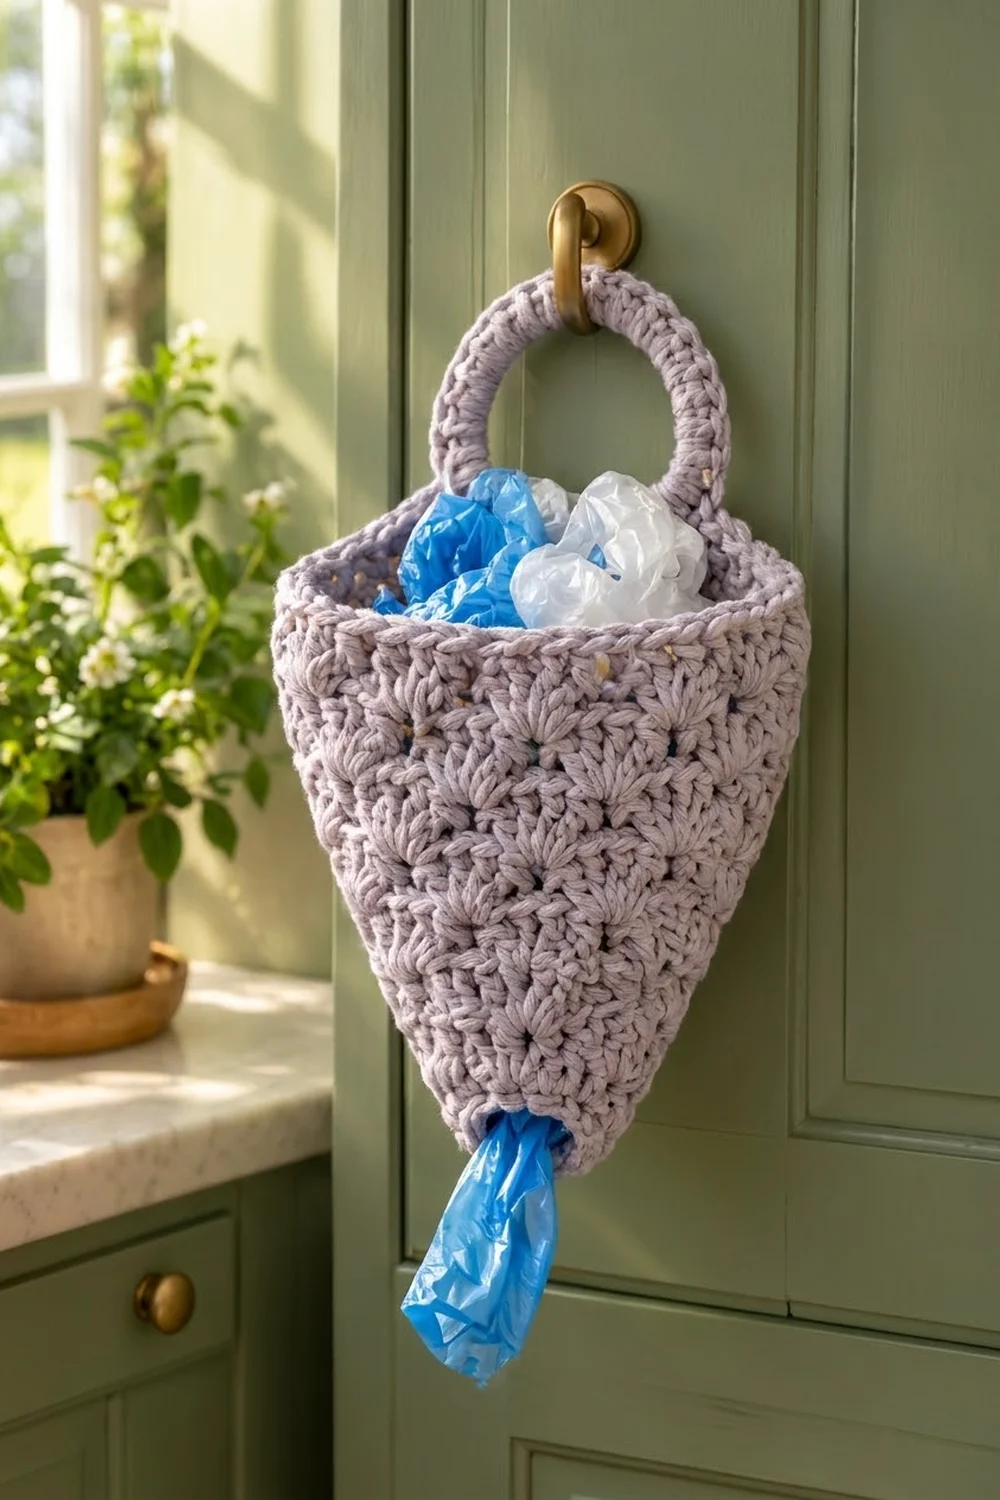
Every kitchen has that drawer full of crumpled grocery bags. This cone-shaped holder gives them a tidy home: you stuff bags in through the wide top and pull them out one at a time through the small hole at the point.
The design is worked in a single soft lavender cotton. The body is covered in staggered rows of 5-double-crochet shells separated by plain single crochet rounds, which gives a scalloped, almost floral texture. A smooth band of single crochet finishes the top, and a crochet-covered ring at the back hangs neatly from a cabinet knob or hook.
This pattern uses US crochet terms. The finished body measures about 8.25 in (21.0 cm) wide across the top when flat and 11 in (27.9 cm) tall. With the ring, the holder hangs about 13.75 in (34.9 cm) long.
Construction is simple. You start at the bottom opening with a chain ring, work upward in joined rounds that alternate shells and single crochet, and add 6 stitches on set increase rounds to form the cone. A 4-round rim closes the top, one round edges the bottom hole, and the covered ring is sewn to the back.
Finished Size and Construction
- Finished size: 8.25 in (21.0 cm) wide flat at the top x 11 in (27.9 cm) tall; 13.75 in (34.9 cm) total with hanger
- Skill level: Easy / Intermediate
- Terminology: US
- Yarn weight: Worsted (#4), cotton or cotton blend
- Hook: 5.0 mm (H-8)
- Number of pieces: 1 body + 1 covered ring (one item, not a multi-motif project)
- Layout: body hangs below the ring, ring sewn to center back of the rim
- Body before border: 9.75 in (24.8 cm) tall x 8.25 in (21.0 cm) wide flat
- Border depth: top rim 1 in (2.5 cm); bottom edging 0.25 in (0.6 cm)
- Bottom opening: 18 stitches, 4.5 in (11.4 cm) around, about 1.4 in (3.6 cm) across
Materials
Choose a smooth worsted-weight cotton or cotton blend. Cotton holds the cone shape well and doesn’t stretch out when the holder is full. Avoid very fuzzy yarns because they hide the shell texture.
- Lavender: 140 g / about 265 m (290 yd) of worsted cotton
These quantities include a margin of roughly 20% for checking gauge, joins and sewing.
Tools:
– 5.0 mm (H-8) crochet hook
– One 3 in (7.6 cm) outer-diameter metal or wooden ring (macramé ring)
– Locking stitch marker
– Tapestry needle
– Scissors
– Measuring tape
– Rust-proof pins and a small rolled towel for blocking
Abbreviations (US Terms)
- ch – chain
- sl st – slip stitch
- sc – single crochet
- dc – double crochet
- sk – skip
- st(s) – stitch(es)
- rep – repeat
- Rnd – round
Special stitch – Shell: 5 dc in the same stitch.
Pattern repeat: one shell plus one sc uses 6 stitches of the round below and makes 6 stitches (5 dc + 1 sc).
Gauge and Checkpoints
- Single crochet: 16 sts and 16 rounds = 4 in (10.2 cm). That’s 4 sts per inch, and each sc round is 0.25 in (0.6 cm) tall.
- Shell pattern: one 6-st repeat = 1.5 in (3.8 cm) wide; one shell round = 0.5 in (1.3 cm) tall.
Gauge matters here because every round is joined, so small differences add up all the way around the cone. Instead of a flat swatch, work Rnds 1–6 of the body and measure.
Checkpoints:
– After Rnd 1 (18 sts): circumference 4.5 in (11.4 cm); flat width 2.25 in (5.7 cm).
– After Rnd 6 (30 sts): circumference 7.5 in (19.1 cm); flat width 3.75 in (9.5 cm); height 2.25 in (5.7 cm).
– After Rnd 12 (48 sts): circumference 12 in (30.5 cm); flat width 6 in (15.2 cm); height 4.5 in (11.4 cm).
– After Rnd 26 (66 sts): flat width 8.25 in (21.0 cm); height 9.75 in (24.8 cm).
– After the rim: height 10.75 in (27.3 cm).
If your piece is too big, go down to a 4.5 mm (7) hook. If it is too small, go up to a 5.5 mm (I-9) hook. Don’t change stitch counts, because the shell repeat depends on multiples of 6.
Body
Work in joined rounds with the right side facing you throughout. Do not turn. A beginning ch-1 does not count as a stitch; a beginning ch-3 counts as a dc.
Shell Round A (worked over 6N sts): Ch 1, sc in first st, sk 2, shell in next st, sk 2, sc in next st; rep from * around. End the last rep with sk 2, sl st to first sc instead of the final sc. Count: N shells + N sc = 6N sts.
Shell Round B (worked over 6N sts): Ch 3, 2 dc in same st (half shell), sk 2, sc in next st, sk 2, shell in next st, sk 2, sc in next st; rep from * around. End with sk 2, 2 dc in first st (completing the split shell), sl st to top of ch-3. Count: N shells + N sc = 6N sts.
Alternating A and B shifts the shells by half a repeat, so each shell sits between the shells below. That gives the staggered look.
Increase sc round: Ch 1, sc in next k sts, 2 sc in next st; rep 6 times, sl st to first sc. Each group uses k + 1 sts and makes k + 2, so the count is (sts worked one per stitch) + 6 extra.
Plain sc round: Ch 1, sc in each st around, sl st to first sc.
Foundation: Ch 18, sl st to first ch to form a ring, taking care not to twist.
Rnd 1: Ch 1, sc in each ch around, sl st to first sc. (18 sts)
Rnd 2: Shell Round A. (3 shells + 3 sc = 18 sts)
Rnd 3: Ch 1, sc in next 2 sts, 2 sc in next st 6 times, sl st to join. (18 + 6 = 24 sts)
Rnd 4: Shell Round B. (4 repeats = 24 sts)
Rnd 5: Ch 1, sc in next 3 sts, 2 sc in next st 6 times, join. (24 + 6 = 30 sts)
Rnd 6: Shell Round A. (5 repeats = 30 sts)
Rnd 7: Ch 1, sc in next 4 sts, 2 sc in next st 6 times, join. (30 + 6 = 36 sts)
Rnd 8: Shell Round B. (6 repeats = 36 sts)
Rnd 9: Ch 1, sc in next 5 sts, 2 sc in next st 6 times, join. (36 + 6 = 42 sts)
Rnd 10: Shell Round A. (7 repeats = 42 sts)
Rnd 11: Ch 1, sc in next 6 sts, 2 sc in next st 6 times, join. (42 + 6 = 48 sts)
Rnd 12: Shell Round B. (8 repeats = 48 sts)
Rnd 13: Plain sc round. (48 sts)
Rnd 14: Shell Round A. (8 repeats = 48 sts)
Rnd 15: Ch 1, sc in next 7 sts, 2 sc in next st 6 times, join. (48 + 6 = 54 sts)
Rnd 16: Shell Round B. (9 repeats = 54 sts)
Rnd 17: Plain sc round. (54 sts)
Rnd 18: Shell Round A. (9 repeats = 54 sts)
Rnd 19: Ch 1, sc in next 8 sts, 2 sc in next st 6 times, join. (54 + 6 = 60 sts)
Rnd 20: Shell Round B. (10 repeats = 60 sts)
Rnd 21: Plain sc round. (60 sts)
Rnd 22: Shell Round A. (10 repeats = 60 sts)
Rnd 23: Ch 1, sc in next 9 sts, 2 sc in next st 6 times, join. (60 + 6 = 66 sts)
Rnd 24: Shell Round B. (11 repeats = 66 sts)
Rnd 25: Plain sc round. (66 sts)
Rnd 26: Shell Round A. (11 repeats = 66 sts)
Rnds 1–26 contain 13 sc rounds (3.25 in / 8.3 cm) and 13 shell rounds (6.5 in / 16.5 cm), for a total of 9.75 in (24.8 cm). Do not fasten off; go straight on to the rim.
The increases come every 2 rounds at first, then every 4 rounds. That keeps the point narrow and makes the upper body fuller, matching the slightly rounded cone shape.
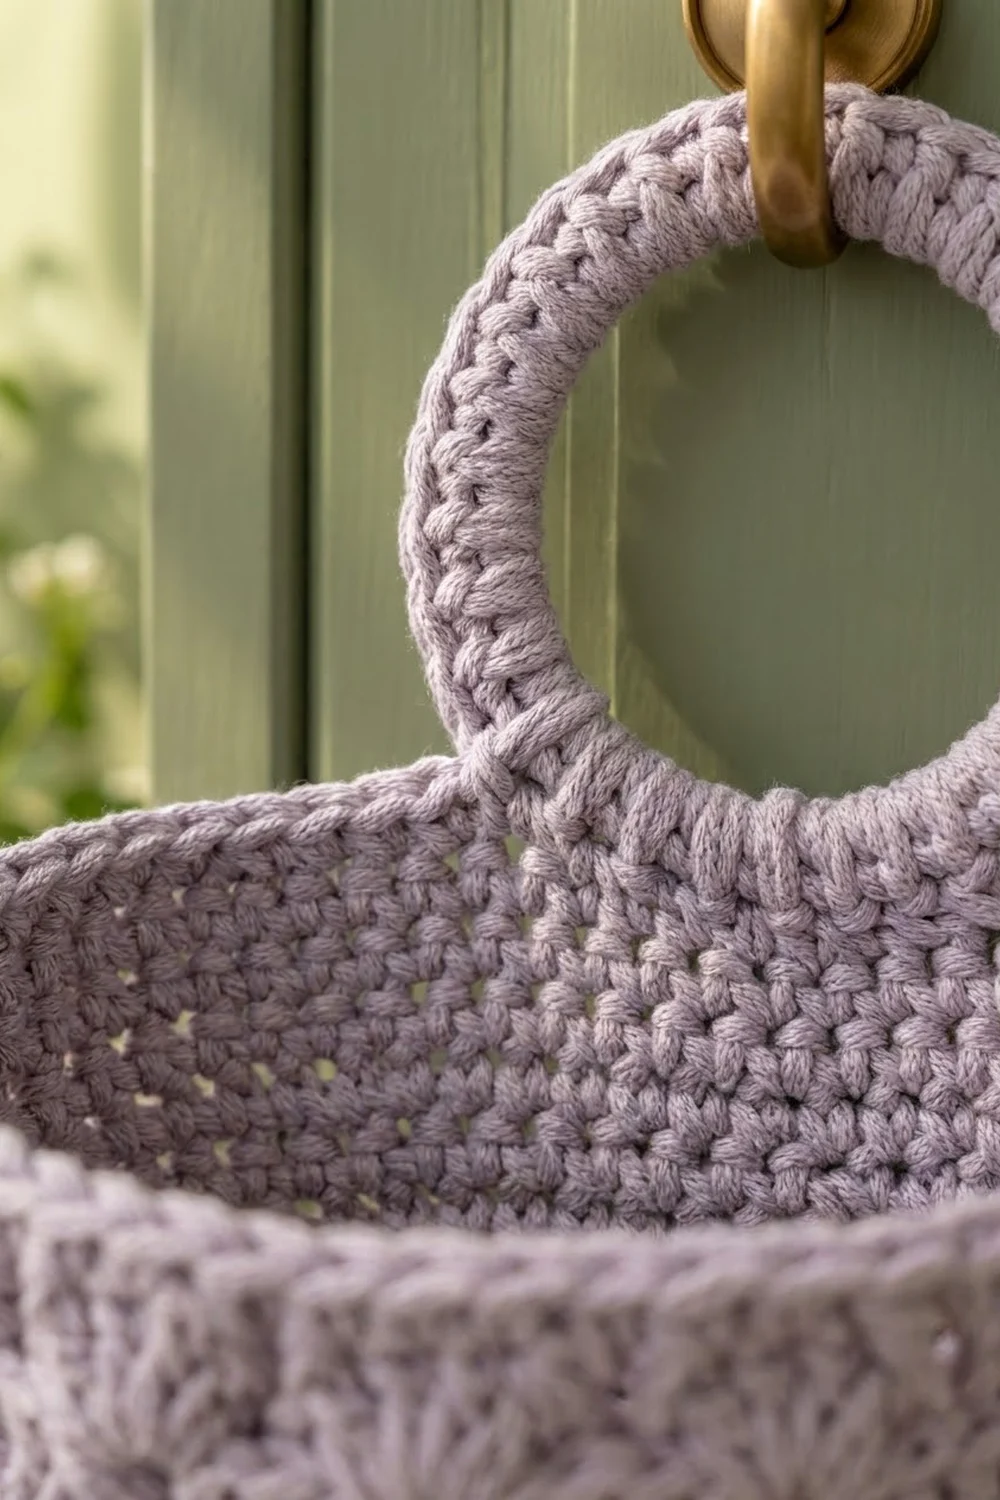
Covered Ring Hanger
Rnd 1: Make a slip knot on the hook. Working over the 3 in (7.6 cm) ring, work 56 sc around it, packing the stitches snugly so no ring shows. Sl st to first sc. (56 sts)
Rnd 2: Ch 1, rotate the sc ridge to the outside of the ring, sc in each st around, sl st to join. (56 sts)
Fasten off, leaving a 16 in (40.6 cm) tail for sewing. The covered ring measures about 3.5 in (8.9 cm) across, with an opening about 2.25 in (5.7 cm) across.
If your yarn is thicker or thinner, the ring may need 52–60 sc in Rnd 1. Give Rnd 2 the same count as Rnd 1.
Border
The border is the top rim plus one round around the bottom hole. Border gauge is the same sc gauge: 4 sts and 4 rounds per inch.
Top Rim
Rnds 27–30: Plain sc round. (66 sts each round)
When the cone is flattened, each rim round has 33 sts across the front and 33 across the back. Fasten off with an invisible join after Rnd 30.
Why the math works: Rnd 26 ends with 11 repeats x 6 sts = 66 sts. The rim works 1 sc into each stitch with no increases, so the top stays 66 sts = 16.5 in (41.9 cm) around, or 8.25 in (21.0 cm) flat. Four rounds at 0.25 in (0.6 cm) each add 1 in (2.5 cm), so the body now measures 10.75 in (27.3 cm).
Bottom Edging
Turn the cone upside down. Join yarn in any free loop of the foundation chain.
Edging Rnd: Ch 1, sc in each free loop around, sl st to first sc. (18 sts; 9 per side when flattened)
Fasten off. The edging matches Rnd 1’s 18 sts, so the hole stays 4.5 in (11.4 cm) around and won’t flare. It adds 0.25 in (0.6 cm), bringing the body to 11 in (27.9 cm).
Attaching the Ring
Flatten the body with the beginning-of-round seam at the center back. Mark the center 11 sts of the 33 back rim sts, leaving 11 sts on each side. Position the ring so its lower edge overlaps the rim by 0.75 in (1.9 cm) on the inside. Using the tail, whipstitch 11 sts of the ring’s bottom edge to the 11 marked rim sts, sewing through both layers twice. The ring rises 2.75 in (7.0 cm) above the rim, for a total length of 13.75 in (34.9 cm).
Final Blocking
- Weave in all ends on the inside of the cone.
- Lightly mist the body with water, or soak it and gently squeeze it in a towel.
- Roll a hand towel into a cone and slide it inside the body to hold the shape.
- Pat the shells so each row lies flat and the scallops line up.
- Check that the top measures 8.25 in (21.0 cm) flat and the body is 11 in (27.9 cm) tall. Ease it gently if needed.
- Shape the bottom hole into a neat circle with your fingers.
- Let it dry completely before removing the towel and hanging.
Final Quality-Control Checklist
- Final round counts: 66 sts at the rim, 18 sts at the bottom edge.
- Shells are staggered, with each one sitting between the shells below.
- The body has no twist, and the round seam runs straight up the back.
- Top width is 8.25 in (21.0 cm) flat; height is 11 in (27.9 cm).
- The ring is fully covered, centered on the back and sewn through both layers.
- The bottom hole is round, about 1.4 in (3.6 cm) across.
- All ends are woven in on the inside.
Troubleshooting
- Cone is lumpy or wavy: the increases are stacking on top of each other. Start each increase round at a different point in the group so they spread out.
- Shells don’t line up: recount. Each shell round must be worked over a multiple of 6 sts. If the count is off, redo the previous sc round.
- Body leans or spirals: make sure you’re joining each round with a sl st, not working a continuous spiral.
- Bottom hole is too tight for bags: redo the foundation and Rnd 1 with a 5.5 mm (I-9) hook, for those rounds only.
- Bags fall out of the bottom: the hole is too loose. Work the Edging Rnd with a 4.5 mm (7) hook.
- Ring shows through: add 2–4 sc to Rnd 1 of the hanger and use the same count in Rnd 2.
- Ring droops forward: sew it farther down inside the rim, increasing the overlap to 1 in (2.5 cm).
Care
Hand wash in cool water and lay flat to dry, reshaping the cone over a rolled towel. If you machine wash it, take the ring out first if it’s wooden.
Final Notes
The whole holder rests on one chain of measurements. At a gauge of 4 sc per inch, the 18-st foundation is 4.5 in (11.4 cm) around. Eight increase rounds of 6 sts each take the body from 18 to 66 sts, which is 11 shell repeats and 8.25 in (21.0 cm) flat. Twenty-six rounds make 9.75 in (24.8 cm). The 4-round rim brings that to 10.75 in (27.3 cm), and the bottom edging finishes the body at 11 in (27.9 cm). The ring adds 2.75 in (7.0 cm), for 13.75 in (34.9 cm) overall.
Check your counts at each checkpoint and the holder will come out the right size.
Happy crocheting!