

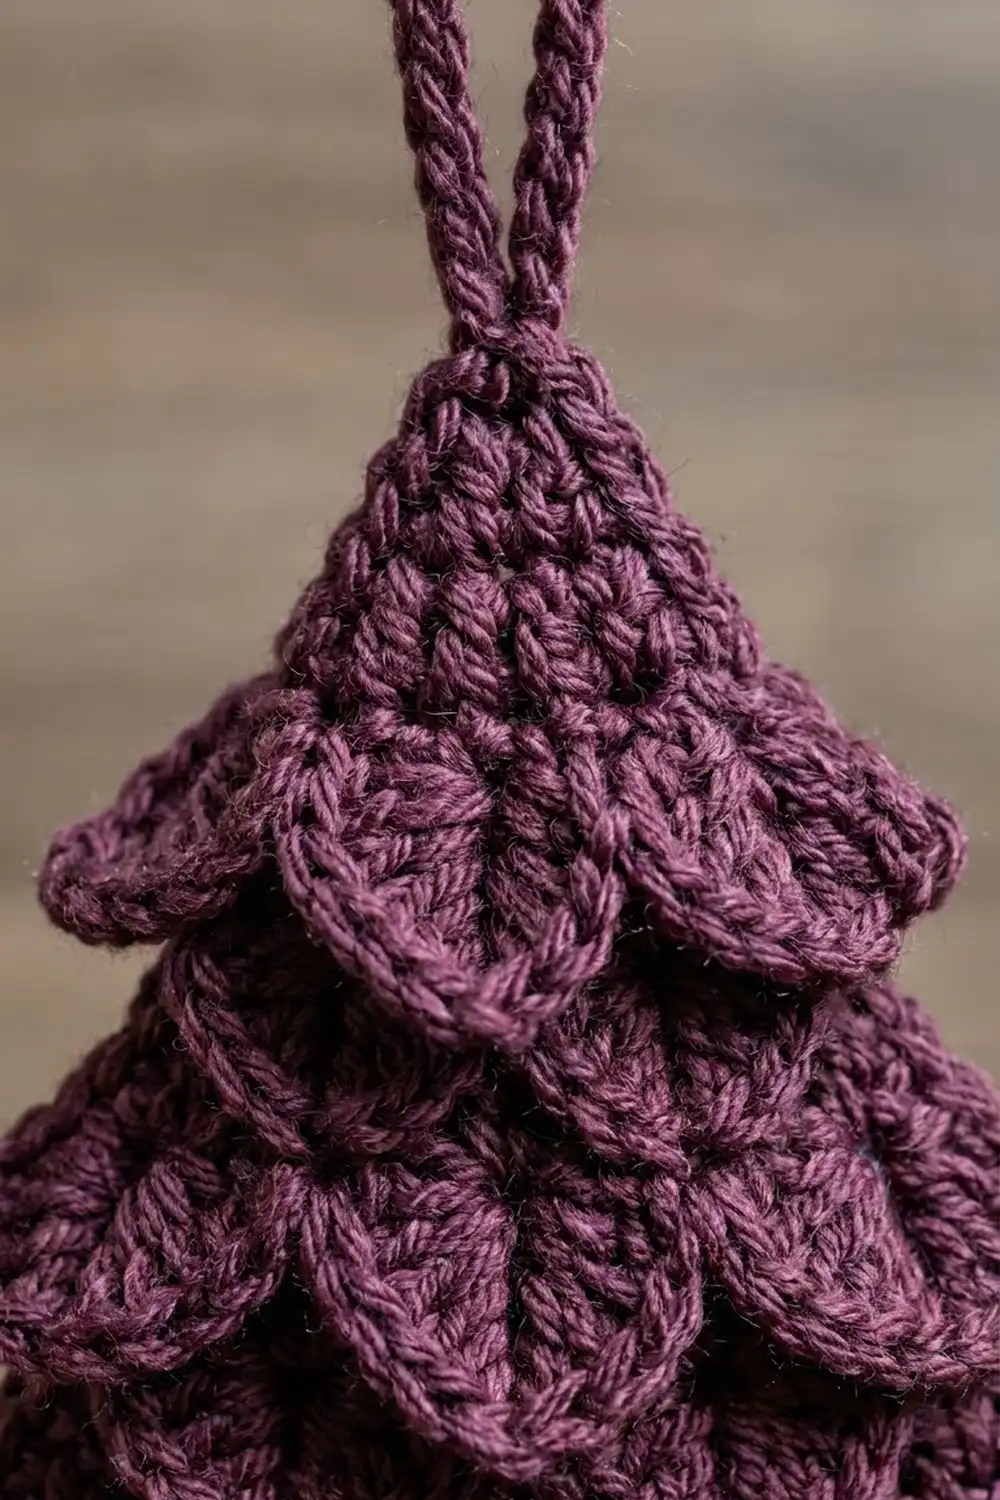
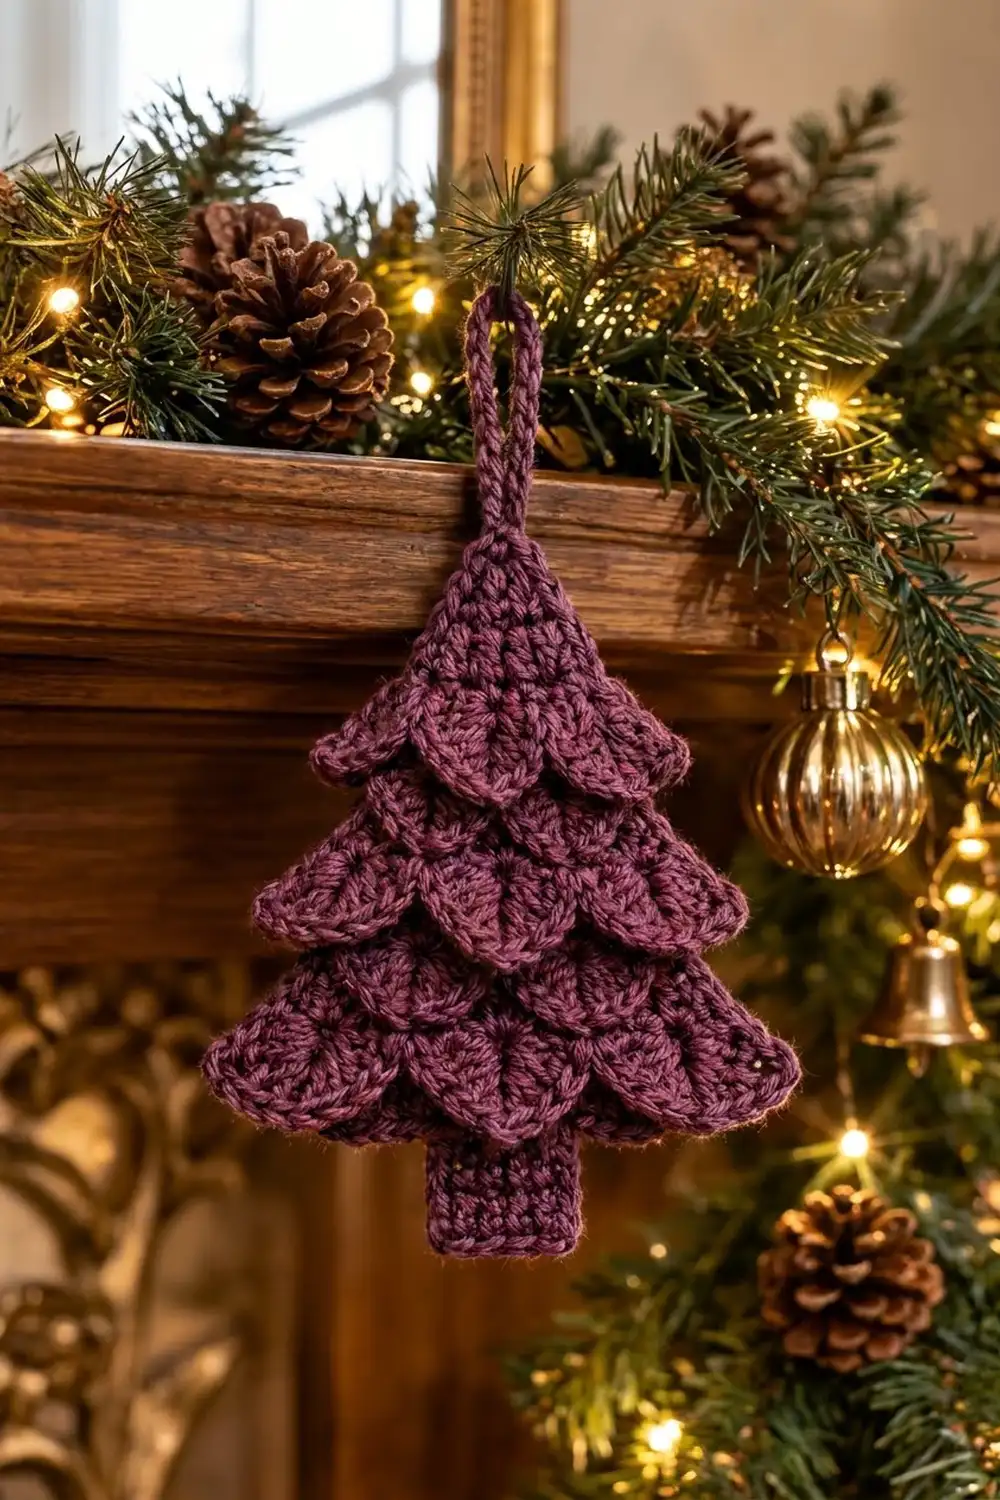
This little tree is a single flat ornament covered in overlapping, rounded scales. Each tier of scales drapes over the one below it, so the tree has a soft, feathered texture that catches the light on a mantel or a branch.
The sample is worked in one color, a deep plum or mulberry shade. One color lets the scale texture do the work. It also looks good in forest green, cranberry, cream, or a metallic blend.
The pattern uses US crochet terms. The finished ornament measures about 4.5 in (11.4 cm) wide across the bottom tier and 4.5 in (11.4 cm) tall from the treetop to the bottom of the trunk. With the hanging loop it is about 5.75 in (14.6 cm) tall.
Construction is simple and has no sewing. You crochet the tree body flat from the bottom up in rows. Four tiers of crocodile-style scales shrink from 5 scales to 2. A small solid tip and a chain hanging loop follow. Then you work a short solid trunk down from the foundation chain and finish it with a slip-stitch edging.
Finished Size and Construction
- Finished size: 4.5 in (11.4 cm) wide x 4.5 in (11.4 cm) tall, not counting the loop
- Height with loop: about 5.75 in (14.6 cm)
- Skill level: Intermediate (you need to be comfortable working around stitch posts)
- Terminology: US
- Yarn weight: DK (#3)
- Hook: 3.5 mm (US E-4)
- Number of pieces: 1 (worked in one piece, no sewing)
- Layout: Tip at the top, 4 tiers of scales (2, 3, 4, and 5 scales from the top down), trunk centered at the bottom
- Piece size: foundation row 4 in (10.2 cm) wide; trunk 1.2 in (3.0 cm) wide x 1.5 in (3.8 cm) long
- Size before border: 4.5 in (11.4 cm) x 4.5 in (11.4 cm)
- Border depth: 0 in (0 cm); the slip-stitch trunk edging neatens the edge but adds no measurable size
Materials
Yarn: DK-weight yarn with good stitch definition, such as a cotton-acrylic blend or a smooth mercerized cotton. Fuzzy or very splitty yarn hides the scale edges. A firm, slightly shiny yarn keeps each scale crisp.
- Plum (main and only color): 15 g, about 40 m (44 yd)
These quantities include a margin of about 30 percent for your gauge swatch and weaving in ends. One ornament uses roughly 11 to 12 g.
Tools:
- 3.5 mm (US E-4) crochet hook
- Tapestry needle
- Scissors
- 2 stitch markers
- Blocking mat, rust-proof pins, and a spray bottle
- Ruler or tape measure
Abbreviations (US Terms)
- ch = chain
- sl st = slip stitch
- sc = single crochet
- dc = double crochet
- sc2tog = single crochet 2 together
- st(s) = stitch(es)
- RS / WS = right side / wrong side
Special stitches:
- V: On a V row, this is 2 dc worked side by side, 1 dc in each of 2 neighboring sts. Each V becomes the base for one scale.
- Scale: Turn the V sideways. Working around the post of the first dc of the V from top to bottom, work 5 dc. Ch 1. Rotate the work. Working around the post of the second dc from bottom to top, work 5 dc. One scale has 10 dc plus 1 ch-1. It forms a rounded flap on the side facing you.
Gauge and Checkpoints
Gauge: 20 sc and 24 rows = 4 in (10.2 cm) in sc with a 3.5 mm hook.
Make one test tree before you make a batch. The ornament is small, so a full tree is a better swatch than a square. Check these points as you go:
- After Row 1: 20 sc measure 4 in (10.2 cm) across.
- After Row 3 (tier 1): the 5 scales together span about 4.5 in (11.4 cm). Each scale is about 0.9 in (2.3 cm) wide.
- After Row 9 (tier 4): the fabric measures 2.2 in (5.6 cm) from the foundation edge to the top of Row 9. Each tier adds about 0.5 in (1.3 cm).
- After Row 14 (tip): the body measures 3 in (7.6 cm) from the foundation edge to the treetop.
- After the trunk: the trunk is 1.2 in (3.0 cm) wide and 1.5 in (3.8 cm) long.
If your tree is too big, go down a hook size, to 3.25 mm (US D-3). If it is too small, go up to 3.75 mm (US F-5). If only the scales are too floppy, keep the hook and pull the dc stitches in the scales a little snugger. Don’t change stitch counts, because the tier math depends on them.
Tree Body
The body is worked in rows. Scales are made on RS rows (odd rows) so they always face the front. On WS rows you work behind the scales: fold them toward you and out of the way, then work into the slip stitches and the free tops of the V stitches.
Foundation: Ch 21.
Row 1 (RS): Sc in 2nd ch from hook and in each ch across. (20 sc)
Tier 1: 5 Scales
Row 2 (WS): Ch 1, turn. Sc in first st, dc in each of next 2 sts, sc in each of next 2 sts; repeat from * 3 more times, dc in each of next 2 sts, sc in last st. (20 sts: 10 sc and 10 dc, which make 5 Vs)*
Row 3 (RS): Ch 1, turn. Sl st in first sc, Scale over next V, sl st in each of next 2 sc; repeat from * 3 more times, Scale over last V, sl st in last sc. (5 scales, 10 sl sts)*
The scales hang down over Rows 1 and 2, and over the bottom edge of the foundation. The dc tops of Row 2 stay unworked; you will use them in the next row.
Tier 2: 4 Scales
Row 4 (WS): Turn; do not ch. Working behind the scales, sl st in first sl st and in next dc top. Ch 1, sc in next dc top, dc in each of next 2 sl sts, sc in each of next 2 dc tops; repeat from * 2 more times, dc in each of next 2 sl sts, sc in next dc top. Leave the last 2 sts unworked. (16 sts: 8 sc and 8 dc, which make 4 Vs)*
Each new V sits on the 2 sl sts between two scales below it. This offsets the new tier by half a scale and narrows the tree by 2 sts on each side.
Row 5 (RS): Ch 1, turn. Sl st in first sc, Scale over next V, sl st in each of next 2 sc; repeat from * 2 more times, Scale over last V, sl st in last sc. (4 scales, 8 sl sts)*
Tier 3: 3 Scales
Row 6 (WS): Turn; do not ch. Sl st in first sl st and in next dc top. Ch 1, sc in next dc top, dc in each of next 2 sl sts, sc in each of next 2 dc tops; repeat from * once more, dc in each of next 2 sl sts, sc in next dc top. Leave the last 2 sts unworked. (12 sts: 6 sc and 6 dc, which make 3 Vs)*
Row 7 (RS): Ch 1, turn. Sl st in first sc, Scale over next V, sl st in each of next 2 sc; repeat from * once more, Scale over last V, sl st in last sc. (3 scales, 6 sl sts)*
Tier 4: 2 Scales
Row 8 (WS): Turn; do not ch. Sl st in first sl st and in next dc top. Ch 1, sc in next dc top, dc in each of next 2 sl sts, sc in each of next 2 dc tops, dc in each of next 2 sl sts, sc in next dc top. Leave the last 2 sts unworked. (8 sts: 4 sc and 4 dc, which make 2 Vs)
Row 9 (RS): Ch 1, turn. Sl st in first sc, Scale over next V, sl st in each of next 2 sc, Scale over last V, sl st in last sc. (2 scales, 4 sl sts)
Checkpoint: The rows run 20, 16, 12, 8 sts, so every V row is 4 sts shorter than the one before. That is 2 sts fewer on each side. Each count equals 4 times the number of scales in that tier.
Treetop
Row 10 (WS): Turn; do not ch. Sl st in first sl st and in next dc top. Ch 1, sc in next dc top, sc in each of next 2 sl sts, sc in next dc top. Leave the last 2 sts unworked. (4 sc)
Row 11 (RS): Ch 1, turn. Sc in each st across. (4 sc)
Row 12 (WS): Ch 1, turn. Sc2tog twice. (2 sc)
Row 13 (RS): Ch 1, turn. Sc in each st across. (2 sc)
Row 14 (WS): Ch 1, turn. Sc2tog. (1 sc)
These 5 rows make a solid point about 0.8 in (2.0 cm) tall. The 2 top scales overlap its base.
Hanging Loop
Ch 15, then sl st into the top of the sc2tog from Row 14. Fasten off, leaving a 4 in (10.2 cm) tail. Weave the tail down through the tip a few times so the loop is anchored firmly. The loop stands about 1.25 in (3.2 cm) tall.
Trunk
Row 1: Turn the tree upside down with the RS facing you, so the free loops of the foundation chain run along the top. Skip the first 7 free loops. Join the yarn in the 8th loop, ch 1, then sc in the same loop and in each of the next 5 loops. (6 sc) This leaves 7 loops unworked on each side: 7 + 6 + 7 = 20.
Rows 2–9: Ch 1, turn. Sc in each st across. (6 sc)
Fasten off. The trunk measures 1.2 in (3.0 cm) wide and 1.5 in (3.8 cm) long from the foundation. About 0.5 in (1.3 cm) of the top sits under the tier 1 scales, so roughly 1 in (2.5 cm) shows below the tree.
Border: Trunk Edging
The tree has no added border. Its scalloped tiers already form the outline. The trunk gets one row of slip stitches that tidies the row ends and matches the clean look of the scale edges.
Border gauge: Work 1 sl st per sc row end and 1 sl st per bottom st. Keep the sl sts loose enough that they lie flat, and use the same hook.
Edging: With the RS facing, join the yarn at the top of the right side of the trunk, where it meets the foundation.
- Right side: Sl st in each of 9 row ends going down. (9 sl sts)
- Corner: Ch 1.
- Bottom: Sl st in each of 6 sts across. (6 sl sts)
- Corner: Ch 1.
- Left side: Sl st in each of 9 row ends going up. (9 sl sts)
Total: 24 sl sts + 2 ch. Fasten off and weave in the end.
Why the math works: The trunk has 9 rows, so 9 sl sts per side means one stitch per row end. Nothing gets stretched or bunched. The bottom has 6 sts and gets 6 sl sts, one for one. The ch-1 at each corner lets the edging turn without pulling the corner in. Slip stitches add almost no height, so the trunk stays 1.2 in (3.0 cm) wide.
Final Blocking
- Weave in all the remaining ends along the WS, behind the scales, so nothing shows on the front.
- Lightly mist the ornament with water until it is damp but not soaked.
- Lay it RS up on the blocking mat.
- Pin the foundation edge to 4 in (10.2 cm) wide, then center the trunk below it.
- Smooth each scale down so it overlaps the tier below. Pin the outer edge of each bottom-tier scale so the tier spans 4.5 in (11.4 cm).
- Check that the tree measures 4.5 in (11.4 cm) from the tip to the bottom of the trunk. Pin the tip straight up.
- Pin the hanging loop into a neat upright teardrop shape.
- Let it dry completely, then unpin it.
Final Quality-Control Checklist
- Tiers have 5, 4, 3, and 2 scales from the bottom up.
- Each scale has 5 dc on each side with a ch-1 at its lowest point.
- Each tier is centered and offset by half a scale from the tier below.
- The width across the bottom tier is 4.5 in (11.4 cm).
- The height from the tip to the bottom of the trunk is 4.5 in (11.4 cm).
- The trunk is centered, with 7 foundation loops free on each side.
- The trunk edging lies flat, with 9 + 6 + 9 sl sts.
- The hanging loop is firmly anchored and about 1.25 in (3.2 cm) tall.
- No ends show on the RS.
Troubleshooting
Scales curl up or flip backward. You worked the scale dc around the post from the wrong side. Hold the V so the scale builds toward you, and block with pins at each scale edge.
The tree leans or a tier is off-center. You probably skipped the 2 sl sts at the start of a WS row, or left more or fewer than 2 sts unworked at the end. Recount: each V row must be exactly 4 sts per scale.
Gaps show between tiers. Work the WS rows snugly into the dc tops, and make sure each new V uses the 2 sl sts between scales and not the scale itself.
The trunk pulls the foundation inward. Your trunk sc are too tight. Redo Row 1 of the trunk with a looser tension or a hook 0.25 mm larger.
Scales look too small and flat. Your dc are too short. Pull up the loops a little taller, or go up one hook size and check gauge again.
Care
Hand wash in cool water with a gentle soap, press out the water in a towel, and lay flat to dry. Reshape the scales while the ornament is damp.
Final Notes
Each measurement leads to the next. A foundation of 20 sc at 4 in (10.2 cm) gives a bottom tier of 5 scales spanning 4.5 in (11.4 cm). Four tiers at about 0.5 in (1.3 cm) each reach 2.2 in (5.6 cm). The tip adds 0.8 in (2.0 cm), for a body of 3 in (7.6 cm). The trunk adds 1.5 in (3.8 cm) below the foundation, so the tree is 4.5 in (11.4 cm) tall, plus a 1.25 in (3.2 cm) loop. Check the foundation and the first tier, and the rest of the tree will follow.
Happy crocheting!