

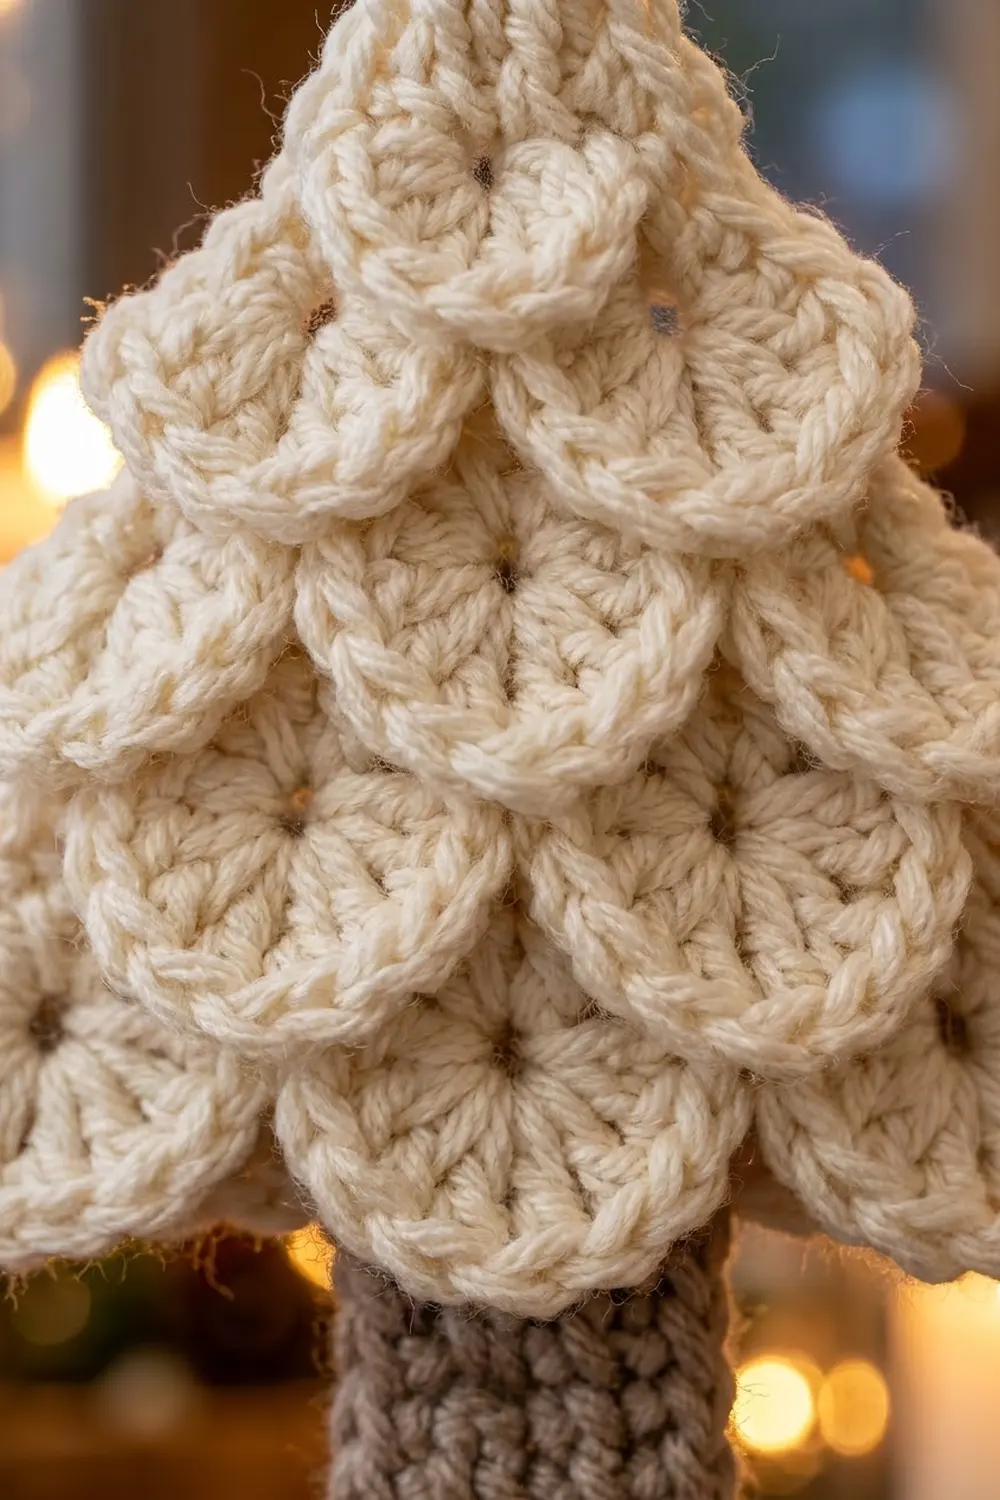
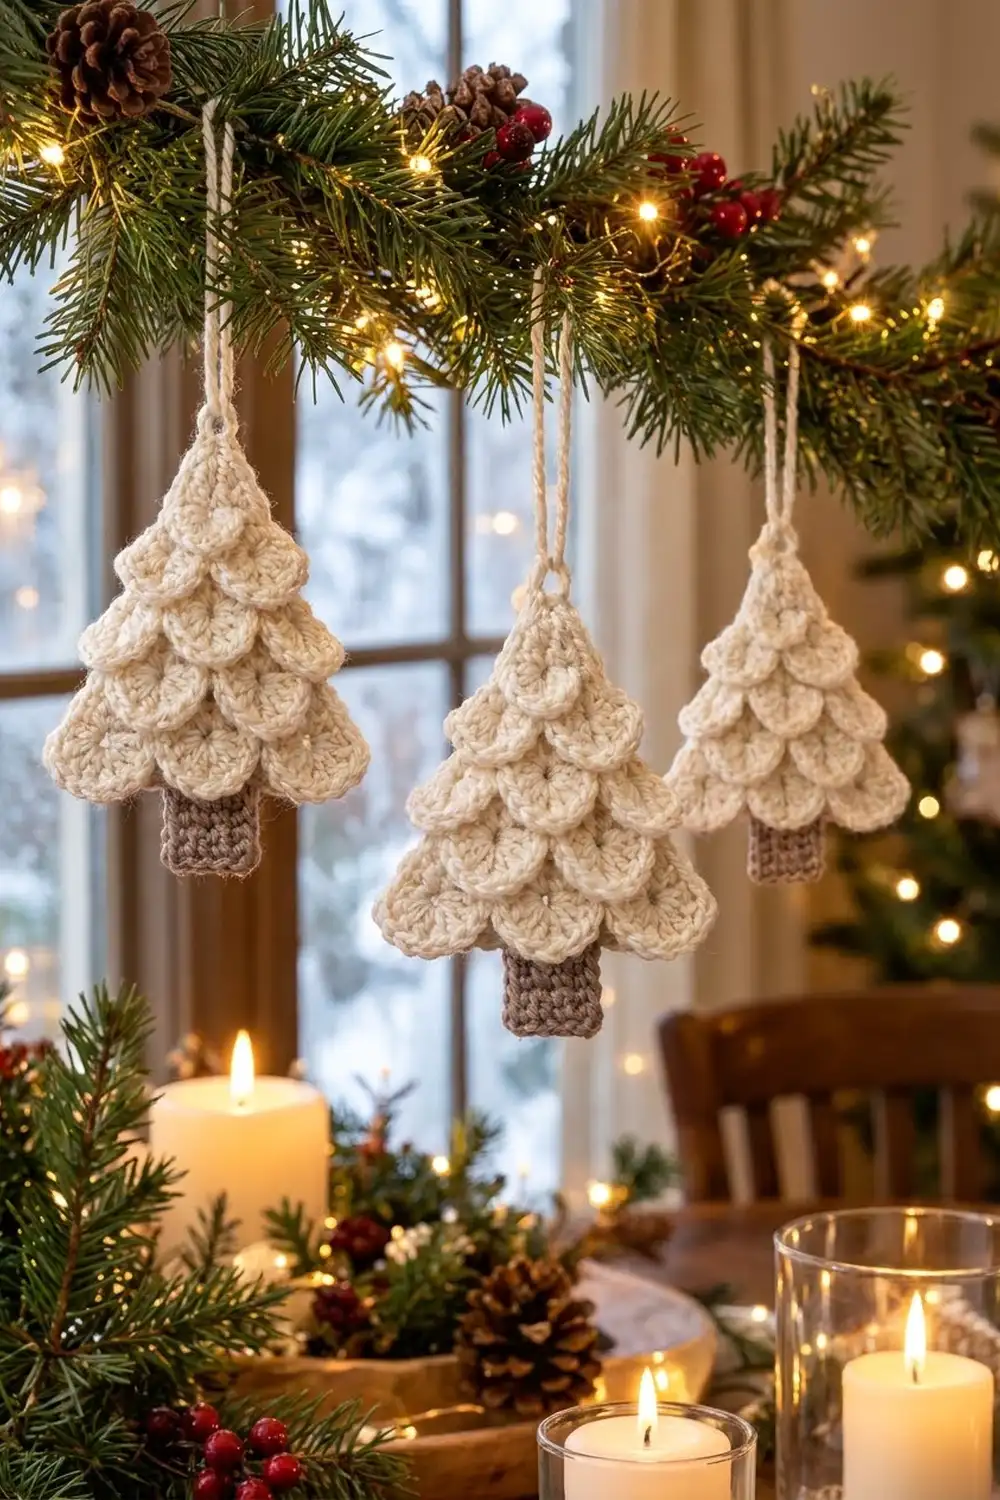
This little tree is all texture. Rounded crocodile-stitch scales overlap in four tiers like the boughs of a snowy pine, and a small solid point at the top holds a chain hanging loop. A short taupe trunk peeks out under the lowest row of scales.
The palette is calm and Scandinavian: soft cream for the tree and warm taupe for the trunk. It looks lovely on a natural evergreen garland, a window, or a gift package, and it works up well in pure white or natural cotton too.
This pattern uses US crochet terms. The finished ornament measures about 4 in (10.2 cm) wide across the bottom scales and 5.2 in (13.2 cm) tall from tip to trunk, not counting the loop.
You work the tree flat, from the bottom up, in four-row tiers: a base row of V-stitches, a scale row worked around those V posts, then single crochet rows that narrow the tree for the next tier. The trunk is added afterward into the foundation chain. A slip-stitch edge finishes the sides and makes the hanging loop.
Finished Size and Construction
- Finished size: 4 in (10.2 cm) wide × 5.2 in (13.2 cm) tall, plus a 2 in (5.1 cm) loop
- Skill level: Intermediate (crocodile stitch, working behind scales)
- Terminology: US
- Yarn weight: Worsted (#4)
- Hook: 4.0 mm (G-6)
- Number of pieces: 1 (the trunk is worked directly onto the tree)
- Layout: Single flat triangle with 4 scale tiers (4, 3, 2, 1 scales), a solid tip and a centered trunk
- Body width at foundation: 3.75 in (9.5 cm)
- Size before border: 4 in (10.2 cm) × 5.2 in (13.2 cm)
- Border depth: under 1/8 in (0.3 cm), slip-stitch edge only
Materials
Choose a smooth worsted-weight yarn so the scale edges show clearly. Cotton or a cotton blend gives crisp scales that stay flat. Acrylic gives a softer, slightly fuzzier look, like the one in the photo.
- Cream (tree, edge, loop): 15 g, about 30 m
- Taupe (trunk): 5 g, about 10 m
These quantities include a safety margin. One ornament uses about 12 g of cream and 3 g of taupe.
Tools:
– 4.0 mm (G-6) crochet hook
– Tapestry needle
– 2 locking stitch markers
– Scissors
– Rust-proof pins and a blocking mat or foam board
– Spray bottle with water
Abbreviations (US Terms)
- ch – chain
- sl st – slip stitch
- sc – single crochet
- dc – double crochet
- sc2tog – single crochet 2 together
- sk – skip
- st(s) – stitch(es)
- RS / WS – right side / wrong side
Special stitches
- V (V-stitch): 2 dc in the same stitch. Each V gives you two posts to build one scale around.
- Scale: Turn the work so the V posts lie sideways. Work 5 dc around the post of the first dc of the V, moving from its top down to its base. Ch 1. Then work 5 dc around the post of the second dc, moving from its base up to its top. You now have a rounded fan of 10 dc that hangs down over the RS.
Gauge and Checkpoints
Gauge: 18 sc × 20 rows = 4 in (10.2 cm) with a 4.0 mm hook.
Make one full ornament first and treat it as your test piece. Use these checkpoints as you go:
- After Row 1: 17 sc measure 3.75 in (9.5 cm) across.
- After Row 5: 13 sc measure 2.9 in (7.4 cm) across, and the piece is about 1 in (2.5 cm) tall from the foundation.
- After Row 9: 9 sc measure 2 in (5.1 cm) across.
- After Row 16: the body is 3.4 in (8.6 cm) tall from the foundation.
- After Row 18: the body is 3.8 in (9.7 cm) tall from the foundation to the tip.
If your piece is too big, go down to a 3.5 mm hook. If it is too small, go up to a 4.5 mm hook. The stitch counts stay the same, so only the hook size changes the finished size.
Tree Body
With cream, ch 18.
Tier 1 (4 scales)
Row 1 (RS): Sc in the 2nd ch from the hook and in each ch across. Turn. (17 sc)
Row 2 (WS, base row): Ch 1 (does not count as a stitch here or in any later row). Sc in the first st, sk 1, V in the next st, sk 1, sc in the next st; repeat from * 3 more times. Turn. (13 sts: 5 sc + 4 V of 2 dc each)*
Row 3 (RS, scale row): Ch 1, sl st in the first sc, work 1 Scale around the next V, sl st in the next sc; repeat from * 3 more times. Turn. (4 scales)*
The scales hang down over the RS and cover the top half of Row 1.
Row 4 (WS): Ch 1. Fold the scales away from you. Working into the Row 2 stitches only, sc in each sc and in the top of each dc across. Turn. (13 sc)
Row 5 (RS): Ch 1, sc in each st across. Turn. (13 sc)
Checkpoint: 2.9 in (7.4 cm) wide.
Tier 2 (3 scales)
Row 6 (WS, base row): Ch 1, sc in the first st, sk 1, V in the next st, sk 1, sc in the next st; repeat from * 2 more times. Turn. (10 sts: 4 sc + 3 V)*
Row 7 (RS, scale row): Ch 1, sl st in the first sc, Scale around the next V, sl st in the next sc; repeat from * 2 more times. Turn. (3 scales)*
The center scale of Tier 2 sits over the gap between the 2nd and 3rd scales of Tier 1, which gives the staggered, brick-like look.
Row 8 (WS): Ch 1, working into the Row 6 stitches behind the scales, sc in each st across. Turn. (10 sc)
Row 9 (RS, shaping row): Ch 1, sc in the next 4 sts, sc2tog, sc in the last 4 sts. Turn. (9 sts = 4 sc + 1 sc2tog + 4 sc)
Tier 3 (2 scales)
Row 10 (WS, base row): Ch 1, sc in the first st, sk 1, V in the next st, sk 1, sc in the next st; repeat from * 1 more time. Turn. (7 sts: 3 sc + 2 V)*
Row 11 (RS, scale row): Ch 1, sl st in the first sc, Scale around the next V, sl st in the next sc; repeat from * 1 more time. Turn. (2 scales)*
Row 12 (WS): Ch 1, working into the Row 10 stitches behind the scales, sc in each st across. Turn. (7 sc)
Row 13 (RS, shaping row): Ch 1, sc2tog, sc in the next 3 sts, sc2tog. Turn. (5 sts = 1 sc2tog + 3 sc + 1 sc2tog)
Tier 4 (1 scale)
Row 14 (WS, base row): Ch 1, sc in the first st, sk 1, V in the next st, sk 1, sc in the last st. Turn. (4 sts: 2 sc + 1 V)
Row 15 (RS, scale row): Ch 1, sl st in the first sc, Scale around the V, sl st in the last sc. Turn. (1 scale)
Row 16 (WS): Ch 1, working into the Row 14 stitches behind the scale, sc in each st across. Turn. (4 sc)
Checkpoint: the body is 3.4 in (8.6 cm) tall from the foundation.
Solid Tip
Row 17 (RS): Ch 1, sc2tog twice. Turn. (2 sts)
Row 18 (WS): Ch 1, sc2tog. (1 st)
Fasten off and weave in the end. The body now measures 3.8 in (9.7 cm) from the foundation to the tip. The Tier 1 scales hang about 0.6 in (1.5 cm) below the foundation chain.
Trunk
With the RS facing and the tree upside down, find the free loops of the foundation chain. Counting from the right edge, place a marker in the 7th loop and another in the 11th loop. These are the center 5 of the 17 loops.
Row 1: Join taupe in the 7th loop. Ch 1, sc in the same loop and in each of the next 4 loops. Turn. (5 sc)
Rows 2–7: Ch 1, sc in each st across. Turn. (5 sc each row)
Fasten off. The trunk measures 1.1 in (2.8 cm) wide and 1.4 in (3.6 cm) long. About 0.6 in (1.5 cm) of it sits behind the Tier 1 scales, so about 0.8 in (2.0 cm) shows below them.
Border: Slip-Stitch Edge and Hanging Loop
Border gauge: Work 1 sl st into the end of each sc row and 2 sl sts into the end of each dc (base) row. Skip the ends of the scale rows, because their first and last sl sts sit on the same sc as the base-row ends.
Each side edge has:
– 10 sc row ends (Rows 1, 4, 5, 8, 9, 12, 13, 16, 17 and 18) = 10 sl sts
– 4 base row ends (Rows 2, 6, 10 and 14) × 2 = 8 sl sts
– Total: 18 sl sts per side
Round 1: With the RS facing, join cream at the bottom right corner (the first st of Row 1). Work 18 sl sts evenly up the right edge to the tip.
At the tip, make the loop: ch 20, then sl st into the same tip st.
Work 18 sl sts evenly down the left edge, ending at the bottom left corner. Fasten off.
Final count: 36 sl sts + a 20-ch loop.
Why the math works: A sc row is about as tall as one sl st is long, and a dc row is about twice as tall. Matching 1 and 2 sl sts to those row heights keeps the edge flat, without ruffling or pulling in. The 20-ch loop folds to about 2 in (5.1 cm).
Final Blocking
- Weave in all ends on the WS, running them along the stitches of the same color.
- Lay the ornament RS up on the blocking mat.
- Mist it until it is damp but not soaked.
- Pin the bottom corners 4 in (10.2 cm) apart, measured across the Tier 1 scales.
- Pin the tip so the total height from tip to trunk bottom is 5.2 in (13.2 cm).
- Shape each scale with your fingertips: round its curve and let it overlap the tier below.
- Pin the trunk straight and square.
- Let it dry completely, then remove the pins.
Final Quality-Control Checklist
- Tiers have 4, 3, 2 and 1 scales from the bottom up.
- Each scale has 10 dc and a ch-1 point at the bottom.
- Scales lie on the RS and overlap the tier below.
- The tip comes to a single stitch.
- The trunk is 5 sts wide and centered under the tree.
- The edge has 18 sl sts per side and lies flat.
- The loop is secure and about 2 in (5.1 cm) long.
- The finished size is 4 in × 5.2 in (10.2 cm × 13.2 cm).
Troubleshooting
Scales are on the WS. You turned after the base row an extra time. Scale rows are always RS rows (Rows 3, 7, 11 and 15).
Scales cup or ruffle. Your scale dc are too tight around the posts. Loosen them slightly, or check that you have exactly 5 dc per post.
The next tier looks crooked. You may have worked into the scales instead of into the base-row stitches. Rows 4, 8, 12 and 16 go into the base-row stitches only.
The tree is too wide. Check your Row 1 gauge against 3.75 in (9.5 cm) and change hook size if needed.
The trunk is off-center. Recount the foundation loops. The trunk starts in loop 7 of 17.
The side edge puckers. Add the missing second sl st at each base-row end.
Care
Hand wash in cool water, press out the water in a towel, and dry flat, reshaping the scales. Store flat or hanging so the scales keep their curve.
Final Notes
The measurement chain is short and reliable:
- Row 1 sets the 3.75 in (9.5 cm) foundation.
- The scales widen the bottom tier to 4 in (10.2 cm).
- Each tier narrows the tree by about one scale: 13, 9 and then 5 stitches across the following foundation rows.
- The body reaches 3.8 in (9.7 cm) at the tip.
- The 1.4 in (3.6 cm) trunk brings the total to 5.2 in (13.2 cm).
Check those numbers once on your first tree, and every one after will match. Happy crocheting!