

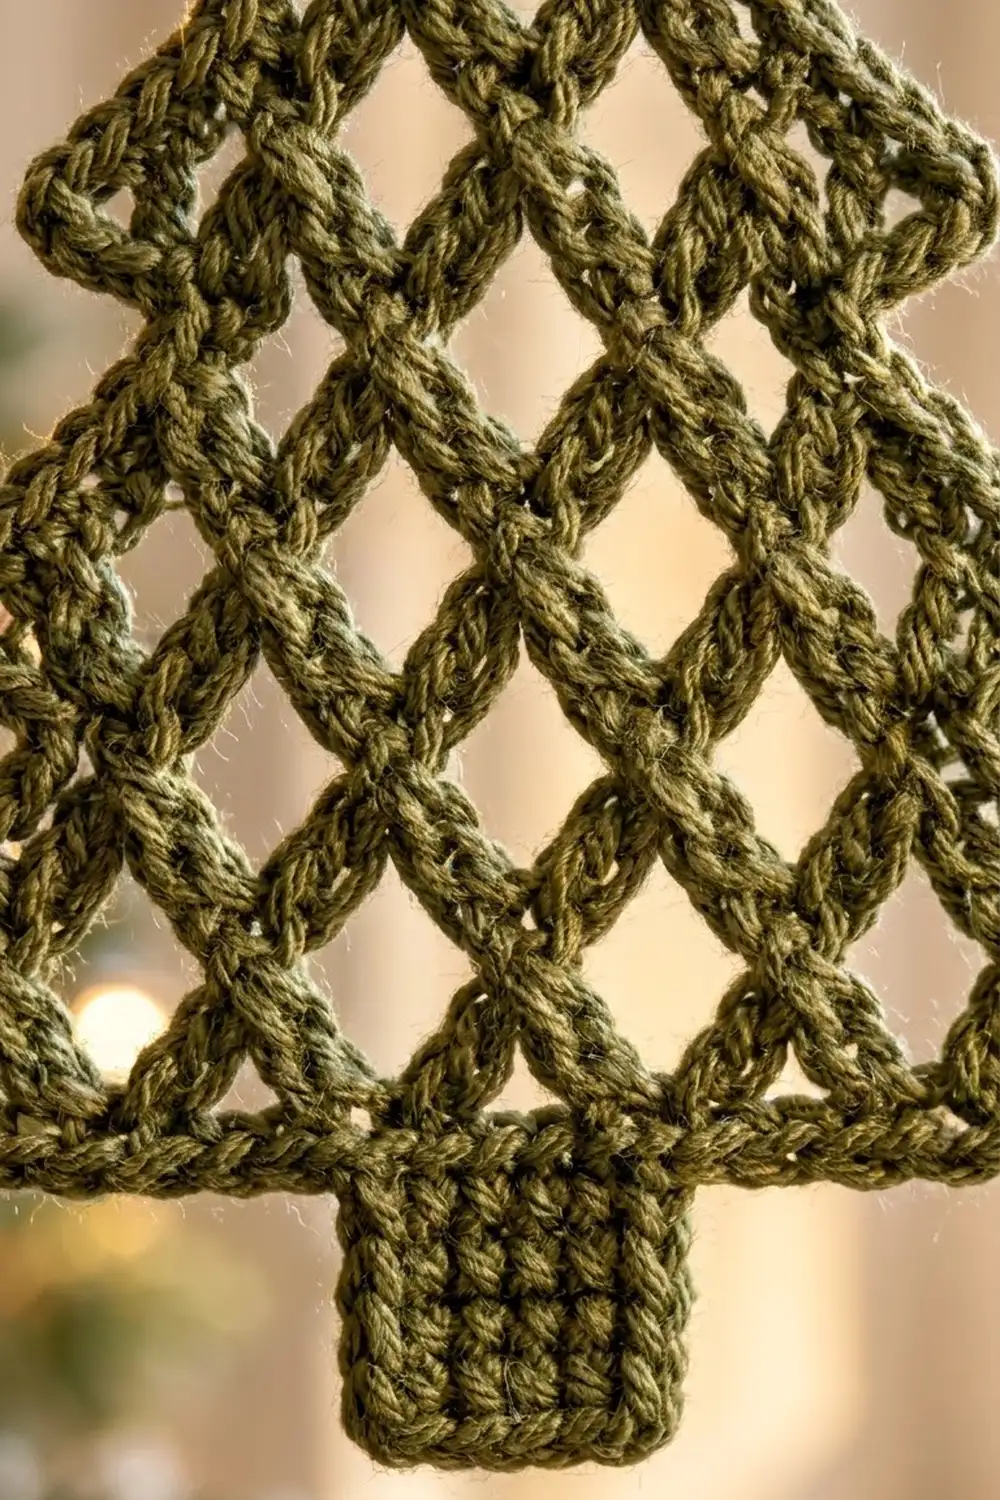
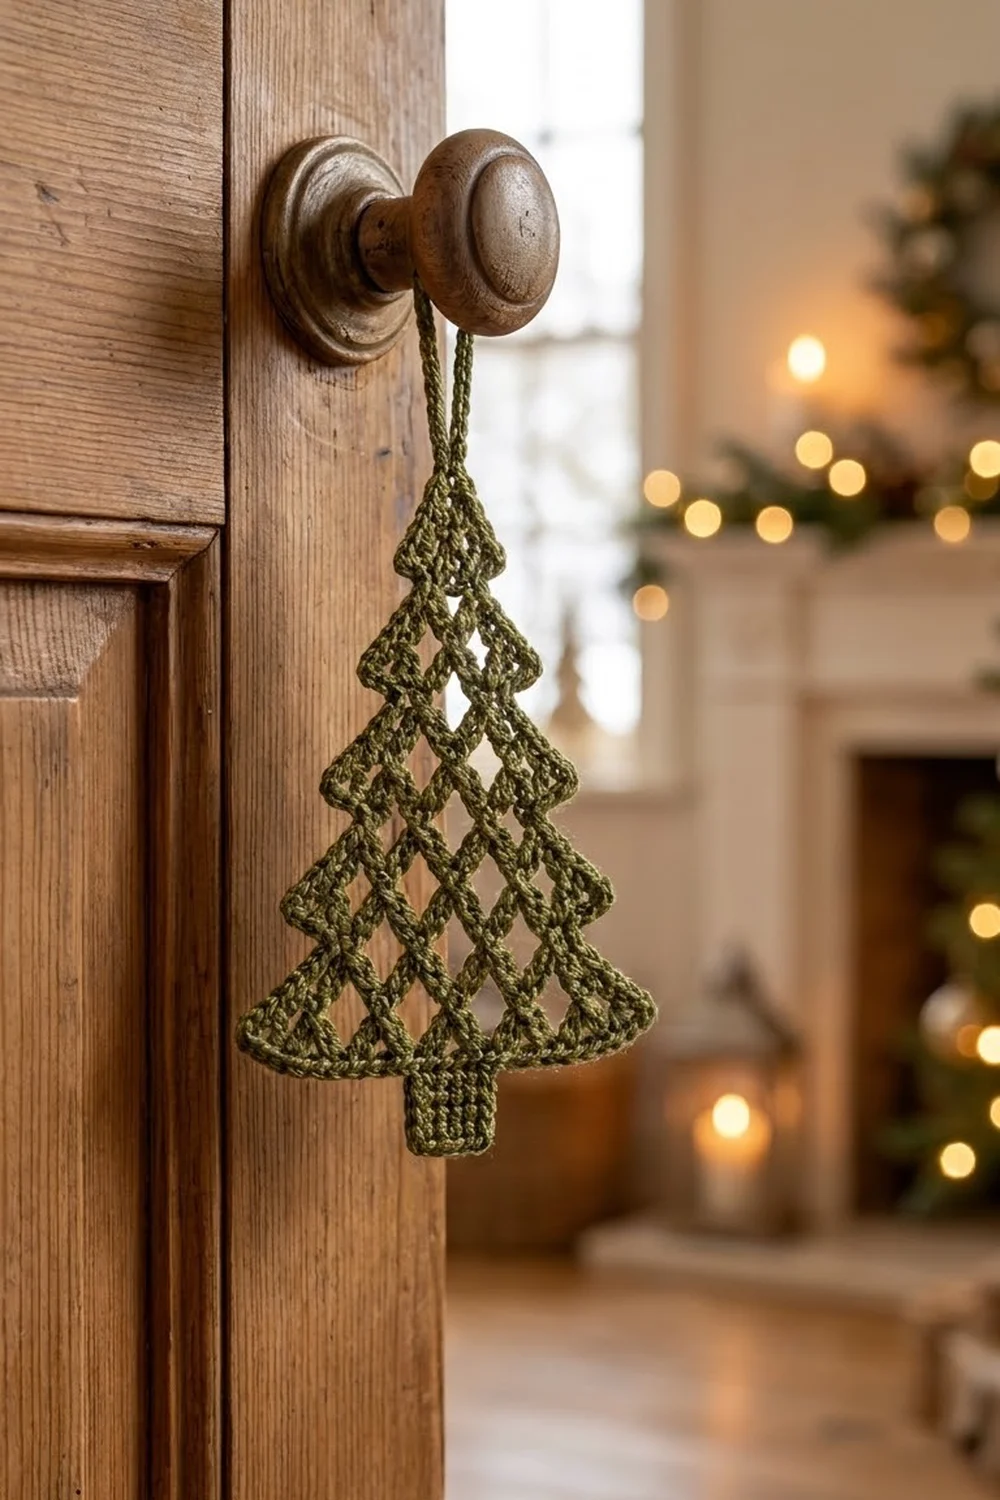
The Evergreen Lattice Tree is a light, airy Christmas ornament made from a single piece of diamond-mesh lace. It has three tiers, and each one flares out into small pointed tips. A solid rectangular trunk sits at the bottom, and a slim chain loop at the top lets you hang it from a branch, a drawer knob, or a mirror.
The sample uses one color, a soft olive green that looks natural and a little vintage against warm lights. The style is simple and graphic: open diamonds framed by a smooth single crochet outline that sharpens the tree silhouette.
The pattern uses US crochet terms. The finished tree measures 4 in (10.2 cm) wide across the bottom tier and 5 in (12.7 cm) tall from the apex to the base of the lace. The trunk adds 0.75 in (1.9 cm) and the hanging loop adds about 1 in (2.5 cm), so the total hanging height is about 6.75 in (17.1 cm).
You work the lace flat from the top down in 16 turned rows. You start with one loop at the apex and widen row by row. Two “step” rows pull the width back in, and that creates the tiers. One round of single crochet border outlines the whole tree and forms the hanging loop. The trunk is worked last, in short rows from the bottom edge.
Finished Size and Construction
- Finished size: 4 in (10.2 cm) wide x 5 in (12.7 cm) tall (lace only)
- Trunk: 1 in (2.5 cm) wide x 0.75 in (1.9 cm) tall
- Hanging loop: about 1 in (2.5 cm) tall
- Skill level: Intermediate
- Terminology: US
- Yarn weight: Sport (2), cotton or cotton blend
- Hook: 2.75 mm (US C-2)
- Number of pieces: 1 single piece, nothing to join
- Layout: one tree motif with three tiers, worked flat
- Piece size: 4 in (10.2 cm) x 5 in (12.7 cm)
- Size before border: 3.75 in (9.5 cm) wide x 4.75 in (12.1 cm) tall
- Border depth: 0.125 in (0.3 cm) per edge
Materials
Choose a smooth, tightly plied cotton in sport weight. Mercerized cotton gives crisp diamonds and holds starch well. Avoid fuzzy or very soft yarns, because they blur the mesh and the tips won’t stay sharp. A deep forest green, a cream, or a metallic-blend gold also suit this design if you want a set in different colors.
- Olive green: 10 g, about 30 m (33 yd)
- 2.75 mm (US C-2) crochet hook
- Tapestry needle
- Scissors
- Stitch marker (1)
- Rust-proof pins and a foam blocking mat
- Spray starch or fabric stiffener
- Ruler or tape measure
The quantity includes a margin of about 30 percent for practice, tension adjustments and weaving in ends. One ornament uses about 7 g.
Abbreviations (US Terms)
- ch: chain
- sl st: slip stitch
- sc: single crochet
- sp(s): space(s)
- ch-5 sp: the space under a chain-5 loop
- st(s): stitch(es)
Special term, net loop: a ch-5 that runs from one sc anchor to the next. Each “loop” in the counts below is one ch-5 sp. The diamond mesh forms because every new sc anchors in the center of a loop from the row below.
Special term, edge loop: the first and last loop of each row. Edge loops sit on the outside edge of the tree and become the anchors for the border.
Gauge and Checkpoints
Gauge controls the silhouette, but small differences only change the size slightly. Use the first tier (Rows 1–5) as your test piece and measure it before you continue.
- Gauge: Rows 1–5 measure 1.5 in (3.8 cm) tall and 2.25 in (5.7 cm) wide, tip to tip, lightly stretched.
- Checkpoint 1, after Row 5: 1.5 in (3.8 cm) tall x 2.25 in (5.7 cm) wide
- Checkpoint 2, after Row 10: 3 in (7.6 cm) tall x 2.75 in (7.0 cm) wide
- Checkpoint 3, after Row 16: 4.75 in (12.1 cm) tall x 3.75 in (9.5 cm) wide
- Checkpoint 4, after border: 5 in (12.7 cm) tall x 4 in (10.2 cm) wide
If your first tier is too big, switch to a 2.5 mm hook or work your chains more snugly. If it is too small, try a 3 mm hook. Don’t change the number of chains in a loop. That changes the angle of the diamonds and breaks the border math.
Pattern: Lace Tree (Top-Down)
Work in turned rows. Each row count below is the number of ch-5 loops in that row, and it is that row’s own complete total.
Tip: Keep every ch-5 the same length. Uneven loops are the main reason a lattice looks wavy. If you tend to chain tightly, pull each chain up a little taller than feels natural.
Increase row (used for most rows): Ch 5, turn, sc in first ch-5 sp, [ch 5, sc in next ch-5 sp] across to the last sp, ch 5, sc in same last sp. This row has 1 more loop than the row before it.
Step row (used for Rows 6 and 11): Turn, sl st in each ch of the first ch-5 loop and in the next sc, then sl st into the next ch-5 sp (the 2nd sp). Ch 1, sc in same sp, [ch 5, sc in next ch-5 sp] across, ending with sc in the second-to-last sp. Leave the last sp unworked. This row has 3 fewer loops than the row before it, and it leaves the first and last loops free as tier tips.
Tier 1
Row 1: Ch 1 (anchor), ch 5, sc in the anchor ch. (1 loop) Place a marker in this loop. It is the apex.
Row 2: Ch 5, turn, sc in ch-5 sp, ch 5, sc in same sp. (2 loops)
Row 3: Work Increase row. (3 loops)
Row 4: Work Increase row. (4 loops)
Row 5: Work Increase row. (5 loops)
Check against Checkpoint 1. The first and last loops of Row 5 are the tips of Tier 1.
Tier 2
Row 6 (step): Work Step row across Row 5. Your sc anchors land in sps 2, 3, and 4. (2 loops)
Row 7: Work Increase row. (3 loops)
Row 8: Work Increase row. (4 loops)
Row 9: Work Increase row. (5 loops)
Row 10: Work Increase row. (6 loops)
Check against Checkpoint 2. Tier 2 should hang below Tier 1, and the Tier 1 tips should sit about 0.25 in (0.6 cm) outside the top of Tier 2.
Tier 3
Row 11 (step): Work Step row across Row 10. Your sc anchors land in sps 2, 3, 4, and 5. (3 loops)
Row 12: Work Increase row. (4 loops)
Row 13: Work Increase row. (5 loops)
Row 14: Work Increase row. (6 loops)
Row 15: Work Increase row. (7 loops)
Row 16: Work Increase row. (8 loops) Do not fasten off.
Check against Checkpoint 3. Pin the piece flat for a moment and make sure the diamonds line up in straight diagonals.
Edge loops per side: Tier 1 has edge loops from Rows 2–5 (4 loops), Tier 2 from Rows 7–10 (4 loops), and Tier 3 from Rows 12–16 (5 loops). That makes 13 edge loops per side. Step rows add no edge loops, and their sl st paths form the inner notches between tiers.
Border
The border is one round of sc worked into the ch-5 sps around the outside of the tree. It smooths the zigzag edges into a clean, firm outline.
Border gauge: 4 sc fill one ch-5 sp and lie flat. Along the bottom edge, 24 sc measure about 2.75 in (7.0 cm).
Tip group: (2 sc, ch 2, 2 sc) in the same ch-5 sp.
Border Round: You are at the end of Row 16, at a bottom corner. Do not turn. Work up the first side:
- Tier 3 side: Tip group in the Row 16 edge loop (bottom corner), then 4 sc in each of the next 4 edge loops (Rows 15, 14, 13, 12). (20 sc, 1 ch-2 tip)
- Notch: sc in the Row 11 anchor sc at the edge. (1 sc)
- Tier 2 side: Tip group in the Row 10 edge loop, then 4 sc in each of the next 3 edge loops (Rows 9, 8, 7). (16 sc, 1 ch-2 tip)
- Notch: sc in the Row 6 anchor sc at the edge. (1 sc)
- Tier 1 side: Tip group in the Row 5 edge loop, then 4 sc in each of the next 3 edge loops (Rows 4, 3, 2). (16 sc, 1 ch-2 tip)
- Apex and hanging loop: In the marked Row 1 loop, work 3 sc, ch 18, 3 sc. (6 sc)
- Second side: Work the mirror image going down. Work 4 sc in each Tier 1 edge loop (Rows 2, 3, 4), a tip group in the Row 5 edge loop, and sc in the Row 6 notch. Then work 4 sc in each Tier 2 edge loop (Rows 7, 8, 9), a tip group in the Row 10 edge loop, and sc in the Row 11 notch. Finish with 4 sc in each Tier 3 edge loop (Rows 12, 13, 14, 15) and a tip group in the Row 16 edge loop (bottom corner).
- Bottom edge: 4 sc in each of the 6 remaining ch-5 sps along the bottom of Row 16 (sps 2 through 7). (24 sc)
Join with a sl st to the first sc. Fasten off.
Count per side: 10 regular edge loops x 4 sc = 40 sc. 3 tip groups x 4 sc = 12 sc. Add 2 notch sc. That makes 54 sc and 3 ch-2 tips per side.
Round total: 54 + 54 (sides) + 6 (apex) + 24 (bottom) = 138 sc, plus 6 ch-2 tips and 1 ch-18 hanging loop.
Why the math works: A ch-5 sp is about as wide as 4 sc, so 4 sc per loop lie flat without ruffling or cupping. The ch-2 in each tip group lets the corner turn sharply into a point. The single notch sc pulls the edge inward between tiers, which keeps the stepped silhouette. The bottom corners are tip groups too, so Row 16 sp 1 and sp 8 count toward the sides. Only sps 2–7 count toward the 24 bottom sc.
Trunk
The trunk is a solid rectangle centered on the 24 bottom sc. Counting from the right corner along the bottom edge, skip 8 sc. The next 8 sc (4 from sp 4 and 4 from sp 5) sit exactly at the center, and 8 sc remain on the far side.
Row 1: With the right side facing, join yarn in the 9th bottom sc, ch 1, sc in the same st and in each of the next 7 sc. (8 sc)
Rows 2–6: Ch 1, turn, sc in each sc across. (8 sc)
Fasten off. The trunk measures 1 in (2.5 cm) wide x 0.75 in (1.9 cm) tall. Plain sc rows stack into neat vertical columns, which gives the trunk its ribbed look.
Weave in all ends along the border, splitting the plies so nothing slips out after starching.
Final Blocking
- Soak the tree in cool water for a few minutes. Press out the water in a towel without wringing.
- Lay the tree flat on the blocking mat, right side up.
- Pin the apex, then the two bottom corners, so the bottom tier spans 4 in (10.2 cm).
- Pin the Tier 1 and Tier 2 tips so each sits about 0.25 in (0.6 cm) outside the tier below its notch.
- Pin the center of each bottom-edge loop so the base is straight.
- Gently open each diamond with a pin or blunt needle so the lattice lines run straight.
- Pin the trunk square at 1 in (2.5 cm) x 0.75 in (1.9 cm).
- Spray with starch and let it dry fully. Spray again for a firmer ornament.
- Unpin only when the tree is completely dry, then shape the hanging loop with your fingers.
Final Quality-Control Checklist
- Height is 5 in (12.7 cm) from the apex to the base of the lace.
- Width is 4 in (10.2 cm) across the bottom tier tips.
- Loop counts run 1–5 in Tier 1, 2–6 in Tier 2, and 3–8 in Tier 3.
- Each side has 54 sc, 3 pointed tips, and 2 notches.
- The bottom edge has 24 sc, and the trunk is centered with 8 sc on each side.
- The trunk has 6 rows of 8 sc.
- The hanging loop sits exactly at the apex.
- The diamonds are open and even, with no twisted loops.
- All ends are woven in and trimmed.
Troubleshooting
The tree leans to one side. You probably missed the final “sc in same sp” on an increase row. Count the loops at the end of every row.
The tiers don’t step in. Check that each step row starts in the 2nd sp and ends in the second-to-last sp. Starting in sp 1 removes the notch.
The border ruffles. Your sc are smaller than your loops. Work the border with a 3 mm hook, or go down a hook size for the lace.
The border cups or pulls. Work the sc more loosely, or use a 3 mm hook for the border round only.
The diamonds look lopsided. Your ch-5 loops vary in length. Work a few practice rows and focus on even chain height.
The tips are rounded. Re-starch and pin directly into each ch-2 tip.
The trunk is off-center. Recount the bottom edge: 8 sc, then 8 sc under the trunk, then 8 sc.
Care
Hand wash in cool water, press dry in a towel, and re-block with starch. Store flat in tissue paper so the tips stay crisp.
Final Notes
Here is the full measurement chain. Tier 1 sets your gauge at 1.5 in (3.8 cm) tall x 2.25 in (5.7 cm) wide. After Row 10 the lace measures 3 in (7.6 cm) x 2.75 in (7.0 cm), and after Row 16 it measures 4.75 in (12.1 cm) x 3.75 in (9.5 cm). The 138-sc border adds 0.125 in (0.3 cm) per edge, for a finished 5 in (12.7 cm) x 4 in (10.2 cm). The trunk and loop bring the hanging height to about 6.75 in (17.1 cm). Check each stage, and the tree will come out the same size every time.
Happy crocheting!