

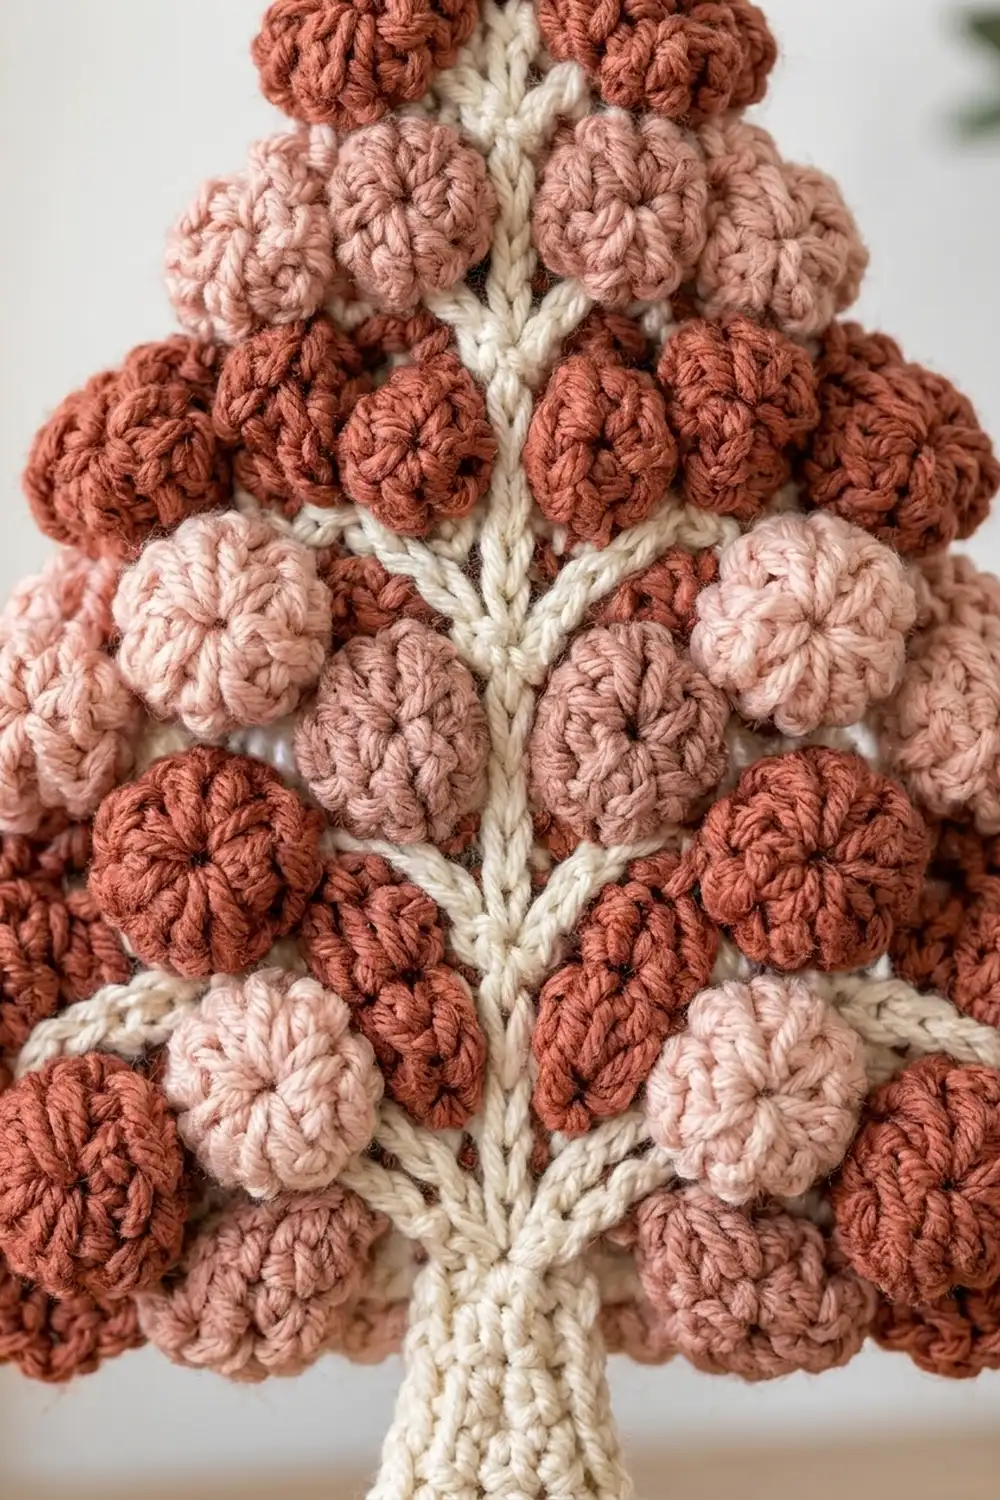
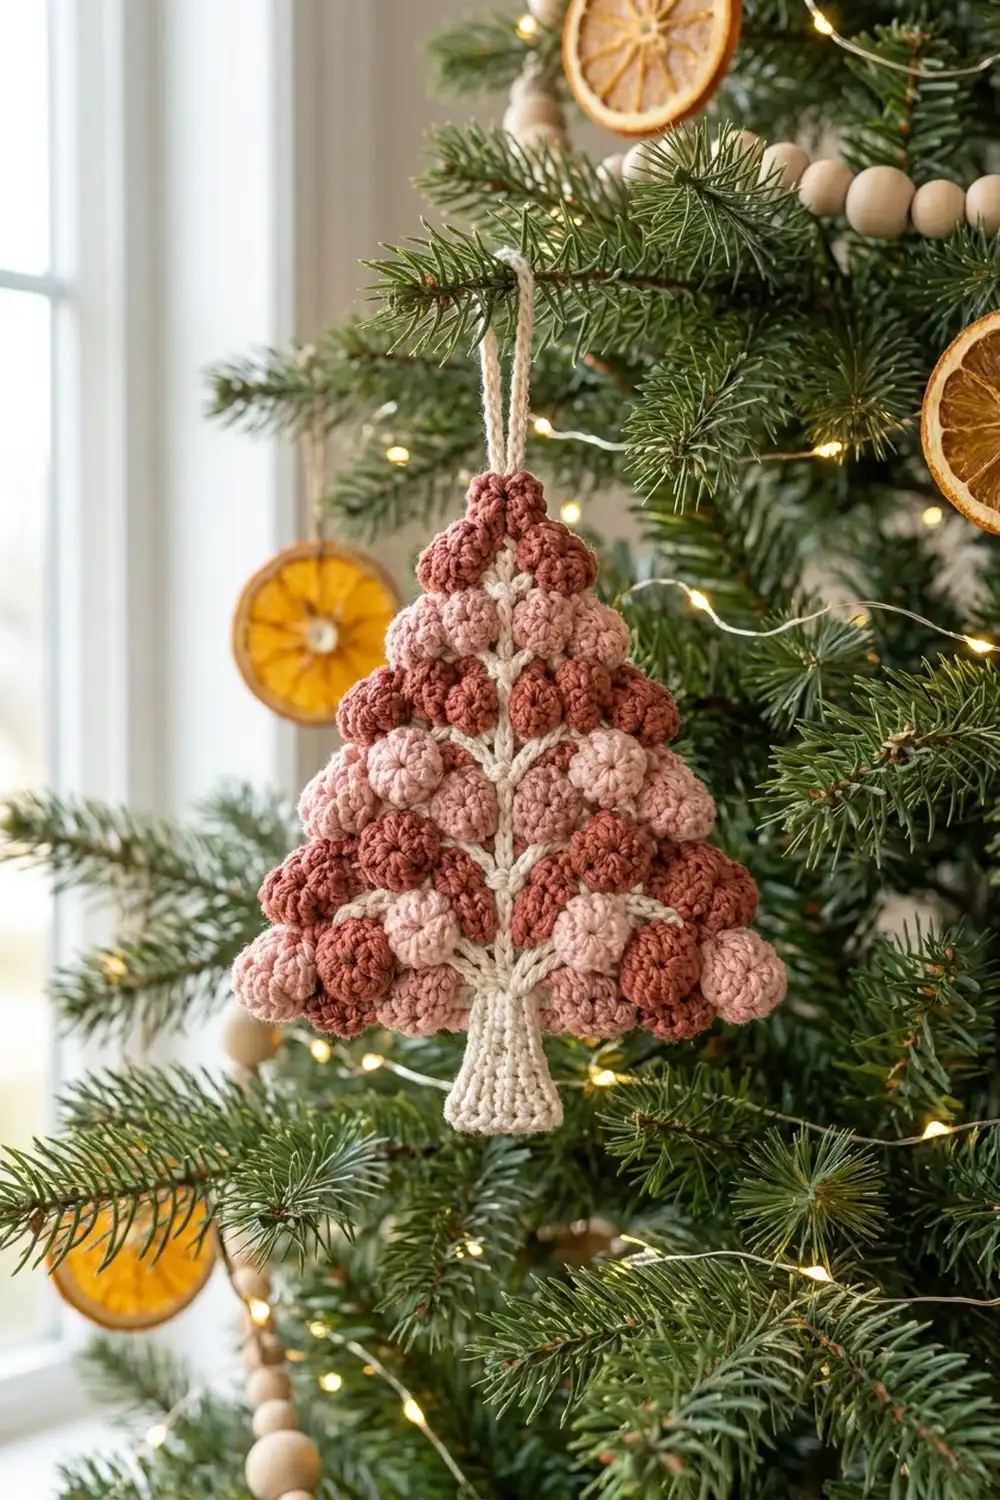
The Berry Bobble Christmas Tree is a flat, textured tree for a wall, door, or shelf. Its whole face is covered in plump bobbles in terracotta, dusty rose, and pale blush. Cream fabric shows between them, and a cream center vein with short angled branches makes the bobbles look like berries hanging from a tree.
The style is warm and modern-rustic, and it suits a neutral or pink-toned holiday room. This pattern uses US crochet terms throughout.
The finished tree measures about 9.25 in (23.5 cm) wide and 9.6 in (24.4 cm) tall including the trunk, plus a 1.5 in (3.8 cm) hanging loop.
You work the tree body flat from the bottom up, in rows of single crochet. Bobbles are worked on wrong-side rows so they pop out on the front. Next comes one round of terracotta border, then a cream hanging loop and a cream trunk worked down from the bottom edge. Finally, you add the center vein and branches in surface slip stitch.
Finished Size and Construction
- Finished size: 9.25 in (23.5 cm) wide × 7.8 in (19.8 cm) tall for the bordered tree; 9.6 in (24.4 cm) tall with trunk
- Skill level: Intermediate
- Terminology: US
- Yarn weight: Worsted (#4)
- Hook: 4.5 mm (US 7)
- Number of pieces: 1
- Layout: Single triangle with an attached trunk
- Piece size before border: 8.75 in (22.2 cm) wide × 7.3 in (18.5 cm) tall
- Border depth: 0.25 in (0.6 cm), 1 round
- Trunk: 1.75 in (4.4 cm) wide at top, 2.75 in (7.0 cm) wide at base, 1.8 in (4.6 cm) tall
Materials
Use a smooth worsted-weight yarn with good stitch definition. Cotton blends and soft acrylics both work well. Very fuzzy yarn will blur the bobbles. Choose a cream with good contrast against the pinks so the branches stand out.
- Cream (background, trunk, loop, veins): 20 g / 37 m
- Terracotta (13 bobbles + border): 10 g / 18 m
- Dusty rose (11 bobbles): 8 g / 15 m
- Pale blush (9 bobbles): 6 g / 11 m
Quantities include a safety margin of roughly 15%.
Tools:
– 4.5 mm (US 7) crochet hook
– Tapestry needle
– Scissors
– Stitch markers (4–6)
– Tape measure
– Blocking mat and rust-proof pins
– Spray bottle
Abbreviations (US Terms)
- ch – chain
- sc – single crochet
- sc2tog – single crochet 2 together
- sc3tog – single crochet 3 together
- dc – double crochet
- sl st – slip stitch
- st(s) – stitch(es)
- yo – yarn over
- RS / WS – right side / wrong side
- bob – bobble (see below)
Bobble (bob): *Yo, insert hook in st, yo and pull up a loop, yo and draw through 2 loops; repeat from * 4 more times in the same st (6 loops on hook). Yo and draw through all 6 loops.
Color change for bobbles: Cut a 30 in (76.2 cm) strand of the bobble color. Work the cream sc before the bobble until 2 loops remain, then finish it with the bobble color. Leave a 6 in (15.2 cm) tail on the side facing you, which is the WS. Make the bobble in the bobble color, then complete its last yo with cream. Drop the bobble strand on the WS and carry on in cream. At the end of the row, tie each bobble’s two tails together in a square knot on the WS.
Gauge and Checkpoints
Gauge: 16 sc and 18 rows = 4 in (10.2 cm) in cream sc rows. One bobble is about 0.75 in (1.9 cm) across.
Make a 20-st swatch first, 2 in (5.1 cm) tall, with one row of 4 bobbles worked on a WS row. If your sc gauge is right but the bobbles look flat, push each one gently through to the RS.
Checkpoints:
– After Row 1: 35 sts should measure 8.75 in (22.2 cm).
– After Row 5: height about 1.1 in (2.8 cm).
– After Row 17: 19 sts, width about 4.75 in (12.1 cm), height about 3.8 in (9.7 cm).
– After Row 33: height 7.3 in (18.5 cm).
– After the border: 9.25 in (23.5 cm) × 7.8 in (19.8 cm).
Too big? Go down a hook size (4.0 mm). Too small? Go up to 5.0 mm. Being 0.25 in (0.6 cm) off is fine for a single ornament.
Tree Body
The ch 1 at the start of each row does not count as a stitch. On bobble rows (all WS), the bobbles pop toward the back of your work, which is the RS. Bobble colors are listed in working order: T = terracotta, D = dusty rose, B = blush.
The body is built in tiers of 4 rows: a WS bobble row, then three plain sc rows, with sc2tog at each end of the two RS rows. Each tier loses 4 sts. Its bobbles sit halfway between the bobbles of the tier below, which gives the staggered look. A cream column always stays clear at the center for the vein.
With cream, ch 36.
Row 1 (RS): Sc in 2nd ch from hook and in each ch across. Turn. (35)
Tier 1
Row 2 (WS): Ch 1, sc 2, (bob, sc 3) 3 times, bob, sc 5, (bob, sc 3) 3 times, bob, sc 2. Turn. (35 sts: 27 sc + 8 bobbles)
Colors: T, D, T, B, D, T, B, T.
Row 3 (RS): Ch 1, sc2tog, sc 31, sc2tog. Turn. (33)
Row 4: Ch 1, sc across. Turn. (33)
Row 5: Ch 1, sc2tog, sc 29, sc2tog. Turn. (31)
Tier 2
Row 6 (WS): Ch 1, sc 2, (bob, sc 3) twice, bob, sc 9, (bob, sc 3) twice, bob, sc 2. Turn. (31: 6 bobbles)
Colors: D, B, T, D, T, B.
Row 7: Ch 1, sc2tog, sc 27, sc2tog. (29)
Row 8: Sc across. (29)
Row 9: Sc2tog, sc 25, sc2tog. (27)
Tier 3
Row 10 (WS): Ch 1, sc 2, (bob, sc 3) twice, bob, sc 5, (bob, sc 3) twice, bob, sc 2. (27: 6 bobbles)
Colors: T, D, B, T, B, D.
Row 11: Sc2tog, sc 23, sc2tog. (25)
Row 12: Sc across. (25)
Row 13: Sc2tog, sc 21, sc2tog. (23)
Tier 4
Row 14 (WS): Ch 1, sc 2, bob, sc 3, bob, sc 9, bob, sc 3, bob, sc 2. (23: 4 bobbles)
Colors: B, T, D, T.
Row 15: Sc2tog, sc 17, sc2tog. (21)
Row 16: Sc across. (21)
Row 17: Sc2tog, sc 17, sc2tog. (19)
Tier 5
Row 18 (WS): Ch 1, sc 2, bob, sc 3, bob, sc 5, bob, sc 3, bob, sc 2. (19: 4 bobbles)
Colors: D, T, B, D.
Row 19: Sc2tog, sc 13, sc2tog. (17)
Row 20: Sc across. (17)
Row 21: Sc2tog, sc 13, sc2tog. (15)
Tier 6
Row 22 (WS): Ch 1, sc 2, bob, sc 9, bob, sc 2. (15: 2 bobbles)
Colors: T, D.
Row 23: Sc2tog, sc 9, sc2tog. (13)
Row 24: Sc across. (13)
Row 25: Sc2tog, sc 9, sc2tog. (11)
Tier 7
Row 26 (WS): Ch 1, sc 2, bob, sc 5, bob, sc 2. (11: 2 bobbles)
Colors: B, D.
Row 27: Sc2tog, sc 7, sc2tog. (9)
Row 28: Sc across. (9)
Row 29: Sc2tog, sc 5, sc2tog. (7)
Tip
Row 30 (WS): Ch 1, sc 3, bob, sc 3. (7: 1 bobble, T)
Row 31: Ch 1, sc2tog, sc 3, sc2tog. (5)
Row 32: Ch 1, sc2tog, sc 1, sc2tog. (3)
Row 33: Ch 1, sc3tog. (1) Fasten off.
Bobble total: 8 + 6 + 6 + 4 + 4 + 2 + 2 + 1 = 33 (13 T, 11 D, 9 B).
Knot all bobble tails in pairs on the WS and trim them to 0.5 in (1.3 cm). Weave in the cream ends.
Border
Border gauge: 4 sc per inch along the bottom, with 1 sc per row-end along the slanted sides.
Round 1 (RS facing, terracotta): Join at the first foundation loop of one bottom corner.
– First bottom corner: 3 sc in that foundation loop.
– Bottom edge: sc in each of the next 33 foundation loops. (33)
– Second bottom corner: 3 sc in the last foundation loop.
– First slanted side: sc in the row-end of each of Rows 1–32. (32)
– Tip: 3 sc in the Row 33 st.
– Second slanted side: sc in the row-end of each of Rows 32–1. (32)
Sl st to the first sc. Fasten off.
Border total: 3 + 33 + 3 + 32 + 3 + 32 = 106 sts.
Why the math works: The bottom has 35 foundation sts. The 33 middle sts get 1 sc each, and the 2 end sts become the 3-sc corners. Nothing is added or lost, so the bottom stays at 8.75 in (22.2 cm). Each slanted side is about 8.5 in (21.6 cm) long on the diagonal. At 4 sc per inch, it needs about 34 sts. The 32 row-end sc plus the corner sts give that length, so the sides lie flat.
The finished border is 0.25 in (0.6 cm) deep. It sits beside the outer bobbles and blends into the scalloped edge.
Hanging Loop
Join cream in the center sc of the 3-sc tip corner. Ch 12, then sl st in the same st. Fasten off and weave the ends back through the loop base twice so it holds firmly. The loop stands about 1.5 in (3.8 cm) tall.
Trunk
The trunk is worked downward from the bottom border, widening as it goes.
Hold the tree upside down with the RS facing. Count the 39 bottom-edge border sts, corners included. The center st is #20. Join cream in st #17.
Row 1 (RS): Ch 1, sc in sts 17–23. Turn. (7)
Rows 2–4: Ch 1, sc across. Turn. (7)
Row 5: Ch 1, 2 sc in first st, sc 5, 2 sc in last st. Turn. (9)
Row 6: Ch 1, sc across. Turn. (9)
Row 7: Ch 1, 2 sc in first st, sc 7, 2 sc in last st. Turn. (11)
Row 8: Ch 1, sc across. (11) Fasten off.
The trunk is 1.75 in (4.4 cm) wide at the top, 2.75 in (7.0 cm) at the base, and about 1.8 in (4.6 cm) tall. The stacked sc columns give it its fine vertical lines.
Center Vein and Branches
All veins are cream surface slip stitch. Hold the yarn behind the work, insert the hook from front to back, and draw a loop through to the front and through the loop on the hook. Keep each sl st about the length of one row or one stitch so the fabric doesn’t pucker.
Center vein: Start in border st #20, the center st above the trunk. Pull up a loop, then sl st into the center st of each row from Row 1 to Row 29, one per row. That makes 30 sl sts in all. The vein stops just under the tip bobble. Fasten off and pull the tail to the WS.
Branches: Work 2 branches, one on each side, starting at each of these rows: 3, 7, 11, 15, 19, 23, for 12 branches in total. For each branch:
1. Pull up a loop in the starting row, 1 st out from the vein.
2. Sl st in the next row up, 2 sts out.
3. Sl st in that same row, 3 sts out.
4. Sl st in the next row up, 4 sts out.
Fasten off on the WS. Each branch ends just under a bobble of the tier above, so the bobble looks like it hangs from that branch.
Final Blocking
- Weave in any remaining ends on the WS. Tie the bobble knots a second time if they feel loose.
- Lightly mist the WS with water until it is damp.
- Turn the piece RS up on the blocking mat. Pin the 3 corners first: bottom width 9.25 in (23.5 cm), height 7.8 in (19.8 cm) to the tip.
- Pin the slanted sides straight, placing pins in the border, not in the bobbles.
- Pin the trunk’s bottom corners 2.75 in (7.0 cm) apart.
- Push each bobble up from the back with a fingertip so it stands round.
- Let it dry completely, then unpin.
Final Quality-Control Checklist
- [ ] 33 bobbles, all popped to the RS (13 T, 11 D, 9 B)
- [ ] Bobbles staggered, with no bobble on the center column below the tip
- [ ] Border has 106 sts, with 3 sts at each corner
- [ ] Bordered tree is 9.25 in (23.5 cm) × 7.8 in (19.8 cm)
- [ ] Trunk is centered on border sts 17–23 and widens from 7 to 11 sts
- [ ] Center vein runs straight from the trunk to Row 29
- [ ] 12 branches, matching on both sides
- [ ] Hanging loop is centered and secure
- [ ] No tails visible on the RS
Troubleshooting
Bobbles pop to the wrong side: They were worked on RS rows. Make sure every bobble row is an even-numbered WS row.
Sides curl inward: The border is too tight. Redo it with a hook 0.5 mm larger.
Sides ruffle: Skip 1 row-end every 10 rows on each side, and take 3 sts off each side count. The new total is 100 sts.
Holes beside the bobbles: Pull the cream snug when you go back to it after each bobble.
Center vein puckers: The surface sl sts are too short. Loosen them to about one row’s height each.
Trunk off-center: Recount the bottom border sts from the first sc of a corner.
Tree too tall or too short: Check your row gauge. The 33 body rows should measure 7.3 in (18.5 cm).
Care
Hand wash in cool water with mild soap, press out the water in a towel, and dry flat, reshaping the bobbles. Do not tumble dry, because heat can flatten the texture.
Final Notes
Everything follows one measurement chain. Gauge is 16 sc = 4 in (10.2 cm). That makes the 35-st first row 8.75 in (22.2 cm) wide. The 33 body rows reach 7.3 in (18.5 cm). The 106-st border brings the tree to 9.25 in (23.5 cm) × 7.8 in (19.8 cm). The 8-row trunk adds 1.8 in (4.6 cm), for a total height of 9.6 in (24.4 cm) plus the loop. If you check each stage as you go, the tree will come out right.
Happy crocheting!