

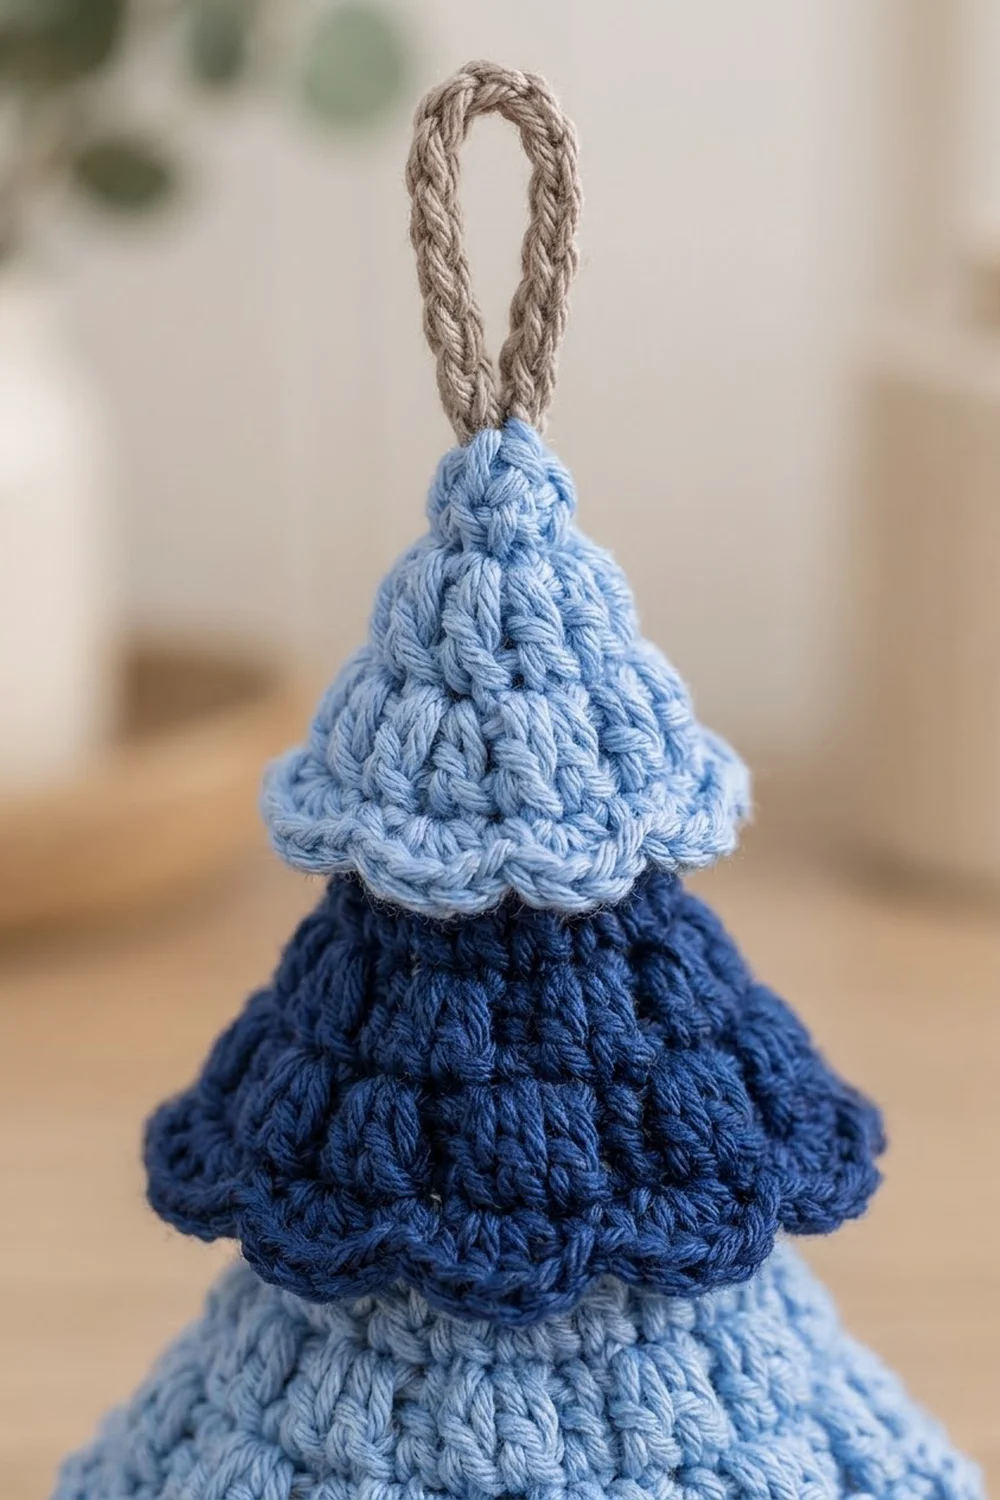
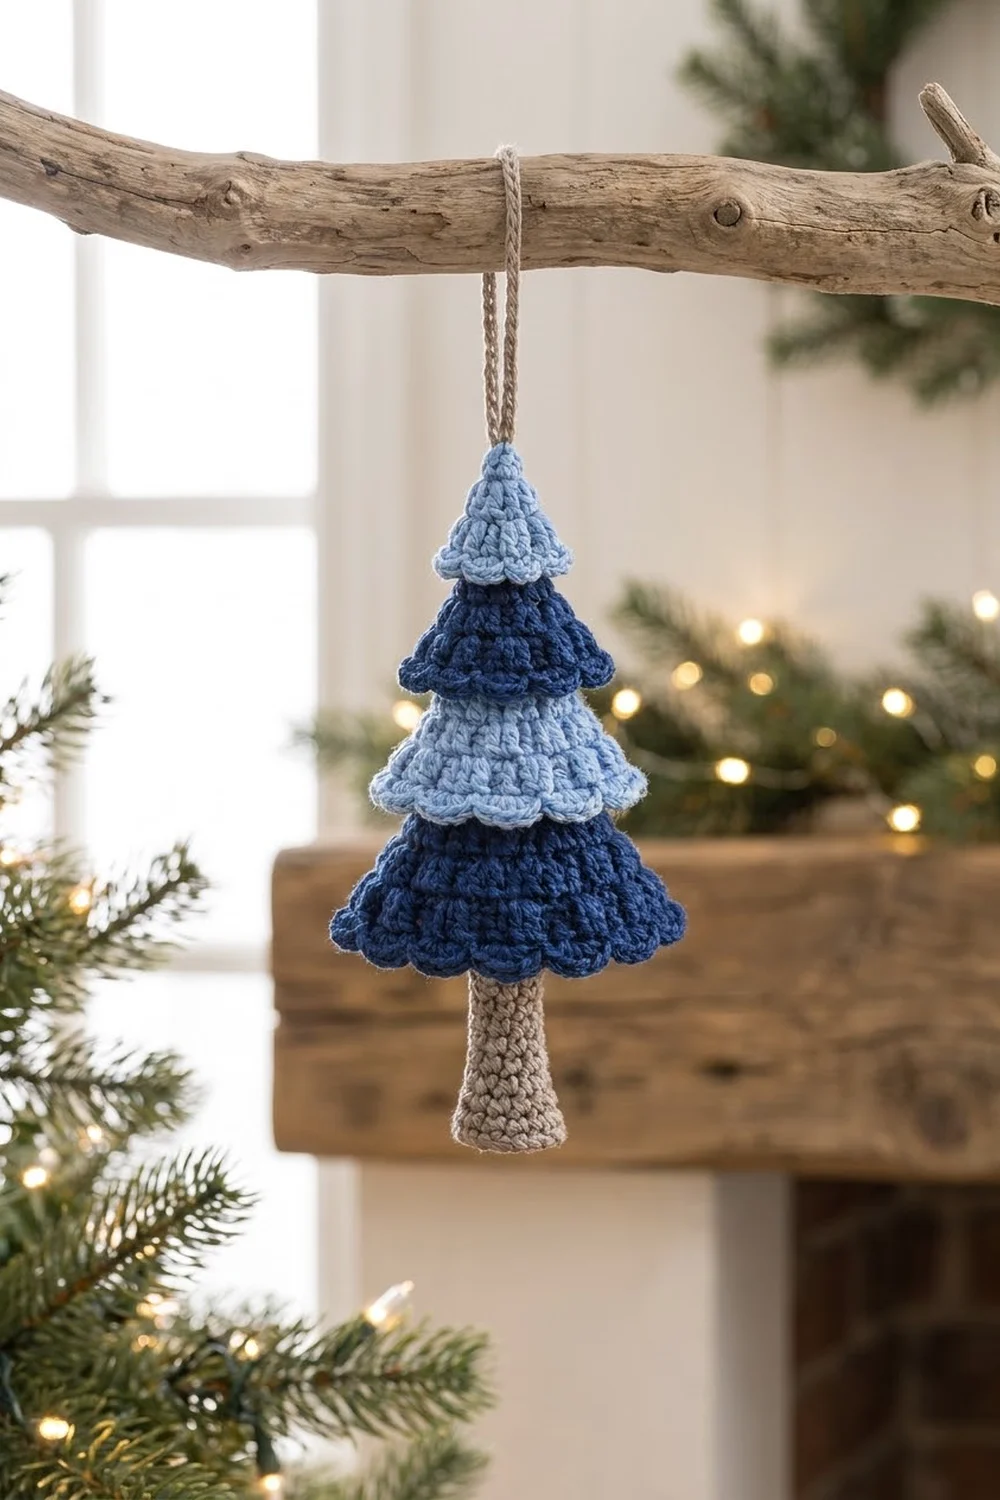
This little tree is made from four stacked cone tiers in alternating sky blue and navy. Each tier ends in a soft scalloped edge, and the tree stands on a tapered taupe trunk. It looks calm and modern, a nice change from the usual red and green, and it suits a Scandinavian-style shelf or a branch of hanging ornaments.
The finished ornament is about 6.2 in (15.7 cm) tall from the base of the trunk to the tip, plus a 1.25 in (3.2 cm) hanging loop. The bottom tier is about 3.5 in (8.9 cm) across at the scallops. Thanks to the flat-bottomed trunk, it can also stand on its own.
The pattern uses US crochet terms throughout. Each tier is worked top-down in single crochet rounds, starting from a magic ring at the tip. Increases shape the cone, a few plain rounds let the edge drop, and a scallop round finishes the tier. The trunk is worked bottom-up and stuffed. Then the tiers are stacked, joined with a hidden center “spine” and a few tacking stitches, and finished with the trunk and loop.
There is no sewing of seams along the sides. The only finishing is stacking, tacking and adding the loop.
Finished Size and Construction
- Finished size: 6.2 in (15.7 cm) tall, without the loop; 3.5 in (8.9 cm) wide at the bottom tier
- Skill level: Easy (confident beginner)
- Terminology: US
- Yarn weight: DK / light (#3), cotton or cotton blend
- Hook: 3.0 mm (US C/2–D/3)
- Number of pieces: 6 (4 tiers, 1 trunk, 1 loop)
- Layout: tiers stacked vertically, smallest on top
- Piece sizes (opening diameter before border): Tier 1: 1.4 in (3.6 cm); Tier 2: 1.9 in (4.8 cm); Tier 3: 2.3 in (5.8 cm); Tier 4: 3.0 in (7.6 cm)
- Border depth: 0.4 in (1.0 cm) scallop on every tier
Materials
Use a smooth, tightly plied DK cotton. It shows the stitches clearly and holds the cone shape without wilting. Acrylic DK works too, but the tiers will be a little softer.
- Navy (Tiers 2 and 4): 15 g, about 38 m
- Sky blue (Tiers 1 and 3): 12 g, about 30 m
- Taupe (trunk, loop, spine): 8 g, about 20 m
These quantities include a margin for swatching and tails.
Tools:
– 3.0 mm crochet hook
– Tapestry needle
– Doll needle, 3 in (7.6 cm) or longer
– Small amount of polyester fiberfill
– Optional: a 1 in (2.5 cm) cardboard or plastic circle for the trunk base
– Stitch marker
– Ruler or tape measure
Abbreviations (US Terms)
- MR – magic ring
- ch – chain
- sl st – slip stitch
- sc – single crochet
- dc – double crochet
- inc – 2 sc in the same stitch
- dec – single crochet decrease (sc2tog; the invisible decrease is recommended)
- BLO – back loop only
- st(s) – stitch(es)
- rep – repeat
Special stitch – Scallop: skip 1 st, 5 dc in the next st, skip 1 st. Each scallop plus the sc that follows it covers exactly 4 stitches of the previous round.
Gauge and Checkpoints
Gauge: 22 sc and 24 rounds = 4 in (10.2 cm) in sc worked in the round. That is 5.5 sts and 6 rounds per 1 in (2.5 cm).
Test one piece first. Tier 1 is small, so make it as your gauge piece. After Rnd 8, set the cone on the table opening-down and measure across the opening. It should be 1.4 in (3.6 cm).
Checkpoints (opening diameter, before border):
– Tier 1 after Rnd 9: 1.4 in (3.6 cm)
– Tier 2 after Rnd 10: 1.9 in (4.8 cm)
– Tier 3 after Rnd 12: 2.3 in (5.8 cm)
– Tier 4 after Rnd 15: 3.0 in (7.6 cm)
– Trunk base after Rnd 3: 1.0 in (2.5 cm)
If your piece is too big by more than 0.1 in (0.3 cm), go down to a 2.75 mm hook. If it is too small, go up to a 3.25 mm hook. Do not change the stitch counts. The tiers have to nest inside each other, so correct size matters more than exact height.
Work in continuous spirals unless told otherwise. Mark the first stitch of each round.
Tier 1 (Top) – Sky Blue
This tier has a narrower, pointed shape, with 3 increases per round.
- Rnd 1: 4 sc in MR. (4)
- Rnd 2: (sc, inc) x2. (6)
- Rnd 3: (sc, inc) x3. (9)
- Rnd 4: (sc 2, inc) x3. (12)
- Rnd 5: (sc 3, inc) x3. (15)
- Rnd 6: (sc 4, inc) x3. (18)
- Rnd 7: (sc 5, inc) x3. (21)
- Rnd 8: (sc 6, inc) x3. (24)
- Rnd 9: sc in each st around. (24) Sl st to the next st.
Checkpoint: opening 1.4 in (3.6 cm). Do not fasten off. Work the border (see Border section).
Tiers 2, 3 and 4 – Shared Cone Method
These three tiers use the same 4-increase cone and differ only in length. Pull the magic ring tight. The center has to be firmly closed because the spine passes through it later.
- Rnd 1: 4 sc in MR. (4)
- Rnd 2: inc in each st. (8)
- Rnd 3: (sc, inc) x4. (12)
- Rnd 4: (sc 2, inc) x4. (16)
- Rnd 5: (sc 3, inc) x4. (20)
- Rnd 6: (sc 4, inc) x4. (24)
- Rnd 7: (sc 5, inc) x4. (28)
- Rnd 8: (sc 6, inc) x4. (32)
From Rnd 3 on, every round is (sc [round number − 2], inc) x4 and totals 4 × the round number.
Optional: to keep the cone round instead of four-sided, start each even-numbered round from Rnd 6 on with half of the plain sc. For example, Rnd 6: sc 2, inc, (sc 4, inc) x3, sc 2. The total stays the same.
Tier 2 – Navy
- Rnds 1–8: as above. (32)
- Rnds 9–10: sc in each st around. (32)
Sl st to the next st. Checkpoint: opening 1.9 in (4.8 cm). Work the border.
Tier 3 – Sky Blue
- Rnds 1–8: as above. (32)
- Rnd 9: (sc 7, inc) x4. (36)
- Rnd 10: (sc 8, inc) x4. (40)
- Rnds 11–12: sc in each st around. (40)
Sl st to the next st. Checkpoint: opening 2.3 in (5.8 cm). Work the border.
Tier 4 – Navy
- Rnds 1–8: as above. (32)
- Rnd 9: (sc 7, inc) x4. (36)
- Rnd 10: (sc 8, inc) x4. (40)
- Rnd 11: (sc 9, inc) x4. (44)
- Rnd 12: (sc 10, inc) x4. (48)
- Rnd 13: (sc 11, inc) x4. (52)
- Rnds 14–15: sc in each st around. (52)
Sl st to the next st. Checkpoint: opening 3.0 in (7.6 cm). Work the border.
The plain rounds at the end of each tier are important. They turn the slope into a short straight drop, so the scallops hang down and flare instead of pointing straight out.
Trunk – Taupe
The trunk is worked from the bottom up.
- Rnd 1: 6 sc in MR. (6)
- Rnd 2: inc in each st. (12)
- Rnd 3: (sc, inc) x6. (18)
- Rnd 4: BLO sc in each st. (18) This makes the crisp edge of the flat base.
- Rnds 5–8: sc in each st. (18)
- Rnd 9: (sc 7, dec) x2. (16)
- Rnds 10–14: sc in each st. (16)
- Rnd 15: (sc 6, dec) x2. (14)
- Rnds 16–23: sc in each st. (14)
Fasten off and leave a 12 in (30.5 cm) tail.
Rounds 4–23 are 20 rounds, about 3.3 in (8.4 cm) tall. The trunk is 1.0 in (2.5 cm) wide at the base and 0.8 in (2.0 cm) at the top. If you want the ornament to stand, drop the optional circle into the base. Then stuff firmly, keeping the top 0.5 in (1.3 cm) lightly filled so it can squeeze into Tier 4.
Hanging Loop – Taupe
Ch 17. Sl st in the back bump of the 2nd ch from the hook and in each ch across. (16 sl st) Fasten off and leave a 6 in (15.2 cm) tail. The cord measures about 2.7 in (6.9 cm).
Make All Pieces
| Piece | Color | Quantity | Final round count |
|---|---|---|---|
| Tier 1 | Sky blue | 1 | 24 sts, 36-st border |
| Tier 2 | Navy | 1 | 32 sts, 48-st border |
| Tier 3 | Sky blue | 1 | 40 sts, 60-st border |
| Tier 4 | Navy | 1 | 52 sts, 78-st border |
| Trunk | Taupe | 1 | 14 sts at top |
| Loop | Taupe | 1 | 16 sl st |
Stacking layout (top to bottom):
        [ Loop – taupe ]
        [ Tier 1 – sky blue ]
      [   Tier 2 – navy    ]
    [   Tier 3 – sky blue    ]
  [      Tier 4 – navy         ]
        [ Trunk – taupe ]
Joining
Method: a hidden center spine plus tacking stitches under the scallops.
- Fill the tips. Put a pea-sized bit of fiberfill into the top 0.5 in (1.3 cm) of Tiers 2, 3 and 4. This keeps each tip firm so the tier above it sits steady.
- Stack. Place Tier 3 over Tier 4, Tier 2 over Tier 3, and Tier 1 over Tier 2. Each tier’s tip goes into the hollow of the tier above it.
- Set the spacing. Adjust each tier so that 1.0 in (2.5 cm) of the lower tier shows, measured from its scallop tips straight up to the scallop tips of the tier above it. With these sizes, the upper tier’s plain rounds sit loosely around the narrower part of the lower cone. There is no forcing and no gap.
- Sew the spine. Thread the doll needle with 18 in (45.7 cm) of taupe. Reach up inside Tier 4 and knot the end just under its magic ring. Push the needle straight up through the centers of Tiers 4, 3, 2 and 1, and out the top tip. Come back down 0.1 in (0.3 cm) away through all four centers. Pull firmly, but only until the tiers stop shifting, not until they pucker. Tie off inside Tier 4.
- Tack the edges. Lift the scallops of each upper tier. At 4 evenly spaced points, tack the inside of its last plain round to the lower tier with matching yarn. For 52-, 40-, 32- and 24-st rounds, “evenly spaced” means every 10, 8 or 6 sts on the upper tier.
- Attach the trunk. Push the trunk’s top up into Tier 4 until its top edge meets the inside of Rnds 4–5. That is about 1.75 in (4.4 cm) of trunk hidden, with 1.5 in (3.8 cm) showing. Use the trunk tail to whipstitch the 14 top sts to the inside of the cone, and catch the spine knot as you go.
- Add the loop. Fold the cord in half. Sew both ends to the top tip over the spine stitches.
Size checkpoint: the tree should now measure 6.2 in (15.7 cm) from the trunk base to the tip, within 0.2 in (0.5 cm).
Border – Scallop Edging (All Tiers)
Border gauge: 1 scallop plus 1 sc covers 4 sts, or 0.7 in (1.8 cm) of edge.
Work the border with the tier’s yarn, straight after its last plain round:
Border Rnd: ch 1, sc in the first st, *skip 1 st, 5 dc in the next st, skip 1 st, sc in the next st; rep from * around. On the last repeat, end with skip 1 st, 5 dc in the next st, skip 1 st, then sl st to the first sc. Fasten off and weave in the ends.
Counts per tier. Each repeat uses 4 existing sts and produces 1 sc + 5 dc = 6 sts:
- Tier 1: 24 ÷ 4 = 6 scallops → 6 sc + 30 dc = 36 sts
- Tier 2: 32 ÷ 4 = 8 scallops → 8 sc + 40 dc = 48 sts
- Tier 3: 40 ÷ 4 = 10 scallops → 10 sc + 50 dc = 60 sts
- Tier 4: 52 ÷ 4 = 13 scallops → 13 sc + 65 dc = 78 sts
Why the math works: every tier’s final round is a multiple of 4, so the repeat closes exactly with no partial scallop. The last sl st lands on the first sc, which is the stitch the 4-st repeat would have reached next. Each scallop adds 2 extra stitches of width over the 4 it covers. That ruffle is what flares the edge from 3.0 in (7.6 cm) out to 3.5 in (8.9 cm) on Tier 4.
Final Blocking
- Lightly mist each tier with water before stacking. Don’t soak cotton cones, because they lose their shape.
- Stand each tier opening-down on the table and pinch the scallops outward and down, one at a time.
- Shape the cones round by rolling them gently between your palms.
- Let them dry completely, about 2 hours.
- After joining, use a fingertip to fluff the scallops on the assembled tree so they all sit at the same angle.
- If you like, give a light shot of steam held 1 in (2.5 cm) away. Don’t press.
Final Quality-Control Checklist
- Magic rings closed tightly, no holes at the tips
- Stitch counts: 24 / 32 / 40 / 52 before the borders
- Scallop counts: 6 / 8 / 10 / 13, all even and none crowded
- 1.0 in (2.5 cm) of each lower tier showing
- Tiers centered, with no lean when viewed from the front and side
- 1.5 in (3.8 cm) of trunk showing, and the trunk stands flat
- Total height 6.2 in (15.7 cm), plus the 1.25 in (3.2 cm) loop
- All ends woven in and hidden inside the cones
Troubleshooting
- The cone flattens into a disk: your tension is too loose at the increases. Go down a hook size or tighten the increase stitches.
- The cone looks square: use the staggered increase option.
- The border doesn’t close evenly: recount the last plain round. It must be a multiple of 4.
- The scallops curl up: add one more plain round before the border. Keep the counts the same.
- The tree leans: redo the spine and keep both passes straight through the centers.
- The trunk wobbles: add the base circle and stuff the bottom more firmly.
- An upper tier won’t sit low enough: reduce the stuffing in the lower tier’s tip.
Care
Spot clean with mild soap and cool water. Reshape the scallops and let the ornament air dry. Store it upright or flat in a box so the tiers don’t get crushed.
Final Notes
The measurement chain is simple. Check gauge on Tier 1 first, 1.4 in (3.6 cm). Confirm each opening diameter: 1.9 in (4.8 cm), 2.3 in (5.8 cm) and 3.0 in (7.6 cm). Count the scallops: 6, 8, 10 and 13. Space the tiers 1.0 in (2.5 cm) apart and show 1.5 in (3.8 cm) of trunk. You end with a 6.2 in (15.7 cm) tree that hangs or stands on its own. Make a few and hang them together on a branch.
Happy crocheting!