

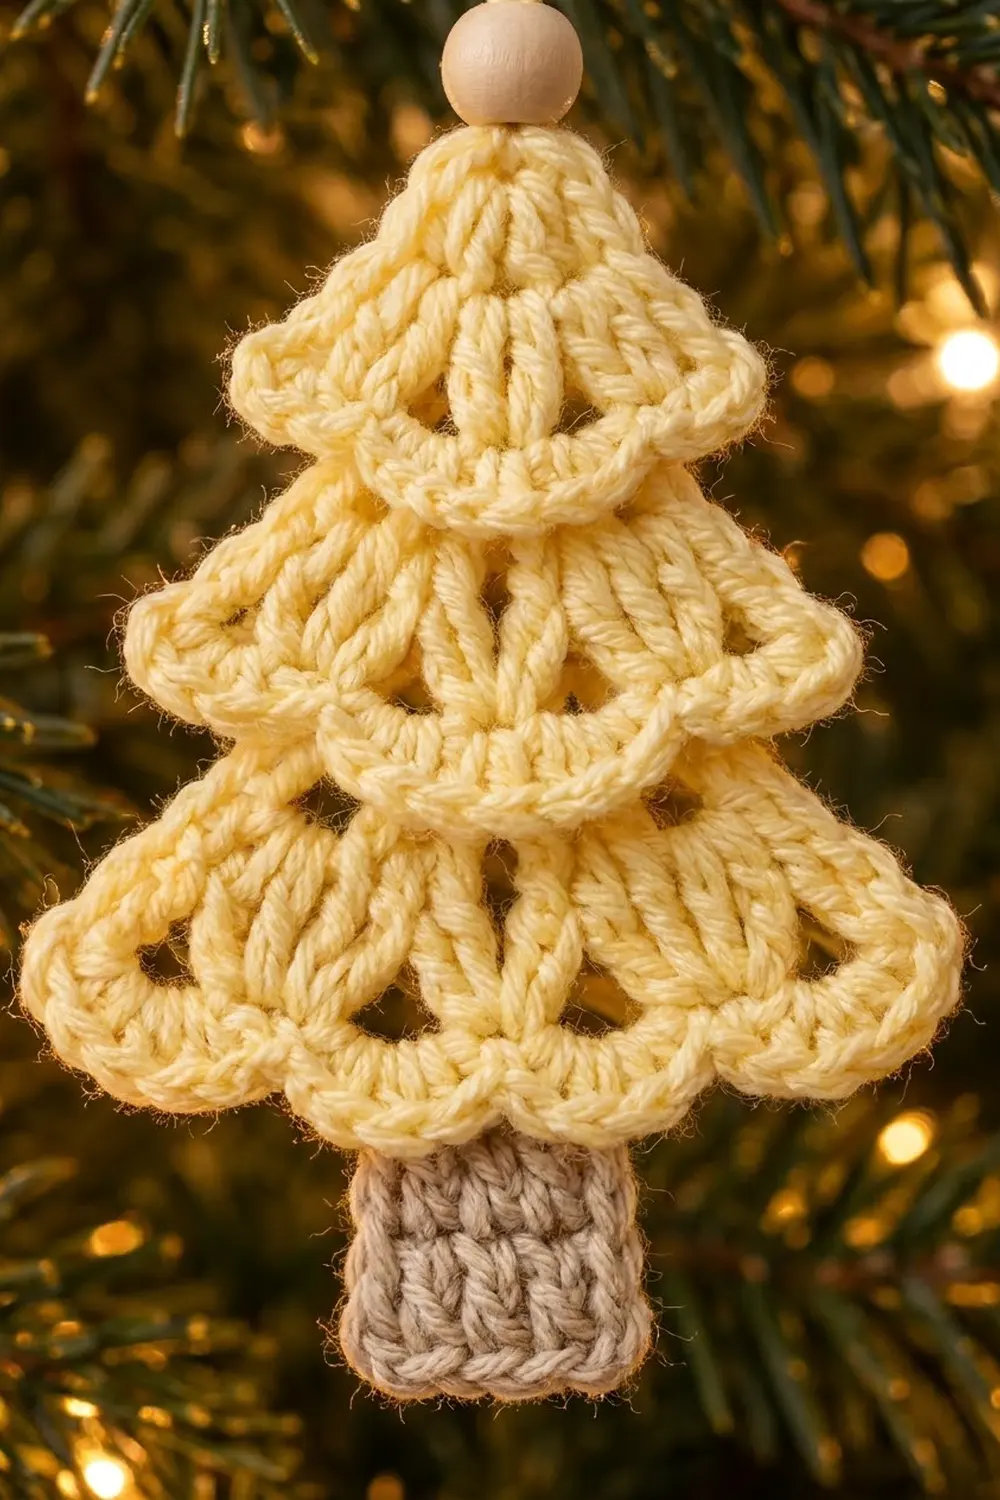
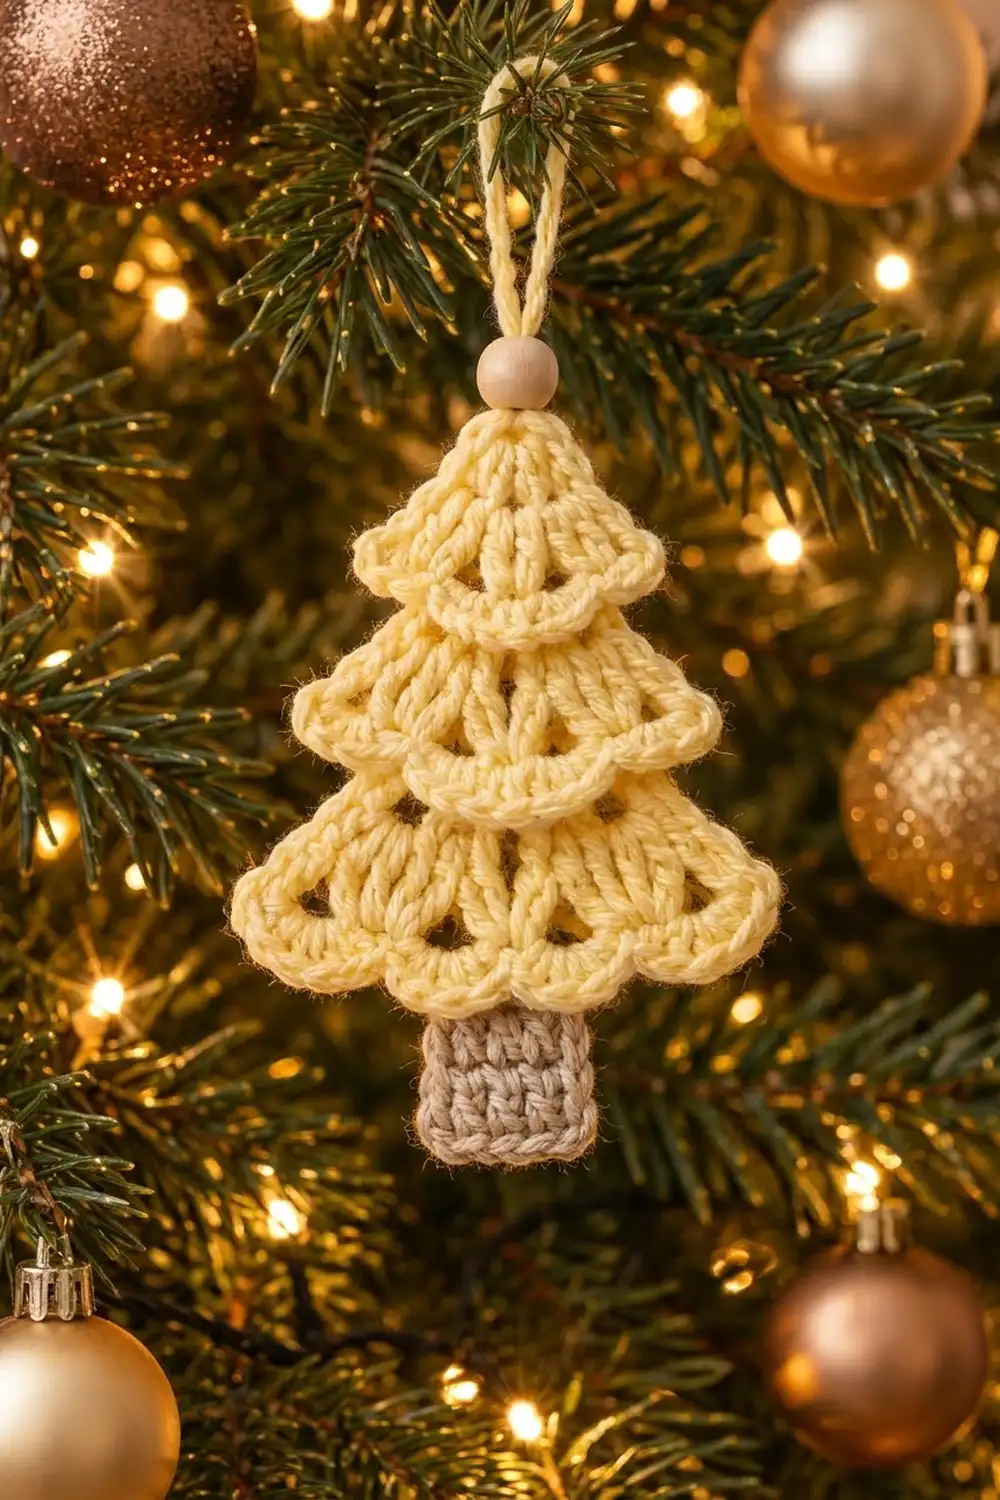
The Butter Glow Tree is a small, lacy Christmas tree ornament with three stacked tiers. Each tier is a fan of tall stitches with open spaces between them. Each one ends in a soft scalloped ruffle that sits over the tier below. A short taupe trunk finishes the bottom, and a natural wooden bead and yarn loop finish the top.
The colors are calm and warm: pale butter yellow for the tree and light taupe for the trunk. It has a cozy, Scandinavian look and stands out well against dark green branches and warm lights.
This pattern uses US crochet terms. The finished ornament measures 3.8 in (9.7 cm) wide and 4.2 in (10.7 cm) tall, not counting the hanging loop.
You work the tree flat, in one piece, from the top point down. Each tier has two rows: a lace row of treble spokes and a solid row of single crochet. You work the next tier into the back loops of that solid row, which leaves the front loops free for the ruffles. The trunk is worked straight off the last solid row, and the ruffles are added at the end.
Finished Size and Construction
- Finished size: 3.8 in (9.7 cm) wide x 4.2 in (10.7 cm) tall, plus a 2 in (5.1 cm) loop
- Skill level: Easy to intermediate
- Terminology: US crochet terms
- Yarn weight: Worsted (#4)
- Hook: 4.0 mm (G-6)
- Number of pieces: 1 (single flat ornament)
- Layout: 3 stacked tiers + 1 trunk, worked as one piece
- Piece size: 3.8 in (9.7 cm) x 4.2 in (10.7 cm)
- Size before border (ruffles): 3.8 in (9.7 cm) x 4.2 in (10.7 cm)
- Border depth: each ruffle hangs 0.5 in (1.3 cm) over the row below it and adds no extra height or width
Materials
Choose a smooth worsted-weight yarn with good stitch definition. A cotton blend or a soft acrylic both work well. Cotton keeps the ruffles crisp, while acrylic gives a slightly fluffier look like the photo.
- Color A, pale butter yellow: 6 g, about 12 m (13 yd) per ornament
- Color B, light taupe: 2 g, about 4 m (4 yd) per ornament
These amounts include a margin for swatching, the hanging loop, and weaving in ends.
Tools:
- 4.0 mm (G-6) crochet hook
- One natural wooden bead, 12 mm, with a hole wide enough for two strands of yarn
- Tapestry needle
- Scissors
- Stitch marker
- Rustproof pins and a foam blocking board
- Ruler or tape measure
Abbreviations (US Terms)
- ch: chain
- sc: single crochet
- dc: double crochet
- tr: treble crochet
- sk: skip
- sp: space
- st(s): stitch(es)
- BLO: back loop only
- MR: magic ring
- RS / WS: right side / wrong side
Special stitch, Scallop: 5 dc in the same stitch or loop.
Note on loops: When you work a RS row into the back loops of a WS row, the unused front loops stay free on the RS. These free loops hold the ruffles later.
Gauge and Checkpoints
Gauge: 18 sc and 20 sc rows = 4 in (10.2 cm). One tr row is about 0.8 in (2.0 cm) tall.
Gauge isn’t critical for an ornament, but it sets the final size and how neatly the tiers line up. Make one tree first and measure it at each checkpoint before you make more.
- After Row 2: 2.0 in (5.1 cm) wide, 1.0 in (2.5 cm) tall
- After Row 4: 2.9 in (7.4 cm) wide, 2.0 in (5.1 cm) tall
- After Row 6: 3.8 in (9.7 cm) wide, 3.0 in (7.6 cm) tall
- After Row 12 (trunk): 4.2 in (10.7 cm) tall overall
If your tree is too big: go down to a 3.5 mm hook, or check that the tops of your tr stitches aren’t loose.
If your tree is too small: go up to a 4.5 mm hook. Tight sc rows also make the tiers cup, so relax your tension on the solid rows.
The Pattern
Work all rows flat and turn at the end of every row. The beginning ch-5 always counts as 1 tr plus 1 ch-1 sp. The ch-1 at the start of a sc row does not count as a stitch.
Keep all tr stitches the same height. Even spokes give even windows, and even windows keep each tier straight across the bottom.
Tier 1 (Top)
With Color A:
Row 1 (RS): MR, ch 5 (counts as tr + ch 1), [tr, ch 1] 3 times in ring, tr in ring. Pull the ring snug but don’t join. The row forms a half-circle fan with the ring as the top point. Turn. (5 tr, 4 ch-1 sps = 9 sts)
Row 2 (WS): Ch 1, sc in first tr, [sc in next ch-1 sp, sc in next tr] 4 times, working the last sc in the 4th ch of the beginning ch-5. Turn. (9 sc)
Check: the tier is 2.0 in (5.1 cm) wide and 1.0 in (2.5 cm) tall.
Tier 2 (Middle)
Row 3 (RS): Working in BLO for the whole row: ch 5 (counts as tr + ch 1), tr in same st, ch 1, sk next st, [tr in next st, ch 1, sk next st] 3 times, (tr, ch 1, tr) in last st. Turn. (7 tr, 6 ch-1 sps = 13 sts)
The spokes land in sts 1, 3, 5, 7, and 9 of Row 2, with a V at each end. The V at each edge widens the tier, and the ch-1 spaces form the open windows you see in the photo.
Row 4 (WS): Ch 1, sc in first tr, [sc in next ch-1 sp, sc in next tr] 6 times, working the last sc in the 4th ch of the beginning ch-5. Turn. (13 sc)
Check: the work is 2.9 in (7.4 cm) wide and 2.0 in (5.1 cm) tall.
Tier 3 (Bottom)
Row 5 (RS): Working in BLO for the whole row: ch 5 (counts as tr + ch 1), tr in same st, ch 1, sk next st, [tr in next st, ch 1, sk next st] 5 times, (tr, ch 1, tr) in last st. Turn. (9 tr, 8 ch-1 sps = 17 sts)
Row 6 (WS): Ch 1, sc in first tr, [sc in next ch-1 sp, sc in next tr] 8 times, working the last sc in the 4th ch of the beginning ch-5. (17 sc) Fasten off Color A.
Check: the work is 3.8 in (9.7 cm) wide and 3.0 in (7.6 cm) tall. In each lace row, the number of repeats is (stitches in the row below − 3) ÷ 2. That gives 3 repeats from 9 sts and 5 repeats from 13 sts.
Trunk
Row 7 (RS): With RS facing, sk the first 6 sts of Row 6. Join Color B in the BLO of the 7th st, ch 1, then sc in the BLO of the same st and the next 4 sts. Turn. (5 sc, centered, with 6 sts free on each side)
Rows 8–12: Ch 1, sc in each st across. Turn. (5 sc each row)
Fasten off Color B. The trunk is 1.1 in (2.8 cm) wide and 1.2 in (3.0 cm) tall. The ornament now measures 4.2 in (10.7 cm) tall.
Border: Scalloped Tier Ruffles
The ruffles are this ornament’s border. Each one is worked into the free front loops of a solid sc row, so it sits on the RS. Once you fold it down, it drapes forward over the tier below.
Border gauge: each scallop uses 4 stitches of the row below (1 sc, 1 skipped st, 1 scallop st, 1 skipped st) and spans about 0.9 in (2.3 cm). A ruffle needs 4 sts per scallop plus 1 closing sc, so its row must hold a multiple of 4, plus 1.
Rows 2, 4, and 6 hold 9, 13, and 17 sts. That is exactly (4 x 2) + 1, (4 x 3) + 1, and (4 x 4) + 1. This is why every ruffle starts and ends with a sc right at the tier edge, with no gaps and no extra stitches.
Work the ruffles from top to bottom so each one overlaps cleanly.
Ruffle 1 (on Row 2)
With RS facing, join Color A in the first free front loop at the right-hand edge of Row 2.
Ch 1, sc in same loop, [sk next loop, Scallop in next loop, sk next loop, sc in next loop] 2 times. Fasten off.
(2 scallops: 3 sc + 10 dc = 13 sts)
Ruffle 2 (on Row 4)
Join Color A in the first free front loop at the right-hand edge of Row 4.
Ch 1, sc in same loop, [sk next loop, Scallop in next loop, sk next loop, sc in next loop] 3 times. Fasten off.
(3 scallops: 4 sc + 15 dc = 19 sts)
Ruffle 3 (on Row 6)
Join Color A in the first free front loop at the right-hand edge of Row 6. The front loops above the trunk are still free because you worked the trunk in back loops.
Ch 1, sc in same loop, [sk next loop, Scallop in next loop, sk next loop, sc in next loop] 4 times. Fasten off.
(4 scallops: 5 sc + 20 dc = 25 sts)
The scallops fall on loops 3, 7, 11, and 15 of Row 6. Fold each ruffle down over the tier below. Ruffle 3 hangs 0.5 in (1.3 cm) over the top of the trunk, so about 0.7 in (1.8 cm) of trunk shows below it, as in the photo.
Hanging Loop and Bead
Cut a 12 in (30.5 cm) strand of Color A and fold it in half. Push the fold up through the bead, leaving a 2 in (5.1 cm) loop above it. Thread both tails onto the tapestry needle and pass them through the center of the magic ring at the tree’s top point. Slide the bead down so it rests on the point. Then tie the tails firmly on the WS and weave them in.
Final Blocking
- Weave in all ends on the WS, following stitches of the same color.
- Pin the tree RS up on the blocking board. Pin the top point, both edges of Row 6, and the bottom corners of the trunk.
- Check the measurements: 3.8 in (9.7 cm) across Row 6, and 4.2 in (10.7 cm) from the top point to the bottom of the trunk.
- Fold each ruffle down flat over the tier below. Lightly pin the center of each scallop.
- Open each ch-1 window by gently stretching the tr spokes outward.
- Spray the piece until it’s damp, or hold a steam iron 1 in (2.5 cm) above it. Don’t press acrylic.
- Let it dry completely, for at least 4 hours, before you unpin it.
Final Quality-Control Checklist
- Row 2 has 9 sc, Row 4 has 13 sc, and Row 6 has 17 sc.
- Every lace row shows open ch-1 windows between straight tr spokes.
- Each tier is wider than the one above, with neat V increases at the edges.
- The trunk is centered, with 6 free sts on each side.
- The ruffles have 2, 3, and 4 scallops, from top to bottom.
- Each ruffle starts and ends with a sc exactly at the tier edge.
- The ruffles sit on the RS and overlap the tier below by about 0.5 in (1.3 cm).
- The bead sits snug on the top point, and the loop is 2 in (5.1 cm).
- The final size is 3.8 in (9.7 cm) x 4.2 in (10.7 cm).
Troubleshooting
The tier curls up like a bowl. Your sc rows are too tight. Loosen your tension, or go up half a hook size for the solid rows only.
The tier ripples. Your tr stitches are too long. Pull the first loop up a little shorter, or go down half a hook size.
A ruffle ends with leftover loops. Recount the solid row; it must hold 9, 13, or 17 sts. Most errors come from missing the last sc in the turning chain.
The ruffles sit on the back. You worked the next tier into the front loops by mistake. Work every RS lace row in BLO.
The trunk is off-center. Count the 6 skipped sts again before joining Color B.
The magic ring loosens. Weave the starting tail through the ring twice, in opposite directions, before you add the hanging loop.
Care
Hand wash in cool water with mild soap, then lay flat to dry and reshape the ruffles. Store the ornament flat or hanging, away from heavy ornaments that could crush the scallops.
Final Notes
The whole ornament follows one simple chain of measurements. Gauge sets each tier width: 9 sc for 2.0 in (5.1 cm), 13 sc for 2.9 in (7.4 cm), and 17 sc for 3.8 in (9.7 cm). Each tier adds 1.0 in (2.5 cm) of height and the trunk adds 1.2 in (3.0 cm), for 4.2 in (10.7 cm) in total. Every solid row holds a multiple of 4, plus 1, so the ruffles fit exactly, with 2, 3, and 4 scallops. They add no extra size, only the soft layered look.
Make one tree and check it against the checkpoints. Then make as many as you like for branches, gift tags, or package toppers.
Happy crocheting!