

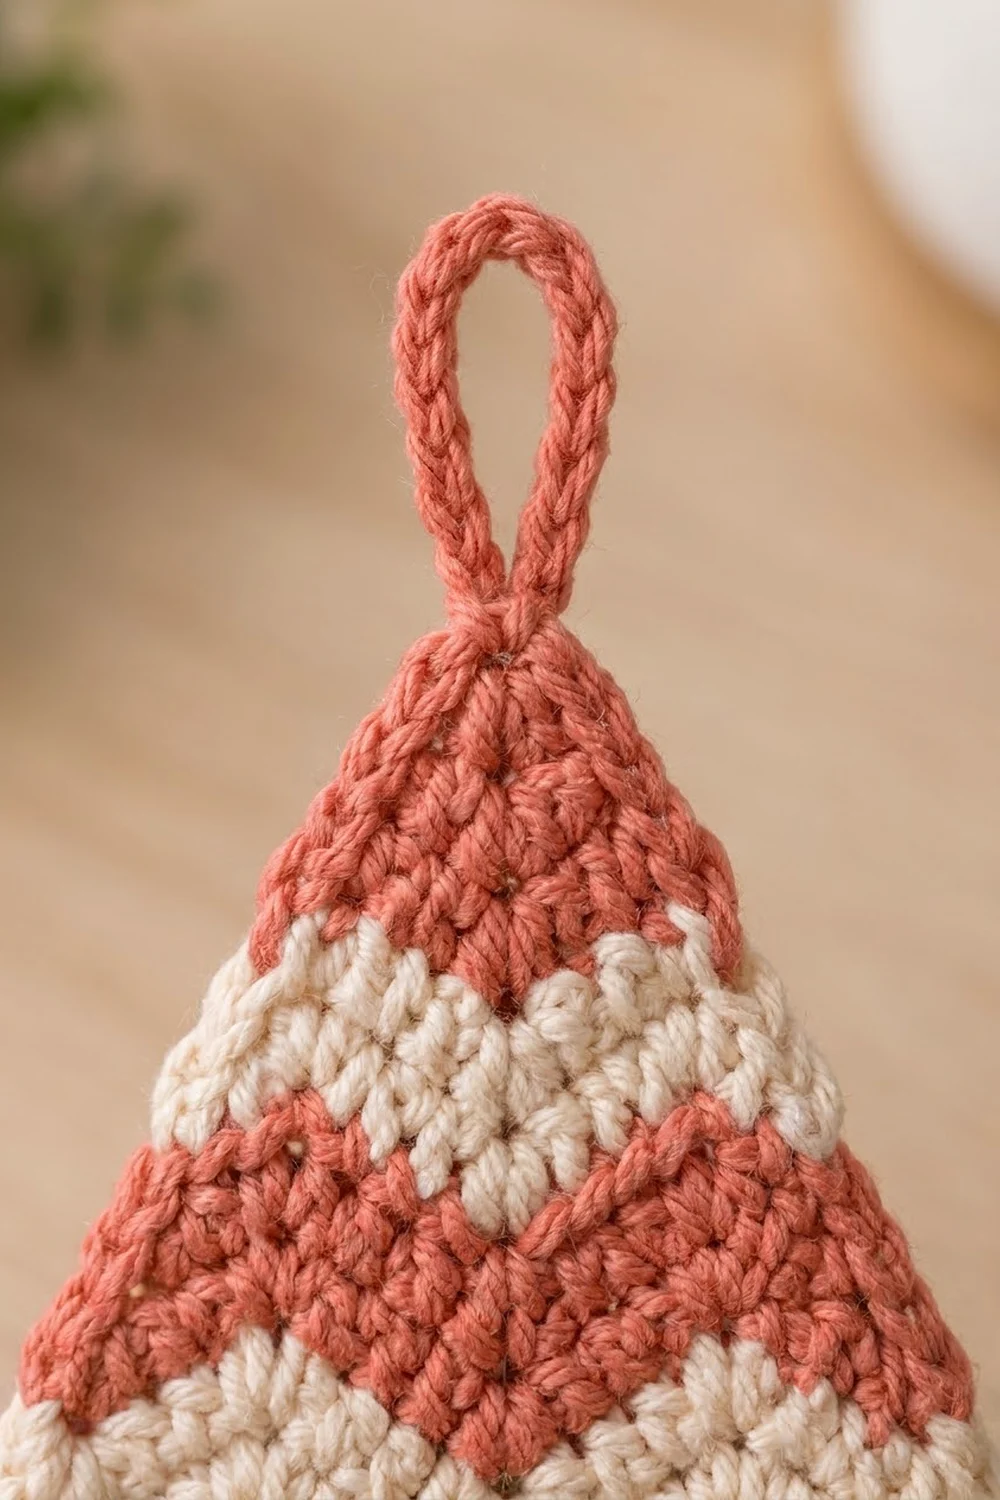
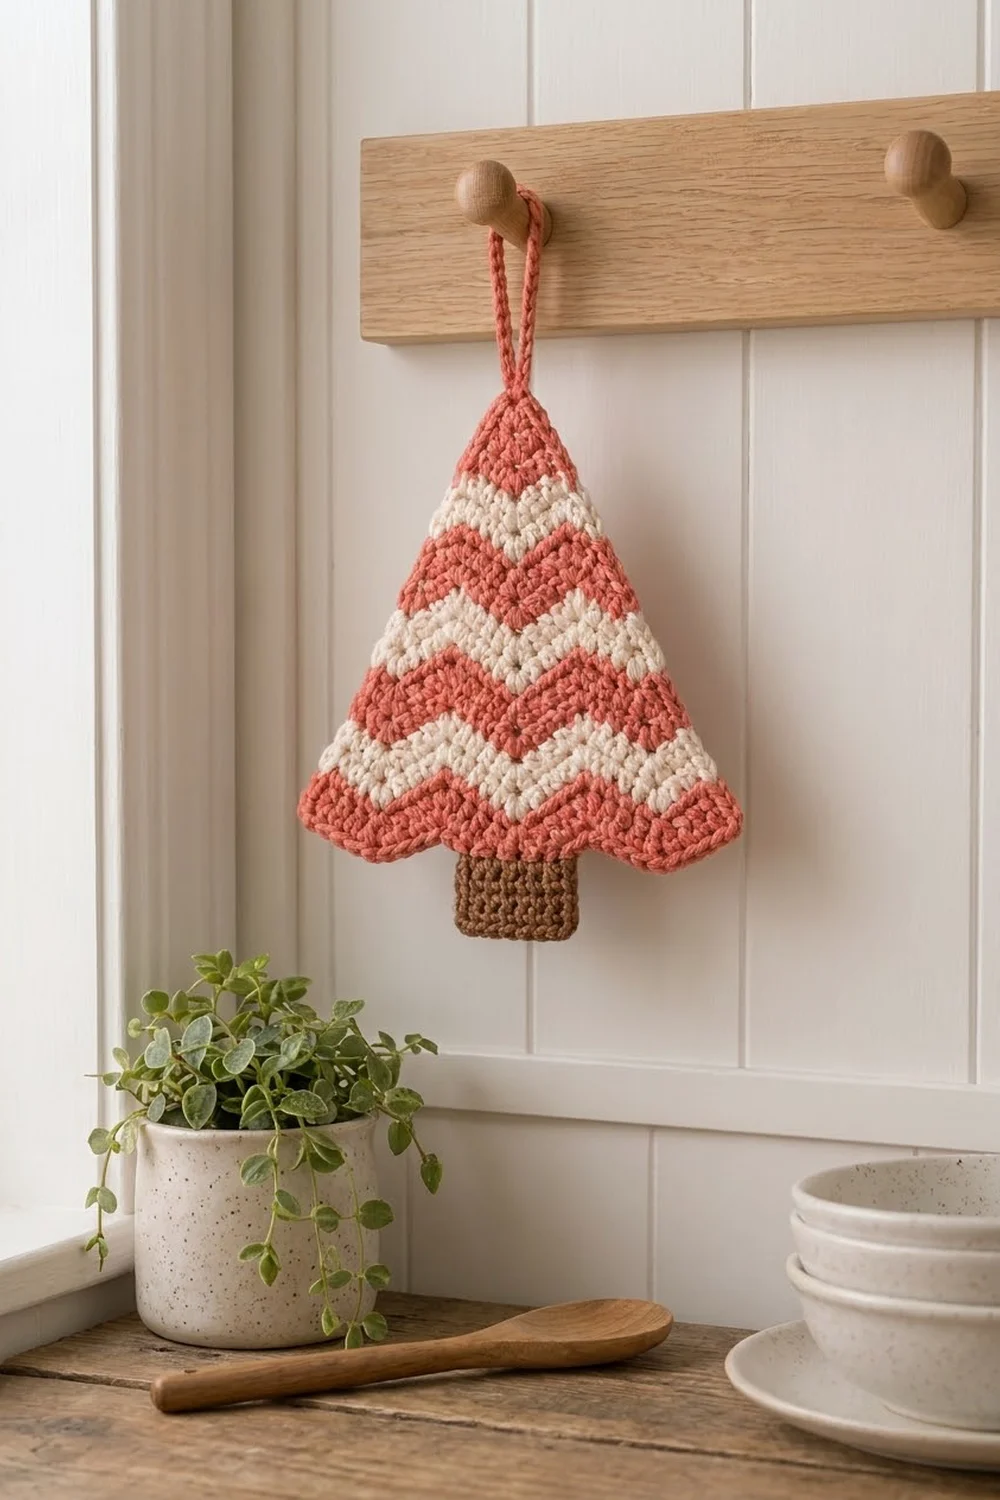
This little tree is one flat triangle worked in bold zigzag stripes of warm coral and soft cream. It has a neat coral border, a small brown trunk, and a sturdy hanging loop at the tip. You can use it as an ornament, a gift-tag topper, a wall hanging, or a thick little trivet.
The look is cozy and simple, in a Scandinavian style: two main colors, crisp chevrons, and a wavy bottom edge that follows the stripes. The bottom edge dips at both corners and at the center and rises in two soft peaks between them, so the tree looks like a stylized fir.
This pattern uses US crochet terms. The finished triangle is about 7.3 in (18.5 cm) wide and 7.8 in (19.8 cm) tall. With the trunk it is 9.3 in (23.6 cm) tall, plus a 1.5 in (3.8 cm) loop.
You work the triangle flat from the tip down in turned rows of double crochet. Increases at the center build the chevron, fans at the edges widen the tree, and decreases form the peaks. Two rounds of single crochet make the border, and a separate trunk is sewn to the back.
Finished Size and Construction
- Finished size: 7.3 in (18.5 cm) wide x 7.8 in (19.8 cm) tall (triangle with border); 9.3 in (23.6 cm) tall with trunk
- Skill level: Easy-Intermediate
- Terminology: US
- Yarn weight: Worsted (#4), cotton or cotton blend
- Hook: 4.5 mm (US 7)
- Number of pieces: 1 tree body + 1 small trunk panel, sewn into one finished item
- Layout: single triangle, tip up, trunk centered below
- Triangle size before border: 6.5 in (16.5 cm) wide x 7 in (17.8 cm) tall
- Border depth: 0.4 in (1.0 cm), 2 rounds
- Trunk: 2 in (5.1 cm) wide x 1.75 in (4.4 cm) tall, with 1.5 in (3.8 cm) showing
Materials
Use a smooth worsted cotton. Cotton gives crisp stitches, holds the zigzag points well, and can handle heat if you use the tree as a trivet. Acrylic is fine for ornaments, but the points will be softer.
- Color A, coral: 18 g / 31 m
- Color B, cream: 10 g / 17 m
- Color C, chocolate brown: 4 g / 7 m
Tools:
- 4.5 mm (US 7) crochet hook
- Tapestry needle
- Scissors
- Stitch markers (3)
- Rust-proof pins and a blocking mat
- Tape measure or ruler
All yarn amounts include about 20% extra for tails, checking gauge, and small differences in tension.
Abbreviations (US Terms)
- ch – chain
- sl st – slip stitch
- sc – single crochet
- dc – double crochet
- st(s) – stitch(es)
- tch – turning chain
- yo – yarn over
- RS / WS – right side / wrong side
Special stitches:
- dc3tog (double crochet 3 together): [yo, insert hook in next st, yo, pull up a loop, yo, pull through 2 loops] 3 times, yo, pull through all 4 loops on hook. This forms a peak.
- sc3tog (single crochet 3 together): [insert hook in next st, yo, pull up a loop] 3 times, yo, pull through all 4 loops on hook.
- Edge fan: 3 dc in one edge st. At the start of a row, work it as ch 3 (counts as dc) plus 2 dc in the st at the base of the ch-3.
Gauge and Checkpoints
Gauge: 16 dc and 8 rows = 4 in (10.2 cm) in plain dc rows. Each dc row is about 0.5 in (1.3 cm) tall. For the trunk, 16 sc and 18 rows = 4 in (10.2 cm).
Use Rows 1–7 as your test piece. They are part of the tree, so checking them first costs you nothing.
Checkpoints:
- After Row 7: about 3.5 in (8.9 cm) tall from the tip to the center point, and about 3.5 in (8.9 cm) across at the widest part.
- After Row 14: 7 in (17.8 cm) tall and 6.5 in (16.5 cm) wide from corner to corner.
- After the border: 7.3 in (18.5 cm) wide and 7.8 in (19.8 cm) tall.
- Trunk: 2 in (5.1 cm) wide and 1.75 in (4.4 cm) tall.
Being off by up to 0.25 in (0.6 cm) either way is fine. If your piece is bigger than this, use a hook 0.5 mm smaller. If it is smaller, use a hook 0.5 mm larger. If only the height is off, make sure you pull each dc up to full height before the first yo-through.
Tree Body
Work the body from the tip down in turned rows. The ch 3 at the start of each row counts as the first dc. Work the last dc of each row into the top of the tch.
Stripe sequence: Rows 1–3 Color A; Rows 4–5 Color B; Rows 6–7 Color A; Rows 8–9 Color B; Rows 10–11 Color A; Rows 12–13 Color B; Row 14 Color A.
Change colors in the last yo of the final dc of the row before. Every stripe after Row 3 is 2 rows deep, so you can carry the unused color loosely up the side edge. The border will hide it.
Tip Section (Rows 1–7)
These rows increase only at the center, which forms the first V of the chevron.
Row 1 (Color A): Ch 4, 2 dc in 4th ch from hook. Turn. (3 sts; the skipped ch-3 counts as a dc)
Row 2: Ch 3, 3 dc in next st (center), dc in top of tch. Turn. (5 sts)
Row 3: Ch 3, dc in next st, 3 dc in next st (center), dc in last 2 sts. Change to Color B. Turn. (7 sts)
Row 4 (Color B): Ch 3, dc in next 2 sts, 3 dc in next st, dc in last 3 sts. Turn. (9 sts)
Row 5: Ch 3, dc in next 3 sts, 3 dc in next st, dc in last 4 sts. Change to Color A. Turn. (11 sts)
Row 6 (Color A): Ch 3, dc in next 4 sts, 3 dc in next st, dc in last 5 sts. Turn. (13 sts)
Row 7: Ch 3, dc in next 5 sts, 3 dc in next st, dc in last 6 sts. Change to Color B. Turn. (15 sts)
Each tip row has 2 more sts than the row before. The count is always odd, with one center st.
Chevron Section (Rows 8–14)
From here on, two kinds of rows alternate:
- Valley Rows (8, 10, 12, 14): an edge fan at each end, a dc3tog on each side to make the two peaks, and 3 dc in the center to keep the center dip.
- Plain Rows (9, 11, 13): dc across, with 3 dc in the center only.
Both kinds of row add exactly 2 sts. Valley Rows push the corners outward. Plain Rows push each peak 1 st farther out. Together they keep the W shape widening evenly as the tree grows.
Row 8 (Color B, Valley): Ch 3, 2 dc in first st (edge fan), dc in next 2 sts, dc3tog, dc in next st, 3 dc in next st (center), dc in next st, dc3tog, dc in next 2 sts, 3 dc in top of tch. Turn. (17 sts)
Put a marker in each dc3tog and in the center dc of the center 3-dc group. Move the markers up as you work.
Row 9 (Plain): Ch 3, dc in next 7 sts, 3 dc in next st (center), dc in last 8 sts. Change to Color A. Turn. (19 sts)
Row 10 (Color A, Valley): Ch 3, 2 dc in first st, dc in next 3 sts, dc3tog, dc in next 2 sts, 3 dc in next st, dc in next 2 sts, dc3tog, dc in next 3 sts, 3 dc in top of tch. Turn. (21 sts)
Row 11 (Plain): Ch 3, dc in next 9 sts, 3 dc in next st, dc in last 10 sts. Change to Color B. Turn. (23 sts)
Row 12 (Color B, Valley): Ch 3, 2 dc in first st, dc in next 4 sts, dc3tog, dc in next 3 sts, 3 dc in next st, dc in next 3 sts, dc3tog, dc in next 4 sts, 3 dc in top of tch. Turn. (25 sts)
Row 13 (Plain): Ch 3, dc in next 11 sts, 3 dc in next st, dc in last 12 sts. Change to Color A. Cut Color B, leaving an 8 in (20.3 cm) tail. Turn. (27 sts)
Row 14 (Color A, Valley): Ch 3, 2 dc in first st, dc in next 5 sts, dc3tog, dc in next 4 sts, 3 dc in next st, dc in next 4 sts, dc3tog, dc in next 5 sts, 3 dc in top of tch. Do not turn or fasten off. (29 sts)
Each dc3tog should sit centered two rows above the one before it. Each center 3-dc group should sit over the previous center st. Row 14 adds up as 3 + 5 + 1 + 4 + 3 + 4 + 1 + 5 + 3 = 29 sts.
Border
Border gauge: 4 sc per 1 in (2.5 cm), the same as the trunk gauge. Each dc row-end is about 0.5 in (1.3 cm) long, so 2 sc per Plain or tip row-end matches the fabric. The edge fan on a Valley Row makes that row-end longer, so it gets 3 sc.
In the counts below, “side” means the sts between corner groups. Each of the 3 corners (tip, left corner, right corner) is its own 3-sc group and is not part of any side count.
Round 1 (Color A): Ch 1, 3 sc in last dc of Row 14 (corner group). Work along the row-ends up to the tip: 2 sc in each row-end of Rows 13 to 1, except 3 sc in the row-ends of Rows 12, 10, and 8 (29 sc). Work 3 sc in the foundation ch at the tip. Work down the other side with the same spacing for Rows 1 to 13 (29 sc). Work 3 sc in top of the tch at the start of Row 14 (corner group). Now work across the bottom of Row 14: sc in next 6 sts, sc3tog, sc in next 4 sts, 3 sc in next st (center), sc in next 4 sts, sc3tog, sc in next 6 sts. Join with sl st to first sc.
Round 1 count: 29 + 29 on the sides, 25 across the bottom (6 + 1 + 4 + 3 + 4 + 1 + 6), and 3 corner groups of 3 = 92 sc.
Round 2: Ch 1, sc in first sc, 3 sc in next sc (corner), sc in next 31 sc. In the center sc of the tip group, work 2 sc, ch 16, sl st in the last sc made to form a ring, work 24 sc into the ring, sl st in the same sc, then work 1 more sc in the same tip center sc. Sc in next 31 sc, 3 sc in next sc (corner). Across the bottom: sc in next 6 sc, sc3tog, sc in next 4 sc, 3 sc in next sc, sc in next 4 sc, sc3tog, sc in next 5 sc. Join with sl st to first sc, which counts as the 6th st of that last bottom section. Fasten off.
Round 2 count, not including the loop: 31 + 31 on the sides, 25 across the bottom, and 3 corner groups of 3 = 96 sc.
Why the math works: In Round 2, each side gains 2 sts because the outer sc of each corner group next to it now counts as a side st, so 29 + 2 = 31. Across the bottom, the 2 outer corner sts make 27 sts to work into. The two sc3tog remove 4 and the center group adds 2, so the bottom stays at 25 sts and keeps its W shape. Each slanted side of the finished tree is about 7.7 in (19.6 cm) long. Round 1’s 29 sc cover 7.25 in (18.4 cm), a little snug, which keeps the edge firm and straight. Round 2’s 31 sc cover 7.75 in (19.7 cm), which matches the outer edge.
Trunk
Row 1 (Color C): Ch 9, sc in 2nd ch from hook and in each ch across. Turn. (8 sc)
Rows 2–8: Ch 1, sc in each st across. Turn. (8 sc)
Fasten off, leaving a 12 in (30.5 cm) tail for sewing. The trunk measures 2 in (5.1 cm) x 1.75 in (4.4 cm).
Attach: Turn the tree WS up. Center the trunk under the center dip of the bottom edge, with its top 0.25 in (0.6 cm) tucked behind the border. Whipstitch the top edge and the overlapping parts of the short sides to the back of Round 1 only, so no stitching shows on the front. This leaves 1.5 in (3.8 cm) of trunk showing.
Final Blocking
- Weave in all tails through stitches of the same color on the WS, then trim.
- Lightly mist the tree with water, or wet it and press the extra water out in a towel.
- Lay it RS up on a blocking mat.
- Pin the tip and both bottom corners first, setting the triangle to 7.3 in (18.5 cm) wide and 7.8 in (19.8 cm) tall.
- Pin the center dip and the two peaks to sharpen the wavy edge.
- Straighten each slanted side with pins every 1 in (2.5 cm).
- Shape the loop into an upright oval and straighten the trunk.
- Let it dry completely before you unpin it. You can also steam cotton by holding the iron just above the fabric.
Final Quality-Control Checklist
- Row 14 has 29 sts, and the peaks line up in straight columns.
- There are 7 stripes in total, starting and ending with coral.
- Border Round 1 has 92 sc; Round 2 has 96 sc plus the loop.
- Both slanted sides lie flat, with no ruffling or cupping.
- The bottom edge dips at both corners and at the center, with two peaks in between.
- The trunk is centered, 1.5 in (3.8 cm) of it shows, and no stitching shows on the front.
- The loop is firm and secure at the tip.
- The tree measures 7.3 in (18.5 cm) x 7.8 in (19.8 cm), not counting the trunk.
Troubleshooting
- Peaks drift sideways: a dc3tog is off-center. Make sure its middle leg goes into the st directly above the marked dc3tog.
- Tree cups at the center: your center 3-dc groups are too tight. Loosen your tension on them.
- Sides ruffle: the border has too many sc. Work 2 sc per Plain or tip row-end and check that each side has 29.
- Sides pull in: your border is too tight. Use a hook 0.5 mm larger for the border only.
- Carried yarn shows: the strands are too tight or too long. Twist the two yarns at each row end and keep them loose.
- Loop flops over: pack the 24 sc closely, or add 2 more sc into the ring.
Care
Hand wash in cool water and lay flat to dry, reshaping the points while the tree is damp. Cotton trees used as trivets can be steamed back into shape.
Final Notes
Each measurement builds on the one before. A gauge of 16 dc x 8 rows to 4 in (10.2 cm) gives a 3.5 in (8.9 cm) tip at Row 7. Fourteen rows make the triangle 6.5 in (16.5 cm) x 7 in (17.8 cm). Two border rounds take it to 7.3 in (18.5 cm) x 7.8 in (19.8 cm), and the 1.5 in (3.8 cm) of trunk brings the total height to 9.3 in (23.6 cm). Check each measurement as you go and the tree will come out the right size.
Happy crocheting!