

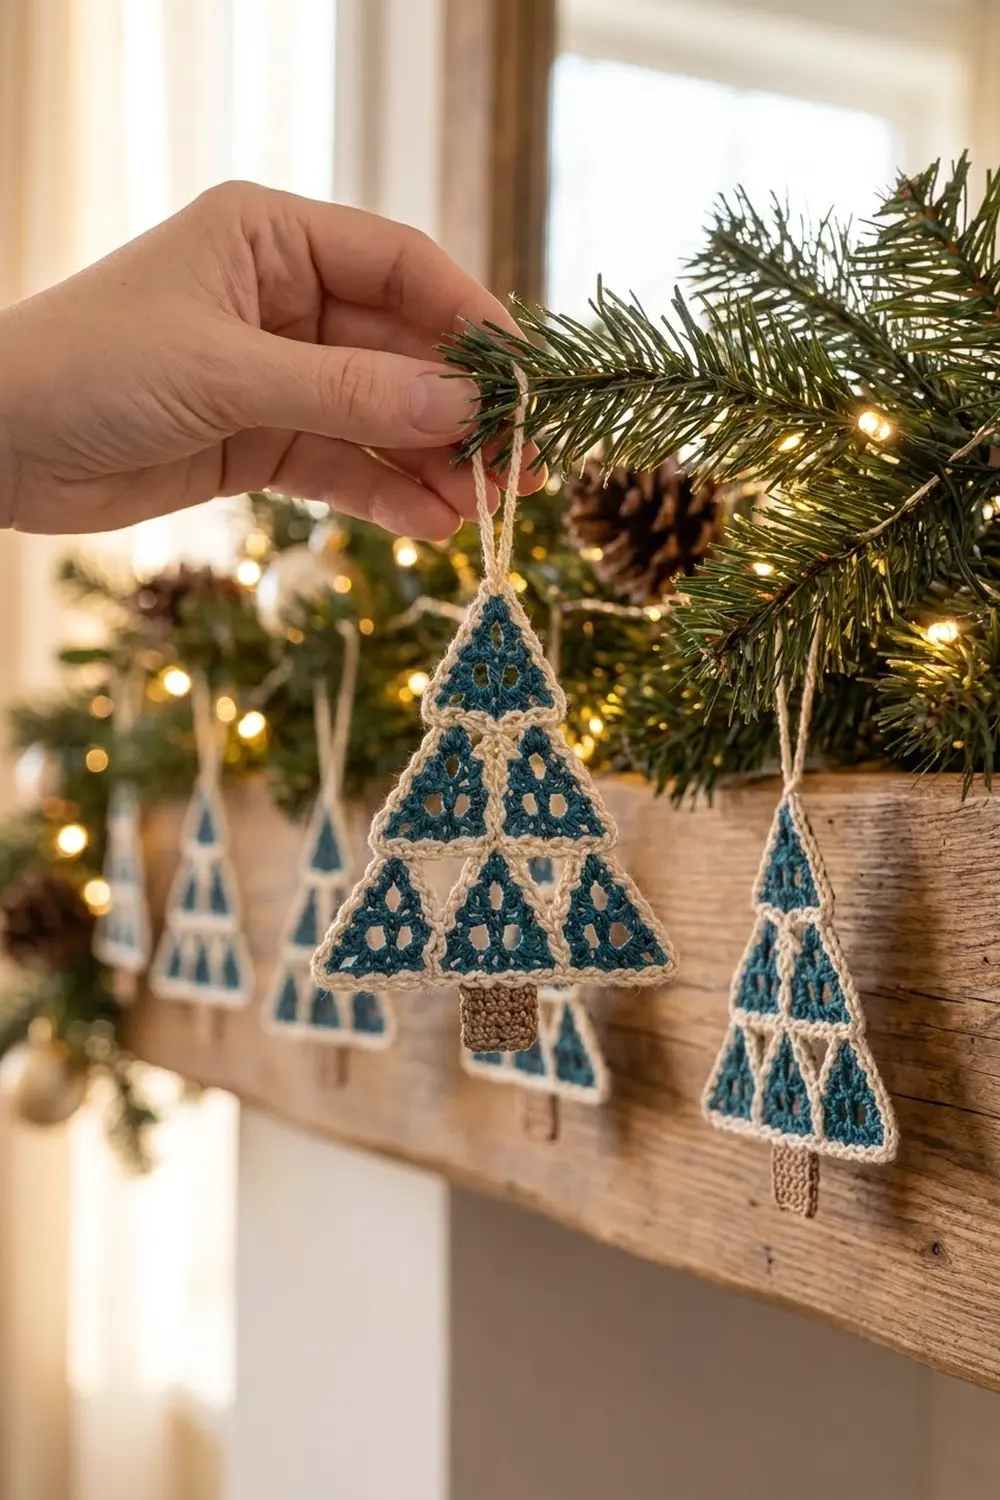
The Evergreen Lattice Tree is a small, flat Christmas ornament made from lace triangles joined into one tiered tree. Six deep teal triangles point upward in rows of one, two and three. Three cream triangles point downward between them, so the cream reads as soft Y-shaped seams through the green.
Each triangle has a lacy center, with a small ring hole and three window openings, and a thin cream edge. A rope-textured cream border goes around the whole tree. A solid tan trunk and a cream hanging loop finish it.
This pattern uses US crochet terms. The finished ornament is about 5.2 in (13.2 cm) wide along each edge and 5.25 in (13.3 cm) tall including the trunk. With the loop, the total height is about 6.5 in (16.5 cm).
Construction is simple and repetitive. You make nine identical three-round triangles: six teal with cream edging and three all cream. Then you join them with slip stitches into one large triangle, work two border rounds, and sew on a separate trunk.
Finished Size and Construction
- Finished size: 5.2 in (13.2 cm) per side; 5.25 in (13.3 cm) tall with trunk; 6.5 in (16.5 cm) with loop
- Skill level: Easy+ (motif-based; needs careful edge matching)
- Terminology: US crochet terms
- Yarn weight: Super fine / fingering (#1), cotton or cotton blend
- Hook: 2.5 mm (US B/1 or C/2)
- Number of pieces: 9 triangles + 1 trunk
- Layout: 3-row triangular arrangement: 1 / 3 / 5 triangles per row, alternating point-up (teal) and point-down (cream)
- Single triangle size: 1.5 in (3.8 cm) per side, 11 sts per side
- Size before border: 4.5 in (11.4 cm) per side, 33 sts per side
- Border depth: 2 rounds, about 0.2 in (0.5 cm)
Materials
Choose a smooth, mercerized cotton in fingering weight. It shows the lace openings clearly and blocks to crisp points. Avoid fuzzy yarns, because they fill in the windows.
- Teal (Color A): 10 g, about 34 m
- Cream (Color B): 12 g, about 41 m
- Tan or light brown (Color C): 3 g, about 10 m
These quantities include a margin for swatching and weaving in ends. If you plan to make a set of ornaments, multiply them by the number of trees.
Tools:
– 2.5 mm crochet hook
– Tapestry needle
– Scissors
– Stitch markers (4–6)
– Rust-proof pins and a blocking mat or folded towel
– Spray bottle with water
– Ruler or tape measure
Abbreviations (US Terms)
- ch – chain
- sl st – slip stitch
- sc – single crochet
- dc – double crochet
- sp – space
- st(s) – stitch(es)
- RS / WS – right side / wrong side
- BLO – back loop only
- rev sc – reverse single crochet
Special stitch – reverse single crochet (rev sc): Work from left to right (right-handed). Insert the hook into the next stitch to the right, yarn over, pull up a loop, then yarn over and pull through both loops. This makes a twisted, rope-like edge.
Gauge and Checkpoints
Gauge: 7 sc = 1 in (2.5 cm) in fingering cotton with a 2.5 mm hook.
Make one complete teal triangle before you go on, and use it as your swatch.
Checkpoints for one triangle (measure flat, edge to edge along one side):
– After Round 1: about 0.6 in (1.5 cm) per side
– After Round 2: about 1.25 in (3.2 cm) per side
– After Round 3: 1.5 in (3.8 cm) per side, corner stitch to corner stitch
If your triangle is too big (over 1.6 in / 4.1 cm), change to a 2.25 mm hook. If it is too small (under 1.4 in / 3.6 cm), change to a 2.75 mm hook. All nine triangles must match within about 1/16 in (0.2 cm), or the seams will not line up.
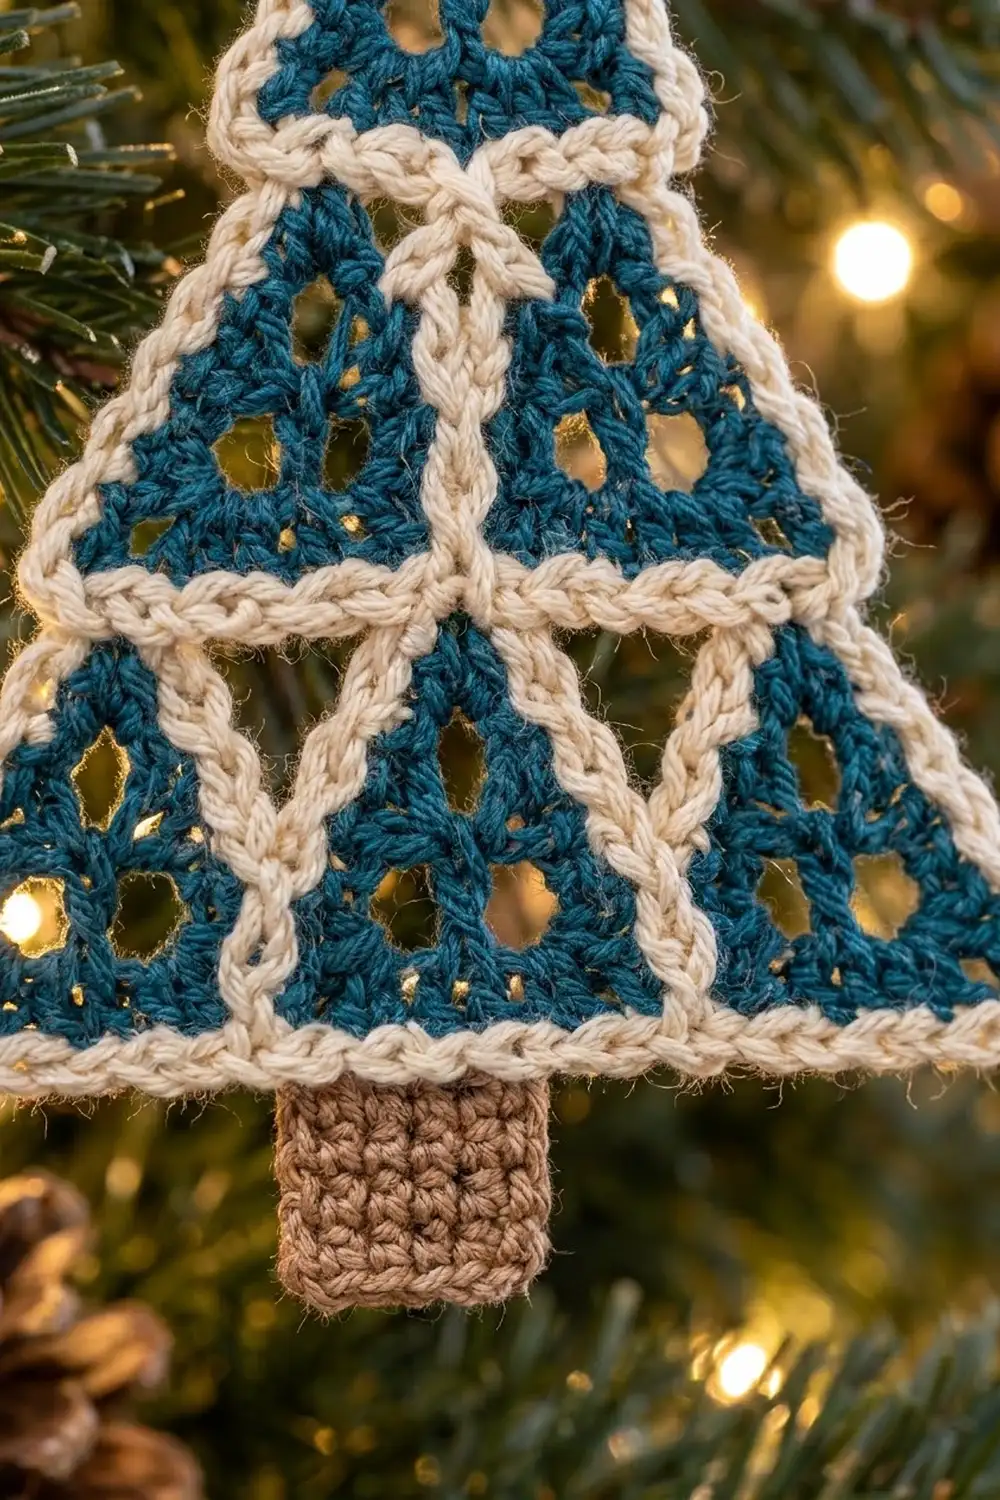
Triangle Motif (Make 9)
Make 6 triangles with Rounds 1–2 in teal and Round 3 in cream. Make 3 triangles with all rounds in cream.
Round 1 (Color A or B): Make a magic ring. Ch 3 (counts as dc), 2 dc in ring, ch 3, [3 dc in ring, ch 3] twice. Join with sl st to the top of the beginning ch-3. Pull the ring tight.
Count: 9 dc and 3 corner ch-3 sps.
Round 2: Sl st in the next 2 dc and into the first ch-3 sp. Ch 3 (counts as dc), work (dc, ch 3, 2 dc) in the same sp, ch 3. Work (2 dc, ch 3, 2 dc) in the next corner ch-3 sp, ch 3. Repeat from * once more. Join with sl st to the top of the beginning ch-3.
Count: 12 dc, 3 corner ch-3 sps and 3 side ch-3 sps.*
Each side ch-3 skips over the 3 dc of Round 1, so it makes one of the three lace windows. For teal triangles, fasten off Color A here.
Round 3 (Color B, cream edging): Join cream in any corner ch-3 sp. Ch 1, then work 3 sc in the same corner sp. Sc in the next 2 dc, 3 sc in the side ch-3 sp, sc in the next 2 dc, 3 sc in the next corner ch-3 sp. Repeat from * around, leaving out the last corner group because you already worked it at the start. Join with sl st to the first sc.
Count: 30 sc = 21 side sc (7 per side) + 9 corner sc (3 per corner).*
Per-side count: The middle sc of each 3-sc corner group is the corner stitch. One side, counted from corner stitch to corner stitch and including both, is 1 + 1 + 7 + 1 + 1 = 11 sts. Each corner stitch is shared by two sides, so 3 × 11 − 3 = 30. ✔
Fasten off with a 6 in (15.2 cm) tail and weave in the ends. Place a marker in each corner stitch.
Make All Pieces
- Teal triangles (Rounds 1–2 teal, Round 3 cream): 6
- Cream triangles (all rounds cream): 3
- Trunk (tan): 1, worked later
Layout grid (▲ = teal point-up, ▼ = cream point-down):
Row 1:        ▲
Row 2:      ▲ ▼ ▲
Row 3:    ▲ ▼ ▲ ▼ ▲
That makes 6 teal and 3 cream triangles. Each outer edge of the big triangle is made of three teal edges. Lay all nine pieces out RS up and check that the points line up before you join anything.
Joining
Method: Slip stitch join in the BLO, worked from the RS in cream. This makes a slightly raised cream line, which adds to the Y-shaped seam effect.
Stitch-to-stitch logic: Each shared edge is 11 sts on each triangle, corner to corner. Hold two neighboring triangles WS together with the shared edges lined up. Join cream in the corner stitch at one end. Sl st through the back loop of each matching pair of stitches, working 1 sl st per pair, for 11 sl sts across the edge. Never skip or double up stitches.
Joining order:
1. Row 3: join ▲▼▲▼▲ left to right (4 seams).
2. Row 2: join ▲▼▲ left to right (2 seams).
3. Join the bottom edge of Row 2 to the top edges of Row 3. The bases of the two teal triangles in Row 2 meet the tops of the two cream triangles in Row 3 (2 seams).
4. Join the bottom edge of the Row 1 triangle to the top edge of the cream triangle in Row 2 (1 seam).
There are 9 seams in total, each 11 sl sts long.
Tension: Keep the slip stitches loose, about the same height as your sc. If they are tight, the seams will pucker and the tree will cup. If needed, go up a hook size for joining only.
Checkpoint: The joined tree should lie flat and measure 4.5 in (11.4 cm) along each outer side (3 × 1.5 in / 3.8 cm).
Border
Border gauge: 7 sc = 1 in (2.5 cm), the same as the motif edging.
Starting count: Each outer side has 3 triangles × 11 sts = 33 sts. This count already includes each triangle’s corner stitches, and no extra stitches are added at the seams. The 3 big tree corners are each shared by two sides, so the total around the tree is 3 × 33 − 3 = 96 sts.
Round 1 (cream, sc): Join cream in the corner stitch at the bottom-right point. Ch 1, then work 3 sc in that corner stitch. Sc in each st to the next big corner stitch, then 3 sc in the corner stitch. Repeat from * once more. Sc in each remaining st and join with sl st to the first sc. At each seam, work into both corner stitches that sit side by side, the same as any other stitch.
Count: 96 sts worked 1 per existing st + 6 extra corner sts = 102 sc.
Per side: 33 + 2 = 35 sts, corner to corner, including both corner stitches. Check: 3 × 35 − 3 = 102.* ✔
Round 2 (cream, rev sc, with hanging loop): Ch 1 and do not turn. Rev sc in each st around. When you reach the center sc of the top corner, work the rev sc, then ch 18, sl st into the same st, and continue with rev sc. Join to the first rev sc.
Count: 102 rev sc + one ch-18 loop.
The ch-18 makes a loop about 1.25 in (3.2 cm) long.
Why the math works: The 33 stitches along each side match the 4.5 in (11.4 cm) edge at the motif gauge. The 2 extra stitches at each corner on Round 1 give the corners room to turn without cupping. The 35 stitches per side then carry the bordered edge out to about 5.2 in (13.2 cm). Rev sc does not change the stitch count; it only adds the rope texture and a little depth.
Trunk
Row 1 (tan): Ch 8, sc in the 2nd ch from the hook and in each ch across. Count: 7 sc.
Rows 2–8: Ch 1, turn, sc in each st across. Count: 7 sc per row.
Fasten off with a 12 in (30.5 cm) tail. The trunk should measure 1 in × 1 in (2.5 cm × 2.5 cm).
Placement: Find the center of the bottom border, which is st 18 of the 35 Round 1 sts on that side. Center the trunk under it, behind sts 15–21. Overlap 0.25 in (0.6 cm) behind the border so that 0.75 in (1.9 cm) of trunk shows below the tree. Whipstitch the top edge and both overlapping sides to the WS of the border.
Final Blocking
- Weave in all remaining ends along seams on the WS.
- Spray the ornament until it is damp but not dripping.
- Lay it RS up on a blocking mat.
- Pin the three big corners so each side measures 5.2 in (13.2 cm).
- Pin each seam intersection so all nine small triangles have straight edges.
- Open each lace window with a fingertip.
- Pin the trunk square and the loop straight up.
- Let it dry completely, 6–12 hours, before you unpin it.
- Optional: for a stiffer ornament, use a light spray starch before drying.
Final Quality-Control Checklist
- [ ] All 9 triangles have Round 3 = 30 sc (11 per side, corners included)
- [ ] Each triangle measures 1.5 in (3.8 cm) per side
- [ ] Six teal triangles point up and three cream triangles point down
- [ ] 9 seams, each 11 sl sts, with no gaps at the points
- [ ] Joined tree is 4.5 in (11.4 cm) per side before the border
- [ ] Border Round 1 = 102 sc (35 per side)
- [ ] Border Round 2 = 102 rev sc plus the ch-18 loop at the top
- [ ] Finished tree is 5.2 in (13.2 cm) per side
- [ ] Trunk is 1 in × 1 in (2.5 cm × 2.5 cm), centered, with 0.75 in (1.9 cm) showing
- [ ] Ornament lies flat and all ends are hidden
Troubleshooting
Triangles curl or cup: Round 2 chains are too tight. Loosen the ch-3 sps or go up a hook size.
Triangles ruffle: Round 3 is too loose. Go down a hook size for the edging only.
Seams don’t line up at the points: A triangle has more or fewer than 11 sts on a side. Recount Round 3 and redo the edging if needed.
Holes where three points meet: Start each seam right in the corner stitch, and stitch the corners closed with the yarn tail.
Border corners pull in: You may have missed the 3-sc corner group. Check for 35 sts per side.
Loop twists: Block it pinned straight, or work a round of sl sts back along the ch-18 before joining.
Trunk tilts: Count again and make sure it sits under sts 15–21.
Care
Hand wash in cool water with mild soap, roll it in a towel, and dry it flat, pinning it into shape again if needed. Store flat or hanging, away from direct sunlight, so the teal does not fade.
Final Notes
The measurement chain is simple. Each triangle has 11 sts per side and measures 1.5 in (3.8 cm). Three triangles make a 33-stitch edge of 4.5 in (11.4 cm). Border Round 1 brings each side to 35 sts, and after Round 2 and blocking the tree measures 5.2 in (13.2 cm) per side. Add a 1 in (2.5 cm) trunk with 0.75 in (1.9 cm) showing and a 1.25 in (3.2 cm) loop, and the ornament reaches about 6.5 in (16.5 cm) from loop to trunk. If every triangle passes its checkpoint, the rest will fit together.
Happy crocheting!