

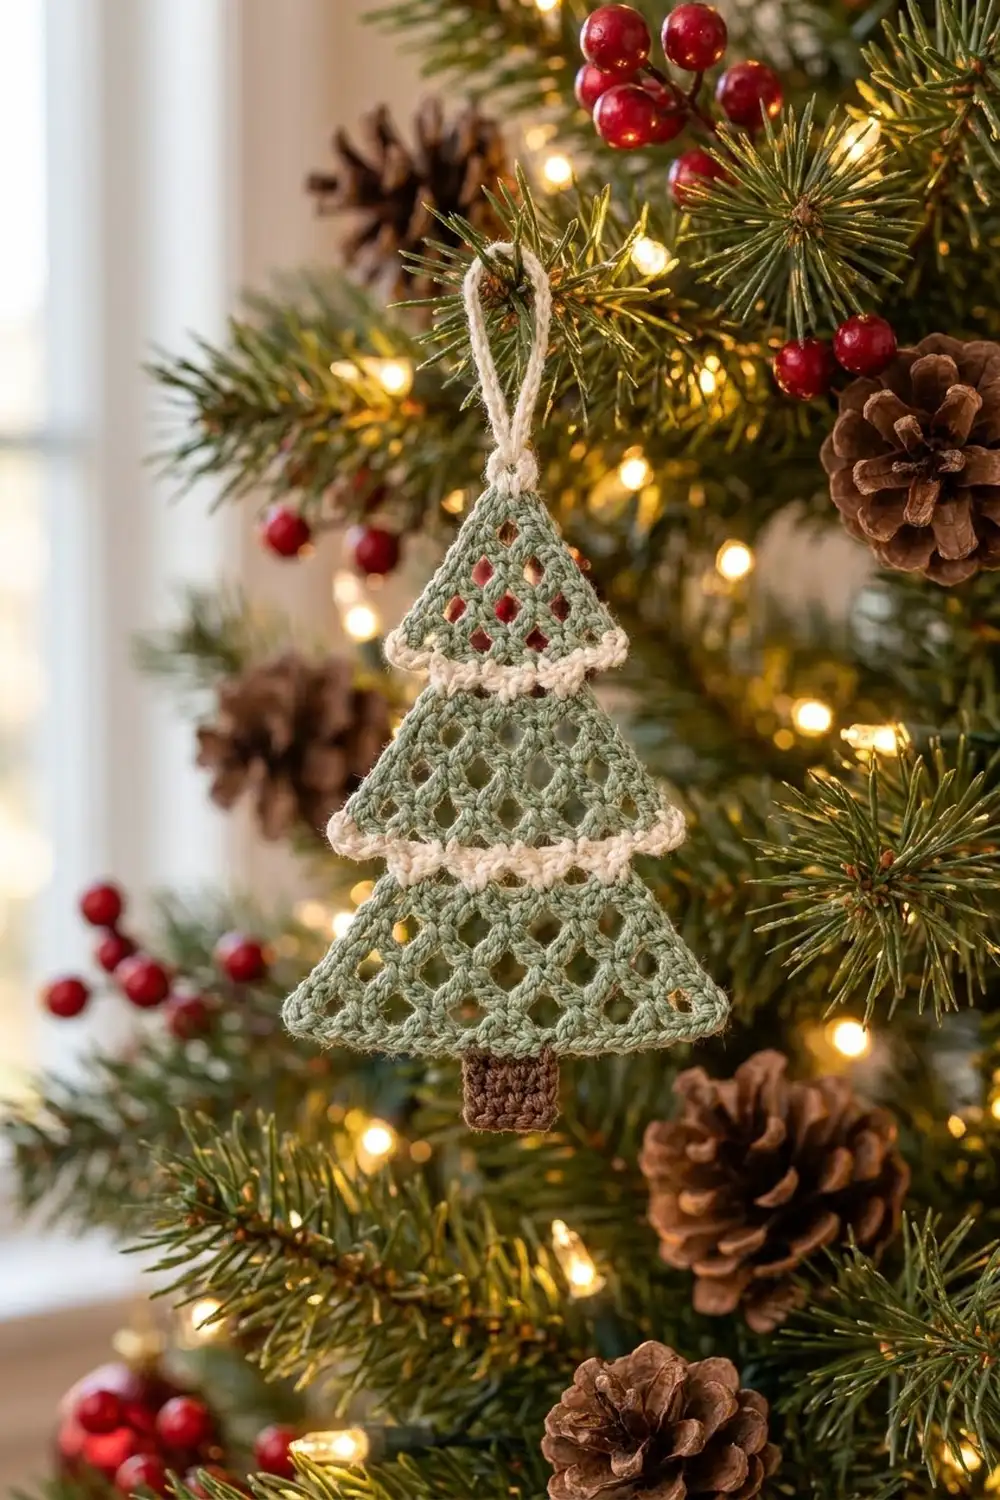
This lacy little tree is made from open diamond mesh in soft sage green. Cream scallops run along the top of each tier, and a small brown trunk sits at the bottom. A cream chain loop lets you hang it on the tree or a garland, or tie it onto a gift.
The look is calm and Scandinavian rather than bright. Three sage tiers overlap like layered branches. The cream trim looks like a dusting of snow, and the brown trunk grounds the shape. Because the mesh is open, tree lights glow through it.
The pattern uses US crochet terms. The finished ornament is 3.8 in (9.7 cm) wide and 4.5 in (11.4 cm) tall from tip to trunk. The hanging loop adds 1.25 in (3.2 cm), for a total hanging length of 5.75 in (14.6 cm).
Construction is simple. You crochet three mesh tiers top-down in rows, and each row gets one loop wider. Every tier gets a green sc edging. The lower two tiers also get a cream scalloped trim, and the top tier gets a cream tip. A small sc square makes the trunk. Last, you layer the pieces, stitch them together, and add the loop.
Finished Size and Construction
- Finished size: 3.8 in (9.7 cm) wide x 4.5 in (11.4 cm) tall, plus a 1.25 in (3.2 cm) hanging loop
- Skill level: Easy / advanced beginner
- Terminology: US crochet terms
- Yarn weight: Sport weight (#2) cotton
- Hook: 2.75 mm (C-2)
- Number of pieces: 4 (3 tiers + 1 trunk), plus a crocheted hanging loop
- Layout: Vertical stack: top tier, middle tier, bottom tier, then trunk
- Piece sizes (after edging): top tier 2.2 in (5.6 cm) wide, middle tier 3 in (7.6 cm) wide, bottom tier 3.8 in (9.7 cm) wide; each tier 1.5 in (3.8 cm) tall; trunk 0.75 in (1.9 cm) square
- Size before edging: top tier 2 in (5.1 cm), middle tier 2.8 in (7.1 cm), bottom tier 3.6 in (9.1 cm) wide; each tier 1.4 in (3.6 cm) tall
- Edging depth: the green edging adds about 0.1 in (0.3 cm) to each edge. The cream trim adds 0.25 in (0.6 cm) above the middle and bottom tiers.
Materials
Use a smooth, mercerized sport-weight cotton. Cotton keeps the diamond mesh crisp and holds its shape after blocking. A yarn of about 50 g / 165 m works well. Choose a muted sage rather than a bright green for the frosted look.
- Sage green: 10 g, about 33 m (tiers and edging)
- Cream: 4 g, about 13 m (scalloped trims, tip, and hanging loop)
- Brown: 2 g, about 7 m (trunk)
These amounts are for one ornament and already include a small safety margin.
Tools:
- 2.75 mm (C-2) crochet hook
- Tapestry needle
- Stitch markers (2–3)
- Small scissors
- Ruler or tape measure
- Blocking mat and rust-proof pins
- Spray bottle with water
Abbreviations (US Terms)
- ch – chain
- sl st – slip stitch
- sc – single crochet
- hdc – half double crochet
- dc – double crochet
- sk – skip
- sp – space
- st(s) – stitch(es)
- RS – right side
Special stitch – Shell: (hdc, dc, hdc) all in the same st. One shell turns 1 st into 3 sts.
Mesh loop: ch 3, then sc in the next sp or st as directed. Each ch-3 forms one side of a diamond in the lattice.
Gauge and Checkpoints
Mesh gauge: 5 ch-3 loops = 2 in (5.1 cm) wide; 4 mesh rows = 1 in (2.5 cm) tall.
Sc gauge (trunk): 20 sc x 24 rows = 3 in (7.6 cm).
Make the bottom tier first and use it as your gauge swatch. It is the largest piece, so any size problem shows up most clearly there.
Checkpoints:
- Bottom tier after Row 2: 5 loops, 2 in (5.1 cm) wide.
- Bottom tier after Row 6: 9 loops, 3.6 in (9.1 cm) wide, 1.4 in (3.6 cm) tall.
- Bottom tier after edging: 3.8 in (9.7 cm) wide, 1.5 in (3.8 cm) tall.
- Trunk: 0.75 in (1.9 cm) square.
If your tier is too big: switch to a 2.5 mm hook, or chain your ch-3 loops more firmly. If it is too small: switch to a 3.0 mm hook. Settle on a hook before you make the other pieces so all the tiers match.
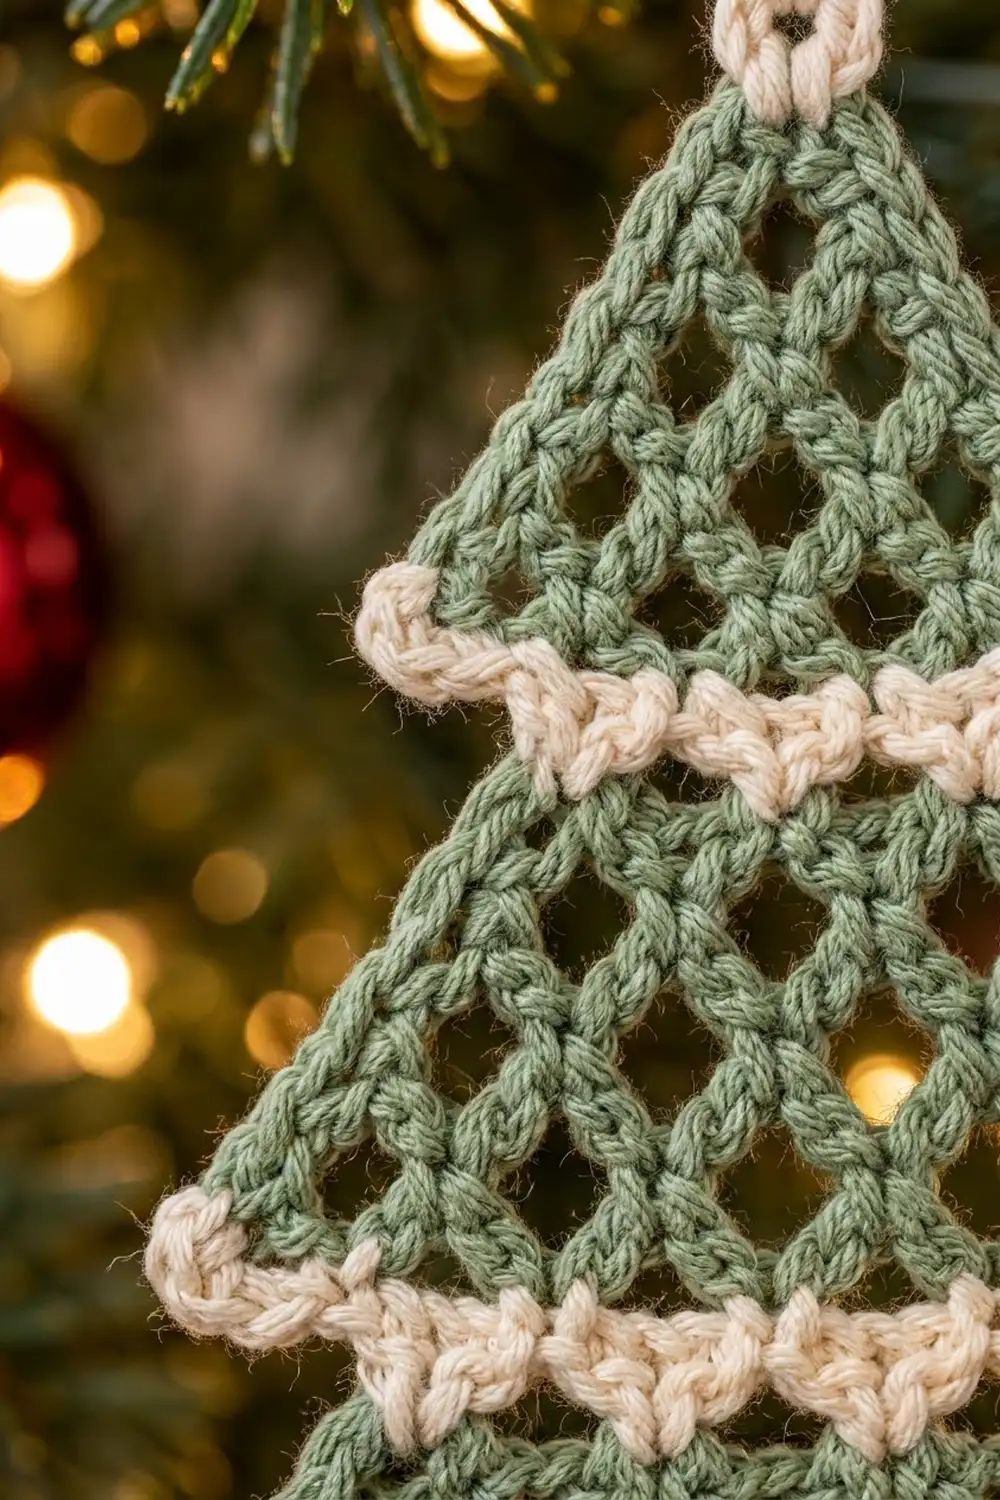
Mesh Increase Row (Used in All Tiers)
All three tiers use the same increase row. It adds exactly 1 loop per row.
Increase Row: Ch 1, turn. Sc in first sc, ch 3, sc in first ch-3 sp, *ch 3, sc in next ch-3 sp; repeat from * across, ch 3, sc in last sc.
If the previous row had L loops, this row has L + 1 loops and L + 2 sc. The new loop at each end makes the tier widen evenly on both sides, which creates the sloped tree shape. Every row begins and ends with an sc in an edge sc, so the side edges stay neat for the edging.
Bottom Tier
With sage green:
Row 1: Ch 12, sc in 2nd ch from hook and in each ch across. (11 sc)
Row 2: Ch 1, turn. Sc in first sc, *ch 3, sk 1 sc, sc in next sc; repeat from * across. (5 loops, 6 sc)
Row 3: Work Increase Row. (6 loops)
Row 4: Work Increase Row. (7 loops)
Row 5: Work Increase Row. (8 loops)
Row 6: Work Increase Row. (9 loops, 10 sc)
Check that the tier is 3.6 in (9.1 cm) wide. Don’t fasten off. Go on to the green edging in the Border section.
Middle Tier
With sage green:
Row 1: Ch 8, sc in 2nd ch from hook and in each ch across. (7 sc)
Row 2: Ch 1, turn. Sc in first sc, *ch 3, sk 1 sc, sc in next sc; repeat from * across. (3 loops, 4 sc)
Rows 3–6: Work Increase Row 4 times. (4, 5, 6, then 7 loops; Row 6 has 8 sc)
Checkpoint: 2.8 in (7.1 cm) wide. Don’t fasten off.
Top Tier
With sage green:
Row 1: Ch 4, sc in 2nd ch from hook and in each ch across. (3 sc)
Row 2: Ch 1, turn. Sc in first sc, ch 3, sk 1 sc, sc in last sc. (1 loop, 2 sc)
Rows 3–6: Work Increase Row 4 times. (2, 3, 4, then 5 loops; Row 6 has 6 sc)
Checkpoint: 2 in (5.1 cm) wide. Don’t fasten off.
Trunk
With brown:
Row 1: Ch 6, sc in 2nd ch from hook and in each ch across. (5 sc)
Rows 2–6: Ch 1, turn, sc in each sc across. (5 sc)
Checkpoint: 0.75 in (1.9 cm) square. Fasten off, leaving a 10 in (25.4 cm) tail for sewing.
Make All Pieces
For one ornament you need:
- Sage green: 1 bottom tier, 1 middle tier, and 1 top tier, each with green edging
- Cream: a scalloped trim on the bottom and middle tiers, a tip trim on the top tier, and 1 hanging loop
- Brown: 1 trunk
Layout (front view, top to bottom):
            [ hanging loop ]
            [   top tier   ]      5 loops
        [cream][ middle tier ]    7 loops
     [cream][   bottom tier    ]  9 loops
              [  trunk  ]         5 sc
Each lower tier sits in front of the tier above it. Its cream trim covers the upper tier’s bottom edge, overlapping it by 0.5 in (1.3 cm). The trunk sits behind the bottom tier, centered, with a 0.25 in (0.6 cm) overlap.
Border: Green Edging and Cream Trim
Edging gauge: 2 sc per mesh row along the sides and 3 sc per ch-3 loop along the bottom. Three sc fill each loop’s 3 chains exactly, and 2 sc match the height of one mesh row. That keeps the edges flat, so they don’t ruffle or cup.
Green Edging (All Tiers)
Each side count includes the 1 sc worked into the end of Row 1. Each corner count is the single sc worked in the edge sc of Row 6.
Bottom tier: When Row 6 is done, ch 1 and turn so you can work back along the bottom edge.
- Corner 1: 1 sc in the last sc of Row 6. (1 sc)
- Bottom: 3 sc in each of the 9 ch-3 loops. (27 sc)
- Corner 2: 1 sc in the end sc of Row 6. (1 sc)
- Side 2: rotate the piece. Work 2 sc into the side of each of Rows 6–2, then 1 sc in the end of Row 1. (11 sc)
Fasten off. With RS facing, join green with sc at the free end of Row 1 on the other side.
- Side 1: 1 sc in the end of Row 1 (the joining sc), then 2 sc into the side of each of Rows 2–6. (11 sc) Sl st into the Corner 1 sc and fasten off.
Total: 11 + 1 + 27 + 1 + 11 = 51 sc.
Middle tier: Work the same way. 11 + 1 + 21 (3 sc x 7 loops) + 1 + 11 = 45 sc.
Top tier: Work the same way. 11 + 1 + 15 (3 sc x 5 loops) + 1 + 11 = 39 sc.
On every tier, leave the top edge (the foundation chain) free for the cream.
Cream Trim (Bottom and Middle Tiers)
With RS facing, join cream in the first free loop of the foundation chain.
Row A (trim base): Ch 1, sc in each free loop of the foundation chain.
– Bottom tier: 11 sts worked 1-per-existing st + 0 added = 11 sc.
– Middle tier: 7 sts worked 1-per-existing st + 0 added = 7 sc.
Row B (scallops): Ch 1, turn. Sc in first sc, *Shell in next sc, sc in next sc; repeat from * across.
– Bottom tier: 11 sts worked + (5 shells x 2 extra) = 21 sts.
– Middle tier: 7 sts worked + (3 shells x 2 extra) = 13 sts.
Fasten off, leaving a 12 in (30.5 cm) cream tail on each tier for joining. The shells stand up as small rounded bumps, which gives the snowy scalloped band.
Top Tier Tip and Hanging Loop
Join cream in the first free loop of the top tier’s foundation chain.
Row A: Ch 1, sc in each of the 3 free loops. (3 sts worked + 0 added = 3 sc)
Row B: Ch 1, turn. Sc in first sc, Shell in next sc, sc in last sc. (3 sts worked + 1 shell x 2 extra = 5 sts)
Hanging loop: Sl st into the center dc of the shell, ch 16, sl st in the same dc. Fasten off and weave in. The loop stands about 1.25 in (3.2 cm) tall.
Joining
Use whipstitch and the cream tails left on the trimmed tiers.
Placement: Lay the top tier face up. Set the middle tier over it so the middle tier’s cream trim lies on the front of the top tier and overlaps its bottom edge by 0.5 in (1.3 cm). Line up the center st of the middle tier’s Row A (st 4 of 7) directly under the top tier’s tip. Pin in place.
Stitch-to-stitch logic: Work 1 whipstitch through each Row A sc, catching the green mesh bar directly behind it. That gives 7 tacks for the middle tier. Next, place the bottom tier over the middle tier the same way. Center st 6 of 11 under the tip and work 11 tacks.
Trunk: Place the trunk behind the bottom tier with a 0.25 in (0.6 cm) overlap. Line up trunk st 3 of 5 behind sc 14 of the bottom tier’s 27 bottom-edge sc, which leaves 11 sc free on each side. Whipstitch the 5 top sc of the trunk to the edging with the brown tail.
Tension: Pull each tack just snug. If it’s too tight, the trim puckers. If it’s too loose, the tiers flop forward.
Size checkpoint: The joined tree should be 3.8 in (9.7 cm) wide and 4.5 in (11.4 cm) tall. Here’s how the height adds up. The top tier is 1.5 in, the middle and bottom tiers are 1.75 in each with trim, and the trunk is 0.75 in. That’s 5.75 in in total. Subtract two 0.5 in overlaps and one 0.25 in overlap (1.25 in), and you get 4.5 in (11.4 cm).
Final Blocking
- Weave all remaining ends through the solid edging, not the mesh, so they stay hidden.
- Pin the ornament face up on a blocking mat.
- Pin the tier corners first, then the tip, then the trunk corners.
- Use your fingertips to gently open the diamonds until they look even.
- Check the measurements: 3.8 in (9.7 cm) wide and 4.5 in (11.4 cm) tall.
- Mist with water until damp but not soaked.
- Shape the cream scallops so each shell stands up evenly.
- Let it dry completely, about 4–6 hours, before you unpin it.
For a firmer ornament, mist with a light fabric stiffener instead of water.
Final Quality-Control Checklist
- Row 6 has 9 loops on the bottom tier, 7 on the middle, and 5 on the top.
- Edging counts are 51, 45, and 39 sc.
- Cream Row B has 21 sts on the bottom tier, 13 on the middle tier, and 5 at the tip.
- Each tier is 1.5 in (3.8 cm) tall.
- All tiers are centered on one vertical line.
- The trunk is 0.75 in (1.9 cm) square and centered.
- The hanging loop is secure and sits straight up.
- No knots or tails show on the front.
Troubleshooting
Tier is lopsided: You probably skipped the ch 3 at one end of an increase row. Count the loops; each row should gain exactly 1.
Sides ripple: There are too many edging sc on the sides. Work exactly 2 sc per mesh row.
Bottom edge cups: There are fewer than 3 sc per loop. Work 3 sc in every loop.
Scallops look flat: Make sure each shell has a dc in the middle, then block the shells upright.
Tiers droop forward: Add an extra tack at each end of the overlap, through the green edging.
Diamonds look stretched: Your ch-3 loops are loose. Go down a hook size or chain more firmly.
Care
Hand wash in cool water with mild soap. Roll in a towel, reshape the scallops, and dry flat. Store flat in tissue paper to protect the mesh.
Final Notes
Every measurement in this ornament comes from your gauge. The mesh gauge gives tier widths of 2 in, 2.8 in, and 3.6 in (5.1, 7.1, and 9.1 cm). The green edging brings them to 2.2 in, 3 in, and 3.8 in (5.6, 7.6, and 9.7 cm). Each tier is 1.5 in (3.8 cm) tall, and the cream trim adds 0.25 in (0.6 cm). After the overlaps and the trunk, the tree is 4.5 in (11.4 cm) tall, plus a 1.25 in (3.2 cm) loop. If the bottom tier matches gauge, the rest of the ornament will come out the right size.
Happy crocheting!