

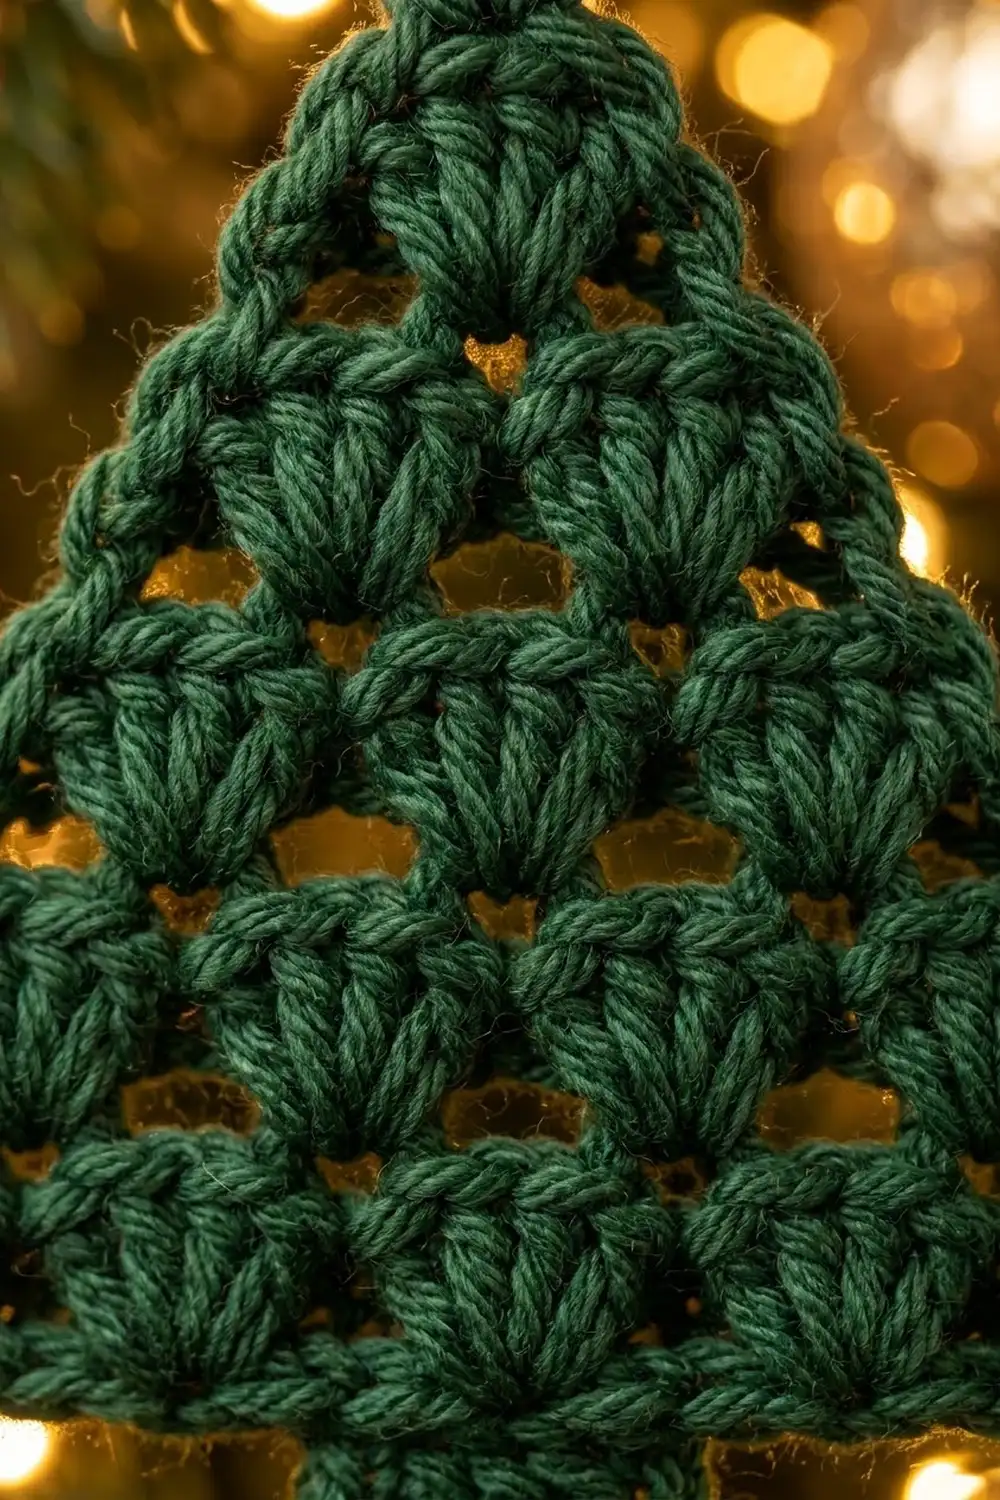
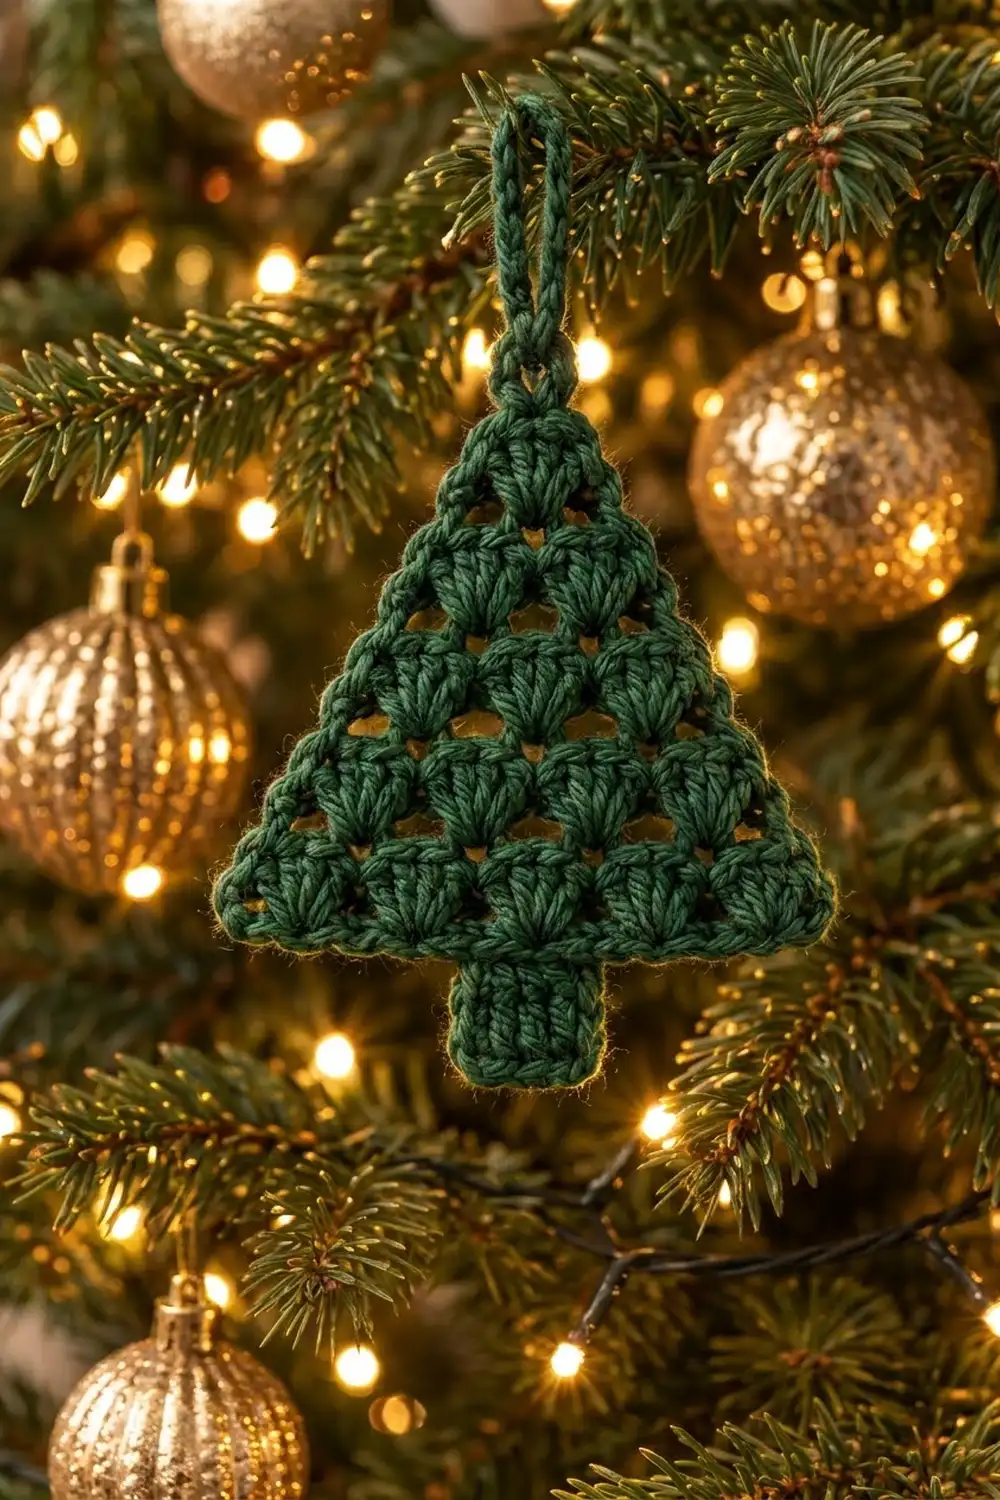
This little ornament is a single flat Christmas tree made of rows of fan-shaped shells. It’s worked in one deep forest green. The shells stack in an offset, brick-like layout, so small openings show between them, and a smooth single crochet edge runs around the outside. A short, solid trunk sits under the center shell, and a chain loop at the top lets it hang straight off a branch.
The style is classic and a little vintage, like the openwork tree ornaments you find on a handmade tree. The single color keeps the texture front and center. With DK yarn the shells look full and rounded, and the green shows up well against warm tree lights.
This pattern uses US crochet terms throughout. The finished ornament measures 4.25 in (10.8 cm) wide by 4.5 in (11.4 cm) tall from tip to trunk. The hanging loop adds about 1.5 in (3.8 cm).
Construction is simple. You start at the tip with a magic ring and work back and forth in rows, adding one shell per row until you reach five. Next, one round of single crochet borders the whole triangle and forms the hanging loop at the tip. Last, the trunk is worked in three short rows of half double crochet, straight down from the center of the bottom edge.
Finished Size and Construction
- Finished size: 4.25 in (10.8 cm) wide x 4.5 in (11.4 cm) tall, not counting the loop
- Skill level: Easy (advanced beginner)
- Terminology: US crochet terms
- Yarn weight: DK (#3 light)
- Hook: 3.5 mm (E-4)
- Number of pieces: 1 (one single ornament, no joining)
- Layout: Upright triangle with 5 rows of shells (1, 2, 3, 4, 5 shells from tip to base) plus a centered trunk
- Triangle size before border: 3.75 in (9.5 cm) wide x 3 in (7.6 cm) tall
- Border depth: 0.25 in (0.6 cm) on every edge
- Trunk: 1 in (2.5 cm) wide x 1 in (2.5 cm) tall
- Hanging loop: about 1.5 in (3.8 cm)
Materials
Pick a smooth DK yarn with good stitch definition. Cotton, a cotton blend, or a firm acrylic all keep the shells crisp. Avoid fuzzy or brushed yarns, because they fill in the small openings between shells.
- Forest green, DK weight: 10 g (about 23 m / 25 yd)
That amount includes a margin for your gauge check, weaving in ends, and a possible restart. One ornament actually uses about 8 g (18 m / 20 yd).
Tools:
- 3.5 mm (E-4) crochet hook
- Tapestry needle
- Scissors
- Stitch marker (optional, for counting the trunk position)
- Blocking mat and rustproof pins
- Spray bottle with water
Abbreviations (US Terms)
- ch – chain
- sl st – slip stitch
- sc – single crochet
- hdc – half double crochet
- dc – double crochet
- sp(s) – space(s)
- st(s) – stitch(es)
- tch – turning chain
- RS / WS – right side / wrong side
- rep – repeat
Special stitch – Shell: 5 dc worked into the same stitch or space. At the start of a row, the ch-3 counts as the first dc, so “ch 3, 4 dc in first dc” makes one complete 5-dc shell.
Gauge and Checkpoints
The whole ornament is the gauge swatch, so treat your first one as a test. Work Rows 1–3, measure, and adjust before you go on.
Base gauge: Each shell row measures 0.6 in (1.5 cm) tall. Each shell, together with the ch-1 space beside it, adds 0.75 in (1.9 cm) of width.
Checkpoints (measured flat, unstretched):
- After Row 1: 0.75 in (1.9 cm) wide x 0.6 in (1.5 cm) tall
- After Row 2: 1.5 in (3.8 cm) wide x 1.2 in (3.0 cm) tall
- After Row 3: 2.25 in (5.7 cm) wide x 1.8 in (4.6 cm) tall
- After Row 4: 3 in (7.6 cm) wide x 2.4 in (6.1 cm) tall
- After Row 5: 3.75 in (9.5 cm) wide x 3 in (7.6 cm) tall
- After the border: 4.25 in (10.8 cm) wide x 3.5 in (8.9 cm) tall
- After the trunk: 4.25 in (10.8 cm) wide x 4.5 in (11.4 cm) tall
If your piece is too big: Go down to a 3.25 mm (D-3) hook, or snug up your dc a little.
If your piece is too small: Go up to a 3.75 mm (F-5) hook.
Being off by up to 0.25 in (0.6 cm) after Row 5 is fine for an ornament. The stitch counts matter more than exact size, because the border and trunk are placed by count.
Tree Body (Shell Triangle)
The tree grows from the tip down. Each row adds one shell, so the edges flare out evenly on both sides. Turn at the end of every row.
Row 1 (RS): Make a magic ring. Ch 3 (counts as dc), 4 dc in the ring. Pull the ring closed so the base of the fan is snug but not puckered. Turn.
(5 sts: 1 shell)
Row 2 (WS): Ch 3 (counts as dc), 4 dc in first dc (the stitch at the base of the ch-3), ch 1, skip next 3 dc, 5 dc in top of tch. Turn.
(11 sts: 2 shells and 1 ch-1 sp)
Row 3 (RS): Ch 3, 4 dc in first dc, ch 1, skip next 4 dc, 5 dc in next ch-1 sp, ch 1, skip next 4 dc, 5 dc in top of tch. Turn.
(17 sts: 3 shells and 2 ch-1 sps)
How it works: the two edge shells go into the first and last stitches of the row below, and every inside shell sits in a ch-1 space. That’s what makes the offset, brick-like stacking and the small openings between shells.
Row 4 (WS): Ch 3, 4 dc in first dc, ch 1, skip next 4 dc, 5 dc in next ch-1 sp; rep from * once more, ch 1, skip next 4 dc, 5 dc in top of tch. Turn.
(23 sts: 4 shells and 3 ch-1 sps)*
Row 5 (RS): Ch 3, 4 dc in first dc, ch 1, skip next 4 dc, 5 dc in next ch-1 sp; rep from * 2 more times, ch 1, skip next 4 dc, 5 dc in top of tch.
(29 sts: 5 shells and 4 ch-1 sps, for 25 dc in total)*
Fasten off, leaving a 6 in (15.2 cm) tail.
Count check: Row n has n shells and (n – 1) ch-1 spaces, so its total is 5n + (n – 1) = 6n – 1. That gives 5, 11, 17, 23, and 29. Check now: the triangle should measure 3.75 in (9.5 cm) across Row 5 and 3 in (7.6 cm) from tip to base.
Border
One round of sc goes around the whole triangle, and the hanging loop is made at the tip. Work with the RS facing you.
Border gauge: An sc is about 0.2 in (0.5 cm) tall and a dc row-end is about 0.6 in (1.5 cm), so 3 sc fit along each row-end. Along the bottom, 1 sc goes into each dc. The ch-1 spaces are skipped so the bottom edge stays firm and flat instead of flaring.
Counting rule: The two bottom corner groups (3 sc each) and the tip group (2 sc plus the loop) are counted separately. The side counts below are only the stitches between those groups.
Border Round (RS): Join yarn with a sl st around the closed magic ring at the tip. Ch 1, sc in the same place (tip sc 1).
- First slanted side: Work 3 sc evenly into each of the 5 row-ends. (15 sc)
- First bottom corner: 3 sc in the corner stitch of Row 5.
- Bottom edge: Sc in each of the next 23 dc, skipping all 4 ch-1 sps. (23 sc)
- Second bottom corner: 3 sc in the last stitch of Row 5.
- Second slanted side: Work 3 sc evenly into each of the 5 row-ends. (15 sc)
- Tip and loop: Sc around the magic ring at the tip (tip sc 2), ch 14, sl st in the first sc of the round.
To make the loop sturdier, sl st into the back bump of each of the 14 loop chains, then sl st into the first sc once more. Fasten off.
(Round total: 15 + 3 + 23 + 3 + 15 + 2 = 61 sc, plus the ch-14 loop)
Why the math works: Row 5 has 25 dc. Two of them are the corner stitches, which leaves exactly 23 dc between corners and 23 sc along the bottom. Each slanted side has 5 row-ends, and at 3 sc each that’s 15 sc. The border adds 0.25 in (0.6 cm) on each side, so the width goes from 3.75 in (9.5 cm) to 4.25 in (10.8 cm). It also adds 0.25 in (0.6 cm) at the tip and at the base, so the height goes from 3 in (7.6 cm) to 3.5 in (8.9 cm).
Trunk
The trunk sits under the middle shell of Row 5. That shell holds dc 11–15 of the 25 dc. Leaving out the corner dc, those match the 10th through 14th of the 23 bottom-edge sc.
Turn the tree upside down with the RS facing you. Count 9 sc in from the end of either bottom corner group and put a marker in the 10th sc.
Row 1 (RS): Join yarn with a sl st in the marked sc. Ch 2 (does not count as a st), hdc in the same sc and in each of the next 4 sc. Turn.
(5 hdc; 9 border sc stay unworked on each side: 9 + 5 + 9 = 23)
Row 2 (WS): Ch 2, hdc in each hdc across. Turn.
(5 hdc)
Row 3 (RS): Ch 2, hdc in each hdc across.
(5 hdc)
Fasten off. Check: The trunk should measure 1 in (2.5 cm) wide and 1 in (2.5 cm) tall below the border. The whole ornament should now be 4.5 in (11.4 cm) tall.
Weave in all ends along the sc border or inside the trunk stitches, not through the open spaces between shells.
Final Blocking
- Lightly spray the ornament with water until it’s damp all the way through, not dripping.
- Lay it RS up on the blocking mat.
- Pin the tip, then both bottom corners, to make a triangle 4.25 in (10.8 cm) wide and 3.5 in (8.9 cm) tall.
- Pin each slanted side straight between the tip and the corner. Each side should be about 4.1 in (10.4 cm) long including the border.
- Square the trunk to 1 in (2.5 cm) x 1 in (2.5 cm) and pin its two bottom corners.
- Gently open each shell with your fingertips so the fans spread evenly and the gaps between shells look alike.
- Lay the hanging loop flat, pointing straight up.
- Let it dry completely before unpinning, usually 6–12 hours.
For acrylic, you can steam-block instead. Hold the iron above the piece and never press it down on the stitches.
Final Quality-Control Checklist
- Rows have 5, 11, 17, 23, and 29 stitches.
- Every shell has exactly 5 dc.
- The border has 61 sc: 15 on each slanted side, 23 along the bottom, 3 in each bottom corner, and 2 at the tip.
- The trunk is 5 hdc wide and 3 rows tall, with 9 unworked border sc on each side.
- The trunk lines up with the center of the middle shell.
- Size is 4.25 in (10.8 cm) wide x 4.5 in (11.4 cm) tall.
- The loop is secure and points straight up from the tip.
- All ends are woven in and hidden.
Troubleshooting
The edges lean or the triangle is lopsided. Make sure every row starts with “4 dc in first dc,” not in the next stitch. Both edge shells have to sit in the very first and very last stitches.
The middle shells drift sideways. You probably skipped 3 dc instead of 4 somewhere after Row 2. Only Row 2 skips 3 dc.
The bottom edge ruffles. Check that you skipped the ch-1 spaces in the border, or use a hook 0.25 mm smaller for the border round only.
The slanted sides pucker. Your border sc are too tight. Loosen your tension, or work the side sc a little more loosely into each row-end.
The tip has a hole. Pull the magic ring tighter before the border. Then weave the starting tail around the ring once more.
The trunk is off-center. Count the 23 bottom sc again. The trunk starts in the 10th sc, so 9 sc are left unworked on each side.
Care
Hand wash in cool water with mild soap, press out the water in a towel, and dry flat, reshaping it to the blocked size. Store it flat or hang it by its loop so the shells keep their shape.
Final Notes
The size of this ornament comes from a short chain of measurements. Each shell row adds 0.6 in (1.5 cm) of height and 0.75 in (1.9 cm) of width. After five rows that’s 3.75 in (9.5 cm) x 3 in (7.6 cm). The sc border adds 0.25 in (0.6 cm) on every side, bringing it to 4.25 in (10.8 cm) x 3.5 in (8.9 cm). The 1 in (2.5 cm) trunk then brings the finished height to 4.5 in (11.4 cm). If your Row 3 checkpoint is right, everything after it will be right too.
Happy crocheting!