

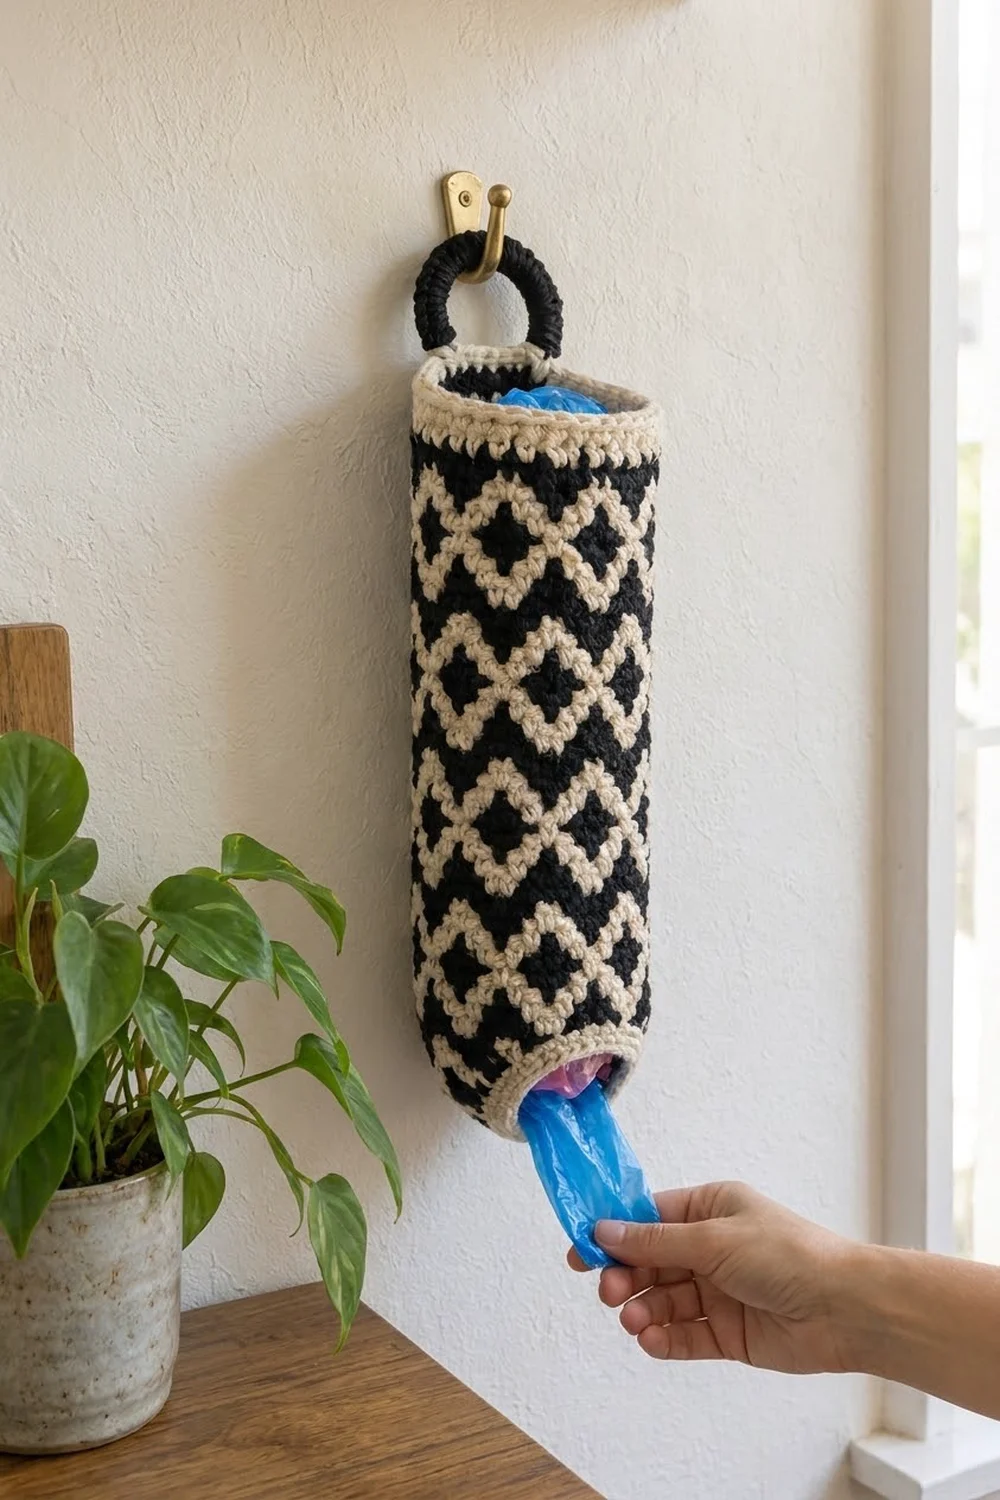
Plastic bags tend to pile up in a cupboard. This holder gives them one tidy place to live. You push bags in at the top and pull them out one at a time from the small opening at the bottom. It hangs from a covered ring, so a single wall hook is all you need.
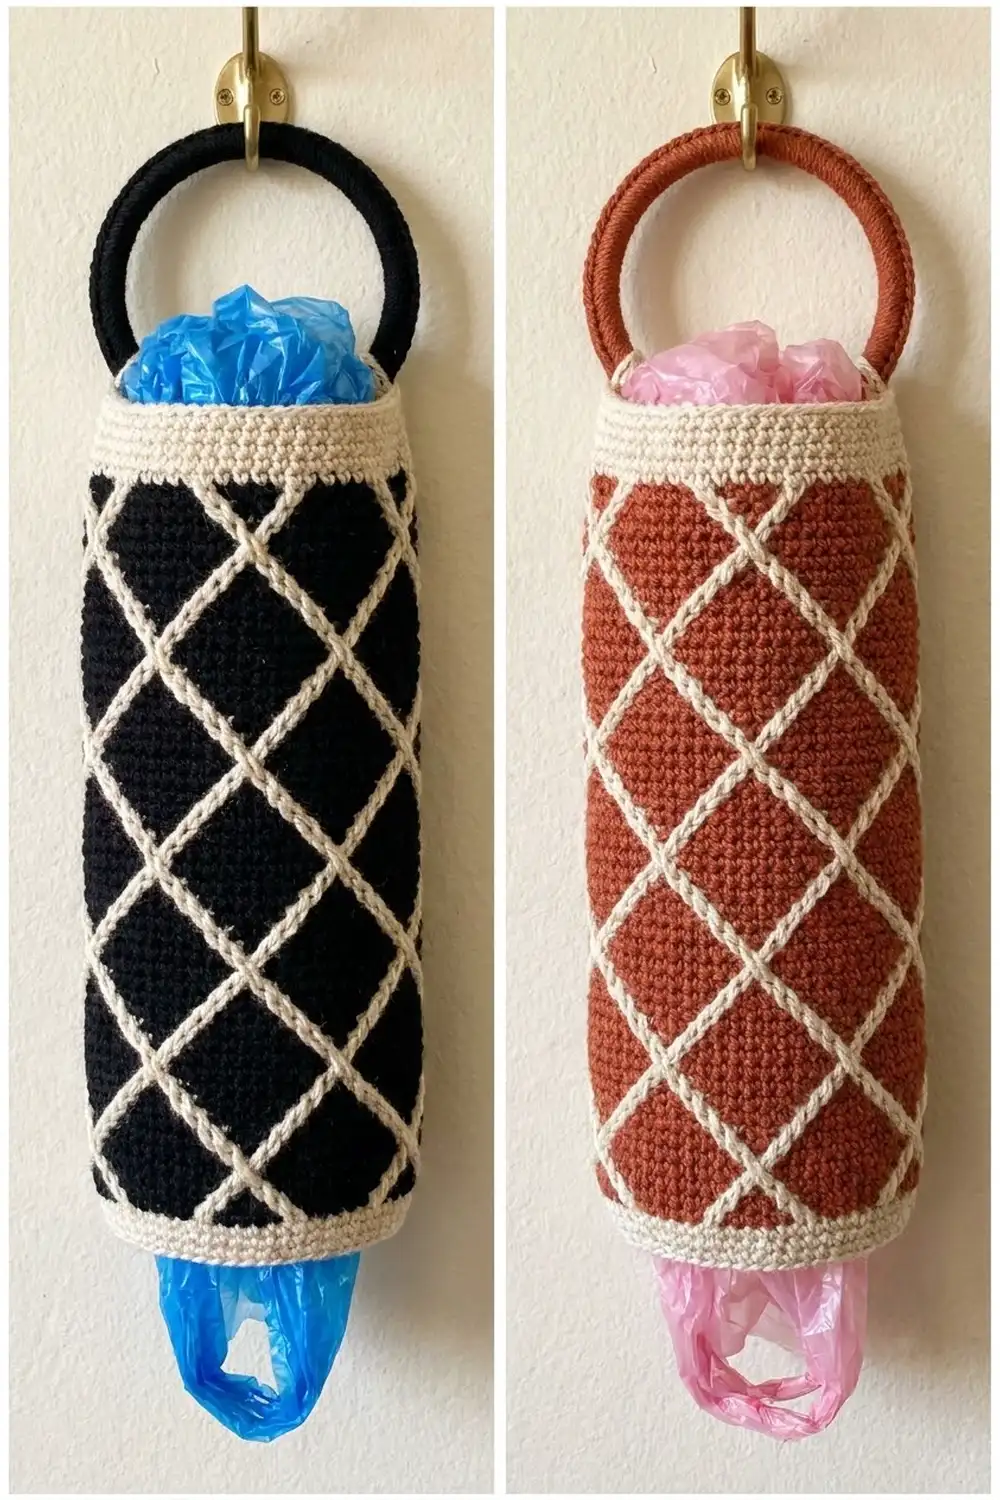
The design is a two-color tapestry crochet tube. Cream lines two stitches wide cross diagonally over a black background, which leaves a neat row of solid black diamonds between every pair of crossings. A plain cream band finishes the top, a narrow cream lip trims the bottom opening, and the hanging ring is covered in black to match. A rust-and-cream version works just as well. Swap the black for any dark, saturated color.
This pattern uses US crochet terms. The finished holder is 15.1 in (38.4 cm) tall and measures 18 in (45.7 cm) around the main body, which is 9 in (22.9 cm) wide when pressed flat. The bottom opening is 9 in (22.9 cm) around, or 4.5 in (11.4 cm) wide when flat.
You start at the bottom opening with a cream foundation ring. Then you increase in black to full width, work seven repeats of an 8-round lattice chart, add a cream border at the top and a cream round at the bottom, and finish by sewing on the covered ring.
Finished Size and Construction
- Finished size: 15.1 in (38.4 cm) tall; 18 in (45.7 cm) circumference; about 5.7 in (14.5 cm) diameter
- Skill level: Intermediate (tapestry crochet in the round)
- Terminology: US
- Yarn weight: Worsted (#4), 100% cotton
- Hook: 4.5 mm (US 7)
- Number of pieces: 1 tubular body + 1 covered hanging ring
- Layout: Single vertical tube, with the ring at the back center of the top edge
- Body size before border: 14.0 in (35.6 cm) tall, 72 sts around
- Border depth: Top 0.9 in (2.3 cm), 4 rounds; bottom 0.2 in (0.5 cm), 1 round
Materials
Use a smooth, firm worsted-weight cotton. Cotton holds the tube’s shape, resists stretching under a full load of bags, and gives crisp color edges. Avoid fuzzy or very soft acrylics, because the carried strand shows through them more easily.
- Black (B): about 90 g / 150 yd (137 m)
- Cream (C): about 85 g / 140 yd (128 m)
These quantities include a margin of roughly 20% for gauge differences and a test swatch.
Tools:
- 4.5 mm (US 7) crochet hook
- 1 plastic or metal ring, 2 in (5.1 cm) inner diameter
- Stitch marker
- Tapestry needle
- Scissors
- Tape measure
- Rolled towel or a cylinder about 5.5–6 in (14.0–15.2 cm) wide for blocking
Abbreviations (US Terms)
- ch: chain
- sc: single crochet
- sl st: slip stitch
- inc: 2 sc in the same stitch
- st(s): stitch(es)
- rnd(s): round(s)
- B / C: black / cream
- [ ] ×N: repeat the bracketed steps N times
Tapestry single crochet: Work a normal sc with the active color while laying the unused color along the tops of the stitches of the previous round. Each new sc encloses it. To change color, work the last sc of the old color until 2 loops remain on the hook, then yarn over with the new color and pull through. Keep the carried strand relaxed but not loose.
Gauge and Checkpoints
Gauge: 16 sc × 18 rnds = 4 in (10.2 cm) in tapestry sc worked in the round.
Test piece first: Ch 32 in C and join with a sl st. Work 1 rnd of sc in C. Then work Chart Rnds 1–8 (4 repeats per round) twice. Lay the tube flat. It should measure 4 in (10.2 cm) wide and about 3.8 in (9.7 cm) tall over the 17 rounds. One chart repeat is 8 sts wide, which is 2 in (5.1 cm), and 8 rnds tall, which is 1.8 in (4.6 cm).
Checkpoints:
- After Rnd 5: 72 sts. The top edge should measure 9 in (22.9 cm) when flat.
- After Rnd 6: height about 1.3 in (3.3 cm) from the foundation.
- After Rnd 14 (first chart repeat): height about 3.1 in (7.9 cm).
- After Rnd 63: height about 14.0 in (35.6 cm).
If your work is too big, go down half a hook size or tug the carried strand slightly firmer. If it is too small, go up half a size. Change the hook, not the stitch count, because 72 sts must stay divisible by 8 for the chart to line up.
Pattern: Holder Body
Join every round with a sl st to the first sc, then ch 1 (the ch 1 does not count as a stitch). Keep the start of round at the back center of the tube. That is where the ring will go, so it hides the small color jog.
Foundation: With C, ch 36. Sl st to the first ch to form a ring, taking care not to twist the chain.
Rnd 1 (C): Ch 1, sc in each ch around. Join. (36 sts)
From here on, carry the unused color inside every round unless told otherwise.
Rnd 2 (B, carry C): Join B in the last step of the joining sl st. Ch 1, sc in each st around. Join. (36 sts)
Rnd 3 (B): [Sc 2, inc] ×12. Join. (48 sts)
Rnd 4 (B): [Sc 3, inc] ×12. Join. (60 sts)
Rnd 5 (B): [Sc 4, inc] ×12. Join. (72 sts)
Rnd 6 (B): Sc in each st around. Join. (72 sts)
These increase rounds create the gentle taper above the bottom opening. Lay the piece flat now and check that the top edge measures 9 in (22.9 cm).
Diamond Lattice Chart (8 sts × 8 rnds)
Each round below is worked as a repeat of 8 sts, done 9 times around, for 72 sts.
- Chart Rnd 1: [2 C, 6 B] ×9. (72 sts: 18 C, 54 B)
- Chart Rnd 2: [3 C, 4 B, 1 C] ×9. (72 sts: 36 C, 36 B)
- Chart Rnd 3: [2 B, 2 C, 2 B, 2 C] ×9. (72 sts: 36 C, 36 B)
- Chart Rnd 4: [3 B, 4 C, 1 B] ×9. (72 sts: 36 C, 36 B)
- Chart Rnd 5: [4 B, 2 C, 2 B] ×9. (72 sts: 18 C, 54 B)
- Chart Rnd 6: Work as Chart Rnd 4. (72 sts)
- Chart Rnd 7: Work as Chart Rnd 3. (72 sts)
- Chart Rnd 8: Work as Chart Rnd 2. (72 sts)
How the lattice forms: The cream pair in Rnd 1 (sts 1–2) splits outward one stitch per round. By Rnd 3 the two lines sit at sts 3–4 and 7–8. In Rnd 5 they meet again at sts 5–6, then split back outward. Each meeting point makes a cream X. The space between the lines fills with a black diamond 2, 4, 6, 4 and 2 sts wide, so the diamonds sit in staggered rows, just like the photo.
Rnds 7–62: Work Chart Rnds 1–8 seven times in total (56 rnds). (72 sts each rnd)
Rnd 63 (B, carry C): Sc in each st around. Join. (72 sts) Cut B and weave it in later.
The body now measures about 14.0 in (35.6 cm) tall.
Pattern: Hanging Ring
With B, make a slipknot and place it on the hook. Insert the hook through the center of the 2 in (5.1 cm) ring, yarn over, and pull up a loop. Work sc over the ring, packing the stitches closely, until the ring is completely covered. That takes about 40 sc. Sl st to the first sc. Fasten off, leaving a 12 in (30.5 cm) tail.
Rotate the stitches so their tops face the inside edge of the ring. The covered ring measures about 2.75 in (7.0 cm) across.
Border
Border gauge: Same as the body, 4 sc and 4.5 rnds per 1 in (2.5 cm).
When the tube is pressed flat, its front and back each count as one “side”. Every border round works 1 sc into each existing stitch with no increases, so each side keeps exactly the same count as the body below it.
Top Border
Rnds 64–67 (C only): Ch 1, sc in each st around. Join. (72 sts: 36 front + 36 back)
After Rnd 67, fasten off. The border adds 0.9 in (2.3 cm).
Bottom Border
Turn the tube upside down. Join C at the back center into the free loops of the foundation chain.
Bottom Rnd (C): Ch 1, sc in each foundation loop around. Join. (36 sts: 18 front + 18 back) Fasten off.
This round adds 0.2 in (0.5 cm). Together with Rnd 1, it makes a firm 2-round cream lip that keeps the opening round.
Why the math works: The body is 72 sts, which is 9 chart repeats of 8, so the lattice closes perfectly at the round join. The top border uses the same 72 sts, so it neither ruffles nor pulls in. The bottom border matches the original 36-ch foundation exactly. The heights add up to 14.0 + 0.9 + 0.2 = 15.1 in (38.4 cm).
Attach the Ring
Find the back center, which is the round join. Place the covered ring inside the tube so that its lower 0.75 in (1.9 cm) overlaps the inside of the top border. The ring should rise about 2.0 in (5.1 cm) above the rim.
With the B tail, whipstitch through the covering stitches and into the back loops of Rnds 64–66, across 4 sts. Go around twice so the ring is firm. Weave in the tail.
Final Blocking
- Weave in all ends inside the tube. Run them through same-color stitches only.
- Soak the holder in cool water for 10 minutes. Press out the water gently without wringing.
- Roll it in a dry towel to remove excess moisture.
- Slide it over a rolled towel or a cylinder 5.5–6 in (14.0–15.2 cm) wide.
- Straighten the lattice columns so that they run vertically and do not spiral.
- Pat the height to 15.1 in (38.4 cm) and the flat width to 9 in (22.9 cm).
- Fold the top border evenly and round out the bottom lip with your fingers.
- Let it dry completely, then lightly steam the ring covering if it looks uneven.
Final Quality-Control Checklist
- The body has 72 sts and the bottom opening has 36 sts.
- There are 7 full chart repeats with 9 diamond columns around.
- The cream X junctions line up vertically all the way up.
- The carried yarn does not peek through on the outside.
- The top border is 4 cream rounds and lies flat without flaring.
- The bottom lip is 2 cream rounds, firm and round.
- The ring is centered at the back and sewn through 3 rounds.
- The holder measures 15.1 in (38.4 cm) tall and 9 in (22.9 cm) flat.
Troubleshooting
The lattice spirals to one side. Tapestry sc naturally leans. Keep joining every round instead of working in a spiral, and correct mild leaning during blocking.
The carried color shows through. Hold the carried strand snugly along the stitch tops, and make the yarn-over around it a little firmer. Dark-over-light shows the most, so check the cream rounds often.
The tube flares at the top. Your border tension is looser than your tapestry tension. Redo the border one hook size smaller.
The bottom opening is too loose. Bags will slide out on their own. Add one more cream round with [sc 4, sc2tog] ×6, for 30 sts.
The diamonds look misaligned. Recount Rnd 5. You must have exactly 72 sts before Chart Rnd 1.
The ring wobbles. Add a second row of whipstitches lower down, through Rnd 66.
Care
Hand wash in cool water with mild soap and dry it flat or on a cylinder. Avoid the dryer, which can shrink cotton unevenly.
Final Notes
The whole pattern rests on one measurement chain. A gauge of 16 sc × 18 rnds = 4 in (10.2 cm) gives 72 sts = 18 in (45.7 cm) around and 36 sts = 9 in (22.9 cm) at the opening. Sixty-three body rounds reach 14.0 in (35.6 cm), and the borders add 0.9 in (2.3 cm) and 0.2 in (0.5 cm) for a finished height of 15.1 in (38.4 cm). Check your gauge early, keep each round at 72 sts, and the lattice will line up on its own.
Happy crocheting!