

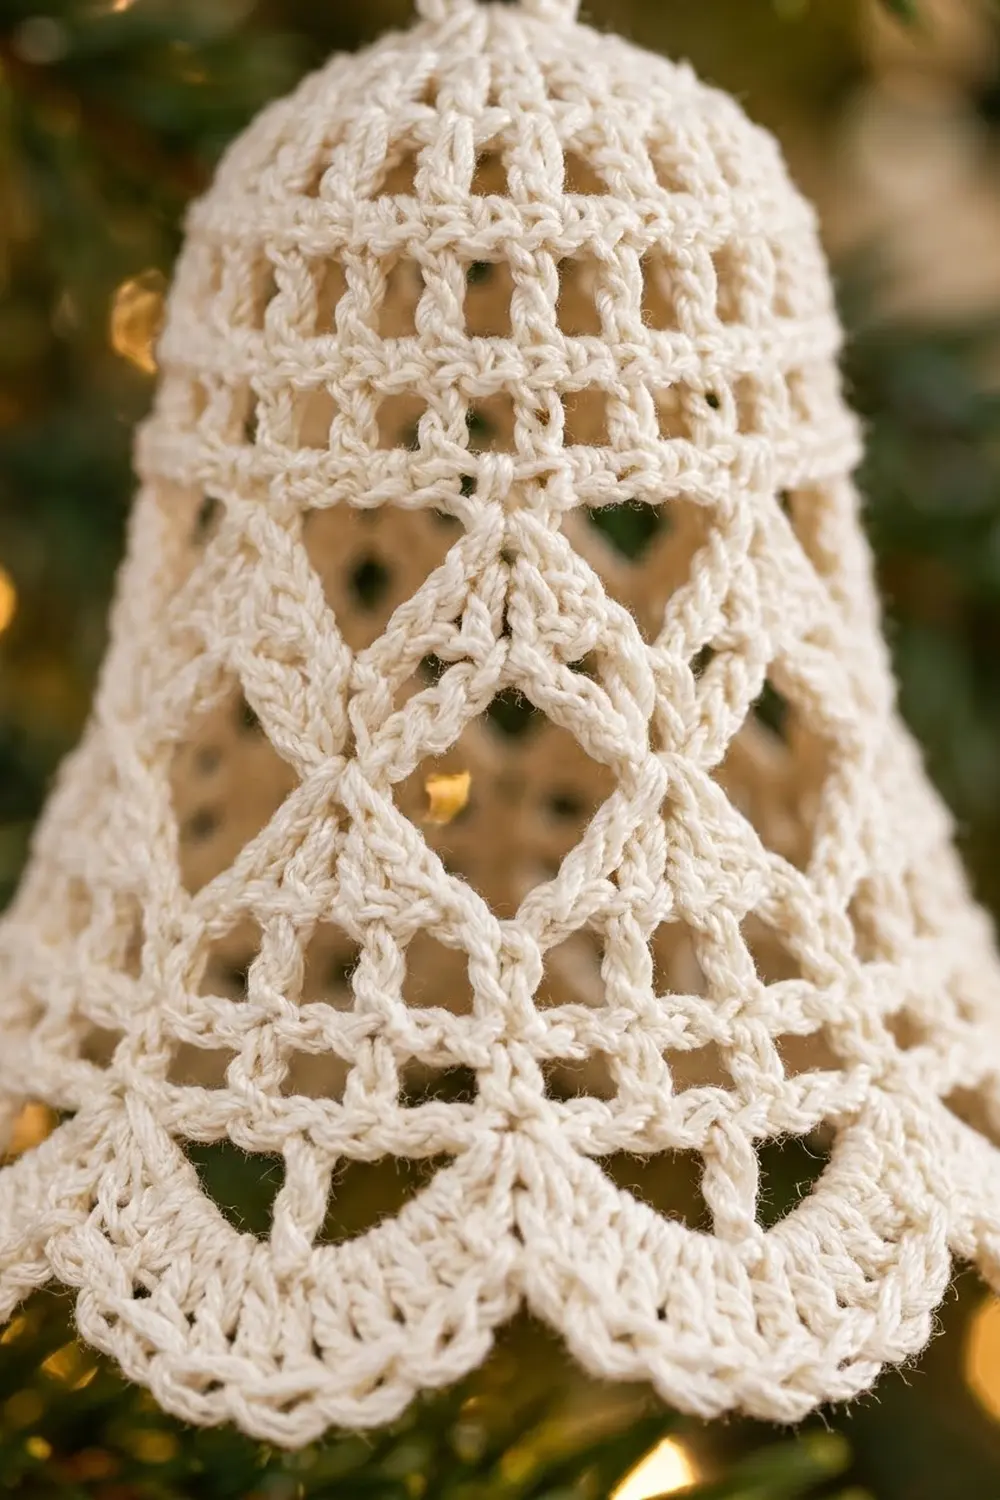
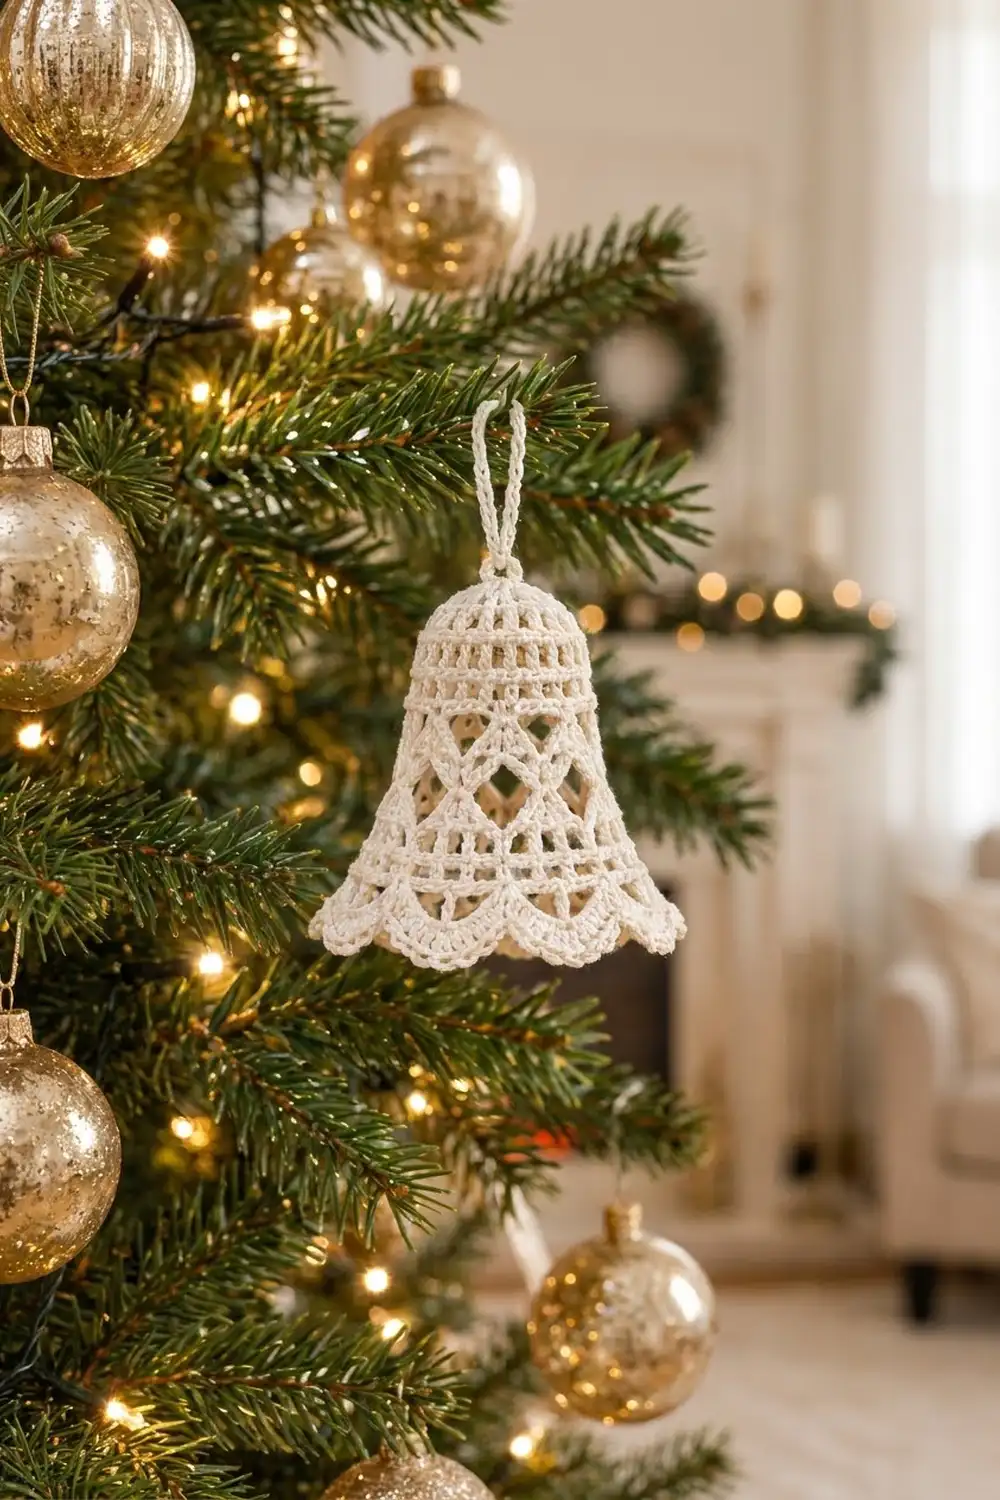
This lace bell ornament is made to hang on a tree. It is a single 3D bell in ivory cotton thread. A flat round crown sits at the top. The narrow upper body has solid ridges and a row of small mesh windows. Below that comes an open band of diamond lattice, then a flared skirt with a second mesh row. Ten rounded shell scallops finish the hem, and a chain loop at the crown lets it hang.
Using one color keeps the look soft and vintage. Ivory thread looks good next to gold and green decorations, and the openwork shows up well against tree lights. The pattern uses US crochet terms throughout.
After blocking, the bell is about 3 in (7.6 cm) tall without the loop. It is about 3.6 in (9.1 cm) wide across the hem, measured flat. The hanging loop adds 1.25 in (3.2 cm).
You work the bell from the top down in joined rounds. First you make a flat crown. A back-loop round then turns the work downward, and you increase in stages so the sides flare out. The scalloped hem serves as the border. Last, you stiffen the bell over a form so it keeps its shape.
Finished Size and Construction
- Finished size: 3 in (7.6 cm) tall; 3.6 in (9.1 cm) wide at the hem, measured flat
- Skill level: Intermediate
- Terminology: US crochet terms
- Yarn weight: Lace (0), size 10 cotton crochet thread
- Hook: 1.75 mm (US steel 6)
- Number of pieces: 1
- Layout: One seamless 3D bell, worked top-down in joined rounds
- Piece size before hem: 2.4 in (6.1 cm) tall; 3.3 in (8.4 cm) wide flat; 6.7 in (17.0 cm) around
- Hem (border) depth: 0.6 in (1.5 cm)
- Hanging loop: 1.25 in (3.2 cm)
Materials
Thread: Use mercerized cotton crochet thread in size 10. It has a slight sheen, shows each stitch clearly, and takes stiffener well. Avoid acrylic, because it won’t hold a stiffened shape.
- Ivory or cream: 6 g, about 30 m (33 yd)
This amount includes a margin for your gauge test, the hanging loop and weaving in ends. The bell alone uses about 4 g, or 20 m (22 yd).
Tools:
- 1.75 mm (US steel 6) crochet hook
- Fine tapestry needle with a large eye
- 1 stitch marker
- Small sharp scissors
- Fabric stiffener, or a starch or glue-and-water solution
- A bell-shaped form: a small plastic cup, a foam cone, or a balloon inflated to about 3.3 in (8.4 cm) across
- Plastic wrap and rust-proof pins
Abbreviations (US Terms)
- ch: chain
- sl st: slip stitch
- sc: single crochet
- dc: double crochet
- BLO: back loop only
- sk: skip
- sp: space
- st(s): stitch(es)
- rnd(s): round(s)
- rep: repeat
Special stitches
- Magic ring: Wrap the thread around two fingers to make a loop. Insert the hook and pull up a loop. Work the first round into the ring, then pull the tail to close it.
- Shell: 7 dc in the same stitch.
Notes
- Join each round with a sl st to the first stitch, or to the top of the starting chain. Do not turn.
- At the start of a dc round, ch 3 counts as the first dc.
- At the start of an sc round, ch 1 does not count as a stitch.
Gauge and Checkpoints
Gauge: 9 dc = 1 in (2.5 cm) in a flat swatch with a 1.75 mm hook.
Make Rnds 1–2 first as your test piece. Laid flat, they should measure 0.85 in (2.2 cm) across. If your circle is larger, go down to a 1.5 mm hook. If it is smaller, go up to a 2 mm hook. Matching the gauge matters more than using the exact hook size.
Checkpoints (measured gently flattened, before stiffening):
- After Rnd 2: crown 0.85 in (2.2 cm) across
- After Rnd 7: 2 in (5.1 cm) wide flat (4 in / 10.2 cm around); 0.9 in (2.3 cm) tall from the crown
- After Rnd 11: 2.7 in (6.9 cm) wide flat (5.3 in / 13.5 cm around); 1.9 in (4.8 cm) tall
- After Rnd 14: 3.3 in (8.4 cm) wide flat (6.7 in / 17.0 cm around); 2.4 in (6.1 cm) tall
- After Rnd 17: 3.6 in (9.1 cm) wide at the hem; 3 in (7.6 cm) tall
If you are more than 0.25 in (0.6 cm) off at any checkpoint, check your tension in the round you just made. Tight chain loops in Rnds 8–9 are the most common reason a bell comes out too narrow.
Bell Body
Crown
Rnd 1: Make a magic ring. Ch 3 (counts as dc), then work 11 dc in the ring. Join to the top of ch-3. Pull the tail to close the ring. (12 dc)
Rnd 2: Ch 3, dc in the same st. Work 2 dc in each remaining st around. Join. (24 dc)
The crown is now a flat disc 0.85 in (2.2 cm) across.
Upper Body
Rnd 3: Ch 1, sc in the BLO of each st around. Join. (24 sc)
The unworked front loops make a neat ridge at the crown edge. From here the work turns downward to form the sides of the bell.
Rnd 4: Ch 3, dc in each st around. Join. (24 dc)
Rnd 5: Ch 1, sc in each st around. Join. (24 sc)
Rnd 6 (mesh windows): Ch 4 (counts as dc + ch 1), sk next st. Dc in next st, ch 1, sk next st. Rep from * 10 more times. Join to the 3rd ch of ch-4. (12 dc + 12 ch-1 sps = 24 sts)
Rnd 7 (shoulder conversion): Ch 1. Sc in next dc, 2 sc in next ch-1 sp. Rep from * around. Join. (24 sts worked one-per-stitch + 12 extra = 36 sc)
This round forms the bell’s shoulder, where the sides start to flare out more. Checkpoint: 2 in (5.1 cm) wide flat.
Diamond Lattice Band
Rnd 8: Ch 1, sc in first st. Ch 5, sk 2 sts, sc in next st. Rep from * 10 more times. Ch 5, sk last 2 sts, join to first sc. (12 sc + 12 ch-5 loops)
Count check: 12 repeats × 3 sts = 36 sts used.
Rnd 9: Sl st in each of the next 3 ch to reach the center of the first loop. Ch 1, sc in the same loop. Ch 6, sc in next ch-5 loop. Rep from * 10 more times. Ch 6, join to first sc. (12 sc + 12 ch-6 loops)
Each sc of Rnd 9 sits at the center of a Rnd 8 loop, so the two rounds together form a ring of open diamonds. The longer ch-6 loops let the band flare.
Rnd 10 (conversion): Sl st in each of the next 3 ch. Ch 3 (counts as dc), then work 3 dc in the same ch-6 loop. Work 4 dc in each remaining ch-6 loop around. Join. (12 loops × 4 dc = 48 dc)
Rnd 11: Ch 1, sc in each st around. Join. (48 sc)
Checkpoint: 2.7 in (6.9 cm) wide flat, 1.9 in (4.8 cm) tall.
Skirt
Rnd 12 (growth): Ch 3, dc in next 2 sts, 2 dc in next st. Dc in next 3 sts, 2 dc in next st. Rep from * 10 more times. Join. (60 dc)
Rnd 13: Ch 1, sc in each st around. Join. (60 sc)
Rnd 14 (lower mesh): Ch 4 (counts as dc + ch 1), sk next st. Dc in next st, ch 1, sk next st. Rep from * 28 more times. Join to the 3rd ch of ch-4. (30 dc + 30 ch-1 sps = 60 sts)
Checkpoint: 3.3 in (8.4 cm) wide flat, 6.7 in (17.0 cm) around, 2.4 in (6.1 cm) tall. Do not fasten off.
Border (Scalloped Hem)
Border gauge: Each scallop uses 6 sts of Rnd 15, which is about 0.67 in (1.7 cm). Ten scallops × 0.67 in = 6.7 in (17.0 cm). That matches the circumference after Rnd 14, so the hem lies smoothly without ruffling or pulling in.
Rnd 15 (base): Ch 1, sc in each dc and each ch-1 sp around. Join. (30 + 30 = 60 sc)
Rnd 16 (shells): Ch 1, sc in first st. Sk 2 sts, shell in next st, sk 2 sts, sc in next st. Rep from * 8 more times. Sk 2 sts, shell in next st, sk 2 sts, join to first sc. (10 shells + 10 sc)
Count check: The first sc uses 1 st. Nine full repeats use 6 sts each, for 54. The last partial repeat uses 5 sts. 1 + 54 + 5 = 60, so every stitch of Rnd 15 is used exactly once.
Rnd 17 (scallop edging): Do not ch. Sc in next 3 dc, 3 sc in next (center) dc, sc in next 3 dc, sl st in next sc. Rep from * 9 more times. The last sl st lands in the joining sc. (10 scallops × (9 sc + 1 sl st) = 100 sts)
The 3 sc in each center dc round out the curve. The sl st between scallops pulls in a little, which separates the scallops clearly. Fasten off and weave in the end on the inside.
Why the math works: Rnd 14 has 60 sts, and Rnd 15 keeps exactly 60. A 6-st shell repeat divides 60 into exactly 10 scallops, with no leftover stitches and no extra increases at the hem.
Hanging Loop
From the outside, join the thread through the closed center of Rnd 1. Ch 30, then sl st back into the same center point. Folded, the loop should measure 1.25 in (3.2 cm). Fasten off. Pass both ends to the inside and weave them into Rnd 2.
Final Blocking
- Weave in all ends on the inside of the bell and trim them close.
- Cover the bell form with plastic wrap. The form should be 3.3 in (8.4 cm) across at the point where Rnd 14 will sit.
- Soak the bell completely in stiffener. Squeeze out the excess gently; don’t wring it.
- Slide the bell over the form. Center the crown on top and line up the rounds so they sit level.
- Use a pin tip to open each diamond in Rnds 8–9 and each mesh window in Rnds 6 and 14.
- Flare the hem slightly outward. Pin each of the 10 scallops at its center so they are evenly spaced, about 0.67 in (1.7 cm) apart.
- Measure: 3 in (7.6 cm) tall, 3.6 in (9.1 cm) wide at the hem.
- Let the bell dry completely, usually 12–24 hours, then remove it from the form.
- Fold the hanging loop upward and straighten it with a fingertip.
Final Quality-Control Checklist
- Crown is flat, closed, and 0.85 in (2.2 cm) across
- Rnd 6 shows 12 even mesh windows
- Diamond band shows 12 open diamonds of equal size
- Rnd 14 shows 30 even mesh windows
- Hem has exactly 10 evenly spaced scallops
- Bell is 3 in (7.6 cm) tall and 3.6 in (9.1 cm) wide at the hem
- Round joins line up in one vertical line at the back
- Loop is centered and 1.25 in (3.2 cm) long
- No visible tails, and the bell holds its shape when hung
Troubleshooting
Crown cups or ruffles: Check that Rnd 2 has exactly 24 dc. If it still ruffles, redo Rnds 1–2 with a smaller hook.
Sides don’t turn down at Rnd 3: Make sure you work in the back loop only, and keep the tension firm.
Diamonds look uneven: In Rnd 9, place each sc in the center ch of its loop, not off to one side.
Bell is too narrow at the hem: Loosen the ch-5 and ch-6 loops, and check that Rnd 12 has 60 dc.
Hem waves: Recount Rnd 15. It should have 60 sc, with no extra sts in the ch-1 sps.
Join line drifts: Always join into the top of the starting chain, not the next stitch over.
Care
Spot clean with a damp cloth. If you wash the bell, re-stiffen it on the form, and store it in a box cushioned with tissue.
Final Notes
The bell’s size depends on a short chain of measurements:
- After Rnd 2, the crown is 0.85 in (2.2 cm) across.
- After Rnd 7, the shoulder is 4 in (10.2 cm) around.
- After Rnd 11, the lattice band is 5.3 in (13.5 cm) around.
- After Rnd 14, the skirt is 6.7 in (17.0 cm) around.
- Ten 0.67 in (1.7 cm) scallops fit that circumference exactly.
If you check each stage, the bell will finish at 3 in (7.6 cm) tall and 3.6 in (9.1 cm) wide. That makes it easy to crochet a matching set for your tree.
Happy crocheting!