

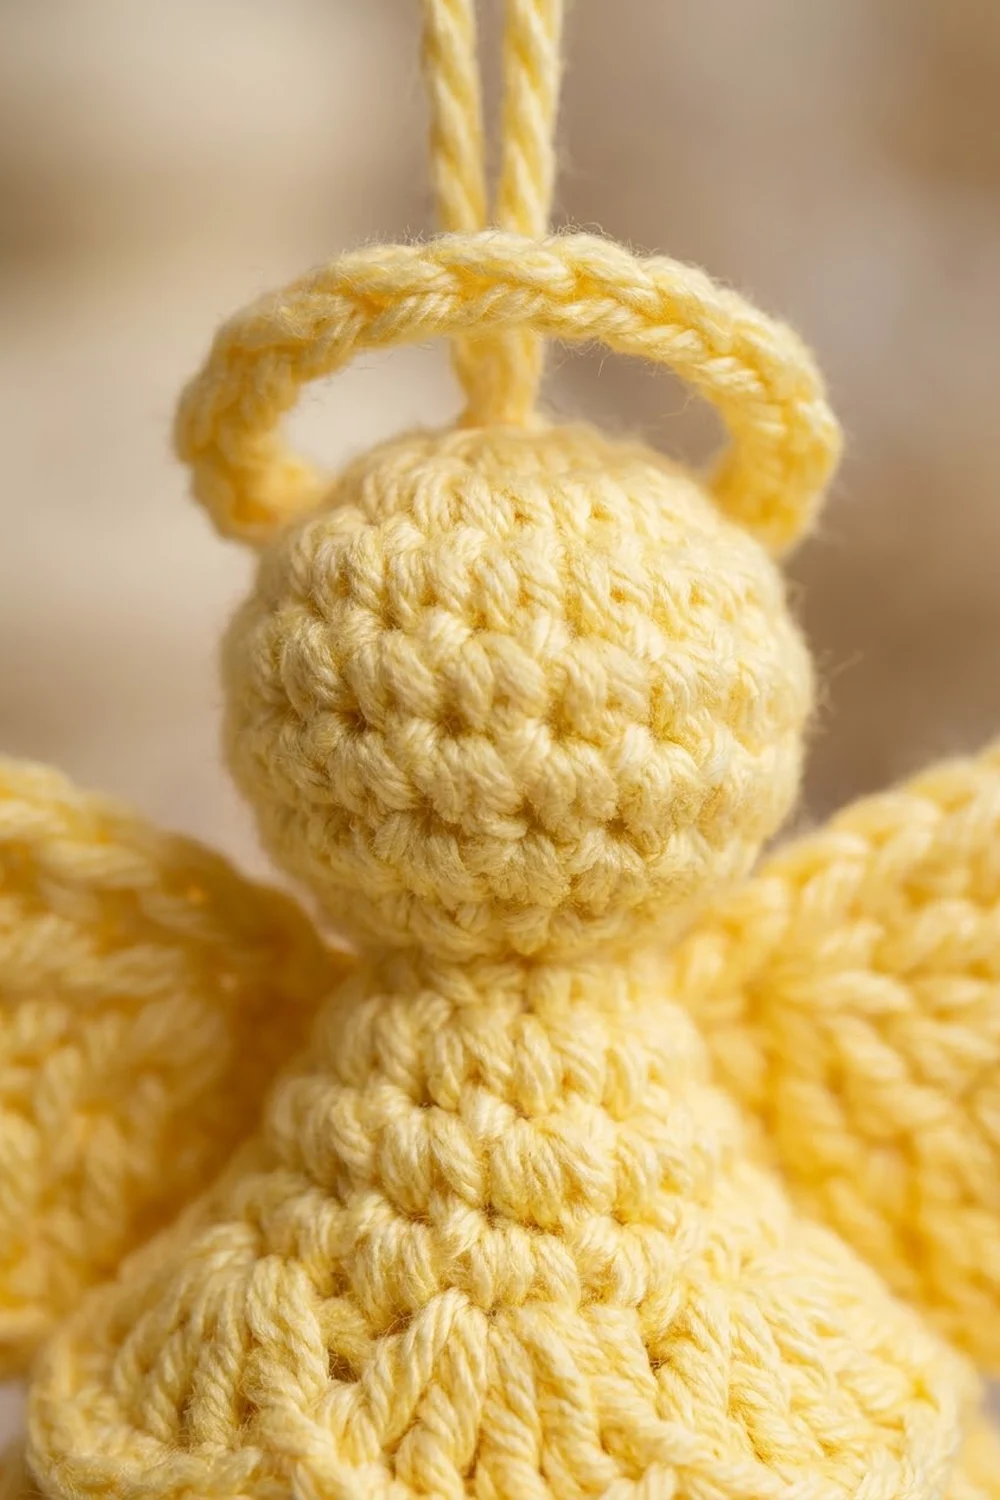
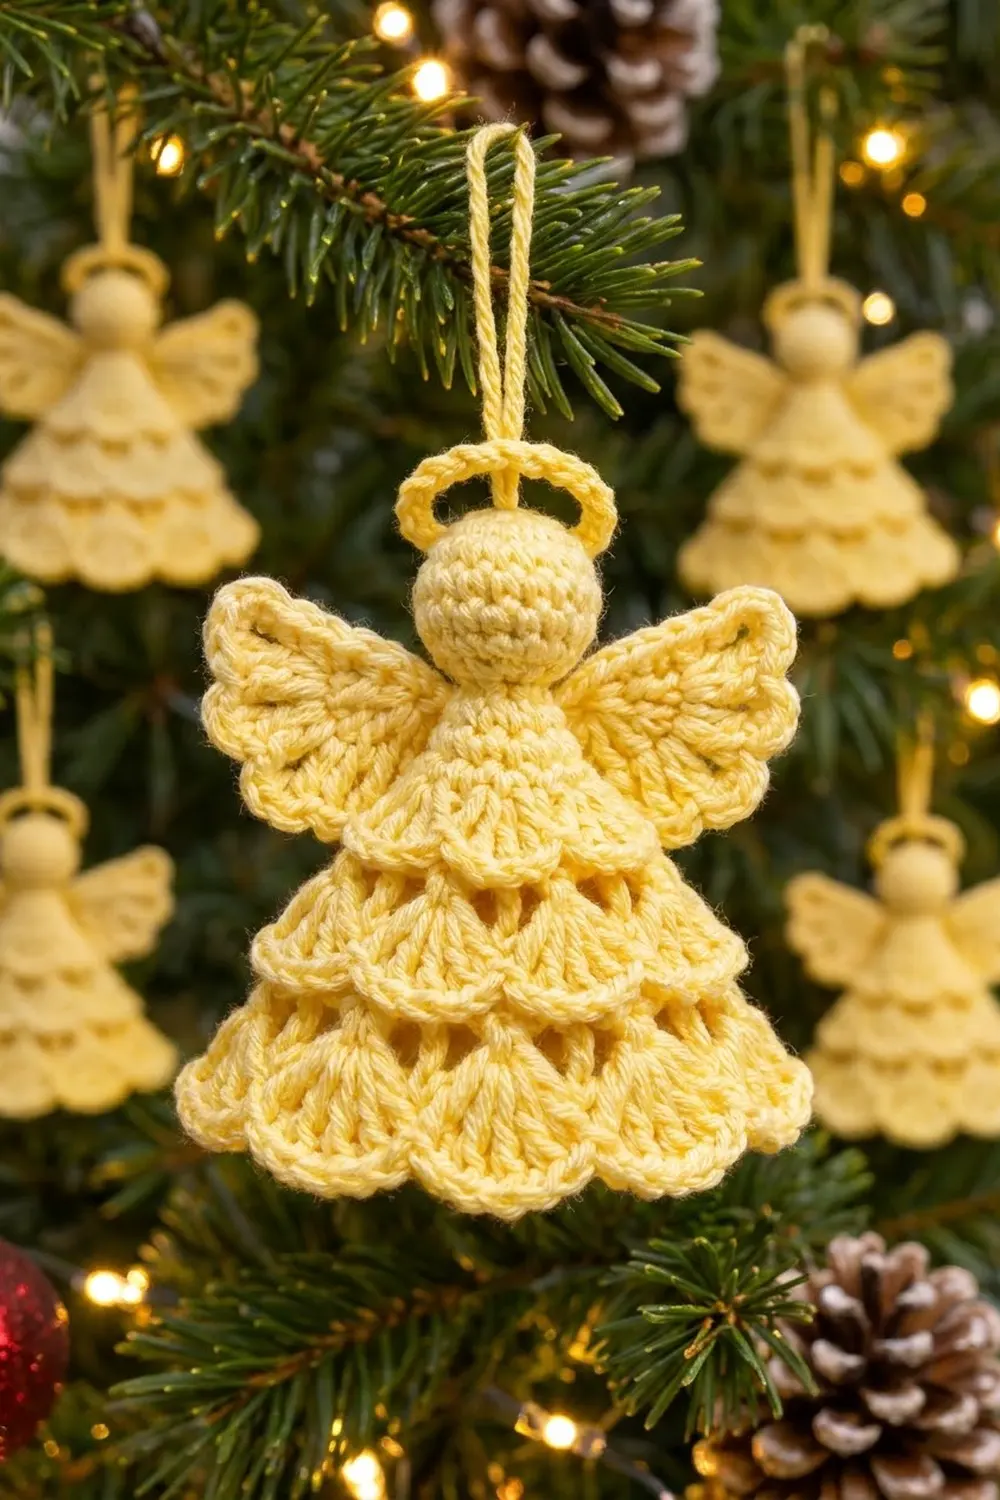
This little angel is made in one soft, buttery pale yellow. She has a round stuffed head, a small ring halo and two fan-shaped wings edged in shells. Her bell-shaped skirt is made of three tiers of overlapping shell scallops. Small open triangles show between the tiers and make the skirt look light and lacy.
The style is classic and calm. Because she is one color, the texture does the work. She looks just as good on a Christmas tree as she does laid flat on a gift. The pattern uses US crochet terms throughout.
The finished angel is about 4 in (10.2 cm) tall from the top of the halo to the hem. Flattened, the hem is about 3.75 in (9.5 cm) wide, and the wingspan is about 4 in (10.2 cm).
You crochet the body from the top down in joined rounds: first a solid neck and bodice, then three shell tiers, each sitting on a round of V-stitches. The head is a small amigurumi ball. You work the wings flat in four short rows. The halo is a chain ring covered in single crochet. Then you sew everything together and add a yarn loop for hanging.
Finished Size and Construction
- Finished size: 4 in (10.2 cm) tall including the halo; hem 3.75 in (9.5 cm) wide flattened; wingspan 4 in (10.2 cm)
- Skill level: Advanced beginner
- Terminology: US crochet terms
- Yarn weight: Sport (#2) cotton
- Hook: 2.75 mm (US C-2)
- Number of pieces: 1 finished ornament, made from 5 small parts (body, head, halo, 2 wings)
- Layout: Head centered on the body, wings sewn to the back of the bodice, halo tilted on the back of the head
- Body size before border: hem 3.5 in (8.9 cm) wide flattened; 2.6 in (6.6 cm) tall
- Border depth: about 1/8 in (0.3 cm) on the hem and wing edges
- Body size after border: hem 3.75 in (9.5 cm) wide; 2.75 in (7.0 cm) tall
Materials
Choose a smooth mercerized cotton or cotton blend in sport weight. Cotton holds the shell shapes crisply and blocks well. Fuzzy or very soft acrylic will blur the scallops and the open triangles.
- Pale butter yellow: 15 g, about 45 m (49 yd)
Tools and notions:
- 2.75 mm (US C-2) crochet hook
- Tapestry needle
- 1 stitch marker
- Scissors
- A small pinch of fiberfill (about 2 g)
- Optional: spray starch or fabric stiffener
- Pins and a foam blocking mat
The yarn amount includes a margin of about 20%. The angel itself uses about 12 g. The rest covers your gauge test, sewing tails and the hanging loop.
Abbreviations (US Terms)
- ch: chain
- sl st: slip stitch
- sc: single crochet
- dc: double crochet
- sc2tog: single crochet 2 together
- st(s): stitch(es)
- sp: space
- MR: magic ring
- beg: beginning
- [ ]: repeat the instructions inside the brackets as directed
Special stitches
- V-st (V-stitch): (dc, ch 2, dc) in the same stitch.
- Shell: the stated number of dc worked into the same stitch or space (a 5-dc, 7-dc or 9-dc shell).
Gauge and Checkpoints
Gauge: 6 sc and 6 sc rounds = 1 in (2.5 cm) with a 2.75 mm hook.
Make the head first as your test piece. It is small and uses only sc, so it shows your tension clearly. If the head comes out right, the rest of the angel will too.
Checkpoints:
- Head, after Rnd 3: the flat disc is 1 in (2.5 cm) across.
- Body, after Rnd 1: the ring is 1 in (2.5 cm) wide when pressed flat.
- Body, after Rnd 3: 2 in (5.1 cm) wide flattened; about 0.75 in (1.9 cm) tall.
- Body, after Rnd 4 (Tier 1): 2.25 in (5.7 cm) across the shell tips, flattened.
- Body, after Rnd 6 (Tier 2): 2.9 in (7.4 cm) across the shell tips.
- Body, after Rnd 8 (Tier 3): 3.5 in (8.9 cm) across; 2.6 in (6.6 cm) tall.
- Wing, after Row 3: 1.75 in (4.4 cm) wide and 1.1 in (2.8 cm) tall.
If your head disc is larger than 1 in (2.5 cm), go down to a 2.5 mm hook. If it is smaller, go up to a 3 mm hook. An error of 1/8 in (0.3 cm) on the head grows to about 0.5 in (1.3 cm) at the hem, so check it now.
Head
Work in continuous spiral rounds. Place a marker in the first stitch of each round.
Rnd 1: 6 sc in MR. (6 sc)
Rnd 2: 2 sc in each st around. (12 sc)
Rnd 3: [sc in next st, 2 sc in next st] 6 times. (18 sc)
Checkpoint: the disc is 1 in (2.5 cm) across.
Rnds 4–6: sc in each st around. (18 sc in each round)
Rnd 7: [sc in next st, sc2tog] 6 times. (12 sc)
Stuff the head firmly with fiberfill and shape it into a smooth ball with your fingers.
Rnd 8: sc2tog 6 times. (6 sc)
Sl st in next st. Fasten off, leaving a 12 in (30.5 cm) tail for sewing. Do not close the opening; you will sew it into the neck of the body.
Body
Work from the top down in joined rounds. Do not turn. The body forms a small bell that flattens neatly when pressed.
Rnd 1 (neck): Ch 12, sl st in first ch to form a ring, taking care not to twist. Ch 1, sc in each ch around; sl st in first sc. (12 sc)
Rnd 2 (bodice): Ch 3 (counts as dc here and throughout), 2 dc in next st, [dc in next st, 2 dc in next st] 5 times; sl st in top of beg ch-3. (18 dc)
Rnd 3: Ch 1, sc in same st as join and in next st, 2 sc in next st, [sc in next 2 sts, 2 sc in next st] 5 times; sl st in first sc. (24 sc)
Checkpoint: 2 in (5.1 cm) wide flattened.
Rnd 4 (Tier 1): Ch 1, sc in same st as join, skip next st, 5 dc in next st, [sc in next st, skip next st, 5 dc in next st] 7 times; sl st in first sc. (8 shells and 8 sc = 48 sts)
The 5-dc shells sit close together and flare outward slightly. This flare starts the bell shape.
Rnd 5 (V-st support): Ch 5 (counts as dc and ch 2), dc in same sc as join (first V-st made). Working behind the next shell, ch 3. [V-st in next sc, ch 3] 7 times; sl st in 3rd ch of beg ch-5. (8 V-sts and 8 ch-3 sps)
The ch-3 loops pass behind the Tier 1 shells, so the shells hang in front like scallops. The gaps between the V-st legs become the open triangles under each tier.
Rnd 6 (Tier 2): Sl st in next ch-2 sp, sl st in next dc, sl st in next ch-3 sp. Ch 1, sc in same ch-3 sp, 7 dc in next ch-2 sp, [sc in next ch-3 sp, 7 dc in next ch-2 sp] 7 times; sl st in first sc. (8 shells and 8 sc = 64 sts)
Each 7-dc shell sits centered under a sc point of Tier 1, so the tiers are offset like scales.
Rnd 7 (V-st support): Ch 5 (counts as dc and ch 2), dc in same sc as join. Working behind the next shell, ch 4. [V-st in next sc, ch 4] 7 times; sl st in 3rd ch of beg ch-5. (8 V-sts and 8 ch-4 sps)
Rnd 8 (Tier 3): Sl st in next ch-2 sp, sl st in next dc, sl st in next ch-4 sp. Ch 1, sc in same ch-4 sp, 9 dc in next ch-2 sp, [sc in next ch-4 sp, 9 dc in next ch-2 sp] 7 times; sl st in first sc. (8 shells and 8 sc = 80 sts)
Checkpoint: flattened, the body is 3.5 in (8.9 cm) across the hem and 2.6 in (6.6 cm) tall. Do not fasten off; go straight on to the hem border below.
Wings (make 2)
Work flat in rows from the shoulder point outward. Turn at the end of each row.
Row 1: Ch 4, 6 dc in 4th ch from hook. Turn. (7 dc; the 3 skipped ch count as the first dc)
Row 2: Ch 4 (counts as dc and ch 1), [dc in next dc, ch 1] 5 times, dc in top of turning ch. Turn. (7 dc and 6 ch-1 sps)
This mesh row opens up the center of the wing.
Row 3: Ch 1, sc in first dc, [5 dc in next dc, sc in next dc] 3 times, working the last sc in 3rd ch of turning ch. Skip the ch-1 sps throughout. Turn. (3 shells and 4 sc = 19 sts)
Checkpoint: 1.75 in (4.4 cm) wide and 1.1 in (2.8 cm) tall. Do not fasten off; the wing edging is in the border section.
Halo
Rnd 1: Ch 16, sl st in first ch to form a ring. Ch 1, work 24 sc into the center of the ring, covering the chain completely; sl st in first sc. (24 sc)
Fasten off, leaving a 6 in (15.2 cm) tail. The halo is about 1 in (2.5 cm) across.
Border
The border is one round of sc that outlines every scallop on the hem and wings. It gives the shells their neat, rounded edge.
Border gauge: 6 sc = 1 in (2.5 cm) along the edge. Each shell gets 1 sc per dc plus 1 extra sc at its center, so the outer curve has room to lie flat.
Hem border (Rnd 9 of body): Ch 1, sc in same sc as join, [sc in next 4 dc, 2 sc in next dc (shell center), sc in next 4 dc, sc in next sc] 7 times, sc in next 4 dc, 2 sc in next dc, sc in next 4 dc; sl st in first sc. Fasten off.
Count for each shell repeat: 1 sc in the sc + 4 + 2 + 4 = 11 sts. Total: 80 sts worked 1 per stitch + 8 extra center sts = 88 sc. When flattened, each side (front and back) shows 4 shells, or 44 sc per side.
Wing border (Row 4): Ch 1, sc in first sc, [sc in next 2 dc, 2 sc in next dc (shell center), sc in next 2 dc, sc in next sc] 3 times. Fasten off, leaving a 12 in (30.5 cm) tail. (19 sts worked 1 per stitch + 3 extra = 22 sc)
Why the math works: one sc in every stitch keeps the border the same length as the edge under it. The single extra sc at each shell center adds length only at the outermost point of the curve, where the edge is longest. The sc in each valley stitch keeps the dips between scallops sharp. The border adds about 1/8 in (0.3 cm) all around. The hem grows from 3.5 in (8.9 cm) to 3.75 in (9.5 cm). Each wing grows from 1.75 in (4.4 cm) to 1.9 in (4.8 cm) wide and to 1.25 in (3.2 cm) tall.
Assembly
- Head: Push the 6-st opening of the head into the neck ring (Rnd 1 of the body). Using the head tail, sew each head stitch to the neck ring with small stitches, 2 neck sts for each head st. Keep the head upright and centered.
- Wings: Lay the body flat, front side down. Place each wing with its Row 1 point at the center back of the bodice (Rnd 2), angled up and out, so the two points almost touch. Using the wing tail, sew the point and the lower half of Row 1 to the bodice.
- Halo: Place the halo on the top back of the head, tilted slightly backward. Sew 3–4 sts at the lower edge of the halo to the head.
- Hanging loop: Cut an 8 in (20.3 cm) strand. Thread it under a stitch at the top of the head, just in front of the halo. Knot the ends to make a 3 in (7.6 cm) loop.
Weave in all ends inside the head or along the back of the bodice.
Final Blocking
- Lightly mist the angel with water. For a firmer ornament, spray with starch instead.
- Lay her flat, face up, on the blocking mat.
- Pin the hem so it measures 3.75 in (9.5 cm) across, with 4 shells showing on the front.
- Pin the tip of every shell on the hem and wings to round it out.
- Ease each tier so it overlaps the one below evenly and the open triangles show.
- Pin the wings so the wingspan is 4 in (10.2 cm).
- Let the angel dry completely, then remove the pins.
Final Quality-Control Checklist
- Height is 4 in (10.2 cm) from halo to hem.
- Hem is 3.75 in (9.5 cm) wide flattened.
- Wingspan is 4 in (10.2 cm).
- Each of the three tiers has 8 shells.
- Each tier is offset from the one above it.
- Hem border has 88 sc; each wing border has 22 sc.
- The head is round, firm and centered.
- The wings are level and match each other.
- The halo sits straight, and the angel hangs upright from the loop.
- No loose ends show on the front.
Troubleshooting
- The skirt ruffles too much: your dc are loose. Go down a hook size, or work Rnds 5 and 7 with 1 fewer ch in each loop.
- The tiers do not overlap: the support loops are too short. Keep the ch-3 and ch-4 loops relaxed, and work them behind the shells.
- The stitch count is off in Rnd 6 or 8: check that each shell is in the ch-2 sp of a V-st and each sc is in a ch-3 or ch-4 loop.
- The head looks lumpy: add stuffing in small pieces, and roll the head between your palms before closing.
- The wings curl: block them flat with starch, and check that Row 2 has 6 ch-1 sps.
- The angel hangs crooked: move the loop to the exact center top of the head.
Care
Hand wash in cool water with mild soap and lay flat to dry. If you used starch, block her again after washing.
Final Notes
The measurement chain is short. A 1 in (2.5 cm) head disc confirms your gauge. The body grows from a 1 in (2.5 cm) neck to a 2 in (5.1 cm) bodice. Across the three tiers it then measures 2.25 in (5.7 cm), 2.9 in (7.4 cm) and 3.5 in (8.9 cm). The border brings the hem to 3.75 in (9.5 cm). With the head, wings and halo added, the angel is 4 in (10.2 cm) tall with a 4 in (10.2 cm) wingspan.
Make one, check it, and then make a whole choir for the tree.
Happy crocheting!