

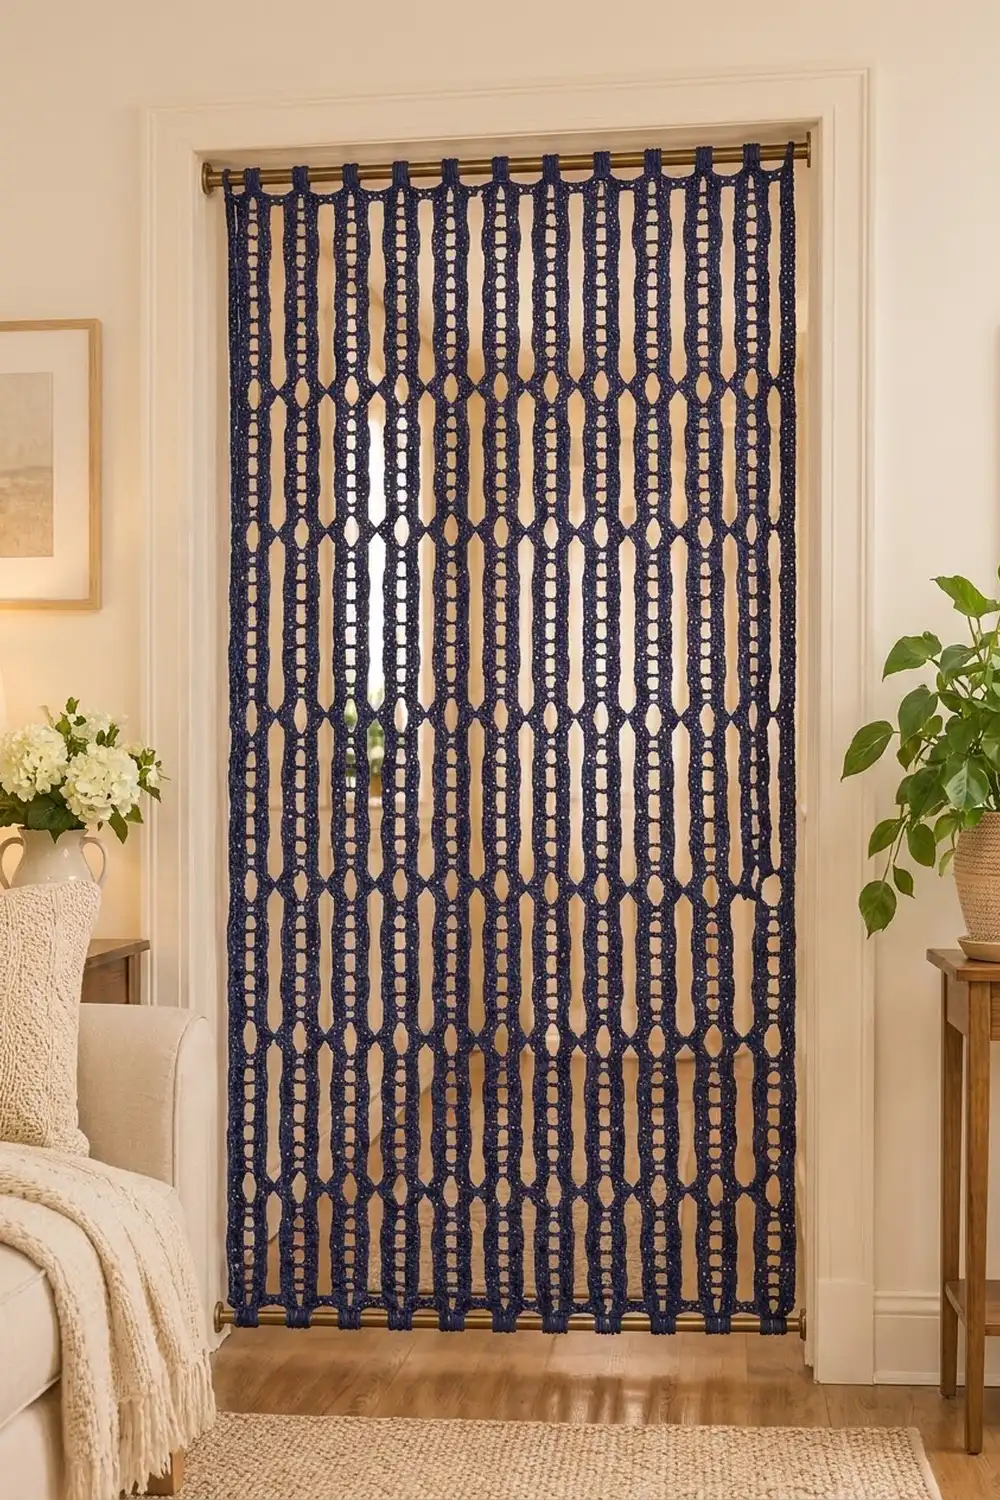
This curtain is built from tall, narrow ladder strips in deep navy. Each strip has two solid rails with a column of small rectangular windows between them. Neighboring strips are pinched together at regular points, so long lens-shaped openings form between them. Light comes through, but the doorway still feels screened.
It is worked in one solid color for a calm, modern look that suits hallways, closets, and pantry doors. Narrow tabs at the top and bottom wrap around two rods, so the curtain hangs straight and doesn’t swing.
The pattern uses US crochet terms. The finished curtain body measures 31 in wide × 71.75 in long (78.7 × 182.2 cm), not counting the tabs.
Construction is straightforward. You crochet 14 identical strips from the bottom up and join each new strip to the previous one as you go. Then you work one edge row across the top and one across the bottom, and finish with small rod tabs.
Finished Size and Construction
- Finished size: 31 × 71.75 in (78.7 × 182.2 cm), not counting tabs
- Skill level: Easy-intermediate
- Terminology: US
- Yarn weight: Worsted (#4), cotton or cotton blend
- Hook: US H-8 (5.0 mm)
- Number of pieces: 14 strips, joined as you go
- Layout: 14 strips side by side, in 1 row
- Strip size: 1.75 × 71.25 in (4.4 × 181.0 cm)
- Size before border: 24.5 in (62.2 cm) of strip width plus the gaps between strips, × 71.25 in (181.0 cm)
- Border depth: one sc row, 0.25 in (0.6 cm), at the top and at the bottom, plus 3 in (7.6 cm) tabs
Materials
Yarn: Use worsted-weight cotton or a cotton blend with good stitch definition. Cotton hangs heavily and straight, which helps the lens openings stay even. Avoid fuzzy or very stretchy yarns, because the strips will grow in length.
- Navy: 600 g, about 930 m (1,015 yd)
These quantities include a margin of about 10%. Each strip uses about 37 g (57 m).
Tools:
– US H-8 (5.0 mm) crochet hook
– Yarn needle
– 6–8 locking stitch markers
– Measuring tape
– Blocking mats and rust-proof pins
– Two curtain rods, each at least 33 in (83.8 cm) long and no more than 0.75 in (1.9 cm) in diameter
Abbreviations (US Terms)
- ch – chain
- sc – single crochet
- dc – double crochet
- sl st – slip stitch
- sk – skip
- sp – space
- st(s) – stitch(es)
- RS / WS – right side / wrong side
Special technique – Join Point: At the end of a join row, sl st into the matching row-end of the strip to the left. Then sl st into its next row-end and continue. The join sl sts are never counted as stitches.
Gauge and Checkpoints
- Gauge: 4 sc = 1 in (2.5 cm) in width.
- Row height: 1 dc row = 0.5 in (1.3 cm), and 1 sc row = 0.25 in (0.6 cm). One 2-row repeat = 0.75 in (1.9 cm).
Test one piece first. Work Rows 1–16 of Strip 1, then measure:
- Width: 1.75 in (4.4 cm)
- Length after Row 16: 6 in (15.2 cm)
If your strip is too wide or too long, go down a hook size. If it’s too narrow or too short, go up a hook size. Row height matters just as much as width here: over 190 rows, an extra 0.05 in (0.1 cm) per repeat adds 4.75 in (12.1 cm) to the length.
Checkpoints on every strip:
– Row 48: 18 in (45.7 cm)
– Row 96: 36 in (91.4 cm)
– Row 190: 71.25 in (181.0 cm)
Measure with the strip lying flat and relaxed, never hanging.
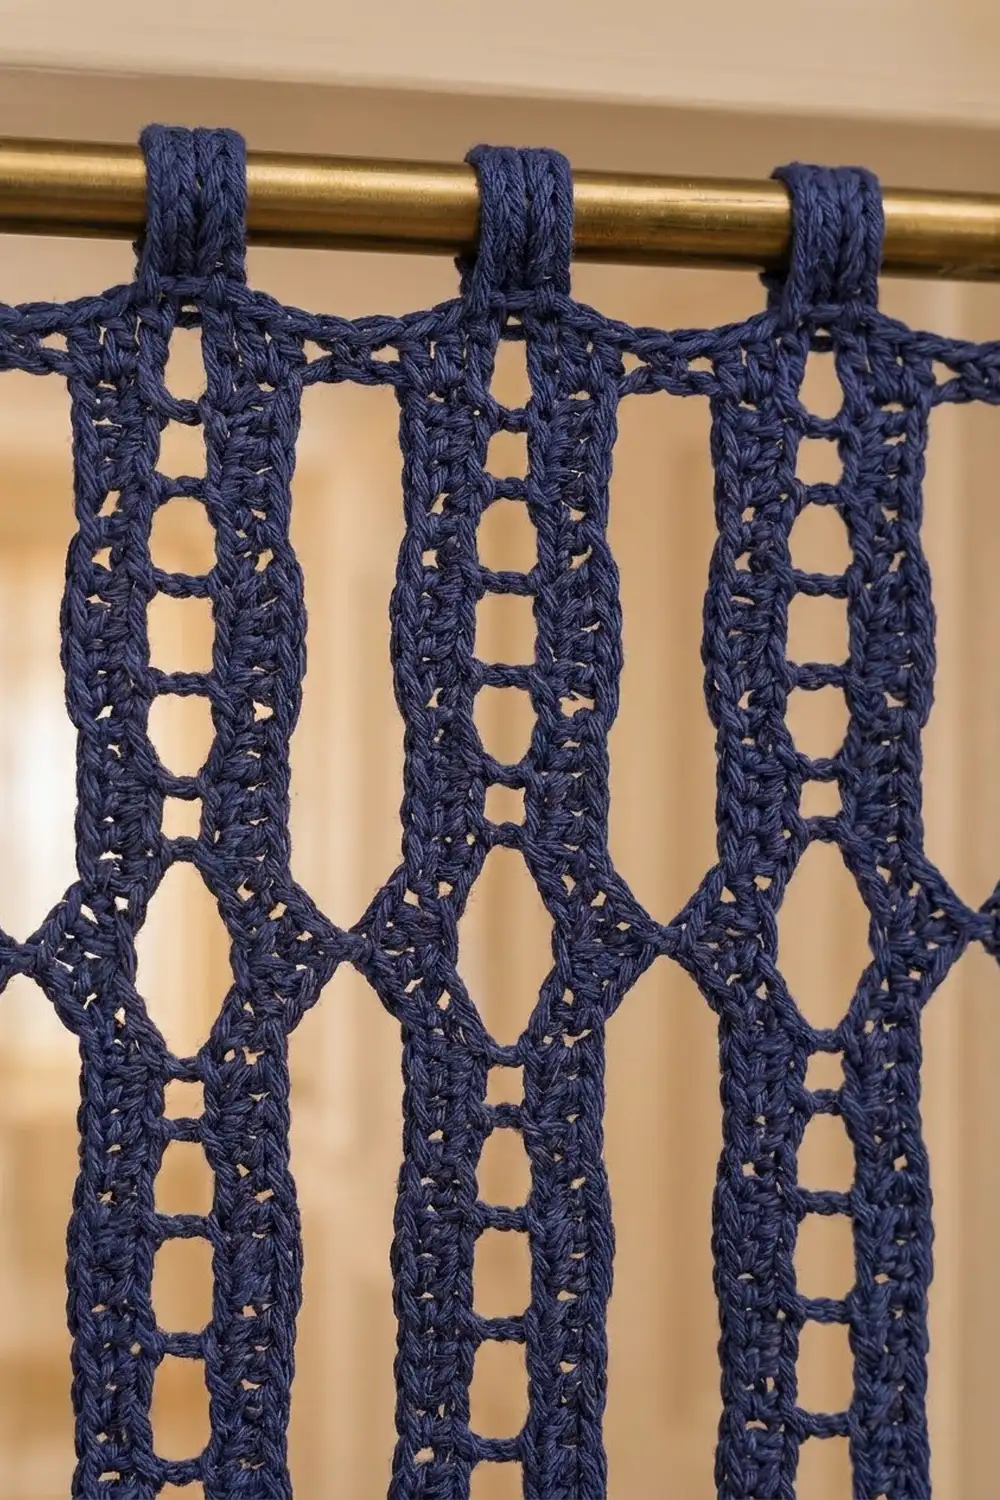
Strip Pattern
Each strip is 7 stitches wide and is worked in rows from the bottom up. Odd rows are dc rows with one ch-1 window in the center. Even rows are sc rows that close the window and form the next rung of the ladder.
Foundation: Ch 9.
Row 1 (RS): Dc in 4th ch from hook (the 3 skipped ch count as the first dc), dc in next ch, ch 1, sk next ch, dc in last 3 ch. Turn. (6 dc + 1 ch-1 sp = 7 sts)
Row 2 (WS): Ch 1 (does not count as a st), sc in first 3 dc, sc in ch-1 sp, sc in next 2 dc, sc in top of turning ch. Turn. (7 sc)
Row 3: Ch 3 (counts as dc), dc in next 2 sc, ch 1, sk next sc, dc in last 3 sc. Turn. (6 dc + 1 ch-1 sp = 7 sts)
Row 4: Ch 1, sc in first 3 dc, sc in ch-1 sp, sc in next 2 dc, sc in 3rd ch of turning ch. Turn. (7 sc)
Rows 5–190: Repeat Rows 3–4 another 93 times, ending with an even (sc) row. (Every odd row: 7 sts. Every even row: 7 sc.)
That makes 95 repeats in total: 95 × 0.75 in = 71.25 in (181.0 cm).
Odd rows always end at the left edge when the RS faces you, and even rows end at the right edge. The rails come from the 3 stitches on each side of the window. The ladder holes come from the ch-1 space, which sits in the 4th stitch of every dc row.
Strip 1: Work Rows 1–190 with no joins. Fasten off and weave in the ends.
Join-as-You-Go Strips
Strips 2–14 follow the same pattern. The only difference is that each one is joined to the strip on its left at 11 join zones.
Lay the finished strip RS up and place the new strip to its right as you work. Both strips should have Row 1 at the bottom.
Join rows: Each join zone is a pair of rows: 15–16, 31–32, 47–48, 63–64, 79–80, 95–96, 111–112, 127–128, 143–144, 159–160, and 175–176. In other words, every 16th row and the row before it.
How to join (example: Rows 15–16):
1. Work Row 15 as normal through the last dc. You are now at the left edge.
2. Sl st into the Row 15 row-end on the right edge of the previous strip (the ch-3 at the start of its Row 15).
3. Sl st into that strip’s Row 16 row-end (its last sc).
4. Ch 1, turn, and work Row 16 as normal. (7 sc)
Stitch-to-stitch logic: Each join point links matching rows only (Row 15 to Row 15, Row 16 to Row 16), so the strips stay level. Because the join sl sts go into row-ends, the strip’s own stitch count never changes.
Spacing check: Below the first join there are 14 free rows (Rows 1–14). Between joins there are 14 free rows, and above the last join there are 14 free rows (Rows 177–190). Each free section is 7 repeats = 5.25 in (13.3 cm). That gives 12 lens openings per column of the curtain, with the same height top and bottom.
Tension: Keep the join sl sts loose, about the height of a sc. If they’re tight, the join pulls one strip upward and the strip shortens on that edge.
Make All Pieces
- Navy: 14 strips (Strip 1 without joins, Strips 2–14 joined as you go)
Layout (RS facing, left to right):
[S1][S2][S3][S4][S5][S6][S7][S8][S9][S10][S11][S12][S13][S14]
Size checkpoint after joining: The strip width alone is 14 × 1.75 in = 24.5 in (62.2 cm). The panel measures 71.25 in (181.0 cm) long. At the join zones the strips touch; between joins they lie side by side, ready to be spaced by the edge rows.
Border: Edge Rows and Rod Tabs
Border gauge: 4 sc = 1 in (2.5 cm), and each ch-2 bridge = 0.5 in (1.3 cm).
Top Edge Row (RS): With RS facing, join yarn in the first st of Row 190 at the top right corner of Strip 14. Then:
– Ch 1, sc in each of the 7 sts of Strip 14.
– Ch 2, sc in each of the 7 sts of the next strip. Repeat from * across, ending with Strip 1.
Fasten off. (14 strips × 7 sc = 98 sc, plus 13 bridges × 2 ch = 26 ch, for a total of 124 sts)
Bottom Edge Row (RS): Turn the panel so the foundation chains are on top, with RS facing. Join yarn at the right-hand corner (the bottom of Strip 1). Then:
– Ch 1. Work 7 sc across Strip 1’s foundation: 1 in the base of the turning ch, 1 in the base of each of the 6 dc, and 1 in the skipped chain. Arrange these to follow the strip’s 7 stitch positions.
– Ch 2, work 7 sc across the next strip’s foundation. Repeat from * across, ending with Strip 14.
Fasten off. (98 sc + 26 ch = 124 sts)
Why the math works: Each strip is 7 sts = 1.75 in (4.4 cm). Fourteen strips give 98 sts = 24.5 in (62.2 cm). The 13 bridges of ch 2 add 26 sts = 6.5 in (16.5 cm). In total, 124 sts ÷ 4 = 31 in (78.7 cm). No stitches are added at the seams beyond the ch-2 bridges listed here.
The bridges hold the strip ends 0.5 in (1.3 cm) apart, while the join zones pinch the strips together. That difference is what opens the lens shapes.
Rod Tabs (make 14 at the top and 14 at the bottom):
– Row 1: With RS facing, join yarn in the 3rd sc of one strip’s 7-sc group on the edge row. Ch 1, sc in the same st and the next 2 sts. Turn. (3 sc)
– Rows 2–12: Ch 1, sc in each of the 3 sts. Turn. (3 sc)
Fasten off, leaving an 8 in (20.3 cm) tail. Each tab is 12 rows = 3 in (7.6 cm) long and 0.75 in (1.9 cm) wide.
Fold each tab to the WS and whipstitch Row 12 to the back of the edge row, making a loop about 1.5 in (3.8 cm) deep. That loop fits a rod up to 0.75 in (1.9 cm) in diameter, which is about 6.0 cm around.
Final Blocking
- Soak the curtain in cool water for 15 minutes, then gently press out the water. Don’t wring it.
- Roll it in towels to remove excess moisture.
- Lay it flat on mats with the RS up.
- Pin the top edge to 31 in (78.7 cm) and the bottom edge to 31 in (78.7 cm).
- Pin the side edges to 71.75 in (182.2 cm).
- Straighten each strip by pinning its two rails parallel at 1.75 in (4.4 cm).
- Pin each lens opening so it is centered between its join points.
- Let it dry completely, then unpin and slide the rods through the tabs.
Final Quality-Control Checklist
- All 14 strips measure 71.25 in (181.0 cm) and have 190 rows.
- Every odd row has 6 dc + 1 ch-1 sp, and every even row has 7 sc.
- Each strip has 11 join zones on the matching rows.
- All lens openings are 5.25 in (13.3 cm) tall.
- Each edge row has 124 sts: 98 sc + 26 ch.
- There are 28 tabs, and each is 12 rows long and sewn securely.
- The width is 31 in (78.7 cm) at both the top and the bottom.
- All ends are woven in along the rails, not across the windows.
Troubleshooting
Strips are different lengths: Count rows, not inches. Rework any strip that doesn’t have exactly 190 rows.
Join zones don’t line up: Check that you joined on Rows 16k−1 and 16k. Place a marker on every join row before you start the next strip.
Windows look slanted: You probably skipped the wrong stitch. The ch-1 must always sit over the 4th stitch.
Panel puckers at the joins: Your join sl sts are too tight. Loosen them, or chain 1 before the second sl st.
Panel is wider at the top than the bottom: Recount both edge rows to confirm each has 124 sts.
Curtain stretches over time: This is normal with cotton. Re-block it, or lower the bottom rod slightly.
Care
Hand wash in cool water with mild soap and dry flat. Never hang the curtain wet, because cotton stretches when wet.
Final Notes
The measurement chain starts with the stitches: 4 sc per inch makes each strip 1.75 in (4.4 cm) wide. At 0.75 in (1.9 cm) per repeat, 95 repeats give 71.25 in (181.0 cm). Fourteen strips plus 13 ch-2 bridges come to 124 edge stitches and 31 in (78.7 cm) of width. The two edge rows bring the length to 71.75 in (182.2 cm). If you check the first strip carefully, the rest of the curtain will follow.
Happy crocheting!