

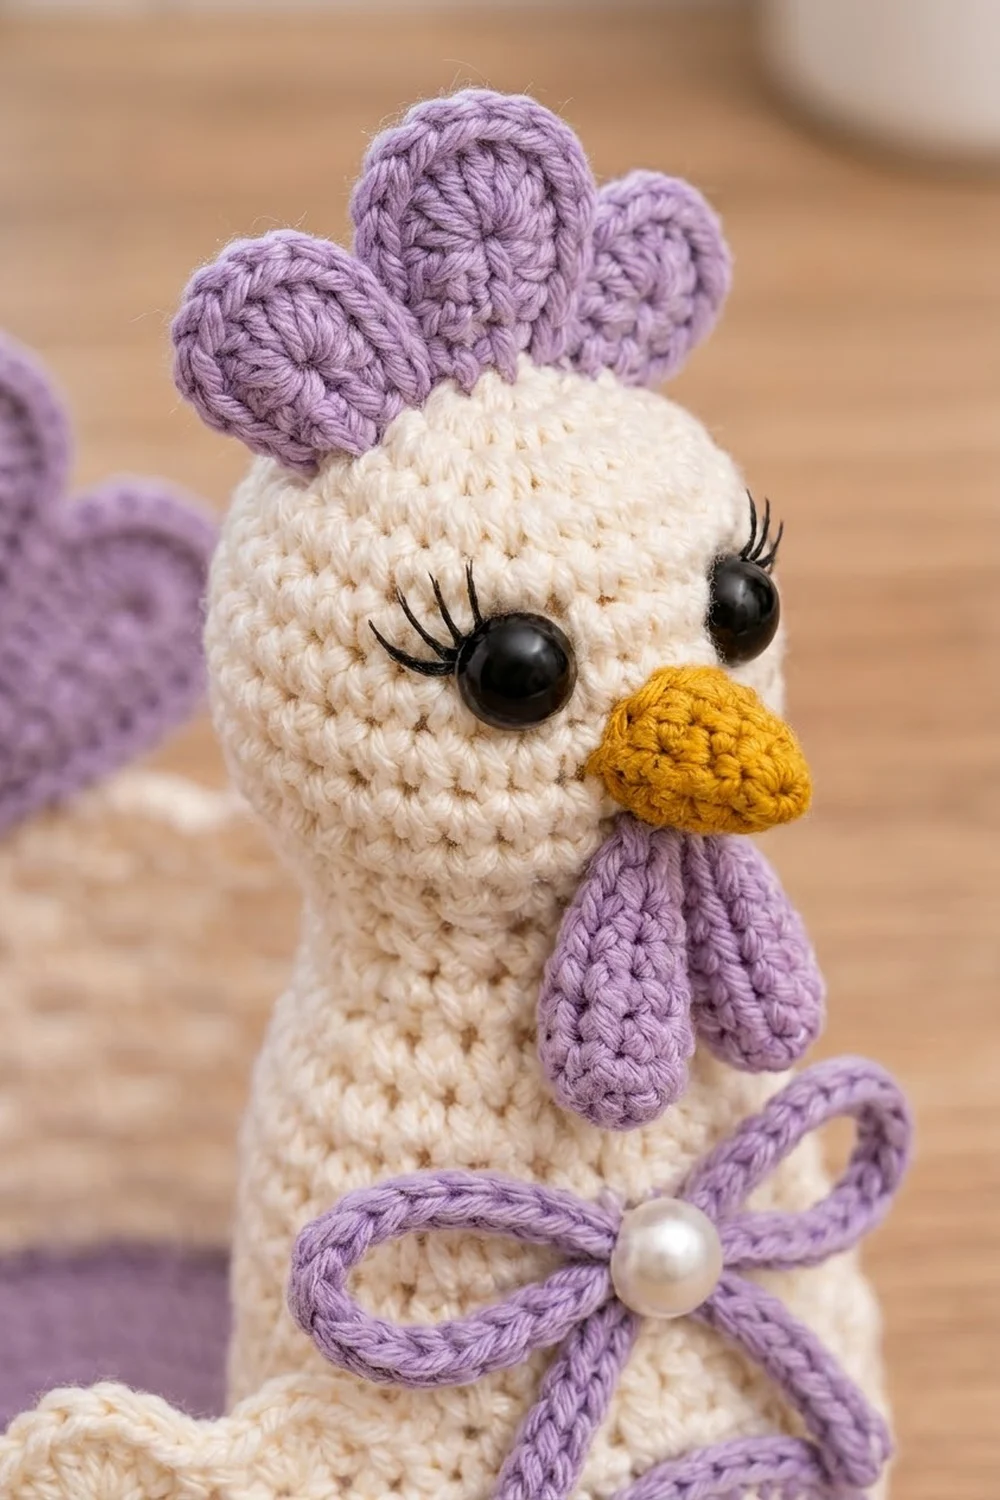
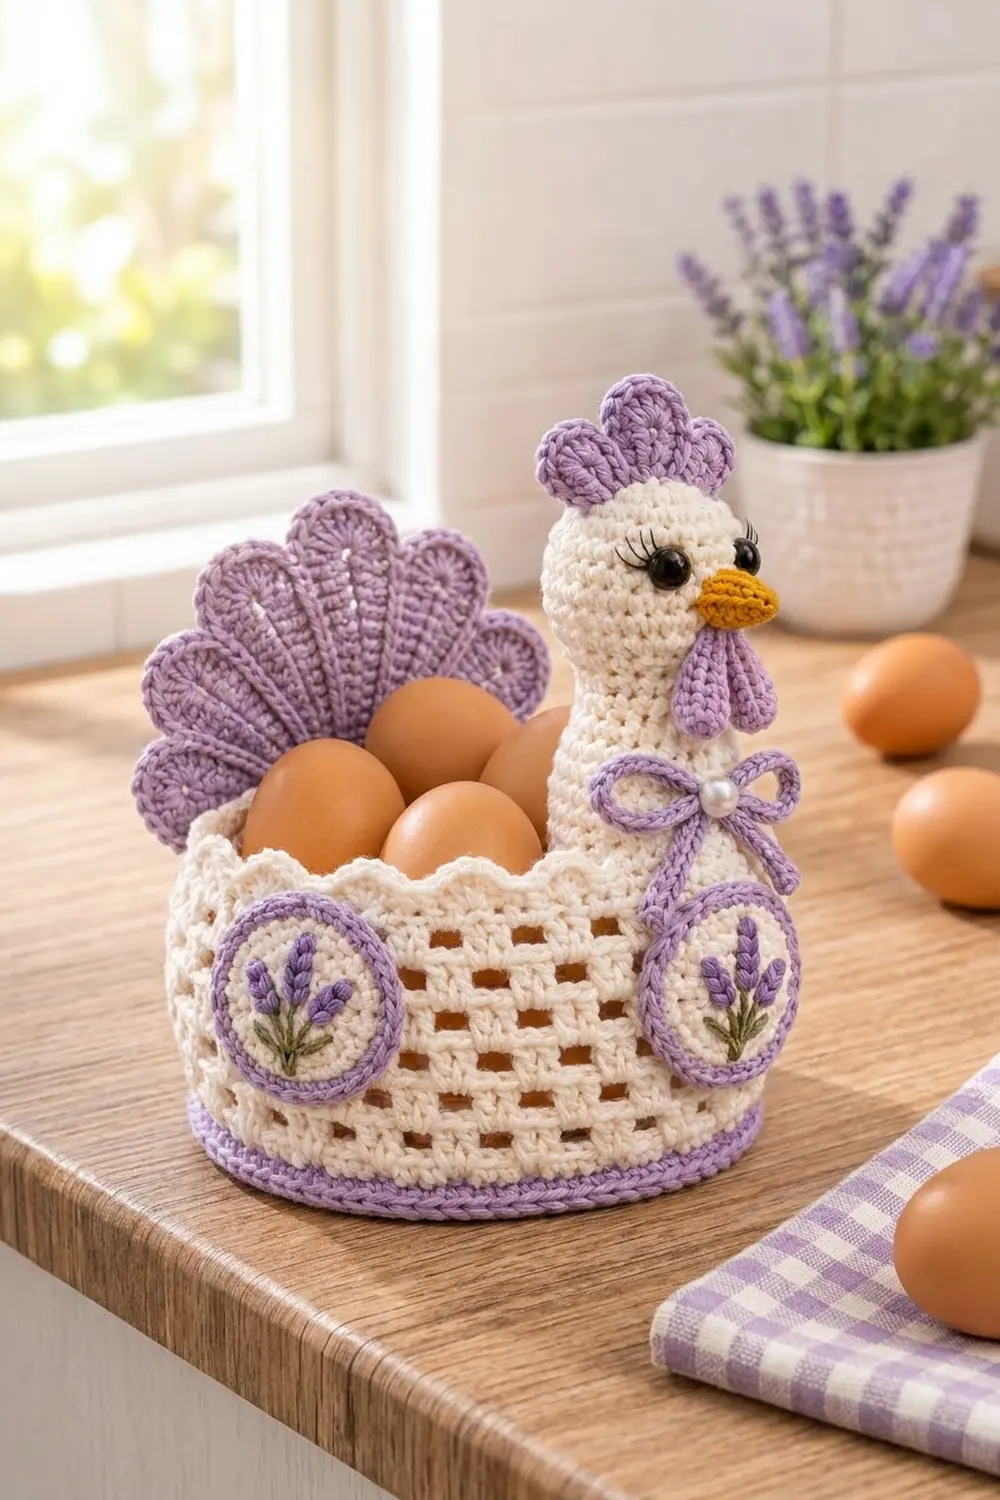
The Lavender Hen Egg Basket is a small round crochet basket shaped like a sitting hen. Cream filet-mesh walls rise from a solid lavender base, and the top edge ends in soft scallops. A stuffed cream neck and head stands at the front, and a ribbed lavender fan tail rises at the back.
The colors are calm and springlike. Cream is used for the body and head. Lavender is used for the base, tail, comb, wattle, bow and medallion edges. The beak is golden yellow, and the embroidered stems are soft green. Two round medallions, each embroidered with a lavender sprig, are sewn to the front wall. A lavender cord bow with a pearl bead sits at the base of the neck.
This pattern uses US crochet terms. The finished basket is about 5 in (12.7 cm) across the base and 3.5 in (8.9 cm) tall at the rim. It stands about 6.5 in (16.5 cm) tall at the top of the comb.
The construction is straightforward. You work the base as a flat circle, turn the wall up with a back-loop round and work the mesh in joined rounds. The top scallops and the bottom braid form the border. The head, tail, comb, beak, wattle, medallions and bow are made separately and sewn on.
Finished Size and Construction
- Finished size: 5 in (12.7 cm) base diameter, 3.5 in (8.9 cm) wall height, about 6.5 in (16.5 cm) overall height
- Skill level: Intermediate
- Terminology: US crochet terms
- Yarn weight: Worsted (#4) cotton
- Hook: 4.0 mm (G-6)
- Number of pieces: 1 basket body plus 9 small parts (head, tail, comb, beak, 2 wattle drops, 2 medallions, bow cord)
- Layout: Round basket with the head at the front, the tail at the back and one medallion on each side of the neck
- Base size: 72 stitches around, 5 in (12.7 cm) across
- Wall size before border: 72 stitches around, 3 in (7.6 cm) tall
- Border depth: 0.5 in (1.3 cm) scallop at the rim, plus a surface braid at the base
Materials
Use a smooth worsted-weight cotton or cotton blend. Cotton holds the basket’s shape, shows the mesh clearly and stands up to handling eggs. Avoid fuzzy or very soft acrylic, because it lets the wall slump.
- Cream: 75 g, about 115 m (126 yd)
- Lavender: 50 g, about 77 m (84 yd)
- Golden yellow: 3 g, about 5 m (5.5 yd)
- Green (embroidery): about 2 m (2.2 yd)
- Black (lashes): about 1 m (1.1 yd)
These amounts include about 15 percent extra for gauge checks and yarn tails.
Tools and notions:
- 4.0 mm (G-6) crochet hook
- Two 9 mm black safety eyes
- One 8 mm pearl bead
- Polyester fiberfill
- Tapestry needle and a sharp embroidery needle
- Stitch markers, pins, scissors, tape measure
Abbreviations (US Terms)
- ch – chain
- sl st – slip stitch
- sc – single crochet
- hdc – half double crochet
- dc – double crochet
- inc – 2 sc in the same stitch
- sc2tog – single crochet 2 together
- BLO – back loop only
- MR – magic ring
- sp – space
- st(s) – stitch(es)
Special stitch – Surface braid: Hold the yarn behind the work. Insert the hook from front to back through the unused front loop, pull up a loop and draw it through the loop on the hook. Repeat. This makes a neat chain-like line on the surface.
Gauge and Checkpoints
Gauge: 18 sc and 20 rounds = 4 in (10.2 cm). Five mesh rounds = 2.25 in (5.7 cm) tall.
Make the base first and use it as your test piece. Every later count depends on it.
- Checkpoint 1 (after Rnd 6): 36 sts, about 2.5 in (6.4 cm) across.
- Checkpoint 2 (after Rnd 12): 72 sts, 5 in (12.7 cm) across and lying flat.
- Checkpoint 3 (after Rnd 21): wall about 3 in (7.6 cm) tall.
- Checkpoint 4 (after Rnd 22): wall 3.5 in (8.9 cm) tall.
If your base is larger than 5 in (12.7 cm), switch to a 3.75 mm hook. If it’s smaller, switch to a 4.5 mm hook. If the base ruffles, your tension is loose. If it cups, your tension is tight. Don’t change the stitch counts, because the mesh and scallop repeats depend on 72 stitches.
Basket Body
Base (lavender). Work in joined rounds. Join each round with a sl st to the first st, then ch 1 to begin the next round. The ch 1 doesn’t count as a stitch.
- Rnd 1: MR, 6 sc in ring. (6 sts)
- Rnd 2: Inc in each st around. (12 sts)
- Rnd 3: Sc 1, inc 6 times. (18 sts)
- Rnd 4: Sc 2, inc 6 times. (24 sts)
- Rnd 5: Sc 3, inc 6 times. (30 sts)
- Rnd 6: Sc 4, inc 6 times. (36 sts)
- Rnd 7: Sc 5, inc 6 times. (42 sts)
- Rnd 8: Sc 6, inc 6 times. (48 sts)
- Rnd 9: Sc 7, inc 6 times. (54 sts)
- Rnd 10: Sc 8, inc 6 times. (60 sts)
- Rnd 11: Sc 9, inc 6 times. (66 sts)
- Rnd 12: Sc 10, inc 6 times. (72 sts)
To keep the circle round instead of hexagonal, stagger the increases. On even rounds, work half of the plain stitches before the first increase.
Wall.
- Rnd 13 (lavender): Sc in BLO of each st around. (72 sts) The unused front loops form a ridge around the edge of the base, and the work now turns upward.
- Rnd 14 (lavender): Sc in each st around. (72 sts) Change to cream on the final pull-through of the join.
- Rnd 15 (cream): Sc in each st around. (72 sts)
- Rnd 16: Ch 3 (counts as dc), dc in next st, ch 1, skip 1 st, dc in next 2 sts, ch 1, skip 1 st 23 times, join to top of ch 3. (24 blocks: 48 dc + 24 ch-1 sps = 72 sts)
- Rnds 17–20: Ch 3, dc in next dc, ch 1, skip ch-1 sp, dc in next 2 dc, ch 1, skip ch-1 sp 23 times, join. (72 sts each round)
Each 2-dc block sits directly on the block below it, so the holes line up in straight vertical columns.
- Rnd 21 (cream): Ch 1, sc in each dc and 1 sc in each ch-1 sp around. (48 sc worked into dc + 24 sc worked into sps = 72 sts)
The wall now measures about 3 in (7.6 cm) from the base. Don’t fasten off. Go straight on to the border.
Head and Neck (cream)
Work in a continuous spiral, and mark the first st of each round.
- Rnd 1: MR, 6 sc. (6)
- Rnd 2: Inc around. (12)
- Rnd 3: Sc 1, inc 6 times. (18)
- Rnd 4: Sc 2, inc 6 times. (24)
- Rnds 5–10: Sc around. (24)
- Rnd 11: Sc 2, sc2tog 6 times. (18)
- Rnds 12–17: Sc around. (18)
- Rnd 18: Sc 5, inc 3 times. (21)
- Rnd 19: Sc around. (21)
- Rnd 20: Sc 6, inc 3 times. (24)
- Rnds 21–26: Sc around. (24)
Insert the safety eyes between Rnds 7 and 8, 5 sts apart. Stuff firmly, then fasten off with a long tail. The head is about 5.25 in (13.3 cm) long and 2.75 in (7.0 cm) wide when the open end is flattened.
Tail (lavender)
Work the tail in rows.
- Row 1: MR, ch 3 (counts as dc), 7 dc in ring, pull ring closed, turn. (8 sts)
- Row 2: Ch 3, dc in first st, 2 dc in each remaining st, turn. (16 sts)
- Row 3: Ch 3, dc in first st, 2 dc in next st, dc in next st, 2 dc in next st 7 times, turn. (25 sts)
- Row 4: Ch 1, sc in first st, skip 1, 7 dc in next st, skip 1, sc in next st 6 times. (6 shells: 42 dc + 7 sc = 49 sts)
Fasten off. The tail is a half-circle fan with six ribbed lobes, about 4 in (10.2 cm) wide and 2 in (5.1 cm) tall.
Comb, Beak and Wattle
Comb (lavender): Ch 8. Starting in the 2nd ch from hook: sl st in next ch, 6 dc in next ch, sl st in next ch, 6 dc in next ch, sl st in next ch, 6 dc in next ch, sl st in last ch. (3 lobes, 22 sts) Fasten off.
Beak (golden yellow): MR, 4 sc. (4) Rnd 2: Sc 1, inc twice. (6) Rnd 3: Sc 2, inc twice. (8) Fasten off and don’t stuff.
Wattle drop (lavender, make 2): Ch 6. Starting in 2nd ch from hook: sl st, sc, hdc, dc, 3 dc in last ch. Then work along the other side of the chain: dc, hdc, sc, sl st. (11 sts) Fasten off.
Medallions (make 2)
- Rnd 1 (cream): MR, ch 3 (counts as dc), 11 dc in ring, join. (12 sts)
- Rnd 2: Ch 3, dc in same st, 2 dc in each remaining st, join. (24 sts) Fasten off cream.
- Rnd 3 (lavender): Join in any st, ch 1, sc 1, inc 12 times, join. (36 sts)
- Rnd 4: Sl st loosely in BLO of each st around. (36 sts)
Each medallion is 2.25 in (5.7 cm) across.
Embroidery: With green, work three straight-stitch stems, each about 1 in (2.5 cm) long, fanning upward from one point near the bottom. Add two green lazy-daisy leaves at the base. With lavender, work five small lazy-daisy stitches up the top half of each stem.
Bow Cord (lavender)
Ch 61. Sl st in the back bump of the 2nd ch from hook and in each ch across. (60 sts, about 12 in or 30.5 cm) Tie the cord into a bow with 1 in (2.5 cm) loops, leaving one tail about 3 in (7.6 cm) long.
Border
Border gauge: Each scallop uses 6 sts, and the scallops are 0.5 in (1.3 cm) deep. Think of the 72-st rim as two halves, front and back, with 36 sts each.
Rnd 22 – Scallop rim (cream): Ch 1, sc in first st, skip 2 sts, 5 dc in next st, skip 2 sts, sc in next st 11 times, skip 2 sts, 5 dc in next st, skip 2 sts, join to first sc. (12 scallops: 12 sc + 60 dc)
Each repeat uses exactly 6 sts: 1 sc, 2 skipped, 1 shell base and 2 skipped. So 72 ÷ 6 = 12 scallops, with 6 on the front half and 6 on the back half. Each mesh repeat is 3 sts, so every scallop sits evenly over two mesh repeats. Fasten off.
Base braid (lavender): Turn the basket upside down. Join lavender in any of the front loops of Rnd 12 that Rnd 13 left unused. Work a surface braid into each front loop around: 72 sts total, 36 on each half. Join and fasten off. This makes the braided lavender line around the bottom edge.
Assembly
- Head: Flatten the open end. Pin it to the outside of the front wall, centered, with the lower edge on Rnd 16. Sew along the sides and the lower edge. The head rises about 2.25 in (5.7 cm) above the scallops.
- Face: Sew the beak between the eyes, one round below them. Sew the two wattle drops side by side just under the beak. Sew the comb across Rnds 1–3 on top of the head. Embroider three short black lashes above each eye.
- Tail: Center the straight edge of the fan on the outside of the back wall, 0.5 in (1.3 cm) below the scallops. Sew along that edge and 0.5 in (1.3 cm) up each side.
- Medallions: Sew one medallion on each side of the neck, centered over the mesh, about 0.5 in (1.3 cm) above the lavender band.
- Bow: Sew the bow’s knot to the neck just above the rim, then sew the pearl over the knot. Run the long tail down to the top of the right-hand medallion and tack it in place.
Final Blocking
- Weave in all ends securely.
- Spray the body lightly with water until it’s damp, not soaked.
- Fill the basket with a container about 5 in (12.7 cm) across wrapped in a towel.
- Straighten the mesh columns and gently shape each scallop.
- Pin the tail flat on a towel with the lobes evenly fanned, and pat the medallions flat.
- Let everything dry completely, for at least 12 hours, before removing the form.
Final Quality-Control Checklist
- The base is 5 in (12.7 cm) across and sits flat.
- The wall is 3.5 in (8.9 cm) tall and stands without slumping.
- 24 mesh columns run straight up the wall.
- 12 even scallops go around the rim.
- The base braid is continuous, with 72 stitches.
- The eyes are level and locked in place, and the beak is centered.
- The head stands upright and is sewn on firmly.
- The tail lobes are even and the tail is secure.
- Both medallions are flat, round and level with each other.
- The pearl is sewn on tightly, and there are no loose ends.
Troubleshooting
- Base ruffles: Your tension is loose or an increase was miscounted. Recount each round, or try a smaller hook.
- Base cups: Your tension is tight. Go up one hook size for the base only.
- Mesh holes drift diagonally: You’re working dc into the ch-1 sps. Work dc only into dc.
- Wall leans outward: Work Rnd 13 firmly, or use a smaller hook for Rnds 14–15.
- Scallops don’t fit: You don’t have 72 sts. Recount Rnd 21.
- Head flops forward: Add more stuffing to the neck and sew the head higher up the wall.
- Tail curls: Pin it flat while damp and let it dry.
Care
Spot clean or hand wash in cool water with mild soap. Reshape the basket and let it dry over a form. Don’t tumble dry.
Final Notes
The measurements build on each other in a short, reliable chain. A 72-st base at 18 sc per 4 in (10.2 cm) makes a 5 in (12.7 cm) circle. Those 72 sts carry straight up into 24 mesh blocks, become 72 sc again and divide into 12 scallops of 6 sts each. The wall reaches 3.5 in (8.9 cm), and the head brings the total height to about 6.5 in (16.5 cm). If the base is right, the rest will be too.
Happy crocheting!