

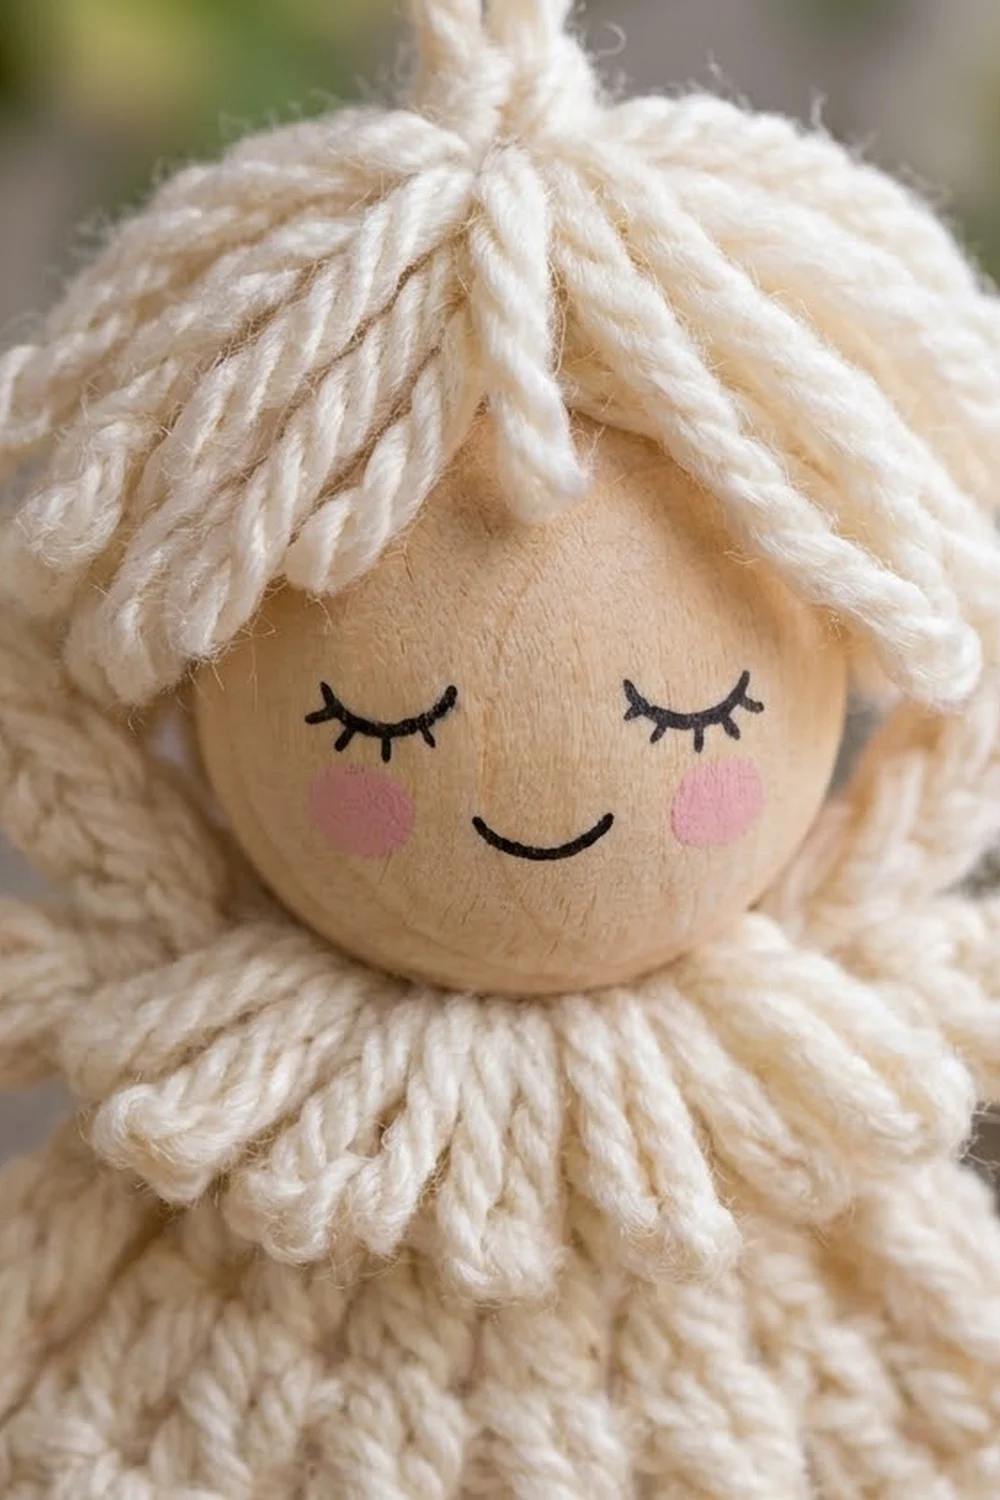
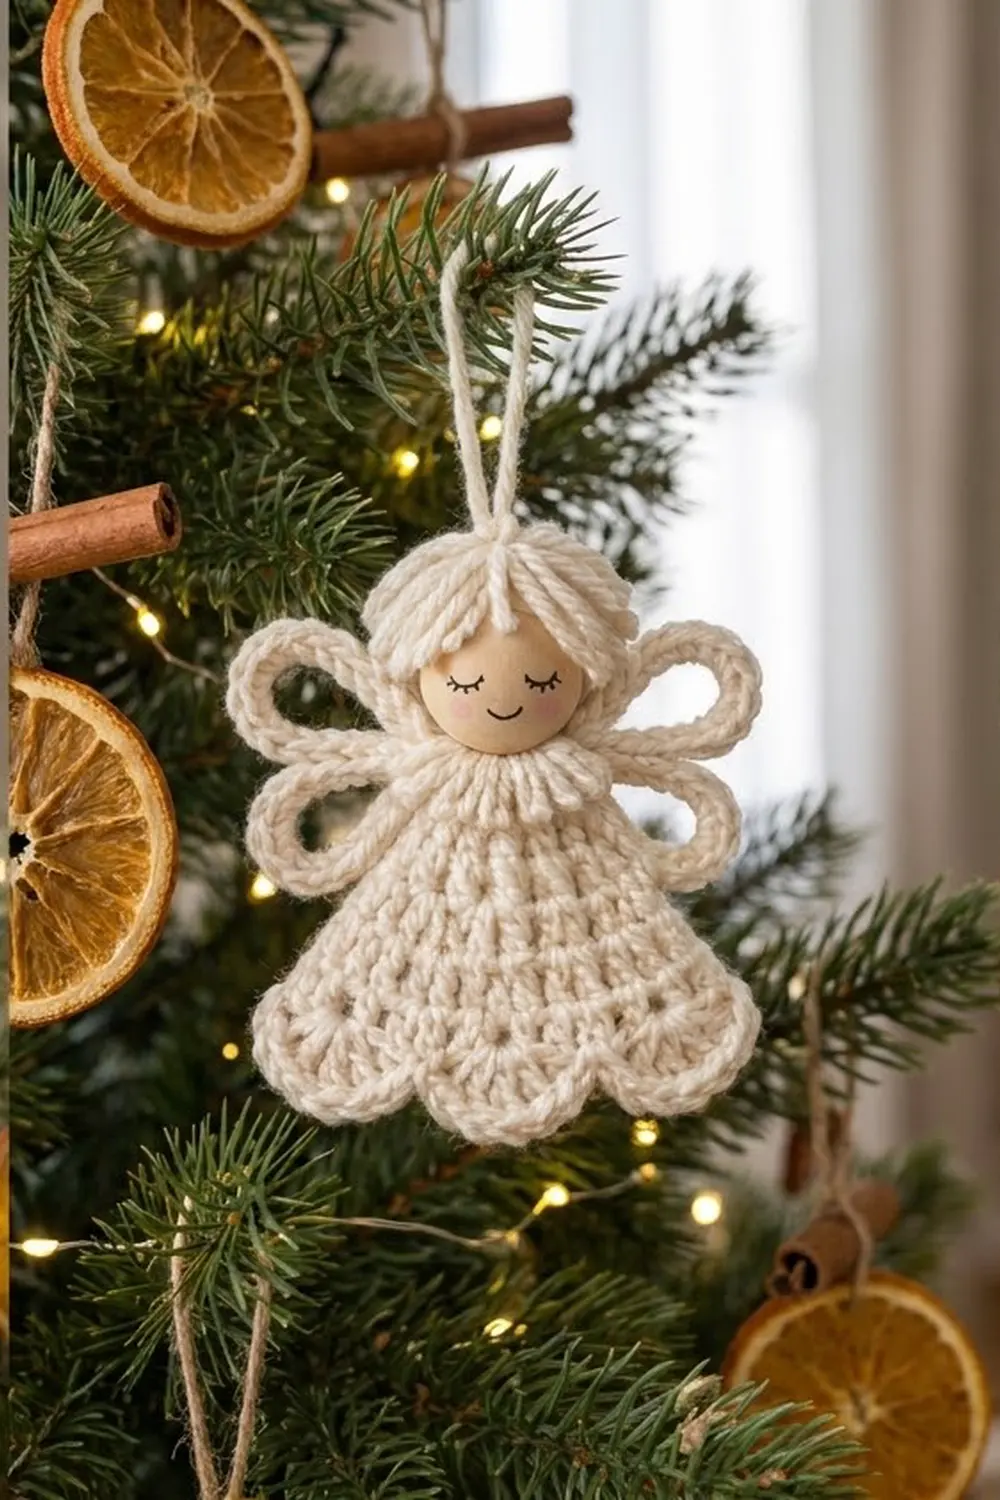
This little angel ornament is quick, soft and calm-looking. She has a flat, bell-shaped skirt of double crochet, a row of small eyelets, a scalloped hem, a ruffled loop collar and two open loop wings on each side. Her face is a wooden bead with closed eyes and rosy cheeks, framed by a soft mop of chain-loop hair.
The sample is worked in creamy off-white cotton for a classic heirloom look. The design also works well in pale beige, dusty pink or soft sage green, so you can make a matching set from leftover DK yarn. The pattern uses US crochet terms throughout.
The finished angel is about 4 in (10.2 cm) tall from hem to the top of the hair, and about 4 in (10.2 cm) wide across the scalloped hem and wings. The hanging loop adds about 1.25 in (3.2 cm).
You work the skirt flat from the top down in seven rows, increasing at each edge. The collar goes into the foundation chain. Then you make a small hair cap and two wing sets separately and assemble everything around the bead.
Finished Size and Construction
- Finished size: 4 in (10.2 cm) tall × 4 in (10.2 cm) wide, not counting the hanging loop
- Skill level: Easy
- Terminology: US
- Yarn weight: DK (#3), cotton or cotton blend
- Hook: 3.5 mm (E-4)
- Number of pieces: 1 ornament, made from 4 crocheted parts (skirt with collar, hair cap, 2 wing sets) plus 1 wooden bead
- Layout: Single standing figure: hair and head on top, collar, wings at each side of the neck, skirt below
- Skirt size before scallops: 3.8 in (9.7 cm) wide at Row 6 × 2.4 in (6.1 cm) tall
- Scallop (border) depth: 0.5 in (1.3 cm)
- Finished skirt: about 4 in (10.2 cm) wide at the hem × 2.9 in (7.4 cm) tall
Materials
Yarn: Use a smooth, mercerized or matte DK cotton. Cotton holds the scallops and wing loops crisply and blocks flat. Avoid fuzzy acrylic, because the halo blurs the eyelets and the loop hair.
- Cream (main color): 10 g / 25 m (27 yd)
- Optional colorways: the same amount in beige, dusty pink or sage green, if you want to make a set
These quantities include a margin of about 30% for your gauge swatch and assembly tails.
Tools and notions:
- 3.5 mm (E-4) crochet hook
- 1 natural wooden bead, 20 mm (0.8 in) round, with a hole of at least 3 mm
- Fine-tip black permanent marker, and pink acrylic paint or blush for the cheeks
- Tapestry needle
- Scissors
- 2 stitch markers
- Rustproof pins and a foam blocking mat
- Spray bottle of water
- Optional: a dot of clear craft glue
Abbreviations (US Terms)
- ch – chain
- sl st – slip stitch
- sc – single crochet
- dc – double crochet
- sk – skip
- st(s) – stitch(es)
- sp – space
- MR – magic ring
- FLO / BLO – front loop only / back loop only
- rep – repeat
Special stitch – Shell scallop: 7 dc worked into the same stitch.
Turning chain: In the skirt, the ch-3 at the start of each row counts as 1 dc. On the next row, the top of that ch-3 is the last stitch.
Gauge and Checkpoints
Gauge: 18 dc and 10 rows = 4 in (10.2 cm). That’s 4.5 dc per inch and 0.4 in (1.0 cm) per row.
Make one skirt first and treat it as your gauge test. Check it at these points:
- After Row 1: 7 dc, about 1.6 in (4.1 cm) wide
- After Row 4: 13 dc, about 2.9 in (7.4 cm) wide at the bottom edge, 1.6 in (4.1 cm) tall
- After Row 6: 17 sts, about 3.8 in (9.7 cm) wide at the bottom edge, 2.4 in (6.1 cm) tall
- After Row 7: about 4 in (10.2 cm) wide across the scallops, 2.9 in (7.4 cm) tall
If your skirt is too big: go down to a 3.25 mm (D-3) hook. If the rows alone are too tall, pull up less on each dc.
If your skirt is too small: go up to a 3.75 mm (F-5) hook.
A difference of 0.25 in (0.6 cm) is fine for an ornament. A bigger difference will make the bead look too large or too small.
Skirt
The skirt is worked flat in rows from the neckline down. Each row adds 1 stitch at each end.
Row 1: Ch 9. Dc in 4th ch from hook (the skipped ch-3 counts as 1 dc) and in each ch across. Turn. (7 dc)
Row 2: Ch 3 (counts as dc), dc in first st. Dc in each st across to the last st. 2 dc in top of turning ch. Turn. (9 dc)
Row 3: Rep Row 2. (11 dc)
Row 4: Rep Row 2. (13 dc)
Checkpoint: the bottom edge measures about 2.9 in (7.4 cm).
Row 5 (eyelet row): Ch 3, dc in first st, dc in next 2 sts. Ch 1, sk next st, dc in next 2 sts. Rep from * 2 more times. 2 dc in top of turning ch. Turn. (15 sts: 12 dc + 3 ch-1 sps)
This makes three evenly spaced eyelets, with exactly 2 dc between each pair and 4 dc at each end. This row uses all 13 stitches of Row 4: 1 + 2 + 1 + 2 + 1 + 2 + 1 + 2 + 1 = 13.
Row 6: Ch 3, dc in first st. Dc in each dc and in each ch-1 sp across to the last st. 2 dc in top of turning ch. Turn. (17 dc)
Checkpoint: the bottom edge measures 3.8 in (9.7 cm), and the skirt is 2.4 in (6.1 cm) tall.
Don’t fasten off. Continue straight into the scalloped hem below (the Border section).
Collar
The collar is a ruffle of chain loops worked across the top of Row 1, into the free loops of the foundation chain.
Turn the skirt upside down so the foundation chain is on top. Join yarn with a sl st in the free loop at the base of the first Row 1 stitch. There are 7 free loops across, including the one at the base of the beginning ch-3.
Collar row: Ch 1. (Sc, ch 3, sc, ch 3) in the same free loop, move to the next free loop. Rep from * across all 7 free loops. Sl st in the last free loop. Fasten off and leave a 6 in (15.2 cm) tail. (14 sc and 14 ch-3 loops)
Two loops in each of the 7 free loops makes the collar ruffle and stand slightly forward, as in the photo.
Hair Cap
Rnd 1: MR, 8 sc into ring. Pull tight and sl st to first sc. (8 sc)
Rnd 2 (long loops, FLO): Working in front loops only, ch 7, sl st in FLO of the next st. Rep from * around. (8 ch-7 loops)
Rnd 3 (short loops, BLO): Working in the unused back loops of Rnd 1, ch 5, sl st in BLO of the next st. Rep from * around. (8 ch-5 loops)
Fasten off and leave a 10 in (25.4 cm) tail.
The long loops fall over the sides and back of the bead. The short loops form the fringe across the forehead.
Wing Sets (make 2)
Each set has a larger upper loop and a smaller lower loop that share one base.
Upper wing: Ch 12, sl st in first ch to form a ring.
Lower wing: Ch 9, sl st in the same first ch.
Edging: Ch 1. Work 18 sc into the upper ring (around the chains, not into them). Sl st in the base ch. Work 14 sc into the lower ring. Sl st in the base ch. Fasten off and leave an 8 in (20.3 cm) tail. (32 sc total: 18 on the upper loop, 14 on the lower loop)
Packing sc around the chain ring gives each wing a thick, braided-looking outline with an open center. The upper loop measures about 1.2 in (3.0 cm) long and the lower loop about 1 in (2.5 cm).
Head and Assembly
- Paint the face. Draw two small downward arcs for closed eyes with the fine marker, about 0.25 in (0.6 cm) apart. Add a tiny smile. Dab pink cheeks with a dry brush. Let it dry completely.
- Attach the head. Thread the collar tail onto the tapestry needle. Pass it up through the center of the collar, through the bead hole from bottom to top, and through the center of the hair cap.
- Make the hanging loop. With the same tail still on top, ch 20 with your hook. Then sl st back into the center of the hair cap to close the loop, which measures about 1.25 in (3.2 cm). Take the tail back down through the bead and secure it on the back of the skirt.
- Arrange the hair. Use the hair cap tail to tack 2–3 long loops lightly to the sides of the bead. The bangs should sit just above the eyes. Add a dot of glue under the cap if you like.
- Attach the wings. Place one wing set behind each side of the neck, with the base at the top corner of Row 1. Angle the upper loop up and out and the lower loop down and out. Sew the base securely through Rows 1–2 from the back with the wing tail.
- Weave in all ends on the back.
Border (Scalloped Hem)
The border is worked on the bottom edge only. The sides are left as their natural row edges, which keeps the bell shape clean.
Border gauge: each scallop covers 4 skirt stitches, or about 0.9 in (2.3 cm), and stands about 0.5 in (1.3 cm) deep.
Row 7 (scallop row): Continuing from Row 6, ch 1, sc in first st. Sk next st, 7 dc in next st, sk next st, sc in next st. Rep from * 3 more times. The final sc lands in the top of the turning ch. Fasten off. (4 scallops: 5 sc + 28 dc = 33 sts)
Count per side:
- Hem: 17 sts worked → 4 scallops
- Left side: no border stitches
- Right side: no border stitches
- Top: the collar row takes the place of a border here (14 loops, worked above)
Why the math works: each scallop repeat uses 4 stitches (sk 1, shell 1, sk 1, sc 1), and the row starts with 1 sc. So 1 + (4 × 4) = 17, which is exactly Row 6’s count. That’s why the eyelet row and Row 6 are built to finish on 17 stitches. The 7-dc shells flare each repeat a little beyond its 0.9 in (2.3 cm) base, which turns the 3.8 in (9.7 cm) Row 6 edge into a hem about 4 in (10.2 cm) wide.
Final Blocking
- Lightly mist the whole angel with water. Keep the bead dry if your paint isn’t sealed.
- Lay her face up on the blocking mat.
- Pin the top corners of Row 1 at 1.6 in (4.1 cm) apart.
- Pin the outer points of Row 6 at 3.8 in (9.7 cm) apart, and check that the skirt is 2.4 in (6.1 cm) tall at the center.
- Pin each scallop into a smooth round curve. The hem should span about 4 in (10.2 cm).
- Shape the wing loops into open teardrops and pin through their centers.
- Fluff the collar loops forward with your fingers.
- Let her dry completely, then remove the pins.
Final Quality-Control Checklist
- [ ] The skirt has exactly 7 rows: 7, 9, 11, 13, 15, 17 stitches, then the scallop row
- [ ] There are 3 eyelets in Row 5, evenly spaced and centered
- [ ] There are 4 even scallops, with an sc at each outer corner
- [ ] The collar has 14 loops and sits evenly across the neckline
- [ ] The bead is centered and the face points straight forward
- [ ] The hair covers the top of the bead and the bangs sit above the eyes
- [ ] The wings match on both sides: upper loop up, lower loop down
- [ ] The hanging loop is about 1.25 in (3.2 cm) and firmly secured
- [ ] The finished size is about 4 in (10.2 cm) × 4 in (10.2 cm)
- [ ] All ends are woven in on the back
Troubleshooting
The skirt curls up at the edges. Your turning chains are too tight, or the yarn is very springy. Loosen the ch-3, and wet-block firmly.
The eyelets are off-center. Recount Row 4. It must have 13 stitches before you start Row 5.
The scallops don’t fit evenly. Row 6 must have exactly 17 stitches. If you have 16 or 18, rip back and redo the increases.
The scallops look ruffled or wavy. Your shells are too loose. Use 6 dc per shell, or a 3.25 mm (D-3) hook for Row 7 only.
The wing loops collapse. Add 1–2 more sc around the ring so the edging packs more tightly, or block with a pin through the center.
The bead wobbles. Pass the tail through the bead a second time before you make the hanging loop.
Care
Spot clean with mild soap and cool water, then reshape and dry flat. Don’t soak the angel if the bead’s paint is unsealed.
Final Notes
Everything in this angel follows from one measurement chain. Gauge of 4.5 dc per inch gives Row 1 at 1.6 in (4.1 cm), Row 4 at 2.9 in (7.4 cm) and Row 6 at 3.8 in (9.7 cm). The 17 stitches of Row 6 divide exactly into four 4-stitch scallops, so the hem finishes at about 4 in (10.2 cm), and the 20 mm bead, hair and collar bring the total height to 4 in (10.2 cm). Check those numbers as you go and every angel in your set will match.
Happy crocheting!