

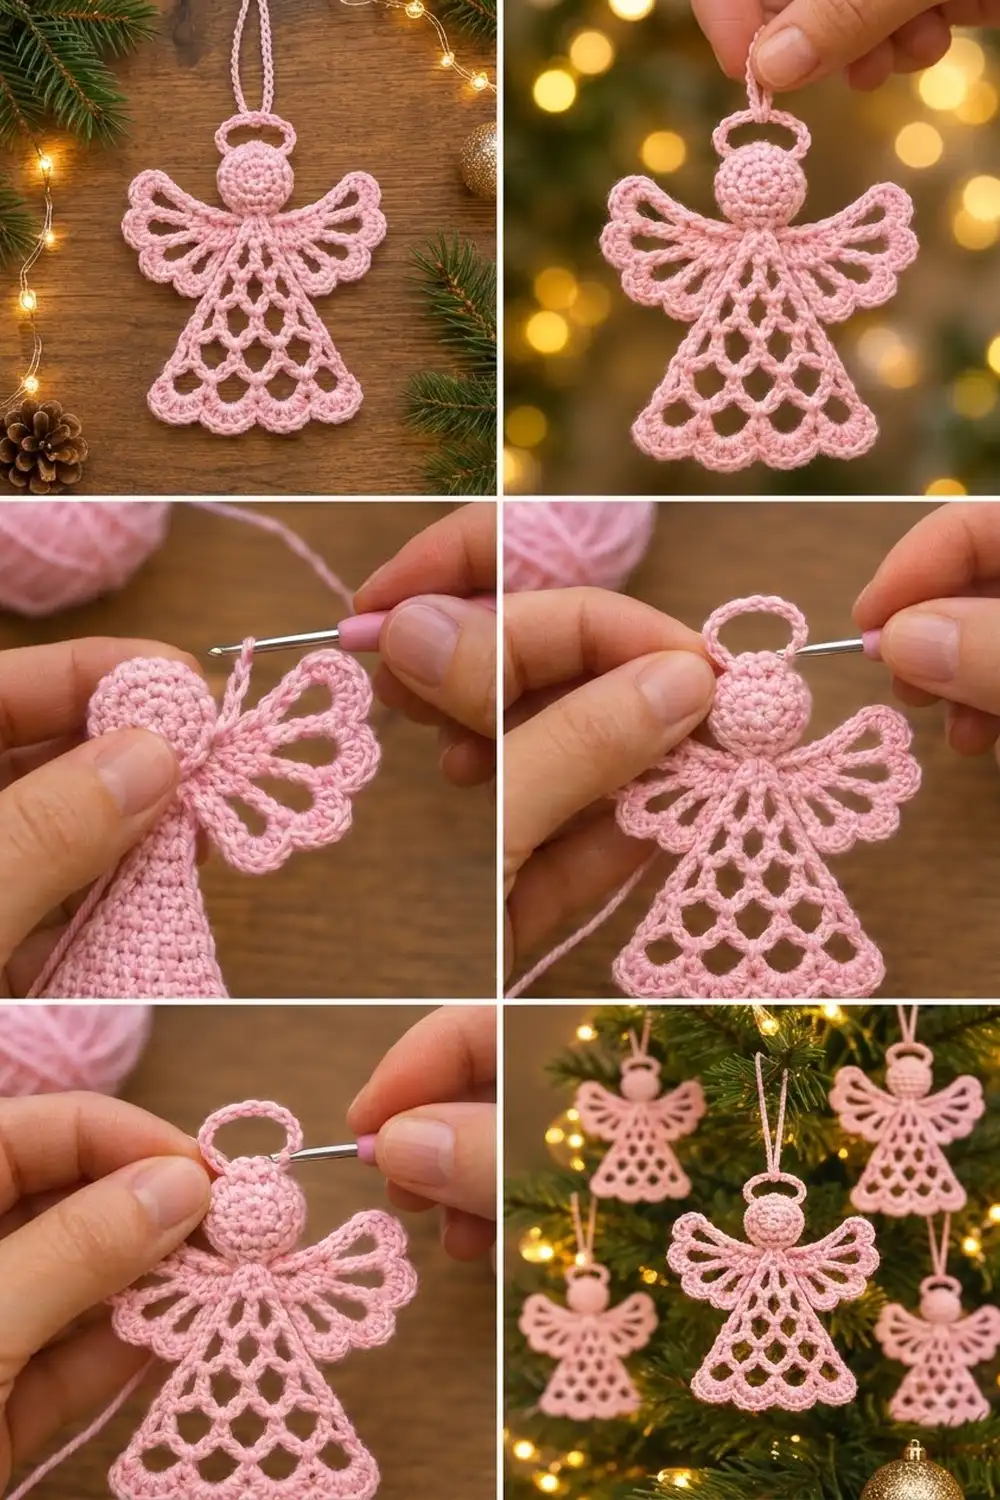
This little angel is a flat, lacy Christmas ornament in one soft shade of light pink. She has a round solid head, a small ring halo with a hanging loop, and two fan-shaped wings with three open petals each. Her triangular skirt is filled with open chain mesh and ends in a row of rounded scallops.
The style is airy and vintage, like the thread angels on old family trees. Sport-weight cotton makes her quick to work and helps her hold her shape. The single color keeps the look gentle. Make one as a gift tag or a whole flock for the tree.
The pattern uses US crochet terms. The finished angel is about 4.75 in (12.1 cm) tall from the top of the halo to the bottom of the scallops. She is about 4 in (10.2 cm) wide across the wings. The hanging loop is extra.
Construction is simple and all in one piece. First you work the head in the round and add the halo and hanging loop at the top. Then you work the skirt top-down in rows from the bottom of the head and add one wing to each shoulder. A border round finishes the skirt sides and forms the scalloped hem.
Finished Size and Construction
- Finished size: 4.75 in (12.1 cm) tall x 4 in (10.2 cm) wide across the wings
- Skill level: Advanced beginner
- Terminology: US crochet terms
- Yarn weight: Sport weight (#2), cotton or cotton blend
- Hook: 2.5 mm (US B/1 or C/2)
- Number of pieces: 1 (worked continuously, no sewing of parts)
- Layout: Single ornament: halo on top, then the head, wings at the shoulders and the skirt below
- Piece size: Head 1.25 in (3.2 cm) across; skirt 3.5 in (8.9 cm) wide at the hem
- Size before border: Skirt 3.25 in (8.3 cm) wide at Row 7 and 2.5 in (6.4 cm) long from the neck
- Border depth: About 0.4 in (1.0 cm) at the hem, about 0.15 in (0.4 cm) along the skirt sides
Materials
Choose a smooth, mercerized or combed cotton in sport weight. Cotton shows the open mesh clearly and blocks crisp. Avoid fuzzy acrylic or mohair, which hide the holes and let the wings droop.
- Light pink, sport weight cotton: 8 g, about 25 m (27 yd) per angel
This amount includes about 20 percent extra for your gauge check, weaving in ends and the hanging loop. One 50 g ball is enough for a set of six.
Tools:
- 2.5 mm crochet hook
- Tapestry needle
- Scissors
- Stitch marker
- Blocking mat or folded towel and rust-proof pins
- Spray bottle with water, plus optional fabric stiffener or starch
Abbreviations (US Terms)
- ch – chain
- sl st – slip stitch
- sc – single crochet
- hdc – half double crochet
- dc – double crochet
- inc – 2 sc in the same stitch
- sp(s) – space(s)
- sk – skip
- st(s) – stitch(es)
- MR – magic ring
Special stitch – Scallop: (sc, hdc, 5 dc, hdc, sc) all worked into the same ch-5 space. One Scallop = 9 sts.
Gauge and Checkpoints
Gauge: 6 sc and 7 sc rows = 1 in (2.5 cm) with a 2.5 mm hook.
Make one angel first and measure it at each checkpoint before you start a batch. Small ornaments are forgiving, but loose gauge makes the mesh floppy and tight gauge makes the wings cup.
- After head Rnd 4: 1.25 in (3.2 cm) across
- After halo: ring about 0.75 in (1.9 cm) across
- After skirt Row 2: yoke about 0.8 in (2.0 cm) wide
- After skirt Row 7: 3.25 in (8.3 cm) wide, 2.5 in (6.4 cm) long from the neck
- After wings: 4 in (10.2 cm) across, each wing about 1.6 in (4.1 cm) long
- After border: 4.75 in (12.1 cm) tall, hem 3.5 in (8.9 cm) wide
If your head is larger than 1.25 in (3.2 cm), go down to a 2.25 mm hook. If it is smaller than 1.1 in (2.8 cm), go up to a 2.75 mm hook. Fix your gauge at the head stage, because every later section depends on it.
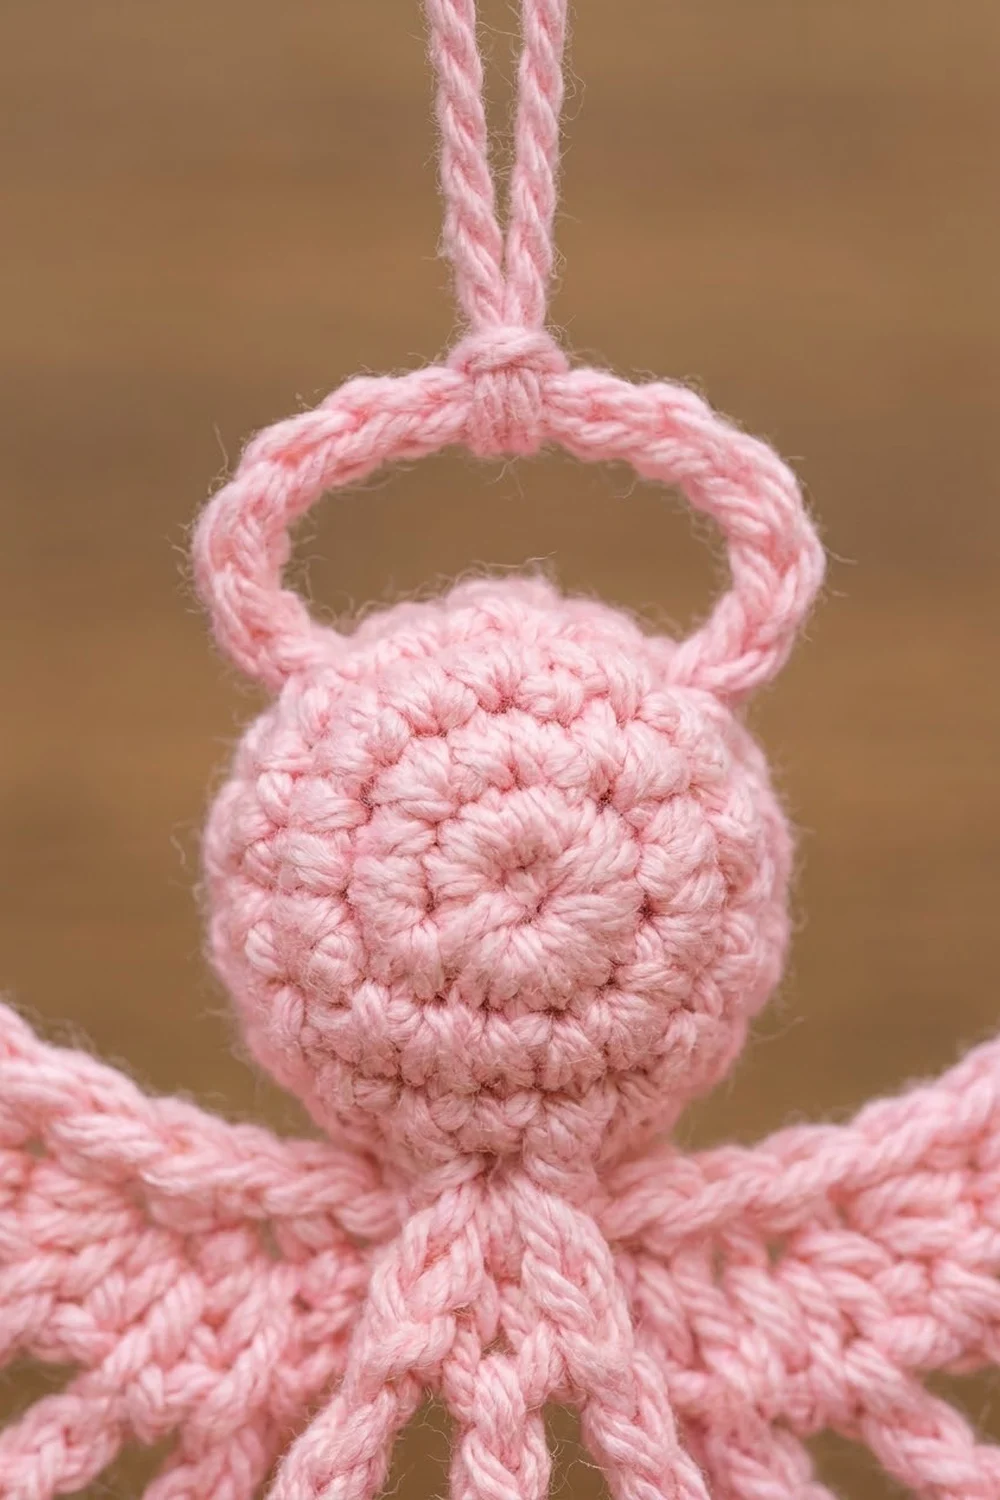
Head
Worked in joined rounds. Do not turn.
Rnd 1: MR, ch 1, 6 sc in ring, sl st to first sc. (6 sts)
Rnd 2: Ch 1, inc in each st around, sl st to first sc. (12 sts)
Rnd 3: Ch 1, (sc in next st, inc) 6 times, sl st to first sc. (18 sts)
Rnd 4: Ch 1, (sc in next 2 sts, inc) 6 times, sl st to first sc. (24 sts)
Fasten off, leaving a short tail. Pull the magic ring tightly closed and weave in the tail on the back.
Lay the head flat and put a marker in the stitch at the very top. Count 12 sts around from the marker to find the bottom center stitch. The 3 bottom stitches are the bottom center stitch and the stitch on each side of it.
Checkpoint: the head is 1.25 in (3.2 cm) across and lies flat without cupping or ruffling.
Halo and Hanging Loop
Halo: Join yarn with a sl st in the marked top stitch. Ch 12, then sl st in the same top stitch to form a ring.
Work 18 sc into the ch-12 ring, covering the chain completely. Sl st in the marked top stitch of the head. (18 sc)
Hanging loop: Sl st into the 9th sc of the halo, at the top of the ring. Ch 30, sl st in the same sc. Fasten off and weave in the ends.
The halo should stand upright above the head, about 0.75 in (1.9 cm) across. The ch-30 loop folds to about 1.75 in (4.4 cm).
Skirt
Worked top-down in turned rows from the bottom of the head. Each row adds one ch-5 loop, which builds the triangular mesh.
Row 1: With the right side facing, join yarn in the first of the 3 bottom stitches of the head. Ch 1, sc in the same st and in the next 2 sts. Turn. (3 sc)
Row 2: Ch 1, 2 sc in the first st, sc in the next st, 2 sc in the last st. Turn. (5 sc)
Checkpoint: the yoke is about 0.8 in (2.0 cm) wide and forms a short solid neck under the head.
Row 3: Ch 1, sc in the first st, (ch 5, sk 1 st, sc in the next st) 2 times. Turn. (2 ch-5 loops, 3 sc)
Row 4: Ch 5, sc in the first ch-5 sp, ch 5, sc in the next ch-5 sp, ch 5, sc in the same (last) sp. Turn. (3 ch-5 loops)
Row 5: Ch 5, sc in the first ch-5 sp, (ch 5, sc in the next ch-5 sp) 2 times, ch 5, sc in the same (last) sp. Turn. (4 ch-5 loops)
Row 6: Ch 5, sc in the first ch-5 sp, (ch 5, sc in the next ch-5 sp) 3 times, ch 5, sc in the same (last) sp. Turn. (5 ch-5 loops)
Row 7: Ch 5, sc in the first ch-5 sp, (ch 5, sc in the next ch-5 sp) 4 times, ch 5, sc in the same (last) sp. (6 ch-5 loops)
Fasten off and weave in the ends.
How the growth works: in each mesh row, the turning ch-5 makes 1 loop. The repeats into the remaining spaces make one fewer loop than the row below. The final “ch 5, sc in the same sp” adds 1 more. So each row has exactly 1 more loop than the row before: 2, 3, 4, 5, 6.
Checkpoint: Row 7 is 3.25 in (8.3 cm) wide and the skirt is 2.5 in (6.4 cm) long from the neck. The sides should form straight diagonal lines.
Wings (Make 2, Worked onto the Body)
Each wing is three open petal loops anchored at the shoulder and outlined with shaped stitches.
Right wing, Row 1: With the right side facing, join yarn with a sl st around the row-end of skirt Row 2 on the right side. Ch 1, sc in the same row-end.
- Lower loop: ch 6, sc in the same row-end.
- Middle loop: ch 9, sc in the same row-end.
- Upper loop: ch 12, sl st around the row-end of Row 1, just under the head.
(3 chain loops: ch-12, ch-9, ch-6)
Right wing, Row 2: Work back into the loops, starting with the upper loop.
- Into the ch-12 loop: 2 sc, 2 hdc, 8 dc, 2 hdc, 2 sc. (16 sts)
- Into the ch-9 loop: 2 sc, 2 hdc, 5 dc, 2 hdc, 2 sc. (13 sts)
- Into the ch-6 loop: 2 sc, hdc, 4 dc, hdc, 2 sc. (10 sts)
Sl st around the row-end of Row 2. Fasten off. (39 sts total)
Each loop holds more stitches than it has chains, so the outline fans outward and the open centers stay visible. The dc in the middle of each loop form the rounded, scalloped wing tips.
Left wing: Work the same way on the left side, joining at the row-end of Row 2 on the left side.
Checkpoint: each wing is about 1.6 in (4.1 cm) long and the angel is 4 in (10.2 cm) across the wings. The upper petal is the largest and points up and out.
Border
The border is one round that outlines both skirt sides and forms the scalloped hem. It starts and ends just below the wings, so it never crowds them.
Border gauge: 3 sc in each side-edge ch-5 space, 1 sc in each solid row-end and 1 Scallop (9 sts) in each hem loop.
Border Rnd: With the right side facing, join yarn around the row-end of Row 3 on the left side, just below the left wing.
- Left side: Ch 1, 1 sc around the row-end of Row 3, then 3 sc in each outer ch-5 space of Rows 4, 5 and 6. (1 + 9 = 10 sc)
- Hem: 1 Scallop in each of the 6 ch-5 loops of Row 7. (6 x 9 = 54 sts)
- Right side: 3 sc in each outer ch-5 space of Rows 6, 5 and 4, then 1 sc around the row-end of Row 3. (9 + 1 = 10 sc)
Sl st into the row-end of Row 2 on the right side, under the wing. Fasten off. (74 sts total: 10 + 54 + 10)
Why the math works: each mesh row is about 0.45 in (1.1 cm) tall along the diagonal side. At this gauge, 3 sc cover almost exactly that length, so the side edge stays flat. Row 3 is a solid sc row, so its row-end takes 1 sc. The two outer loops of Row 7 sit at the hem corners and get Scallops, not side sc. That way each corner is counted only once and both sides match at 10 sc.
Checkpoint: the hem is 3.5 in (8.9 cm) wide and the angel is 4.75 in (12.1 cm) tall from the top of the halo to the scallop tips.
Final Blocking
- Weave in all remaining ends on the wrong side, following the stitches, before you block.
- Spray the angel evenly with water until damp but not dripping. For a firmer ornament, dip it in diluted fabric stiffener and squeeze out the excess.
- Lay it face up on a blocking mat.
- Pin the top of the halo and the center of the hem so the angel measures 4.75 in (12.1 cm) tall.
- Pin each wing tip so the angel is 4 in (10.2 cm) across.
- Pin the tip of every hem scallop, keeping the hem 3.5 in (8.9 cm) wide.
- Open each mesh loop and wing petal with a fingertip so the holes are even.
- Let it dry completely, at least 6 hours, before you unpin it.
Final Quality-Control Checklist
- Head is flat and 1.25 in (3.2 cm) across, with 24 sts in Rnd 4
- Halo has 18 sc and sits centered at the top
- Hanging loop is secure and centered on the halo
- Skirt has 2, 3, 4, 5 and 6 loops in Rows 3 to 7
- Each wing has 16, 13 and 10 sts in its three petals
- Both wings are the same size and angle
- Border has 10 sc on each side and 6 Scallops at the hem
- Finished size is 4.75 in (12.1 cm) by 4 in (10.2 cm)
- All ends are woven in and invisible from the front
Troubleshooting
The head cups like a bowl. Your tension is tight. Go up a hook size or work the increases more loosely.
The head ruffles. You probably added an extra increase. Recount each round against 6, 12, 18 and 24.
The skirt pulls to one side. Check that every mesh row ends with “ch 5, sc in the same sp.” If you miss this step, the row loses a loop.
The mesh looks lopsided. Make sure you sc into each space, not into the chain stitches.
The wings curl forward. Block them flat with stiffener, or make each wing loop one chain longer.
The scallops flip up. Work the border a little looser, or use 4 dc instead of 5 dc in each Scallop and block again.
The side edge waves. If your rows are short, use 2 sc instead of 3 in each side space.
Care
Hand wash in cool water with mild soap, press the water out in a towel and block flat again. Store flat or hanging, out of direct sunlight, so the pink doesn’t fade.
Final Notes
The whole angel follows one chain of measurements. The 1.25 in (3.2 cm) head sets the width of the yoke. Five mesh rows grow the skirt to 3.25 in (8.3 cm). The three-petal wings bring the width to 4 in (10.2 cm). The border adds the side edging and 6 Scallops, for a 3.5 in (8.9 cm) hem and a finished height of 4.75 in (12.1 cm). Check your gauge at the head and count the loops in every skirt row, and the rest falls into place.
Happy crocheting!