

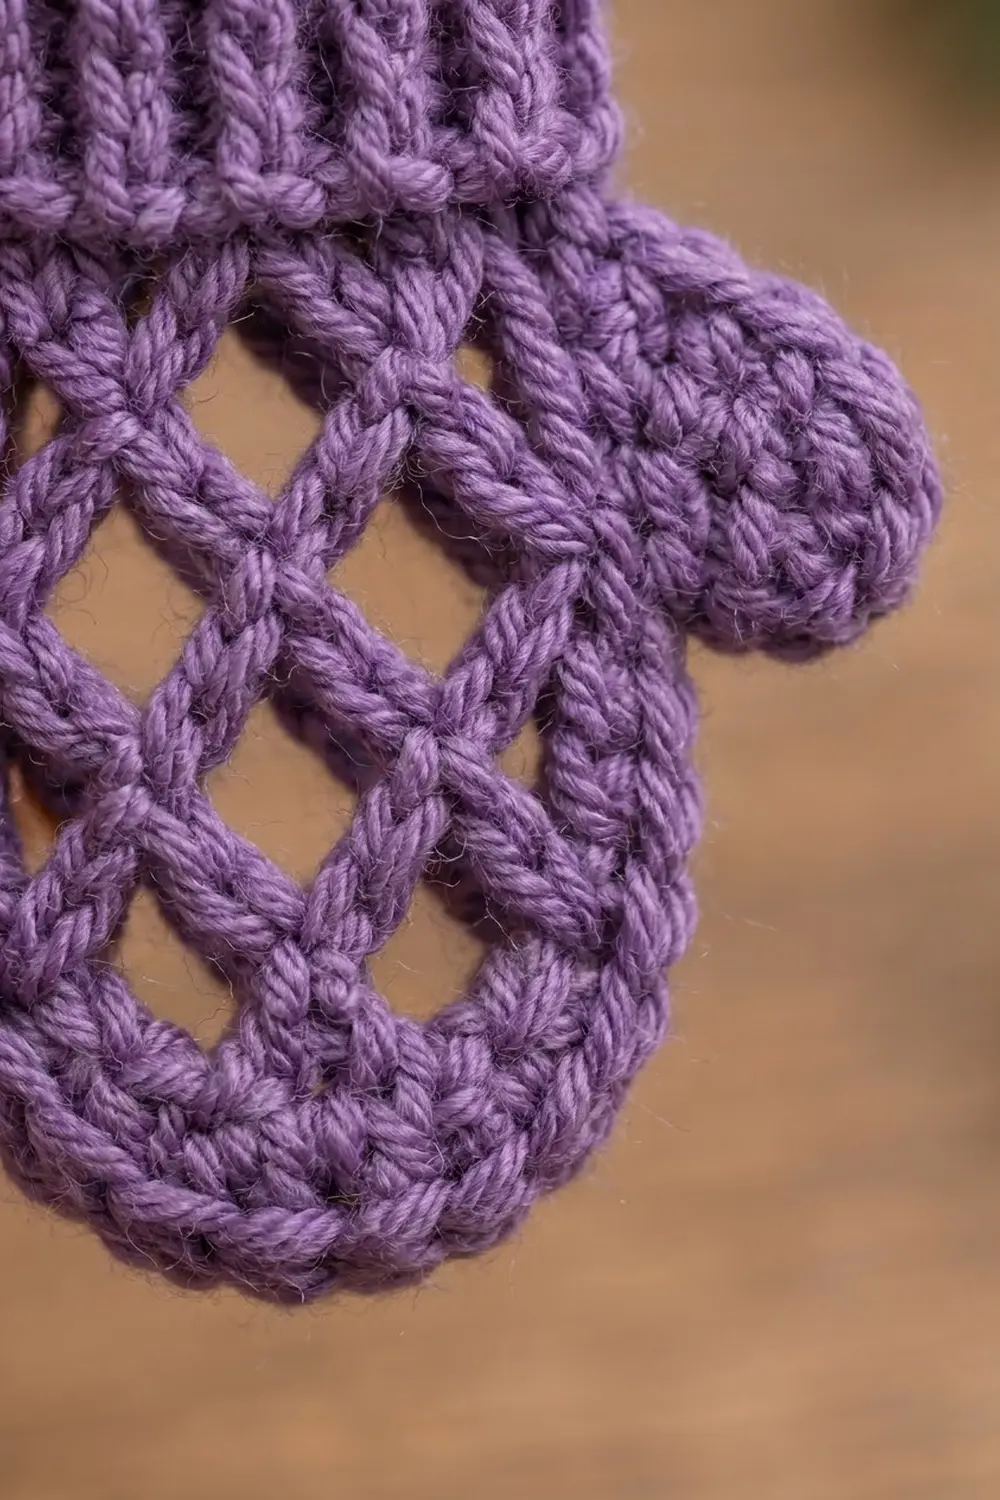
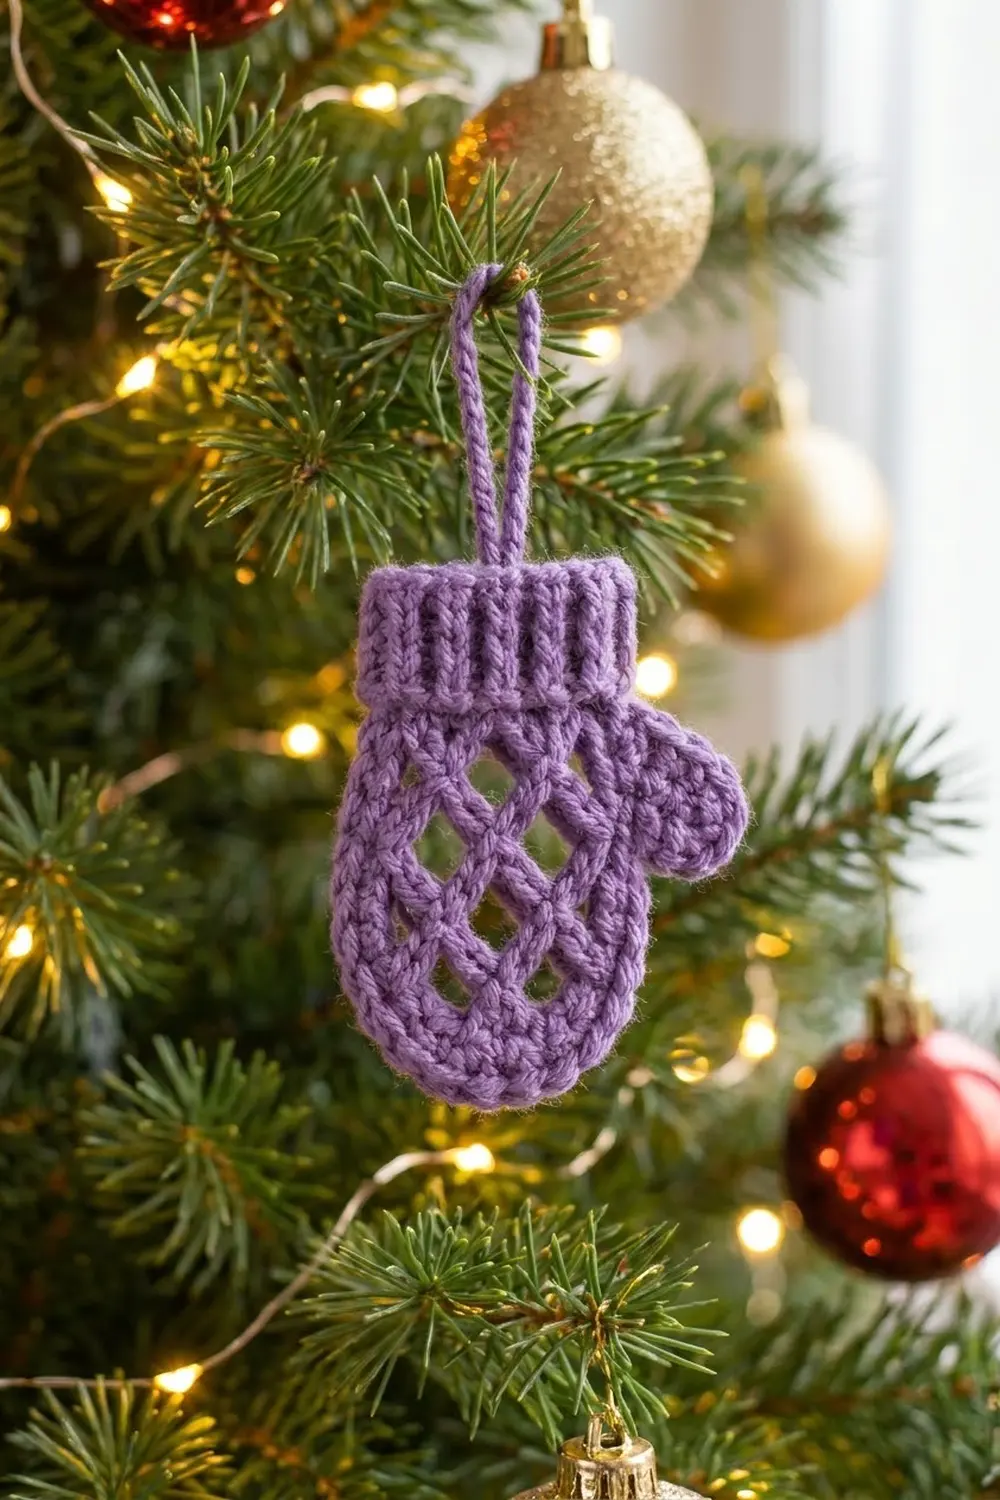
This small mitten is a flat ornament made in one piece. It has a ribbed cuff, an open diamond lattice body, a solid rounded outline and a short thumb that tips out to the side. A slim chain loop at the top of the cuff lets you hang it on a tree branch, a gift bag or a window hook.
The sample uses one soft lavender-purple yarn, so the texture does all the work. The cuff has crisp vertical ribs, the palm has airy chain-mesh diamonds, and a firm single crochet frame stops the lattice from stretching out of shape.
The pattern uses US crochet terms. The finished ornament is about 4.2 in (10.7 cm) wide including the thumb. It is 4.6 in (11.7 cm) tall from the top of the cuff to the bottom edge, not counting the hanging loop.
There are no seams to sew. Here is the order of work:
1. Crochet the cuff sideways in back-loop-only rows.
2. Work the lattice body down from the long edge of the cuff.
3. Add two rows of border around the sides and bottom.
4. Crochet the thumb directly onto the border.
5. Finish with a slip-stitch top edge and the hanging loop.
Finished Size and Construction
- Finished size: 4.2 in (10.7 cm) wide x 4.6 in (11.7 cm) tall, plus a 1.5 in (3.8 cm) hanging loop
- Skill level: Easy-intermediate
- Terminology: US crochet terms
- Yarn weight: DK / light worsted (#3)
- Hook: 3.5 mm (E-4)
- Number of pieces: 1 (single flat mitten, no seams)
- Layout: Cuff at top, lattice body below, thumb on the right edge
- Cuff size: 2.2 in (5.6 cm) wide x 1 in (2.5 cm) tall
- Body panel before border: 2.6 in (6.6 cm) wide x 3.2 in (8.1 cm) tall
- Border depth: 0.4 in (1.0 cm), two rows of single crochet
Materials
Choose a smooth, tightly plied DK or light worsted yarn. Acrylic, cotton blend and wool blend all work. A smooth yarn shows the ribs and the lattice strands most clearly. Avoid fuzzy or brushed yarns, because they blur the diamond openings.
- Lavender / medium purple: 15 g, about 35 m (38 yd)
This amount includes a margin of about 25 percent for checking gauge and for tails. One 100 g ball makes six ornaments with yarn to spare.
Tools:
- 3.5 mm (E-4) crochet hook
- Tapestry needle
- Scissors
- Stitch markers (2)
- Ruler or tape measure
- Pins, a blocking mat or folded towel, and a spray bottle
Abbreviations (US Terms)
- ch – chain
- sl st – slip stitch
- sc – single crochet
- dc – double crochet
- sc2tog – single crochet 2 together
- BLO – back loop only
- sp – space
- st(s) – stitch(es)
- RS / WS – right side / wrong side
- [ ] – repeat the instructions inside the brackets as directed
Special stitch – sc BLO: Insert the hook under the back loop only of the stitch (the loop farthest from you). Yarn over and pull up a loop, then yarn over and pull through both loops. When every row is worked this way, each row forms a raised ridge, and these ridges become the vertical ribs on the cuff.
Gauge and Checkpoints
Gauge: 5 sc and 5 rows = 1 in (2.5 cm) in plain sc. In BLO rows the ribbing is denser, at 6 rows = 1 in (2.5 cm).
The ornament is small enough to act as its own swatch. Make the cuff first and measure it before you go on.
Checkpoints:
- Cuff (after Row 13): 2.2 in (5.6 cm) wide x 1 in (2.5 cm) tall.
- Body panel (after Row 9): 2.6 in (6.6 cm) wide x 3.2 in (8.1 cm) tall. Measure it lightly stretched so the diamonds open.
- After the border: body 3.4 in (8.6 cm) wide; total height 4.6 in (11.7 cm).
- After the thumb: total width 4.2 in (10.7 cm).
If your cuff is too big, go down to a 3.25 mm (D-3) hook. If it is too small, go up to a 3.75 mm (F-5) hook. Don’t change the stitch counts, because the lattice repeat and the border math depend on them.
Cuff
You work the cuff sideways, and each row becomes one vertical rib.
Foundation: Ch 6.
Row 1 (RS): Sc in 2nd ch from hook and in each ch across. (5 sc)
Rows 2–13: Ch 1, turn, sc BLO in each st across. (5 sc)
Don’t fasten off. You now have 13 rows, with raised ribs on both faces. Check that the cuff is 2.2 in (5.6 cm) wide x 1 in (2.5 cm) tall.
Lattice Body
Turn the cuff so you can work along one long edge. This edge becomes the bottom of the cuff, and the body hangs from it.
Row 1 (RS): Ch 1, work 1 sc in the end of each cuff row across. (13 sc)
Row 2: Ch 1, turn, sc in first st, [ch 5, skip 3 sts, sc in next st] 3 times. (3 ch-5 loops, 4 sc)
Row 3: Ch 5 (counts as dc + ch 2), turn, sc in first ch-5 loop, [ch 5, sc in next ch-5 loop] 2 times, ch 2, dc in last sc. (2 full ch-5 loops plus 2 half loops)
Row 4: Ch 1, turn, sc in first dc, [ch 5, sc in next ch-5 loop] 2 times, ch 5, sc in 3rd ch of turning ch. (3 ch-5 loops, 4 sc)
Rows 5–8: Repeat Rows 3 and 4 two more times. Row 8 ends with 3 ch-5 loops and 4 sc.
Each row’s loops are offset from the row before and cross at every sc, which forms the diamond lattice. You now have 7 mesh rows (Rows 2–8).
Row 9 (closing row): Ch 1, turn, sc in first sc, [3 sc in next ch-5 loop, sc in next sc] 3 times. (13 sc)
Count: 1 + (3 x 4) = 13 sc. This matches Row 1, so the body stays rectangular until the border shapes it.
Fasten off. Gently stretch the panel downward and check that it is 2.6 in (6.6 cm) wide x 3.2 in (8.1 cm) tall.
Border
The border runs down the left side, across the bottom and up the right side. It doesn’t continue across the cuff, so the cuff sits a little narrower than the body, as on a real mitten.
Border gauge: 5 sc = 1 in (2.5 cm) along the edges. Each mesh row end is about 0.4 in (1.0 cm) tall, so 2 sc per mesh row end keeps the edge flat.
Border Row 1 (RS): With RS facing, join yarn at the end of body Row 1 on the left side. Ch 1.
- Left side: Sc in end of Row 1, then 2 sc in end of each mesh row (Rows 2–8). (1 + 14 = 15 sc)
- Bottom-left corner: 3 sc in first sc of Row 9. (3 sc)
- Bottom: Sc in next 11 sts. (11 sc)
- Bottom-right corner: 3 sc in last sc of Row 9. (3 sc)
- Right side: 2 sc in end of each mesh row (Rows 8–2), then sc in end of Row 1. (14 + 1 = 15 sc)
Total: 15 + 3 + 11 + 3 + 15 = 47 sc. All 13 sts of Row 9 are used: 1 corner st + 11 bottom sts + 1 corner st.
Border Row 2 (WS): Ch 1, turn.
- Right side: Sc in next 15 sts. (15 sc)
- Corner: [2 sc in next st] 3 times. (6 sc)
- Bottom: Sc in next 11 sts. (11 sc)
- Corner: [2 sc in next st] 3 times. (6 sc)
- Left side: Sc in next 15 sts. (15 sc)
Total: 15 + 6 + 11 + 6 + 15 = 53 sc. Check: 47 + 6 increases = 53.
Fasten off.
Why the math works:
– Sides: Each side has 15 sts, which is 3.0 in (7.6 cm) at 5 sc per inch. The panel side is 3.2 in (8.1 cm), so the border eases the edge in slightly and holds the lattice taut instead of letting it sag.
– Corners: Each corner gains 2 sts in Row 1 (3 sc in one st) and 3 sts in Row 2 (three paired increases), so 5 sts per corner in total. This turns the square corners into a smooth U-shaped curve.
– Width: Two rows at 0.2 in (0.5 cm) each give the 0.4 in (1.0 cm) border depth. The body becomes 2.6 + 0.4 + 0.4 = 3.4 in (8.6 cm) wide.
Thumb
You work the thumb in rows directly onto the right-side border, just below the cuff.
Place markers in the 3rd and 8th sts of Border Row 2, counting from the top of the right side. Border Row 2 started at the top of this side, so these are simply its 3rd and 8th sts.
Row 1 (RS): Join yarn in the marked 8th st, ch 1, sc in same st and in each st up to and including the marked 3rd st. (6 sc)
Row 2: Ch 1, turn, sc2tog, sc in next 2 sts, sc2tog. (4 sc)
Row 3: Ch 1, turn, [sc2tog] 2 times. (2 sc)
Fasten off.
Thumb Edging: With RS facing, join yarn in the body border st just above the thumb. This is the 2nd st from the top of the right side.
- Sc in the end of each of the 3 thumb rows along the upper edge. (3 sc)
- 2 sc in each of the 2 sts of Row 3. (4 sc)
- Sc in the end of each of the 3 thumb rows along the lower edge. (3 sc)
- Sl st into the next body border st (the 9th st).
Total: 3 + 4 + 3 = 10 sc. Fasten off.
The thumb now sticks out about 0.8 in (2.0 cm) from the body, so the total width is 3.4 + 0.8 = 4.2 in (10.7 cm).
Cuff Top Edge and Hanging Loop
This edge uses slip stitches, so it doesn’t add height.
Top Edge and Loop:
1. With RS facing, join yarn at the top-right corner of the cuff.
2. Sl st loosely in the end of cuff Rows 1–7. (7 sl sts)
3. Ch 16, then sl st again in the end of Row 7 (the center row).
4. Sl st in the end of Rows 8–13. (6 sl sts)
That gives 13 sl sts in total, with the loop at the center. Fasten off. Weave the tail back through the base of the loop to strengthen it.
The loop hangs about 1.5 in (3.8 cm) long.
Weave all remaining ends into the border or cuff. Don’t weave them into the lattice, where they would show.
Final Blocking
- Mist the mitten lightly with water until it is damp, not soaking.
- Lay it RS up on a blocking mat or folded towel.
- Pin the top corners of the cuff 2.2 in (5.6 cm) apart, keeping the ribs straight and vertical.
- Gently pull the body downward and pin the bottom center so the total height is 4.6 in (11.7 cm).
- Pin the sides of the body 3.4 in (8.6 cm) apart at the widest point.
- Open each diamond with a fingertip so the lattice strands sit evenly.
- Shape the thumb so it tilts slightly upward, and pin its tip.
- Pin the hanging loop straight up.
- Let it dry completely, for at least 4 hours, before you unpin it.
For acrylic yarn you can steam-block instead. Hold a steam iron 1 in (2.5 cm) above the pinned piece and never let it touch the yarn.
Final Quality-Control Checklist
- The cuff has 13 vertical ribs and is 2.2 in (5.6 cm) wide.
- Body Row 1 and Row 9 each have 13 sc.
- Mesh rows alternate between 3 full loops and 2 full loops plus 2 half loops.
- Border Row 1 has 47 sc and Border Row 2 has 53 sc.
- Each side of the border has 15 sts.
- The thumb starts with 6 sc and ends with 2 sc, and its edging has 10 sc.
- The top edge has 13 sl sts, with the loop at Row 7.
- The finished size is 4.2 in (10.7 cm) wide x 4.6 in (11.7 cm) tall.
- All ends are hidden in solid stitches.
Troubleshooting
Cuff ribs look flat: You are working through both loops. From Row 2 on, work every row in the back loop only.
Cuff curls or flares: Check that every row has exactly 5 sc. A missed turning chain often drops a stitch.
Diamonds look uneven: Keep every ch-5 at the same tension. Count your chains each time, and work each sc into the loop, not into a chain.
Lattice sags: Your chains are too loose. Use a hook one size smaller for the mesh rows only, or chain more firmly.
Border ruffles along the sides: You have too many stitches per mesh row end. Work exactly 2 sc into each row end and check the 15-st side count.
Bottom corners look pointed: Check that Border Row 1 has 3 sc in each corner st and Border Row 2 has 3 paired increases at each corner.
Thumb points down: The thumb is set too low. Count again from the top of the right side; the thumb uses sts 3–8.
Hanging loop is off-center: Make sure you worked 7 sl sts before chaining the loop.
Care
Hand wash in cool water with mild soap, press the water out in a towel, and dry flat. Store the ornament flat or hanging by its loop, away from direct sunlight so the purple doesn’t fade.
Final Notes
Each measurement in this ornament builds on the one before it:
– The 13-row cuff, 2.2 in (5.6 cm) wide, gives 13 sc for the body.
– Those 13 sts fit exactly three lattice repeats, which close back to 13 sc.
– The panel, 2.6 in (6.6 cm) x 3.2 in (8.1 cm), takes 15 sts per side in the border. The border grows from 47 to 53 sts with rounded corners and adds 0.4 in (1.0 cm) to the sides and bottom.
– The 6-st thumb adds 0.8 in (2.0 cm), for a finished mitten of 4.2 in (10.7 cm) x 4.6 in (11.7 cm).
If your cuff matches the first checkpoint, the rest should come out right. Make one, hang it up, then make a few more for the tree.
Happy crocheting!