

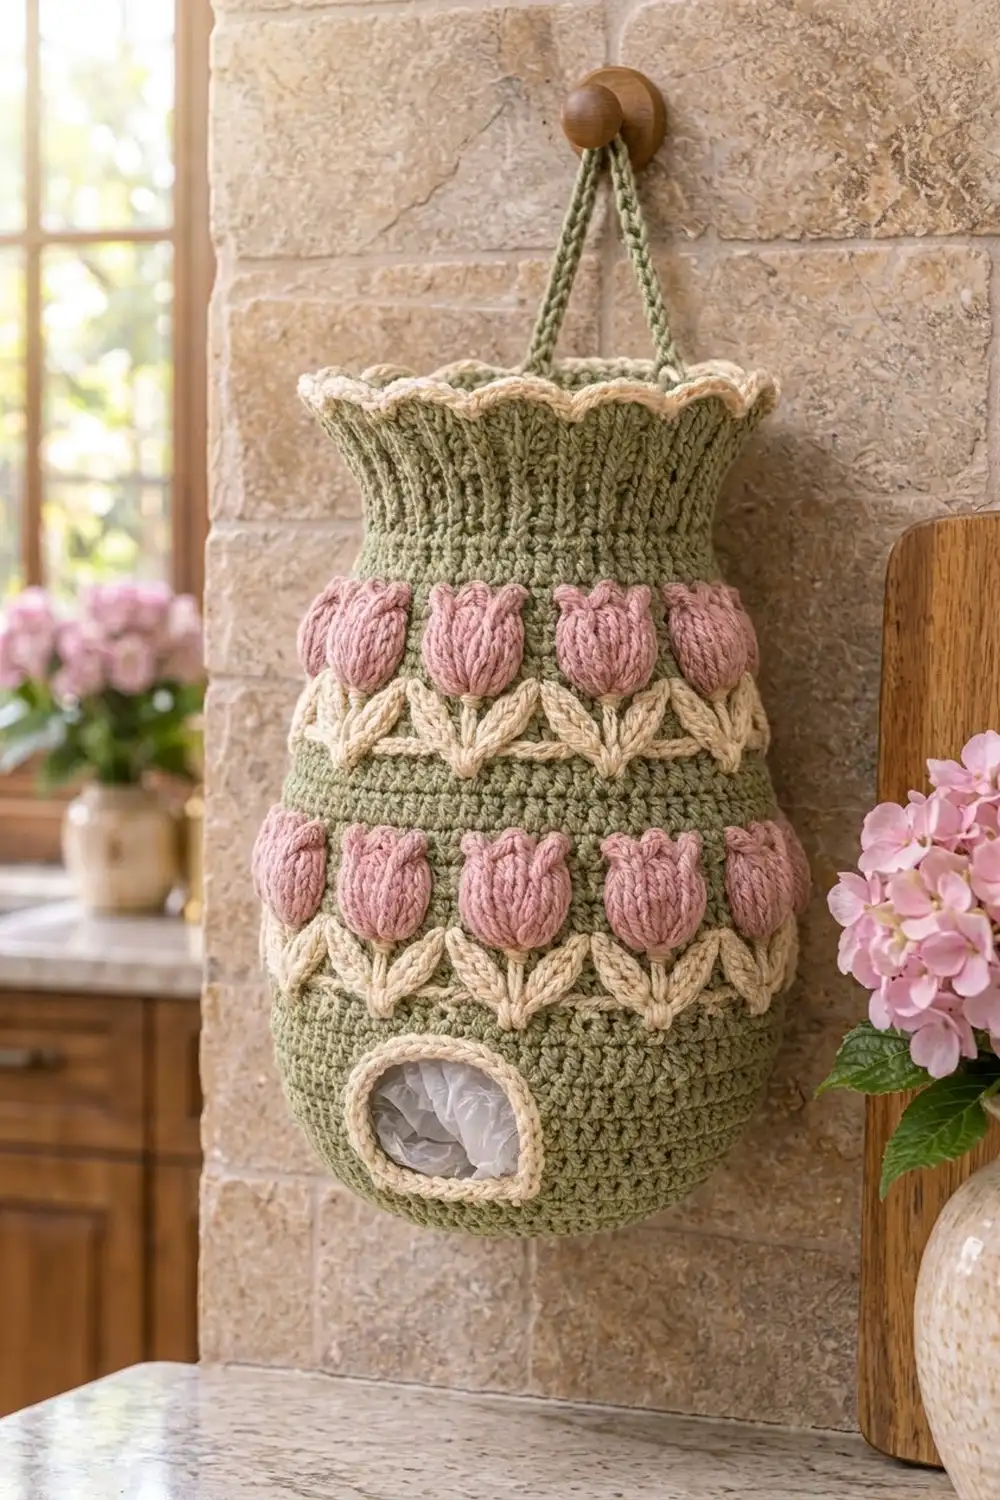
This vase-shaped plastic bag holder has a flat round base, a full rounded belly, a ribbed neck, and a ruffled rim that flares out gently. Two bands of raised pink tulips with cream leaves go around the body. A cream-trimmed opening near the bottom lets you pull bags out one at a time.
The body is sage green and the tulips are dusty pink. Warm cream is used for the leaves, the scalloped rim, and the edge of the opening. It has a cottage-kitchen style: textured and cheerful, but practical enough to use every day.
The pattern uses US crochet terms. The finished holder is about 16 in (40.6 cm) tall without the hanger, 8.7 in (22.1 cm) across at the widest point, and 27.4 in (69.6 cm) around the belly.
You work the body in one piece from the base up in joined rounds. A short section of turned rows forms the bag opening. Next you add the ruffle rim and edge the opening. Then you make small tulip and leaf appliqués and sew them on, along with a simple hanging strap.
Finished Size and Construction
- Finished size: 16 in (40.6 cm) tall, 8.7 in (22.1 cm) diameter at the widest point, base 5 in (12.7 cm) diameter
- Skill level: Intermediate
- Terminology: US
- Yarn weight: Worsted (#4)
- Hooks: 5.0 mm (H-8) for the body, 4.0 mm (G-6) for the appliqués
- Number of pieces: 1 body, with 24 tulips, 24 leaf sprays, and 1 strap sewn on
- Layout: 2 bands of 12 tulips each, evenly spaced around the body
- Body height before rim: 14.5 in (36.8 cm)
- Rim depth: 1.5 in (3.8 cm) of ruffle and scallop
Materials
Pick a smooth worsted yarn in cotton or a cotton blend. Cotton holds the vase shape well and keeps the stitches crisp. Acrylic also works, but the holder will be softer and may slouch more.
- Sage green (Color A): 230 g / 415 m
- Dusty pink (Color B): 30 g / 54 m
- Cream (Color C): 40 g / 72 m
These amounts include a margin of about 15 percent. To make a lilac version, use cream as the main color, lilac for the tulips, and sage for the leaves.
Tools:
– 5.0 mm (H-8) and 4.0 mm (G-6) crochet hooks
– Tapestry needle
– 12 locking stitch markers
– A small handful of fiberfill
– Straight pins
– Measuring tape
– Scissors
Abbreviations (US Terms)
- ch – chain
- sl st – slip stitch
- sc – single crochet
- hdc – half double crochet
- dc – double crochet
- sc2tog – single crochet 2 together
- inc – 2 sc in the same stitch
- BLO – back loop only
- fpdc – front post double crochet
- bpdc – back post double crochet
- rev sc – reverse single crochet
- st(s) – stitch(es)
- RS / WS – right side / wrong side
Special stitch: Reverse single crochet (rev sc). Work from left to right (if you’re right-handed). Insert the hook in the next stitch to the right, yarn over, and pull up a loop. Yarn over again and pull through both loops. This makes a rounded, corded edge.
Gauge and Checkpoints
Body gauge: 14 sc and 16 rounds = 4 in (10.2 cm) with a 5.0 mm hook. Each sc round is 0.25 in (0.6 cm) tall.
Rim gauge: 14 dc and 8 rounds = 4 in (10.2 cm) with a 5.0 mm hook. Each dc round is 0.5 in (1.3 cm) tall.
Make one tulip and one leaf spray as a test before anything else, and check the base before you go further. The base is your gauge swatch.
Checkpoints:
– After Rnd 10: the base is 5 in (12.7 cm) across.
– After Rnd 18: the body is 27.4 in (69.6 cm) around.
– After Rnd 30: the opening is 4 in (10.2 cm) wide and 2.5 in (6.4 cm) tall.
– After Rnd 54: the body is 11 in (27.9 cm) tall from the base edge.
– After Rnd 60: the neck is 17.1 in (43.4 cm) around.
If the base is bigger than 5.25 in (13.3 cm), go down one hook size. If it is smaller than 4.75 in (12.1 cm), go up one size. Start over rather than changing the counts, because every round after the base relies on the 60-stitch start.
Body
Use Color A and the 5.0 mm hook, and work in joined rounds. Start each round with ch 1 (it does not count as a stitch) and join with a sl st to the first sc. Don’t turn unless the pattern tells you to.
Base
Rnd 1: Magic ring, 6 sc in ring. (6)
Rnd 2: Inc in each st around. (12)
Rnd 3: (Sc 1, inc) 6 times. (18)
Rnd 4: (Sc 2, inc) 6 times. (24)
Rnd 5: (Sc 3, inc) 6 times. (30)
Rnd 6: (Sc 4, inc) 6 times. (36)
Rnd 7: (Sc 5, inc) 6 times. (42)
Rnd 8: (Sc 6, inc) 6 times. (48)
Rnd 9: (Sc 7, inc) 6 times. (54)
Rnd 10: (Sc 8, inc) 6 times. (60)
Check: 5 in (12.7 cm) across when laid flat.
Lower belly
Rnd 11: Sc in BLO of each st around. (60) This round turns the edge up and helps the base sit flat.
Rnd 12: (Sc 9, inc) 6 times. (66)
Rnd 13: (Sc 10, inc) 6 times. (72)
Rnd 14: (Sc 11, inc) 6 times. (78)
Rnd 15: (Sc 12, inc) 6 times. (84)
Rnd 16: (Sc 13, inc) 6 times. (90)
Rnd 17: (Sc 14, inc) 6 times. (96)
Rnd 18: Sc in each st around. (96)
Check: 27.4 in (69.6 cm) around.
Bag opening
For this section, you work turned rows over 82 sts and leave 14 sts unworked. The unworked stitches form the gap.
Row 19 (RS): Ch 1, sc in the same st as the join and in the next 81 sts, turn. (82) Leave the last 14 sts of Rnd 18 unworked.
Rows 20–28: Ch 1, sc in each st across, turn. (82)
Row 28 is a WS row. It ends where the rounds begin.
Rnd 29 (RS): Ch 1, sc in each of the 82 sts, ch 14, skip the 14 unworked sts of Rnd 18, and sl st to the first sc. (82 sc + 14 ch)
Rnd 30: Sc in each sc and in each ch around. (82 + 14 = 96)
Check: the opening is 4 in (10.2 cm) wide and 2.5 in (6.4 cm) tall.
Upper belly
Rnds 31–54: Sc in each st around. (96)
Check: 11 in (27.9 cm) from the base edge. Both tulip bands go on this straight section.
Shoulder
Rnd 55: (Sc 14, sc2tog) 6 times. (90)
Rnd 56: (Sc 13, sc2tog) 6 times. (84)
Rnd 57: (Sc 12, sc2tog) 6 times. (78)
Rnd 58: (Sc 11, sc2tog) 6 times. (72)
Rnd 59: (Sc 10, sc2tog) 6 times. (66)
Rnd 60: (Sc 9, sc2tog) 6 times. (60)
Check: the neck opening is 17.1 in (43.4 cm) around and the body is 12.5 in (31.8 cm) tall.
Ribbed neck
Rnd 61: Ch 2 (does not count), dc in each st around. (60)
Rnds 62–64: Ch 2, (fpdc, bpdc) 30 times. (60)
The neck adds 2 in (5.1 cm), so the body is now 14.5 in (36.8 cm) tall. Don’t fasten off. Go straight on to the rim in the Border section.
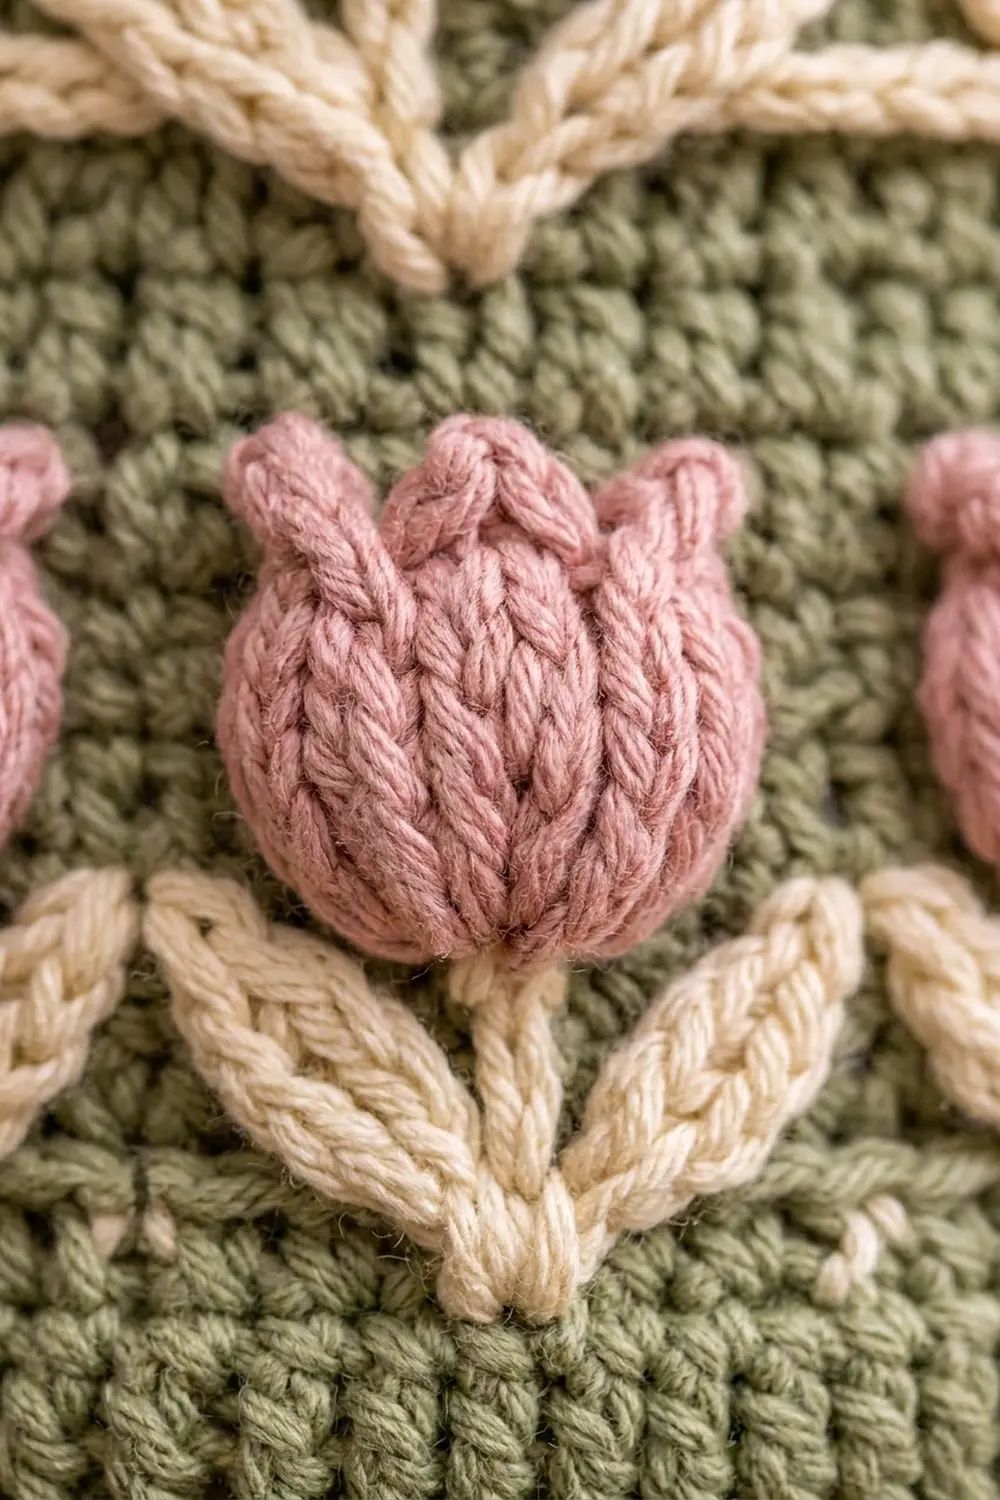
Tulip Appliqué (make 24)
Use Color B and the 4.0 mm hook, and work in rows.
Row 1: Ch 2, 3 sc in 2nd ch from hook, turn. (3)
Row 2: Ch 1, inc in first st, sc 1, inc in last st, turn. (5)
Rows 3–4: Ch 1, sc 5, turn. (5)
Row 5 (petal tips): (Hdc, dc) in first st, sl st in next st, (hdc, dc, hdc) in next st, sl st in next st, (dc, hdc) in last st. (9)
Fasten off and leave a 12 in (30.5 cm) tail. Thread the tail and make 2 straight stitches, each running from the base to one of the sl st dips. These lines mark out the three petals.
Each tulip is about 1.25 in (3.2 cm) wide and 1.25 in (3.2 cm) tall.
Leaf Spray (make 24)
Use Color C and the 4.0 mm hook.
Ch 13.
Leaf 1: Sl st in 2nd ch from hook, sc in next ch, hdc in next 2 ch, sc in next ch, sl st in next ch. (6 sts on chs 2–7)
Sl st in the next ch. This is ch 8, the base point.
Leaf 2: Ch 7, sl st in 2nd ch from hook, sc in next ch, hdc in next 2 ch, sc in next ch, sl st in next ch. (6) Sl st in the base point again.
Stem: Sl st in each of the last 5 ch. (5)
Fasten off and leave a 12 in (30.5 cm) tail. The two leaves make a V on either side of the stem.
Strap
Use Color A and the 5.0 mm hook. Ch 46, then sc in 2nd ch from hook and in each ch across. (45)
Fasten off and leave long tails at both ends. The strap is about 12.9 in (32.8 cm) long, so the loop rises about 5.5 in (14.0 cm) above the neck.
Placing the Appliqués
Fold the body flat with the opening centered at the front. Put 12 markers in Rnd 33, one every 8 sts. Start with the st directly above the center of the opening. Each 8-st space is 2.3 in (5.8 cm), and 12 x 8 = 96 sts, so the markers go all the way around.
Lower band (Rnds 33–41): At each marker, pin a leaf spray with the bottom of the stem on Rnd 33. Angle the leaves up and out so their tips almost touch the leaves next to them, making a zigzag. Pin a tulip so its base covers the top of the stem at Rnd 37. The top of the tulip will reach about Rnd 41.
Upper band (Rnds 44–52): Do the same here, with stems starting on Rnd 44 and tulip bases at Rnd 48. Line each motif up directly above one in the lower band. Rnds 42 and 43 stay plain, leaving a green gap between the bands.
Sew each leaf spray on with small whipstitches all around its edge. Sew each tulip along the sides and base. Before you close the base, tuck a small pinch of fiberfill under the tulip so it stands out from the body. Leave the petal tips free.
Border: Rim and Opening Edge
Rim gauge: 14 dc and 8 rnds = 4 in (10.2 cm).
Rnd 65 (Color A): Ch 2, (dc in next st, 2 dc in next st) 30 times. (60 + 30 = 90)
This conversion round has 60 dc worked one into each existing st, plus 30 extra dc.
Rnd 66: Ch 2, dc in each st around. (90)
Fasten off Color A.
Rnd 67 (Color C): Join in any st, ch 1, sc in the same st. Skip 2 sts, 5 dc in next st, skip 2 sts, sc in next st. Repeat from * 14 more times. On the last repeat, replace the final sc with a sl st to the first sc. (15 scallops: 15 sc + 75 dc = 90)
Why the math works: The neck has 60 sts. Rnd 65 multiplies that by 1.5 to get 90 sts, which is 25.7 in (65.3 cm) at rim gauge. That extra width compared with the 17.1 in (43.4 cm) neck is what makes the ruffle flare. The scallop repeat is 6 sts, and 90 / 6 = 15, so the scallops come out even with no stitches left over.
Opening edge, Rnd 1 (Color C): Use the 5.0 mm hook with the RS facing you, and join in the bottom right corner. Work 14 sc along the bottom into the unworked sts of Rnd 18. Work 10 sc up the side (1 per row end), then 14 sc along the top into the free loops of the ch-14. Finish with 10 sc down the other side. Join. (14 + 10 + 14 + 10 = 48)
Opening edge, Rnd 2: Ch 1, rev sc in each st around. (48) Fasten off.
One sc per row end matches the 10 rows exactly, and the top and bottom each match the 14-st gap. With the edging done, the opening is about 3.2 in (8.1 cm) wide and 1.7 in (4.3 cm) tall.
Strap: Sew the strap ends to the inside of Rnds 62–64 at the back, 7 sts (2 in, 5.1 cm) apart.
Final Blocking
- Weave in all the ends on the inside.
- Mist the body lightly with water.
- Stuff the holder firmly with a towel to shape the belly and neck.
- Stand it on a table and smooth the base flat.
- Pinch each scallop into an even curve and spread the ruffle outward.
- Shape each tulip with your fingers so the petal tips stand up.
- Let it dry completely, for at least 12 hours, before you take the towel out.
Final Quality-Control Checklist
- The base lies flat and is 5 in (12.7 cm) across.
- The belly is 27.4 in (69.6 cm) around.
- The opening is centered at the front, with a smooth edge and no gaps at the corners.
- Each band has 12 evenly spaced tulips, and the two bands line up.
- The leaves form a continuous zigzag.
- The rim has 15 even scallops.
- The strap is centered at the back and the holder hangs level.
- The total height is about 16 in (40.6 cm), not counting the strap.
Troubleshooting
Base cups or ripples: Check your gauge. Cupping means your stitches are too tight, and ripples mean they are too loose. Change hook size.
Holder leans: The strap is off-center. Move it so it sits directly opposite the opening.
Gaps at the opening corners: Work 2 sc into the corner row end on edging Rnd 1, then sc2tog nearby so the count stays at 48.
Tulips look flat: Tuck a little more fiberfill under each one.
Ruffle won’t flare: Steam block it and pin the scallops outward.
Bags fall out: Add a third round of sc around the opening to make it smaller.
Care
Hand wash in cool water and lay flat to dry, reshaping it while damp. Do not tumble dry.
Final Notes
Here is the full measurement chain. The 60-st base is 5 in (12.7 cm) across and grows to 96 sts, or 27.4 in (69.6 cm) around. A 14-st gap gives a 4 in (10.2 cm) opening. The body narrows back to 60 sts, or 17.1 in (43.4 cm), at the neck. The rim then flares to 90 sts for 15 scallops. If every checkpoint matches, the finished holder will be about 16 in (40.6 cm) tall.
Happy crocheting!