

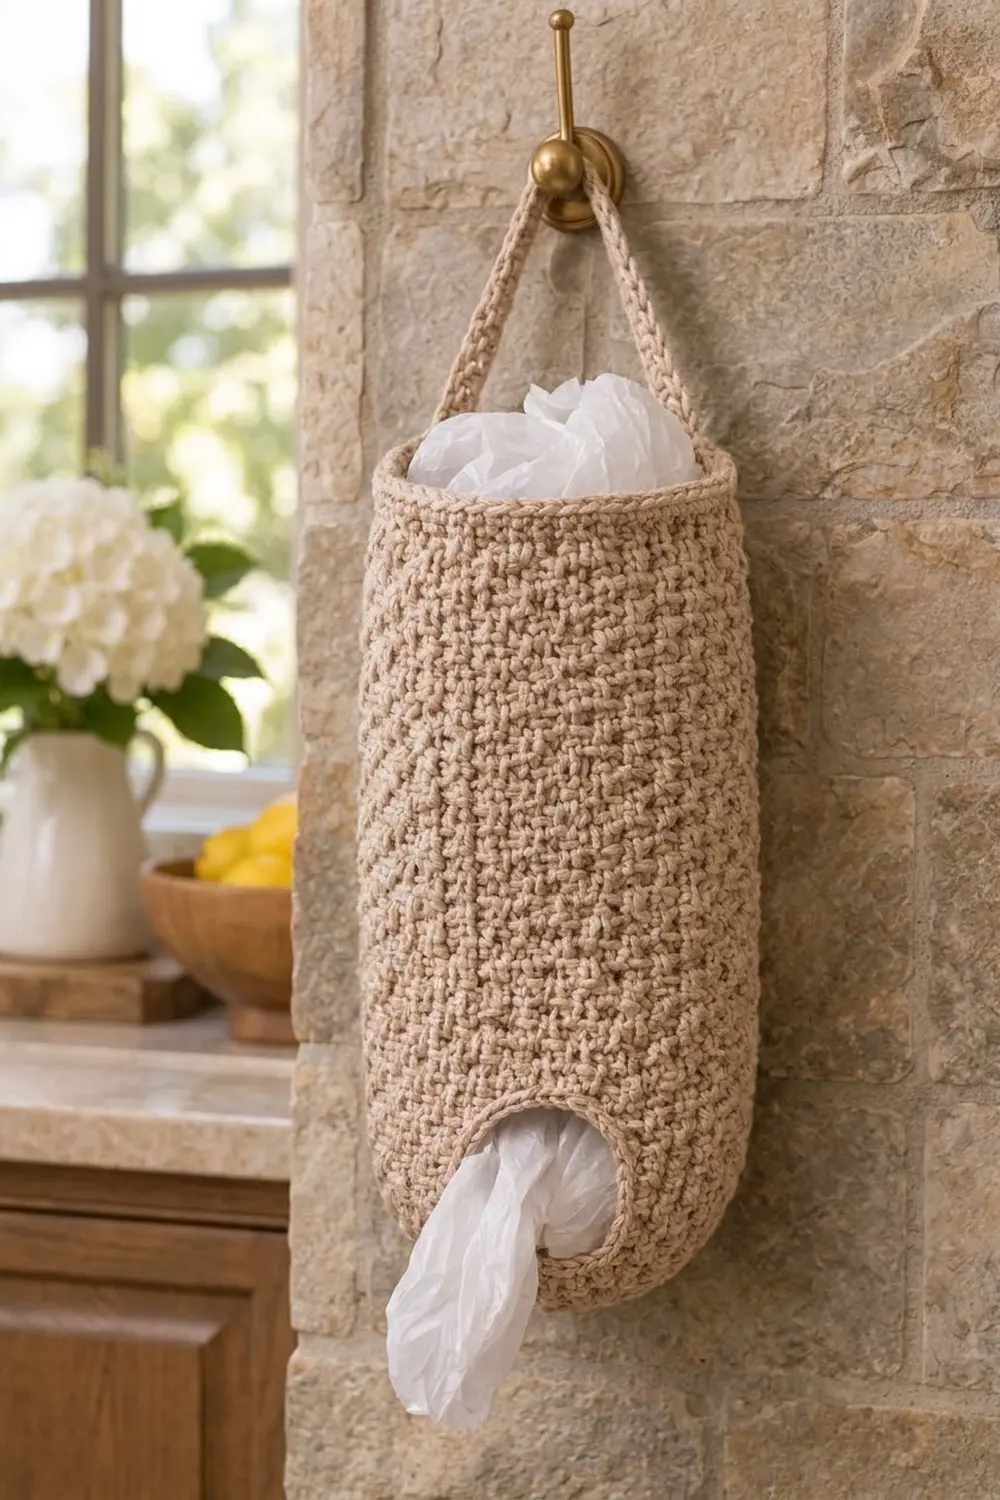
This tall, tidy bag holder turns a pile of plastic bags into something you won’t mind seeing on the kitchen wall. You stuff bags in through the open top and pull them out one at a time through the round hole near the bottom.
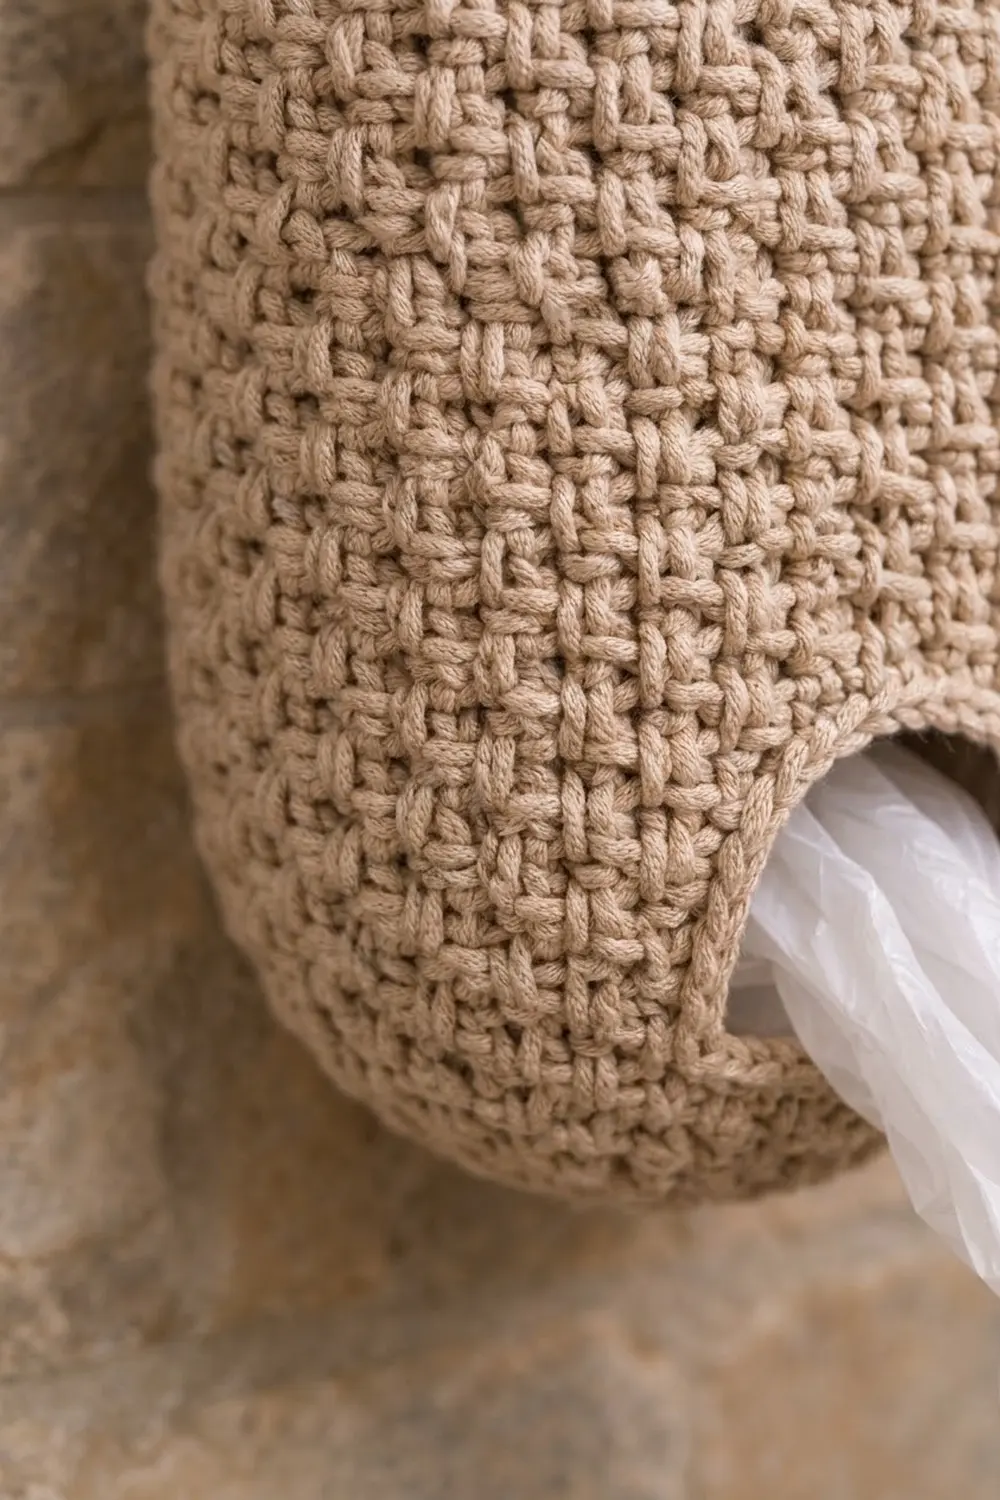
The sample is worked in a soft oatmeal cotton. The body uses griddle stitch, a simple pattern of alternating single and double crochet that makes a dense, woven-looking texture. Bags stay inside and nothing shows through. A sage green version works just as well if you want a cooler kitchen color.
This pattern uses US crochet terms. The finished holder is about 7.75 in (19.7 cm) wide when laid flat and 12 in (30.5 cm) tall, not counting the strap. With the strap, it hangs about 16 in (40.6 cm) long.
The construction is all one piece. You start with a flat oval base in single crochet, turn the walls up with a back-loop round, and work griddle stitch in joined rounds. You make the dispensing hole with a chain bridge as you go. A single crochet rim, a hole edging, and a strap worked straight off the rim finish it.
Finished Size and Construction
- Finished size: 7.75 in (19.7 cm) wide flat × 12 in (30.5 cm) tall; about 16 in (40.6 cm) hanging length with strap
- Skill level: Easy / Advanced Beginner
- Terminology: US
- Yarn weight: Worsted (#4) cotton
- Hook: 5.0 mm (H-8)
- Number of pieces: 1 (worked seamlessly)
- Layout: Oval base → tube body → rim → strap
- Base size: about 6 × 3 in (15.2 × 7.6 cm)
- Body circumference: 62 stitches = 15.5 in (39.4 cm)
- Height before rim: about 11.1 in (28.2 cm)
- Rim depth: about 0.9 in (2.3 cm)
Materials
Choose a smooth worsted-weight cotton or cotton blend. Cotton holds its shape well and doesn’t stretch much under the weight of the bags. Avoid very splitty yarns, because griddle stitch works into the tops of short and tall stitches in turn, and you need to see each stitch clearly.
- Main color, oatmeal/beige: about 170 g (about 290 m)
- Alternate colorway, sage green: the same quantity if you make the green version instead
These quantities include a margin of about 15% for your gauge swatch and small tension differences.
Tools:
– 5.0 mm (H-8) crochet hook
– 2 locking stitch markers
– Tapestry needle
– Scissors
– Measuring tape
– Rust-proof pins and a cylinder for blocking (a rolled towel or a large bottle)
Abbreviations (US Terms)
- ch – chain
- sl st – slip stitch
- sc – single crochet
- dc – double crochet
- BLO – back loop only
- st(s) – stitch(es)
- rnd(s) – round(s)
- [ ] – repeat the instructions in brackets as directed
Griddle stitch (in the round): The stitches alternate sc, dc around. On the next round, work a dc into each sc and a sc into each dc. This staggers the tall and short stitches and gives the pebbly woven texture. The beginning ch 1 or ch 2 never counts as a stitch.
Gauge and Checkpoints
Single crochet gauge: 16 sts and 18 rows = 4 in (10.2 cm).
Griddle stitch gauge: 16 sts and 14 rnds = 4 in (10.2 cm).
Make the base first (Rnds 1–6) and treat it as your test piece.
- After Rnd 6: the base measures about 6 × 3 in (15.2 × 7.6 cm), and the edge measures about 15.5 in (39.4 cm) around.
- After Rnd 11: the wall stands about 1.4 in (3.6 cm) above the base.
- After Rnd 25: the wall measures about 5.4 in (13.7 cm).
- After Rnd 45: the wall measures about 11.1 in (28.2 cm).
- After Rnd 49: the total height is about 12 in (30.5 cm).
If your base is larger, go down half a hook size. If it is smaller, go up half a size. If your stitch gauge is right but your rounds are too tall or short, add or remove griddle rounds in pairs between Rnds 26 and 45. That keeps the hole in the same place and the pattern alternation intact.
Base
Ch 16.
Rnd 1: 3 sc in 2nd ch from hook, sc in next 13 ch, 3 sc in last ch. Rotate and work along the underside of the chain: sc in next 13 ch. Join with sl st to first sc. (32 sts)
Rnd 2: Ch 1 (doesn’t count), [2 sc in next st] 3 times, sc in next 13 sts, [2 sc in next st] 3 times, sc in next 13 sts. Join. (38 sts)
Rnd 3: Ch 1, [sc in next st, 2 sc in next st] 3 times, sc in next 13 sts, [sc in next st, 2 sc in next st] 3 times, sc in next 13 sts. Join. (44 sts)
Rnd 4: Ch 1, [sc in next 2 sts, 2 sc in next st] 3 times, sc in next 13 sts, [sc in next 2 sts, 2 sc in next st] 3 times, sc in next 13 sts. Join. (50 sts)
Rnd 5: Ch 1, [sc in next 3 sts, 2 sc in next st] 3 times, sc in next 13 sts, [sc in next 3 sts, 2 sc in next st] 3 times, sc in next 13 sts. Join. (56 sts)
Rnd 6: Ch 1, [sc in next 4 sts, 2 sc in next st] 3 times, sc in next 13 sts, [sc in next 4 sts, 2 sc in next st] 3 times, sc in next 13 sts. Join. (62 sts)
Each curved end gains 3 stitches per round, so the base adds 6 stitches in total each round. That rate keeps it flat.
After Rnd 6, the stitches fall into four sections:
– Sts 1–18: end cap A
– Sts 19–31: front side
– Sts 32–49: end cap B
– Sts 50–62: back side
Place a marker in st 25 (the center front). Every round starts in the same stitch as its join, so these positions stay the same all the way up.
Body
Rnd 7 (turning round): Ch 1, sc BLO in each st around. Join. (62 sts)
The unworked front loops form a crisp ridge on the underside. This makes the softly rounded lower edge and stands the walls up.
Rnd 8: Ch 1, [sc in next st, dc in next st] 31 times. Join to first sc. (62 sts)
Rnd 9: Ch 2 (doesn’t count), [dc in next sc, sc in next dc] 31 times. Join to first dc. (62 sts)
Rnds 10–11: Repeat Rnds 8–9. (62 sts)
Checkpoint: the wall is about 1.4 in (3.6 cm) tall.
Rnd 12 (hole round): Ch 1, [sc in next st, dc in next st] 9 times, sc in next st, ch 10, skip next 10 sts, dc in next st, [sc in next st, dc in next st] 16 times. Join.
Count: 18 + 1 + 1 + 32 = 52 sts, plus the ch-10, holds the 62-st count. The skipped sts are 20–29, centered on the marker at st 25.
Rnd 13: Ch 2, [dc in next st, sc in next st] 9 times, dc in next st, then work into the chains: [sc in next ch, dc in next ch] 5 times. Sc in next st, [dc in next st, sc in next st] 16 times. Join. (62 sts)
Count: 18 + 1 + 10 + 1 + 32 = 62. Because 10 is an even number, the griddle alternation continues across the hole without a break.
Rnds 14–45: Repeat Rnds 8–9 sixteen more times. Even-numbered rounds start with sc and odd-numbered rounds start with dc. (62 sts each round)
Checkpoint: the wall measures about 11.1 in (28.2 cm) from the base edge.
Rim and Hole Edging (Border)
Border gauge: single crochet, 16 sts and 18 rows = 4 in (10.2 cm). That makes 4 rounds about 0.9 in (2.3 cm) deep.
Rnds 46–49: Ch 1, sc in each st around. Join. (62 sts each round: 18 per end cap, 13 per front, 18 per end cap, 13 per back.) Fasten off at the end of Rnd 49.
Why the math works: The rim keeps the same 62 sts as the body, worked 1 per stitch with no increases. Single crochet and griddle stitch have the same 16-st gauge, so the rim stays exactly 15.5 in (39.4 cm) around and does not flare or pull in. The firmer single crochet gives the open top some structure.
Hole edging: Join yarn at the right corner of the hole and work 1 round of sc evenly:
– 10 sc into the skipped sts of Rnd 11 along the bottom
– 2 sc in the side corner
– 10 sc into the underside of the ch-10 along the top
– 2 sc in the other side corner
Join. (24 sts) Fasten off.
The opening relaxes to about 2.5 in (6.4 cm) wide and 2 in (5.1 cm) tall.
Strap
Fold the holder flat with the hole centered on the front. The end caps are now the side folds. End cap A covers sts 1–18, so its center is between sts 9 and 10. End cap B covers sts 32–49, so its center is between sts 40 and 41.
Row 1: Join yarn in st 7 of Rnd 49. Ch 1, sc in sts 7–12. (6 sts)
Rows 2–40: Ch 1, turn, sc in each st across. (6 sts)
The strap is about 8.9 in (22.6 cm) long and 1.5 in (3.8 cm) wide.
Bring the strap across the top without twisting it. Whipstitch Row 40 to the inside of the rim at sts 38–43 of Rnd 49, catching 1 strap stitch to 1 rim stitch. Sts 38–43 sit 31 stitches from sts 7–12, so the strap is centered over both side folds. When the holder hangs, the strap peaks about 4 in (10.2 cm) above the rim.
Final Blocking
- Weave in all ends inside the holder, running them through griddle stitches in 2 or 3 directions.
- Wet the holder in cool water and gently squeeze out the excess. Don’t wring it.
- Roll it in a towel to remove more water.
- Slide a cylinder about 15.5 in (39.4 cm) around inside, such as a rolled towel or a large bottle.
- Square the base and shape the rounded lower edge with your fingers.
- Ease the hole into a round shape and pin it open if needed.
- Lay the strap flat and straight.
- Let everything dry completely before hanging.
Final Quality-Control Checklist
- [ ] The base lies flat with no ruffling or cupping
- [ ] Every body round has 62 sts
- [ ] The griddle pattern alternates correctly across the hole
- [ ] The hole is centered on the front, about 1.4 in (3.6 cm) above the base edge
- [ ] The hole edging has 24 sts and lies smooth
- [ ] The rim is about 0.9 in (2.3 cm) deep and the same width as the body
- [ ] The strap is 6 sts wide, 40 rows long, and not twisted
- [ ] The total height is about 12 in (30.5 cm), not counting the strap
- [ ] All ends are secure inside
Troubleshooting
The base cups upward. Your increases are too tight or you missed some. Recount each round against the totals and loosen your tension around the curved ends.
The base ruffles. Your tension is too loose or you added extra stitches. Use a smaller hook.
The griddle stitch makes stripes instead of a staggered texture. You worked sc into sc. Check that each sc sits on a dc from the round below.
There’s a visible diagonal seam. Joined rounds always show a slight seam line. Keep it at the back by always starting at st 1 as written.
The hole is too tight. Skip and chain 12 instead of 10 in Rnd 12 and work 28 sc in the edging. Keep the chain count even so the pattern stays aligned.
The strap stretches. Use a tighter tension or a 4.5 mm hook just for the strap.
Care
Hand wash in cool water with mild soap and lay flat over a cylinder to dry. Don’t tumble dry, because cotton can shrink and lose its shape.
Final Notes
Here is the full measurement chain:
– A 62-stitch base about 6 × 3 in (15.2 × 7.6 cm), measuring 15.5 in (39.4 cm) around
– A body that keeps those 62 stitches for 11.1 in (28.2 cm)
– A rim that adds 0.9 in (2.3 cm), for a total height of 12 in (30.5 cm)
– A 1.5 in (3.8 cm) strap that brings the hanging length to about 16 in (40.6 cm)
If you check the base and the first wall checkpoint, the rest of the holder will come out the right size.
Happy crocheting!