

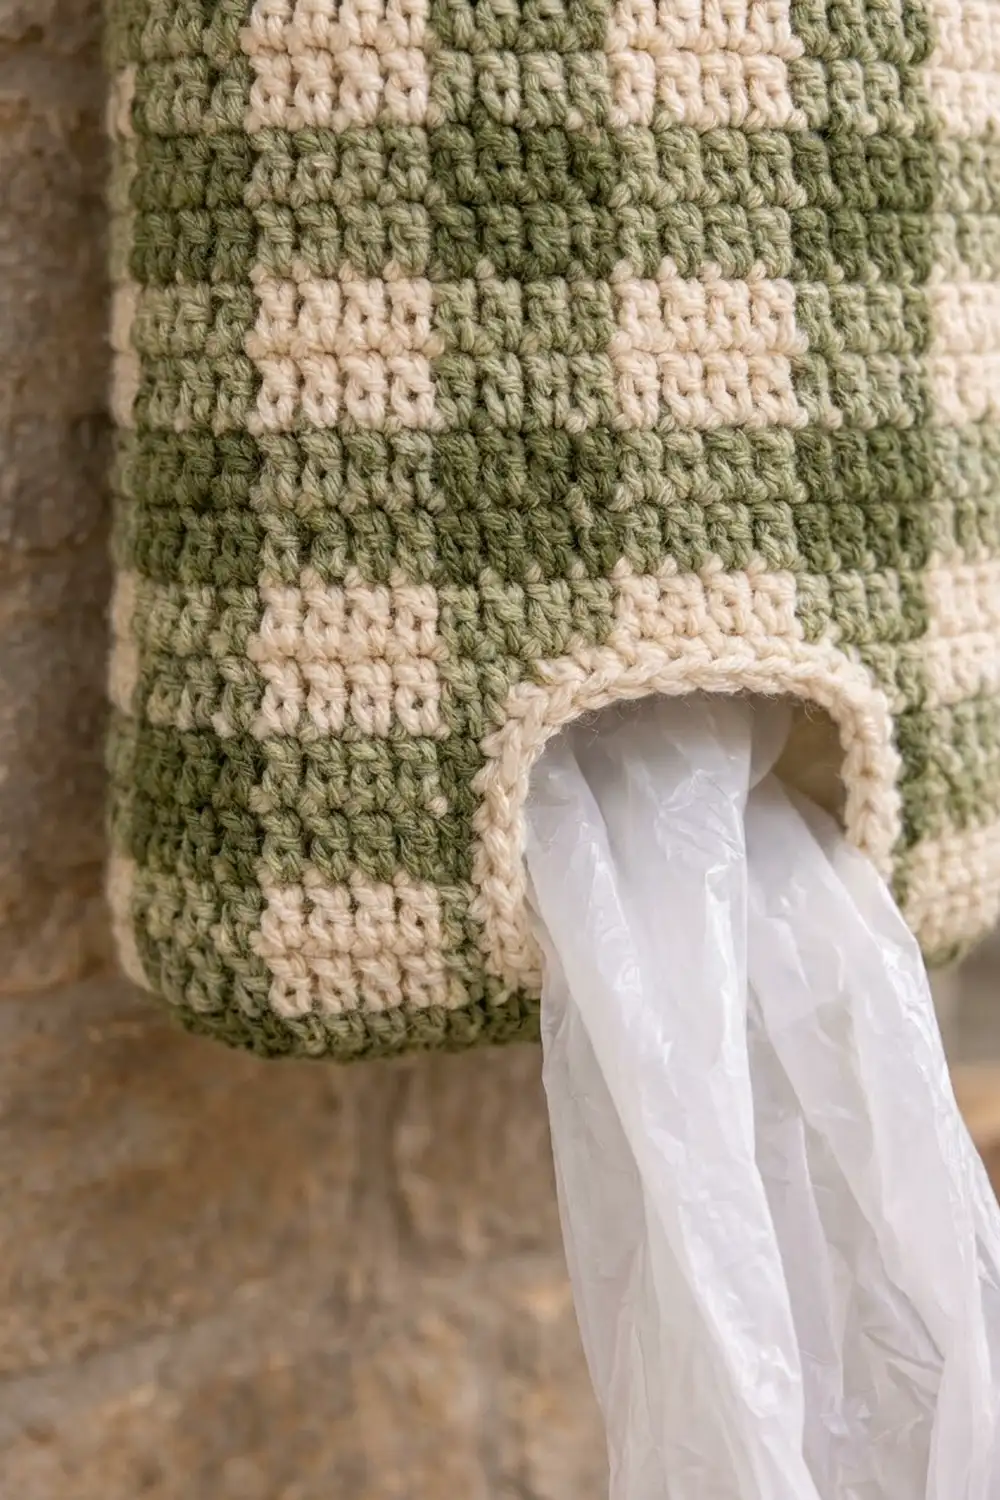
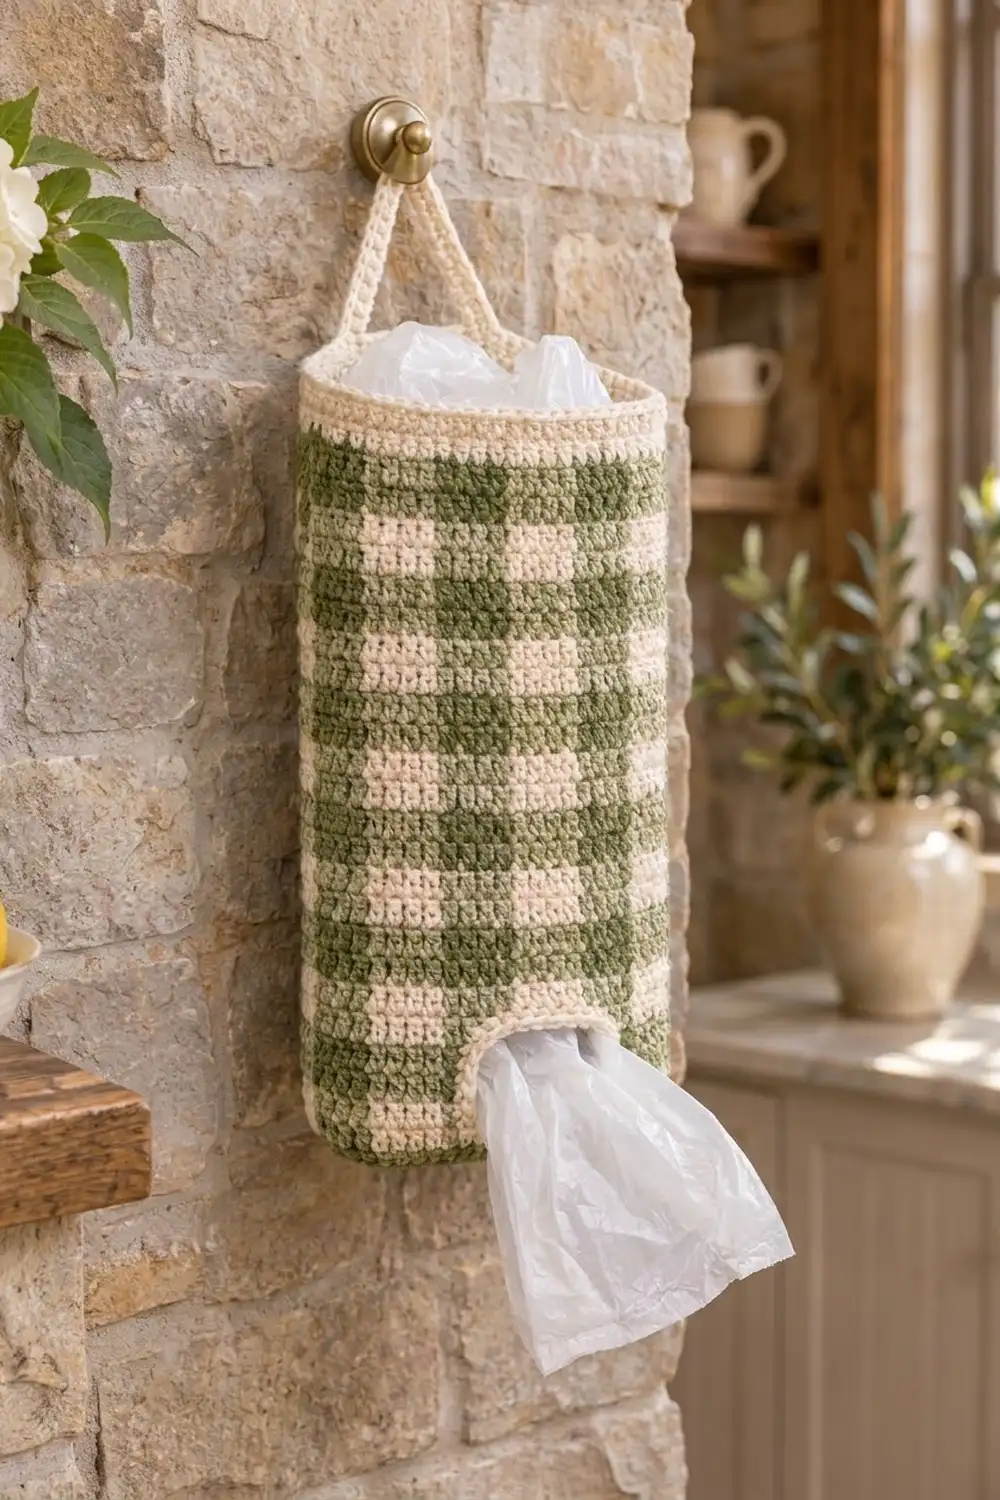
This hanging bag holder brings a soft farmhouse look to a kitchen, pantry, or laundry room. It is a tall, slightly oval tube in sage green and cream gingham, with a solid cream base, a cream top rim, a cream hanging strap, and a cream-edged dispenser opening near the bottom. Stuff plastic bags in through the top and pull them out one at a time from the bottom.
The gingham uses three colors: dark sage, light sage, and cream. Where two green “stripes” cross, the square is dark sage. Where green meets cream, it is light sage. The open squares are cream. The result is the classic checked-tablecloth look, made entirely in single crochet.
All instructions use US crochet terms. The finished holder measures 14.25 in (36.2 cm) tall from the base to the top of the rim and 18 in (45.7 cm) around. That makes an oval tube about 7 in (17.8 cm) wide and 5 in (12.7 cm) deep. The strap rises about 3.5 to 4 in (8.9 to 10.2 cm) above the rim.
You begin with a cream oval base worked in joined rounds. A back-loop round turns the work upward, and the body is worked in tapestry single crochet in joined rounds. A short section of turned rows creates the dispenser opening. A cream rim, an edging around the opening, and a sewn-on strap finish the piece.
Finished Size and Construction
- Finished size: 14.25 in (36.2 cm) tall, 18 in (45.7 cm) circumference
- Skill level: Intermediate (tapestry color changes, rounds and rows)
- Terminology: US crochet terms
- Yarn weight: Worsted (#4)
- Hook: 4.5 mm (US 7)
- Number of pieces: 1 holder body plus 1 strap, sewn together
- Layout: Oval base, upright tube, opening centered low on one long side, strap attached at the two narrow ends
- Piece size: base 7 x 5 in (17.8 x 12.7 cm); strap 12.5 x 0.75 in (31.8 x 1.9 cm)
- Size before border: 13.25 in (33.7 cm) tall from the base fold
- Border depth: top rim 1 in (2.5 cm); opening edging 0.5 in (1.3 cm)
Materials
Choose a smooth worsted-weight yarn in cotton, cotton blend, or acrylic. Cotton gives crisp checks and a firm tube. Acrylic is lighter and a little stretchier. Avoid fuzzy yarns, which blur the gingham squares.
- Color A, dark sage: 45 g, about 90 m
- Color B, light sage: 80 g, about 160 m
- Color C, cream: 80 g, about 160 m
These amounts include a margin of roughly 20 percent for your gauge swatch and tails.
Tools:
- 4.5 mm (US 7) crochet hook
- Tapestry needle
- 2 locking stitch markers
- Scissors
- Measuring tape
- Rust-proof pins and a rolled towel for blocking
- Spray bottle
Abbreviations (US Terms)
- ch – chain
- sc – single crochet
- inc – 2 sc in the same stitch
- sc2tog – single crochet 2 together
- sl st – slip stitch
- BLO – back loop only
- st(s) – stitch(es)
- rnd(s) – round(s)
- RS / WS – right side / wrong side
Tapestry single crochet: Work sc with the active color while laying the unused color along the tops of the stitches below, so each new stitch encloses it. To change color, work the last sc of the old color until 2 loops remain on the hook. Then yarn over with the new color and pull through. Keep the carried strand relaxed.
Gauge and Checkpoints
Gauge: 16 sts and 16 rnds = 4 in (10.2 cm) in tapestry sc. Each gingham square is 4 sts by 4 rnds, so it measures 1 x 1 in (2.5 x 2.5 cm).
Test one piece first: crochet the full base (Rnds 1–10) and measure it before going further. It is the quickest honest check of your tension.
Checkpoints:
- After Rnd 10: base 7 x 5 in (17.8 x 12.7 cm)
- After Rnd 15: one square measures 1 in (2.5 cm) wide and tall
- After Rnd 26: body 4 in (10.2 cm) tall from the base fold
- After Rnd 63: body 13.25 in (33.7 cm) tall
- After Rnd 67: holder 14.25 in (36.2 cm) tall
If your squares are bigger than 1 in (2.5 cm), go down a hook size. If they are smaller, go up a hook size. If the squares are the right width but too tall, keep the hook and pull each loop up a little less.
Base
Use color C. Work in joined rounds without turning. Join each round with a sl st to the first sc. The ch 1 at the start of each round does not count as a stitch.
Rnd 1: Ch 9. Sc in 2nd ch from hook and in next 6 ch, 3 sc in last ch. Rotate and work along the other side of the chain: sc in next 6 ch, 2 sc in the last ch (the same ch as the first sc). Join. (18 sts)
Each end of the oval now has 3 curved stitches, and each long side has 6 straight stitches. Every following round adds 3 increases around each end and keeps the straight sides at 6 sts, so the oval stays flat.
Rnd 2: Ch 1, inc, sc in next 6, inc 3 times, sc in next 6, inc 2 times. Join. (24 sts)
Rnd 3: Ch 1, sc in next st, inc, sc in next 6, (sc in next st, inc) 3 times, sc in next 6, (sc in next st, inc) 2 times. Join. (30 sts)
Rnd 4: Ch 1, sc in next 2, inc, sc in next 6, (sc in next 2, inc) 3 times, sc in next 6, (sc in next 2, inc) 2 times. Join. (36 sts)
Rnds 5–10: Continue the same pattern, adding 1 more sc before each inc in every round. Each round has 6 increases.
- Rnd 5: 42 sts
- Rnd 6: 48 sts
- Rnd 7: 54 sts
- Rnd 8: 60 sts
- Rnd 9: 66 sts
- Rnd 10 (sc in next 8 before each inc): 72 sts
Check Rnd 10: 10 + 6 + 30 + 6 + 20 = 72 sts. Fasten off.
Turning Round
Rnd 11: With the base RS facing, join C with a sl st in the BLO of the 6th st of Rnd 10. Ch 1, sc BLO in the same st and in each st around. Join. (72 sts)
Starting here centers the future opening on one long side of the oval. From now on, the first sc of each round is st 1, and the stitches are numbered 1 to 72. Place a marker in st 1 and move it up as you work.
Gingham Body
The body is 13 bands of 4 rnds each, alternating Band X and Band Y. Think of each round as 18 blocks of 4 sts.
- Band X: (4 sc in A, 4 sc in B) 9 times. (72 sts)
- Band Y: (4 sc in B, 4 sc in C) 9 times. (72 sts)
Blocks 1, 3, 5, and so on are A in Band X and B in Band Y. Blocks 2, 4, 6, and so on are B in Band X and C in Band Y. Each stitch number keeps the same color all the way through its band.
Color B is used in every band. Carry the unused third color up the inside at st 1, catching it under the first sc of each round. Do not carry it through the opening rows. Instead, cut it at the band change and leave a 6 in (15.2 cm) tail.
Rnds 12–15 (Band X): Ch 1, work Band X. Join. (72 sts)
Dispenser Opening
The opening is 16 sts wide (sts 1–16) and 10 rows tall. Work back and forth over sts 17–72 only. Give each stitch the color its stitch number calls for.
Row 16 (WS, Band Y): Ch 1, turn. Sc in st 72 and in each st back to st 17. (56 sts)
Row 17 (RS, Band Y): Ch 1, turn. Sc in sts 17–72. (56 sts)
Rows 18–25: Repeat Rows 16 and 17 four more times. Work Rows 18–19 in Band Y, Rows 20–23 in Band X, and Rows 24–25 in Band Y. You end after a RS row at st 72. (56 sts per row)
Close the opening: Ch 16 in C, then sl st in the first sc of Row 25 (st 17).
Rnd 26 (Band Y): Ch 1, sc in each of the 16 ch, then sc in sts 17–72. Join. (72 sts)
Check: the opening measures 4 in (10.2 cm) wide and 2.5 in (6.4 cm) tall. The body is 4 in (10.2 cm) tall from the base fold.
Upper Body
Rnd 27 (Band Y): Work Band Y. Join. (72 sts)
Rnds 28–63: Keep alternating bands: Band X on Rnds 28–31, Band Y on Rnds 32–35, and so on, ending with Band X on Rnds 60–63. (72 sts each rnd)
You now have 13 bands (7 X and 6 Y), which is 52 rnds or 13 in (33.0 cm) of gingham. Cut A and B.
Strap
Use C.
Row 1: Ch 51. Sc in 2nd ch from hook and in each ch across. (50 sts)
Rows 2–3: Ch 1, turn, sc in each st across. (50 sts)
Fasten off with a 12 in (30.5 cm) tail. The strap measures 12.5 x 0.75 in (31.8 x 1.9 cm).
Border
The border is the top rim plus the opening edging, both in C.
Border gauge: 4 sc and 4 rnds = 1 in (2.5 cm), the same as the body. Because the gauge is square, the edging lies flat when you work 1 sc per stitch along top and bottom edges and 1 sc per row end along side edges.
Top Rim
Count the 72 sts as four quarters of 18 sts each.
Rnds 64–67: Ch 1, sc in each st around. Join. (72 sts per rnd: 18 per quarter)
Fasten off and weave in. The rim is 1 in (2.5 cm) deep. The count never changes, so the rim neither flares nor pulls in.
Opening Edging
Rnd 1: With RS facing, join C at a lower corner of the opening. Work 16 sc along the bottom edge into the unworked tops of Rnd 15, sts 1–16. Work 10 sc up the side, 1 in each row end. Work 16 sc along the top edge into the free loops of the ch-16. Work 10 sc down the other side, 1 per row end. Join. (52 sts: 16 + 10 + 16 + 10)
Rnd 2: Ch 1, sc in each st, but at each top corner work sc2tog over the last st of one side and the first st of the next. Join. (50 sts: bottom 16, sides 9 each, top 14, plus 2 corner sc2tog)
The two decreases round the top corners into a soft arch. Fasten off.
Why the math works: The bottom and top each have 16 sts, matching the 16 skipped stitches. Each side has 10 row ends and 10 sc, which matches the square gauge. After the edging, the open space is about 3 x 1.5 in (7.6 x 3.8 cm), and it stretches easily as a bag is pulled through.
Attaching the Strap
Mark sts 25–28 and sts 61–64 of Rnd 67. These sit at the centers of the two narrow ends. Lay each strap end 1 in (2.5 cm) down inside the rim at a marker and whipstitch it through the top two rounds of the rim. Sew a second line across the strap at the rim edge for strength.
Final Blocking
- Weave in all tails into matching colors on the inside.
- Mist the holder until it is evenly damp, not soaked.
- Stuff it firmly with a rolled towel to shape the tube.
- Pat the base flat to 7 x 5 in (17.8 x 12.7 cm).
- Ease the height to 14.25 in (36.2 cm) and the circumference to 18 in (45.7 cm).
- Line up the columns of squares so they run straight.
- Pin the opening edging into a smooth arch.
- Let it dry fully, then remove the towel.
Final Quality-Control Checklist
- Base lies flat with no cupping or ruffling
- Every round has 72 sts
- Squares measure 1 in (2.5 cm) each
- Columns run straight from base to rim
- No carried yarn shows on the RS
- Opening is centered on a long side
- Top rim is 1 in (2.5 cm) deep and even
- Strap ends are secure at the narrow ends
- Total height is 14.25 in (36.2 cm)
Troubleshooting
Base cups upward: The increases are too tight. Go up a hook size for the base only.
Base ruffles: The increases are too loose, or a round has extra sts. Recount against the totals.
Carried yarn peeks through: Work each stitch a little taller and keep the carried strand on top of the stitches below.
Tube puckers: The carried yarn is too tight. Stretch the round gently after every color change.
Squares look slanted: Tapestry sc naturally leans a little, and blocking straightens most of it.
Opening sags: Work Rnd 2 of the edging slightly tighter, or add a round of sl st.
Strap stretches: Use cotton yarn or add a fourth row of sc.
Care
Hand wash in cool water with mild soap, press out the water in a towel, and dry over a rolled towel. Do not wring.
Final Notes
Your measurements build on each other. A gauge of 16 sts and 16 rnds to 4 in (10.2 cm) gives 1 in (2.5 cm) squares. The 72-st base becomes an 18 in (45.7 cm) tube. Fifty-two gingham rounds add 13 in (33.0 cm), and the rim brings the holder to 14.25 in (36.2 cm). Check each stage, and the finished holder will hang straight and hand out bags neatly.
Happy crocheting!