

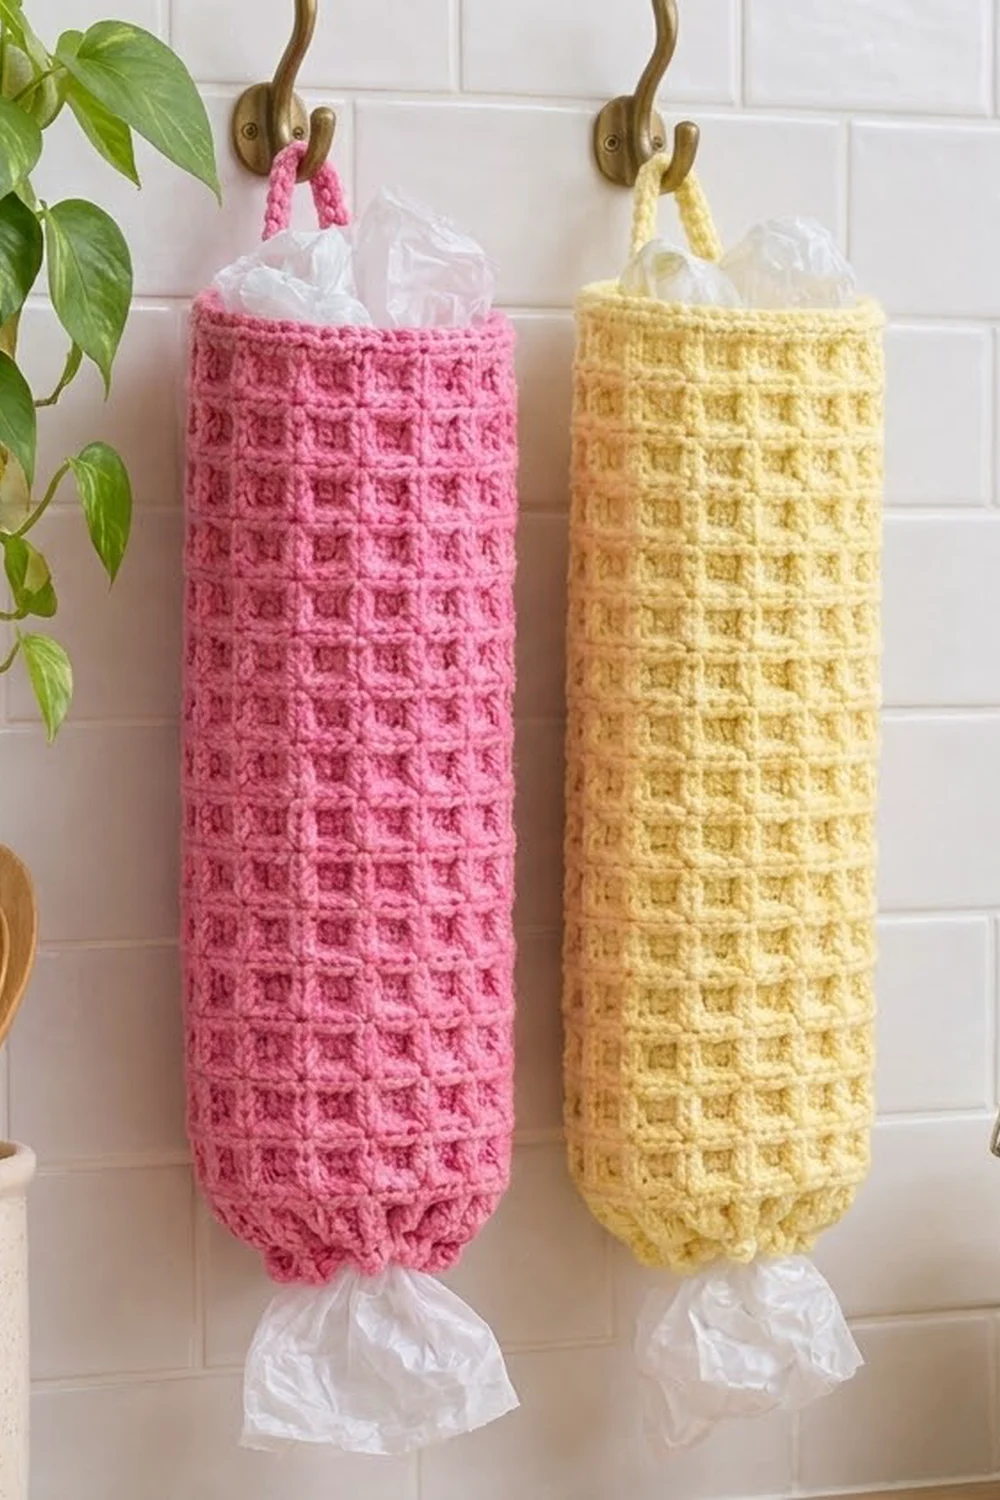
This plastic bag holder is a tall, deeply textured tube that hangs on a hook or cabinet knob. You stuff grocery bags in at the top and pull them out one at a time through the gathered bottom. The waffle stitch grid gives it a plump look and makes the fabric sturdy enough to hold its shape when it’s full.
The sample is a cheerful bubblegum pink. It also looks good in butter yellow or any kitchen color you like. The style is simple and modern, and all the texture comes from the stitch.
This pattern uses US crochet terms. The finished holder measures 6 in (15.2 cm) wide laid flat, which is 12 in (30.5 cm) around. It is 17.5 in (44.5 cm) long, not counting the hanging loop, which adds about 3 in (7.6 cm).
You crochet the tube in one piece, from the bottom up, in joined rounds without turning. First comes a single crochet base round, then the waffle stitch body. A single crochet rim band finishes the top, and a narrow strap becomes the hanging loop. Last, a chain cord gathers the bottom opening.
Finished Size and Construction
- Finished size: 6 in (15.2 cm) wide flat × 17.5 in (44.5 cm) long, plus a 3 in (7.6 cm) loop
- Circumference: 12 in (30.5 cm)
- Skill level: Easy / advanced beginner (front post stitches)
- Terminology: US
- Yarn weight: Worsted (#4)
- Hook: 5.0 mm (H-8)
- Number of pieces: 1 tube with an attached loop, plus 1 chain cord
- Layout: Single vertical tube, worked in joined rounds
- Piece size before rim band: 6 in × 16.5 in (15.2 cm × 41.9 cm)
- Rim band depth: 1 in (2.5 cm)
Materials
Yarn: Use a smooth worsted weight acrylic or cotton blend. Acrylic stays springy and doesn’t sag. Cotton is heavier and firmer, so check your gauge carefully if you use it. Avoid fuzzy yarns, which blur the waffle grid.
- Pink: 140 g, about 238 m (260 yd)
Waffle stitch uses a lot of yarn, so don’t cut it close. This quantity already includes a margin of about 15% for your gauge swatch, the cord, and the loop.
Tools:
– 5.0 mm (H-8) crochet hook
– Stitch marker
– Tapestry needle
– Scissors
– Measuring tape
– Spray bottle and pins for blocking
– Optional: a rolled towel or a 4 in (10.2 cm) wide cardboard tube for blocking
Abbreviations (US Terms)
- ch – chain
- sl st – slip stitch
- sc – single crochet
- dc – double crochet
- FPdc – front post double crochet
- st(s) – stitch(es)
- rnd(s) – round(s)
- rep – repeat
Special stitch – FPdc: Yarn over and insert the hook from front to back to front around the post of the indicated stitch. Yarn over and pull up a loop, then [yarn over, pull through 2 loops] twice. The stitch sits raised on the right side of the fabric.
Note: The beginning ch 2 of each dc round does not count as a stitch. Always join with a sl st to the first real stitch of the round.
Gauge and Checkpoints
Waffle stitch gauge: 15 sts and 9 rnds = 4 in (10.2 cm)
Single crochet gauge: 15 sts and 16 rnds = 4 in (10.2 cm)
Because this is a single tube, the first 10 rounds are your test piece. Work Rnds 1–10, then flatten the tube without stretching it and measure.
- Checkpoint 1 (after Rnd 10): flat width 6 in (15.2 cm), height 4.5 in (11.4 cm)
- Checkpoint 2 (after Rnd 19): flat width 6 in (15.2 cm), height 8.5 in (21.6 cm)
- Checkpoint 3 (after Rnd 37): flat width 6 in (15.2 cm), height 16.5 in (41.9 cm)
- Checkpoint 4 (after Rnd 41): height 17.5 in (44.5 cm)
If your tube is too wide, your stitches are too big. Go down to a 4.5 mm hook and restart. If it’s too narrow, go up to a 5.5 mm hook. Small differences in width won’t stop the holder from working, but a tube narrower than about 5 in (12.7 cm) makes it hard to push bags in.
If your width is right but your rounds are too short or too tall, simply add or remove pairs of waffle rounds until you reach 16.5 in (41.9 cm) at Checkpoint 3.
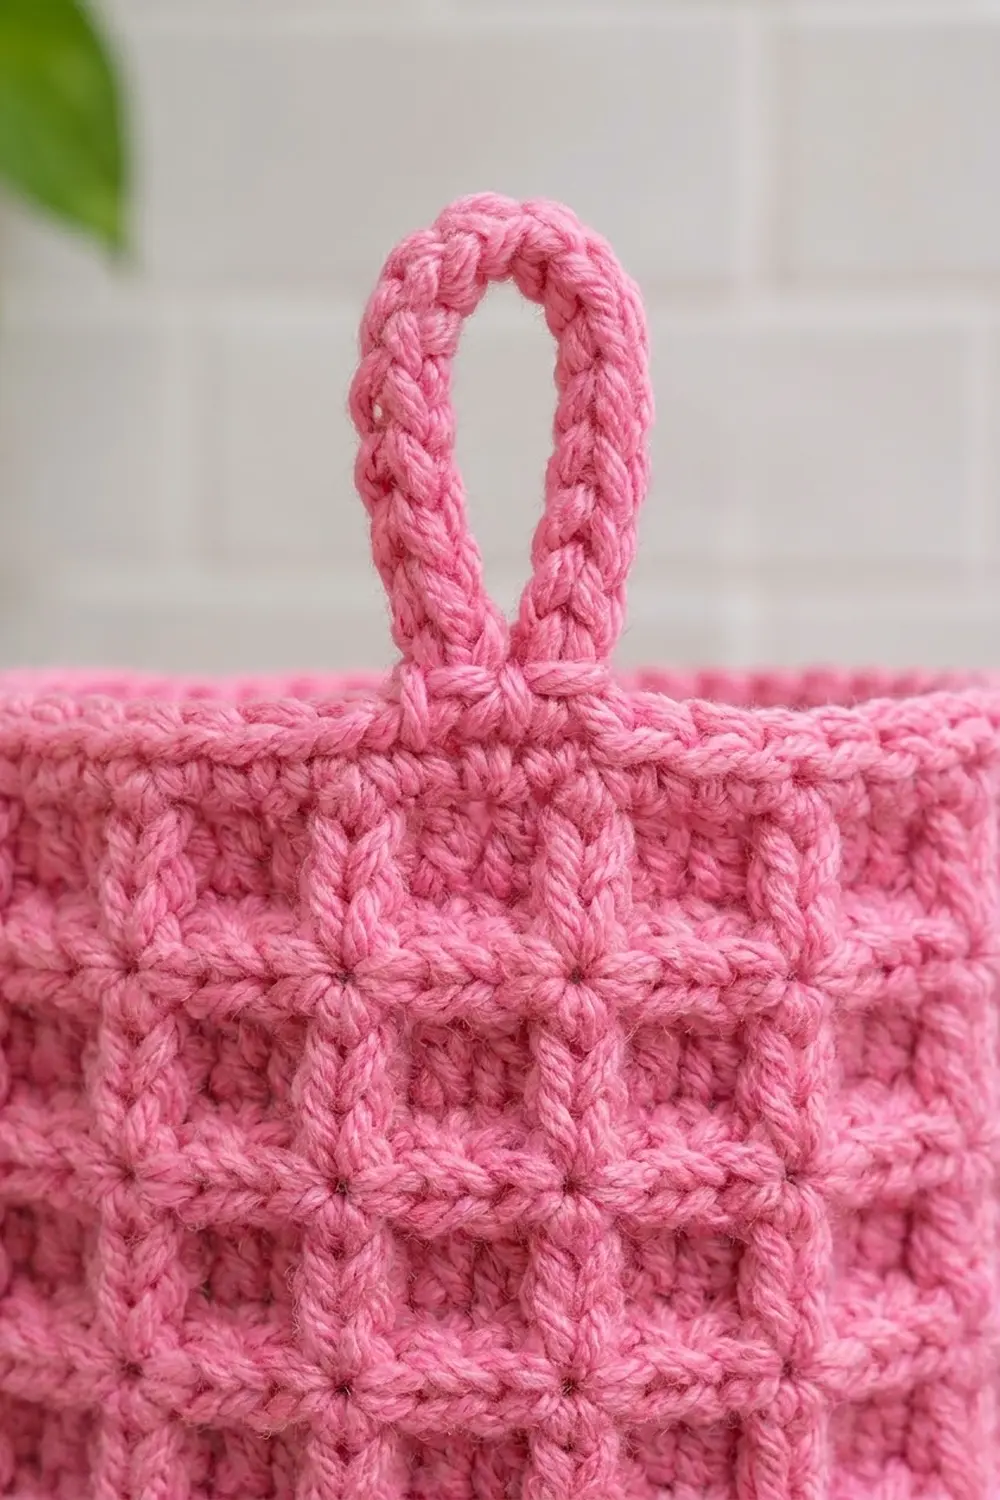
Pattern: The Waffle Tube
Foundation and Base
Foundation: Ch 45. Without twisting the chain, sl st into the first ch to form a ring. Before you join, lay the chain flat and check that it isn’t twisted. A twisted foundation can’t be fixed later.
Rnd 1 (base): Ch 1 (doesn’t count), sc in each ch around. Join with sl st to first sc. (45 sts)
This sc round gives the drawstring a firm row to pass through later.
Rnd 2 (setup): Ch 2, dc in each st around. Join with sl st to first dc. (45 sts)
The setup round gives the first waffle round tall posts to work around.
Waffle Stitch Body
The waffle pattern repeats over 3 sts. In every round, each FPdc goes around a dc from the round below, and each dc goes into the top of an FPdc from the round below. This swap is what builds the square cells.
Rnd 3 (Waffle A): Ch 2, FPdc around next st, dc in each of next 2 sts; rep from * around. Join with sl st to first st. (45 sts: 15 FPdc + 30 dc)*
Rnd 4 (Waffle B): Ch 2, dc in next st (the top of the FPdc), FPdc around each of next 2 sts; rep from * around. Join. (45 sts: 15 dc + 30 FPdc)*
Rnd 5: Rep Rnd 3. (45 sts)
Rnd 6: Rep Rnd 4. (45 sts)
Rnds 7–37: Keep alternating. Work Rnd 3 on every odd round and Rnd 4 on every even round, ending with Rnd 37 (a Rnd 3 round). (45 sts in every round)
That gives 35 waffle rounds (Rnds 3–37), with 18 A rounds and 17 B rounds. Together with Rnd 2, the dc body is 36 rounds tall. At 9 rnds per 4 in, that’s 16 in (40.6 cm). The foundation and sc base add about 0.5 in (1.3 cm), so you reach Checkpoint 3 at 16.5 in (41.9 cm).
Tips for clean waffle cells:
– Keep the joining sl st snug, and always start the round in the first stitch, not in the join.
– Place a marker in the first stitch of each round. The seam drifts slightly, which is normal on the back of the holder.
– Don’t pull the FPdc tight. A relaxed post stitch keeps the cells square.
Border: Top Rim Band and Bottom Gathering
This tube has no corners. Its “border” is a smooth sc band at the top and a gathered edge at the bottom.
Border gauge: 15 sc and 16 rnds = 4 in (10.2 cm), so 45 sc = 12 in (30.5 cm) around and 4 rnds = 1 in (2.5 cm).
Top Rim Band
Rnd 38: Ch 1, sc in each st around. Join. (45 sts)
Work into the tops of the stitches only, both FPdc and dc. Don’t work around the posts.
Rnds 39–41: Ch 1, sc in each st around. Join. (45 sts each round)
Flattened, the rim has 22.5 sts on each face. It has no corner stitches because it is a continuous circle.
Why the math works: The waffle body has 45 sts at 15 sts per 4 in, which makes 12 in (30.5 cm) around. The rim also has 45 sc at 15 sts per 4 in, which is also 12 in (30.5 cm). Working 1 sc into each stitch means the rim neither flares nor pulls in. It stays exactly 6 in (15.2 cm) wide flat, matching the body.
Don’t fasten off. Continue straight into the hanging loop.
Hanging Loop
At the end of Rnd 41, sl st into the next st. The loop sits above the seam at the back of the holder.
Row 1: Ch 1, sc in each of next 3 sts. Turn. (3 sts)
Rows 2–24: Ch 1, sc in each st across. Turn. (3 sts each row)
The strap is now 0.8 in (2.0 cm) wide and 6 in (15.2 cm) long, since 24 rows at 4 rows per in = 6 in. Fasten off and leave a 10 in (25.4 cm) tail.
Skip the next 3 sts of Rnd 41 after the strap’s base, so there is a 0.8 in (2.0 cm) gap. Fold the strap into an arch without twisting it. Sew its last row to the following 3 sts of Rnd 41 with firm whip stitches, going through both loops twice. The arch stands about 3 in (7.6 cm) above the rim.
Bottom Gathering Cord
Cord: Ch 90. That’s about 24 in (61.0 cm) at roughly 3.75 ch per in. Fasten off and leave short tails.
Thread the cord onto the tapestry needle. Starting at the back seam, weave it through Rnd 1, going over 3 sts and under 3 sts all the way around. That makes 15 passes, since 45 sts ÷ 3 = 15. Both ends should come out on the outside of the tube.
Pull the cord until the bottom opening is about 1.5 in (3.8 cm) across. It will stretch to about 2 in (5.1 cm) when you pull a bag through. Tie a firm double knot, then a second knot. Trim the ends to 1 in (2.5 cm) and tuck them inside the tube. The 3-st spacing gathers the base round into the soft, even puffs of the finished design.
Final Blocking
- Weave in all remaining tails along the wrong side, following the waffle posts so they stay hidden.
- Slide a rolled towel or a wide cardboard tube inside the holder to support its shape.
- Lay it flat and pat it into a 6 in × 17.5 in (15.2 cm × 44.5 cm) rectangle. Line up the waffle columns so they run straight.
- Mist evenly with water until the fabric is damp but not soaked.
- Pin the top rim so it lies flat and straight. Don’t stretch the waffle grid, because blocking it open flattens the texture.
- Shape the hanging loop into a smooth arch and pin it in place.
- Let it dry completely, ideally for 24 hours, before removing the support and hanging the holder.
Final Quality-Control Checklist
- Every round has 45 sts.
- Waffle cells are square and the raised columns run straight.
- Flat width is 6 in (15.2 cm) from bottom to top.
- Body height before the rim band is 16.5 in (41.9 cm).
- Total length is 17.5 in (44.5 cm) without the loop.
- The rim band is 1 in (2.5 cm) deep and doesn’t flare.
- The loop is untwisted, firmly sewn, and stands about 3 in (7.6 cm) tall.
- The bottom opening is about 1.5 in (3.8 cm) across and the cord is knotted securely inside.
- All tails are woven in and invisible from the outside.
Troubleshooting
Stitch count drifts from 45: You probably worked into the join or skipped the first stitch. Count each round in groups of 3 and check that every repeat is complete.
Cells look like stripes, not squares: Check that each FPdc goes around a dc and each dc goes into an FPdc. If two A rounds are stacked, the grid breaks.
Tube spirals or leans: Make sure you never turn between rounds. Join every round consistently with a snug sl st.
Rim flares: Your sc is looser than your dc. Go down one hook size for the rim only.
Rim pulls in: Go up one hook size, or check that you made exactly 1 sc per stitch.
Loop stretches too much: Sew it again with a double pass of stitches through both loops. You can also work one extra row of sc along each long edge of the strap.
Bags fall out of the bottom: Tighten the cord to about 1.25 in (3.2 cm) across and knot it again.
Care
Machine wash an acrylic holder on a gentle cycle in a laundry bag and lay it flat to dry. Hand wash cotton versions and reshape while damp.
Final Notes
The measurement chain is simple. 45 sts at 15 sts per 4 in gives a 12 in (30.5 cm) round and a 6 in (15.2 cm) flat width. The 36 dc rounds at 9 rnds per 4 in make 16 in (40.6 cm), and the foundation and base add 0.5 in (1.3 cm), for 16.5 in (41.9 cm). Four sc rim rounds add 1 in (2.5 cm), so the finished tube is 17.5 in (44.5 cm). A 6 in (15.2 cm) strap forms the 3 in (7.6 cm) loop, and a 24 in (61.0 cm) cord gathers the bottom to 1.5 in (3.8 cm). If you check your width at Checkpoint 1, everything after it falls into place.
Happy crocheting!