

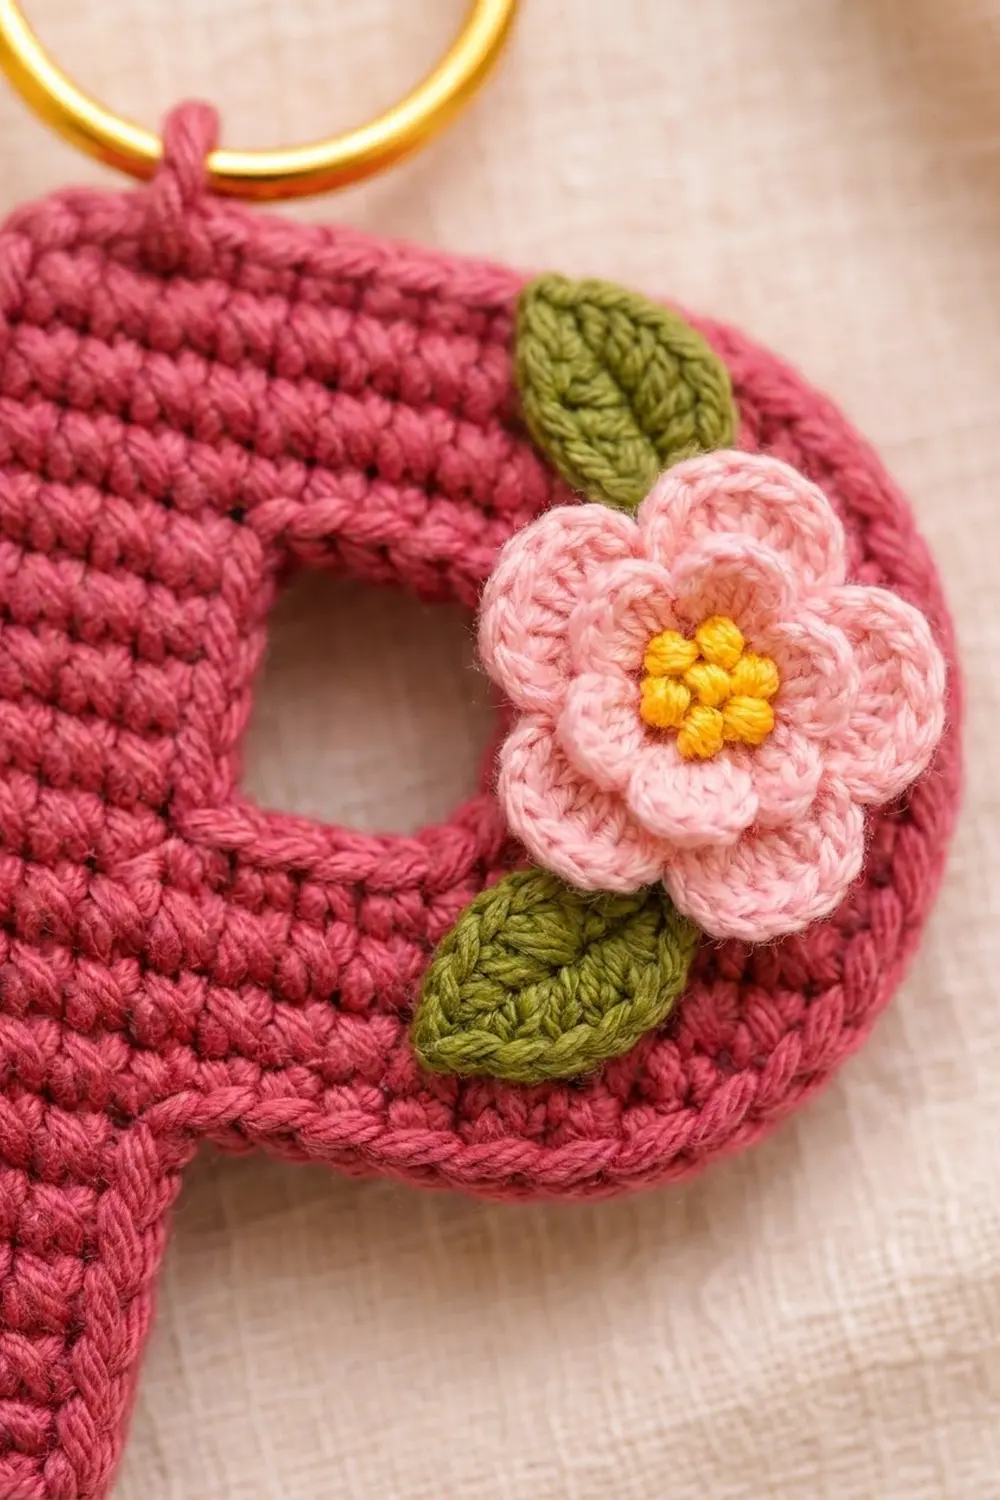
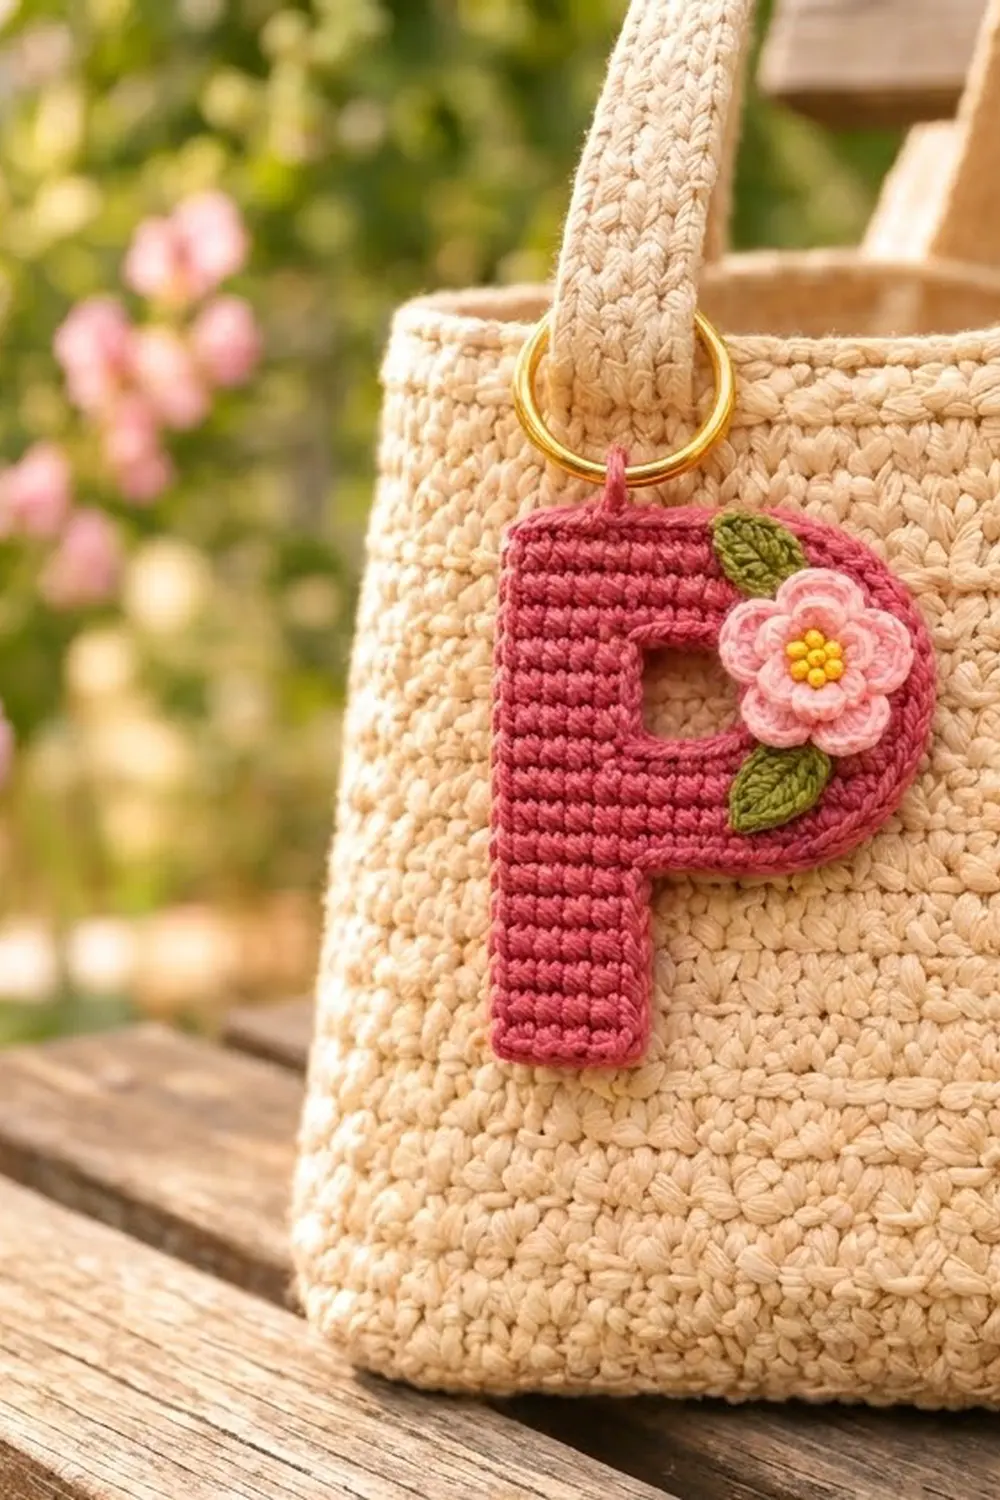
This little Letter P keychain is a cheerful monogram you can clip onto a tote, a backpack, or a set of house keys. The letter is worked in a rich raspberry-rose shade and topped with a soft pink flower that has a sunny yellow center. Two olive-green leaves frame the flower.
The style is clean and graphic. Dense single crochet rows give a firm, tidy fabric that holds its shape, and a raised edging outlines the whole letter like a piped border. The appliqué adds a bit of cottage-garden charm without hiding the letterform.
This pattern uses US crochet terms. The finished letter measures 2.5 in (6.4 cm) wide by 4 in (10.2 cm) tall, not counting the ring.
Construction is simple. You work the letter flat in rows from the bottom of the stem up. The bowl is added with a chain extension, and the counter hole is made by working two short columns and bridging them with a chain. One round of single crochet edges the outside, and slip stitches outline the hole. Finally, you sew on a crocheted flower and two leaves, embroider the center, and attach the ring.
Finished Size and Construction
- Finished size: 2.5 in (6.4 cm) wide x 4 in (10.2 cm) tall
- Skill level: Advanced beginner
- Terminology: US crochet terms
- Yarn weight: DK (light worsted / #3), cotton or cotton blend
- Hook: 3.25 mm (US D-3)
- Number of pieces: 1 letter body plus 3 small appliqués (1 flower, 2 leaves), sewn on
- Layout: Single upright letter, stem on the left, bowl on the right
- Letter size before border: about 2.17 in (5.5 cm) wide x 3.67 in (9.3 cm) tall (13 stitches x 22 rows)
- Border depth: about 0.17 in (0.4 cm) per side (1 round of sc)
- Counter hole: about 0.67 in (1.7 cm) wide x 1 in (2.5 cm) tall
Materials
Use a smooth, firmly twisted cotton or cotton blend in DK weight. Cotton shows stitch definition beautifully and stands up to daily handling on a keychain. Avoid fuzzy or very stretchy yarns, because they blur the letter’s edges.
- Color A, raspberry rose (letter): 8 g, about 18 m
- Color B, light pink (flower): 2 g, about 5 m
- Color C, olive green (leaves): 1 g, about 2 m
- Color D, golden yellow (flower center): 1 g, about 1 m
These quantities include a margin for your gauge swatch and tails.
Tools:
– 3.25 mm (US D-3) crochet hook
– 1 in (2.5 cm) gold split ring or keyring
– Tapestry needle
– Scissors
– Stitch markers (2)
– Blocking board or foam mat, rustproof pins, and a spray bottle
– Ruler or tape measure
Abbreviations (US Terms)
- ch – chain
- sc – single crochet
- hdc – half double crochet
- dc – double crochet
- sl st – slip stitch
- sc2tog – single crochet 2 together: (insert hook in next st, yarn over, pull up a loop) twice, yarn over, pull through all 3 loops on hook
- MR – magic ring
- st(s) – stitch(es)
- sp – space
- RS / WS – right side / wrong side
Special technique, French knot: Bring the needle up through the fabric, wrap the yarn around the needle 2 times, and insert the needle back down close to where it came up. Hold the wraps snug while you pull through.
Gauge and Checkpoints
Gauge: 12 sc x 12 rows = 2 in (5.1 cm) in sc worked flat.
Your stitch gauge and row gauge should match: 6 sc and 6 rows per 1 in (2.5 cm). The border depends on this, so check both.
Treat the letter itself as your test piece. Measure it at each checkpoint below before moving on:
- After Row 10 (stem): 0.83 in (2.1 cm) wide x 1.67 in (4.2 cm) tall
- After Row 13 (bowl base): 2.17 in (5.5 cm) wide x 2.17 in (5.5 cm) tall
- After Row 22 (body complete): 2.17 in (5.5 cm) wide x 3.67 in (9.3 cm) tall
- After the border: 2.5 in (6.4 cm) wide x 4 in (10.2 cm) tall
If your piece is too big by more than 0.1 in (0.3 cm) at Row 10, start over with a hook one size smaller. If it is too small, go up one hook size. If only the height is off, your row gauge is the problem. Adjust your tension on the yarn-over that completes each sc instead of changing the hook.
Letter Body
Use Color A. At the start of every row, ch 1 and turn; the ch-1 does not count as a stitch. Row 1 is the RS.
Odd rows are worked from the right edge toward the left (as seen from the RS), and even rows from the left edge toward the right. This keeps the stem on the left and lets the bowl grow to the right.
Stem
Foundation: Ch 6.
Row 1 (RS): Sc in 2nd ch from hook and in each ch across. (5 sts)
Rows 2–10: Ch 1, turn, sc in each st across. (5 sts each row)
At the end of Row 10 you are at the right edge of the stem. Do not ch 1. Measure: 0.83 in (2.1 cm) x 1.67 in (4.2 cm).
Bowl Base
Row 11 (RS): Ch 7, turn. Sc in 2nd ch from hook and in next 5 ch (6 sc on the new extension), sc in each of the 5 stem sts. (11 sts)
Row 12: Ch 1, turn. Sc in next 10 sts, 2 sc in last st. (12 sts)
This last stitch is at the right edge, so the increase starts the curve.
Row 13: Ch 1, turn. 2 sc in first st, sc in next 11 sts. (13 sts)
Measure: 2.17 in (5.5 cm) wide x 2.17 in (5.5 cm) tall.
Number the 13 stitches of Row 13 from left to right as seen from the RS. Stitches 1–5 sit over the stem, stitches 6–9 will become the bottom of the hole, and stitches 10–13 form the right side of the bowl.
Counter Hole
Left column, Row 14: Ch 1, turn. Sc in sts 1–5. (5 sts) Leave the rest unworked.
Left column, Rows 15–19: Ch 1, turn, sc in each st across. (5 sts each row)
At the end of Row 19 you are at the left edge. Place a marker in the loop on your hook and set this yarn aside without cutting it.
Right column, Row 14: With the WS facing, join a new strand of Color A in st 10 of Row 13 (sts 6–9 stay skipped). Ch 1, sc in the same st and in the next 3 sts. (4 sts)
Right column, Rows 15–19: Ch 1, turn, sc in each st across. (4 sts each row)
Fasten off, leaving a 4 in (10.2 cm) tail.
Bowl Top
Return to the marked loop on the left column.
Row 20: Ch 1, turn. Sc in 5 left-column sts, ch 4, sc in 4 right-column sts. (13 sts: 5 sc + 4 ch + 4 sc)
Row 21: Ch 1, turn. Sc2tog, sc in next 11 sts (including each ch). (12 sts)
Row 22: Ch 1, turn. Sc in next 10 sts, sc2tog. (11 sts)
Do not fasten off. The two decreases on the right edge mirror the two increases in Rows 12–13, which rounds the bowl at the top and bottom. The hole is 4 sts wide x 6 rows tall: 0.67 in (1.7 cm) x 1 in (2.5 cm).
Measure: 2.17 in (5.5 cm) x 3.67 in (9.3 cm).
Flower (Make 1)
Rnd 1: With Color B, MR, ch 1, 10 sc in ring, sl st to first sc. Pull the ring fully closed. (10 sts)
Rnd 2: (Hdc, dc, hdc) in next st, sl st in next st; repeat from * 4 more times. (5 petals)*
Fasten off, leaving a 10 in (25.4 cm) tail for sewing.
Center: With Color D and a tapestry needle, work 5 French knots clustered over the closed ring. Make one knot in the middle and four around it. Knot the ends on the back.
The flower measures about 1.1 in (2.8 cm) across.
Leaves (Make 2)
With Color C, ch 6.
Starting in the 2nd ch from hook, work: sc, hdc, dc, hdc in the next 4 ch. Then work (sc, ch 2, sc) in the last ch for the pointed tip. Rotate and work along the opposite side of the foundation chain: hdc, dc, hdc, sc in the next 4 ch. Sl st in the base.
Fasten off, leaving an 8 in (20.3 cm) tail. The foundation chain forms a natural center vein. Each leaf is about 0.9 in (2.3 cm) long x 0.45 in (1.1 cm) wide.
Border
Border gauge: One sc per stitch along the top and bottom, and one sc per row end along the sides. This works because your gauge is 6 sts and 6 rows per inch. One sc per row end therefore fills exactly the same length as one sc per stitch, so the edges lie flat without ruffling or cupping.
Outer Border
Continue with the working yarn at the end of Row 22, which is the top-left corner. Work clockwise around the letter as seen from the RS.
Rnd 1:
– Top edge: 3 sc in first st of Row 22 (top-left corner), sc in next 9 sts, 2 sc in last st. (14 sc)
– Right curve: Sc in each row end from Row 22 down to Row 11. (12 sc)
– Bowl underside: Work along the free loops of the Row 11 chain extension: 2 sc in first ch, sc in next 5 ch. (7 sc)
– Right side of stem: Sc in each row end from Row 10 down to Row 1. Do not add stitches at the inner corner. (10 sc)
– Bottom edge: Work in the free loops of the foundation chain: 3 sc in first ch (bottom-right corner), sc in next 3 ch, 3 sc in last ch (bottom-left corner). (9 sc)
– Left side: Sc in each row end from Row 1 up to Row 22. (22 sc)
– Sl st to first sc.
Total: 74 sc (14 + 12 + 7 + 10 + 9 + 22). Each count above already includes its corner stitches, so nothing is counted twice.
Why the math works:
– The three square corners each get 3 sc, which turns the edge 90 degrees.
– The curved right side gets 2 sc where the curve begins and ends, and the staggered row ends from the shaping rows fill in the rounding.
– The inner corner where the bowl meets the stem gets no extra stitches, which keeps it crisp instead of puckered.
Hanging Loop
Sl st into the center sc of the top-left 3-sc corner. Ch 6, sl st in the same st. The loop is about 0.5 in (1.3 cm) tall. Fasten off and weave in the end.
Hole Outline
With the RS facing, join Color A with a sl st at the bottom-left corner of the hole. Loosely sl st around the hole:
– 1 sl st in each of the 4 unworked sts of Row 13
– 1 sl st in each of the 6 right-column row ends
– 1 sl st in each of the 4 ch of Row 20
– 1 sl st in each of the 6 left-column row ends
Total: 20 sl st. Join and fasten off.
Slip stitches add almost no depth, so the hole stays 0.67 in (1.7 cm) x 1 in (2.5 cm).
Final Blocking
- Weave in all the letter’s tails before blocking, except the sewing tails on the appliqués.
- Mark a 2.5 in (6.4 cm) x 4 in (10.2 cm) rectangle on your blocking board.
- Pin the letter RS up. Pin the three square corners first, then ease the curve so it fills the right edge of the rectangle.
- Check that the stem is straight and 1.17 in (3.0 cm) wide, including the border.
- Mist the piece evenly until it is damp but not soaked.
- Let it dry completely, which usually takes 2–4 hours.
- Block the flower and leaves separately and lightly. Mist them and shape the petals and leaf tips with your fingers, but don’t flatten them.
- Once everything is dry, sew the appliqués on:
- Flower: Center it on the right side of the bowl at about Row 17, with its left petal just touching the hole outline. Sew around Rnd 1 and tack each petal tip.
- Upper leaf: Place it above-left of the flower with the tip pointing up-left, and tuck its base slightly under a petal.
- Lower leaf: Place it below-left of the flower with the tip pointing down-left.
- Sew each leaf down along its center vein.
- Slip the split ring onto the hanging loop.
Final Quality-Control Checklist
- The letter measures 2.5 in (6.4 cm) x 4 in (10.2 cm).
- The border has 74 sc and lies flat with no ruffles.
- The three outer corners are square and the bowl curve is smooth.
- The hole is open and rectangular, about 0.67 in (1.7 cm) x 1 in (2.5 cm).
- The flower has 5 even petals and 5 yellow knots.
- The leaves point up-left and down-left, framing the flower.
- No sewing stitches show on the back of the letter.
- The hanging loop is secure and the ring turns freely.
- All ends are woven in and trimmed.
Troubleshooting
- Border ruffles along the sides: Your row gauge is shorter than your stitch gauge. Skip 1 row end in every 6 and recount.
- Border cups or pulls: Your rows are taller than your stitches. Work 2 sc in 1 row end every 6 rows.
- Hole looks lopsided: One column has the wrong row count. Both columns must have exactly 6 rows.
- Curve looks pointed: Make sure the 2 sc increases and the sc2tog decreases are at the right-hand edge, not the stem side.
- Flower petals curl: Your tension is too tight. Steam lightly or rework Rnd 2 more loosely.
- Letter is floppy: Go down a hook size or use a firmer cotton.
Care
Hand wash in cool water, press out the water in a towel, and lay flat to dry, reshaping the curve. Remove the metal ring before washing.
Final Notes
Here is the measurement chain:
– Gauge: 6 sc and 6 rows = 1 in (2.5 cm)
– Stem after Row 10: 0.83 in x 1.67 in (2.1 cm x 4.2 cm)
– Bowl base after Row 13: 2.17 in (5.5 cm) wide
– Body after Row 22: 2.17 in x 3.67 in (5.5 cm x 9.3 cm)
– Finished letter after the 74-sc border: 2.5 in x 4 in (6.4 cm x 10.2 cm)
If you check each stage, the finished keychain will come out true to size. Swap the colors to match a favorite bag, or make one for every initial in the family.
Happy crocheting!