

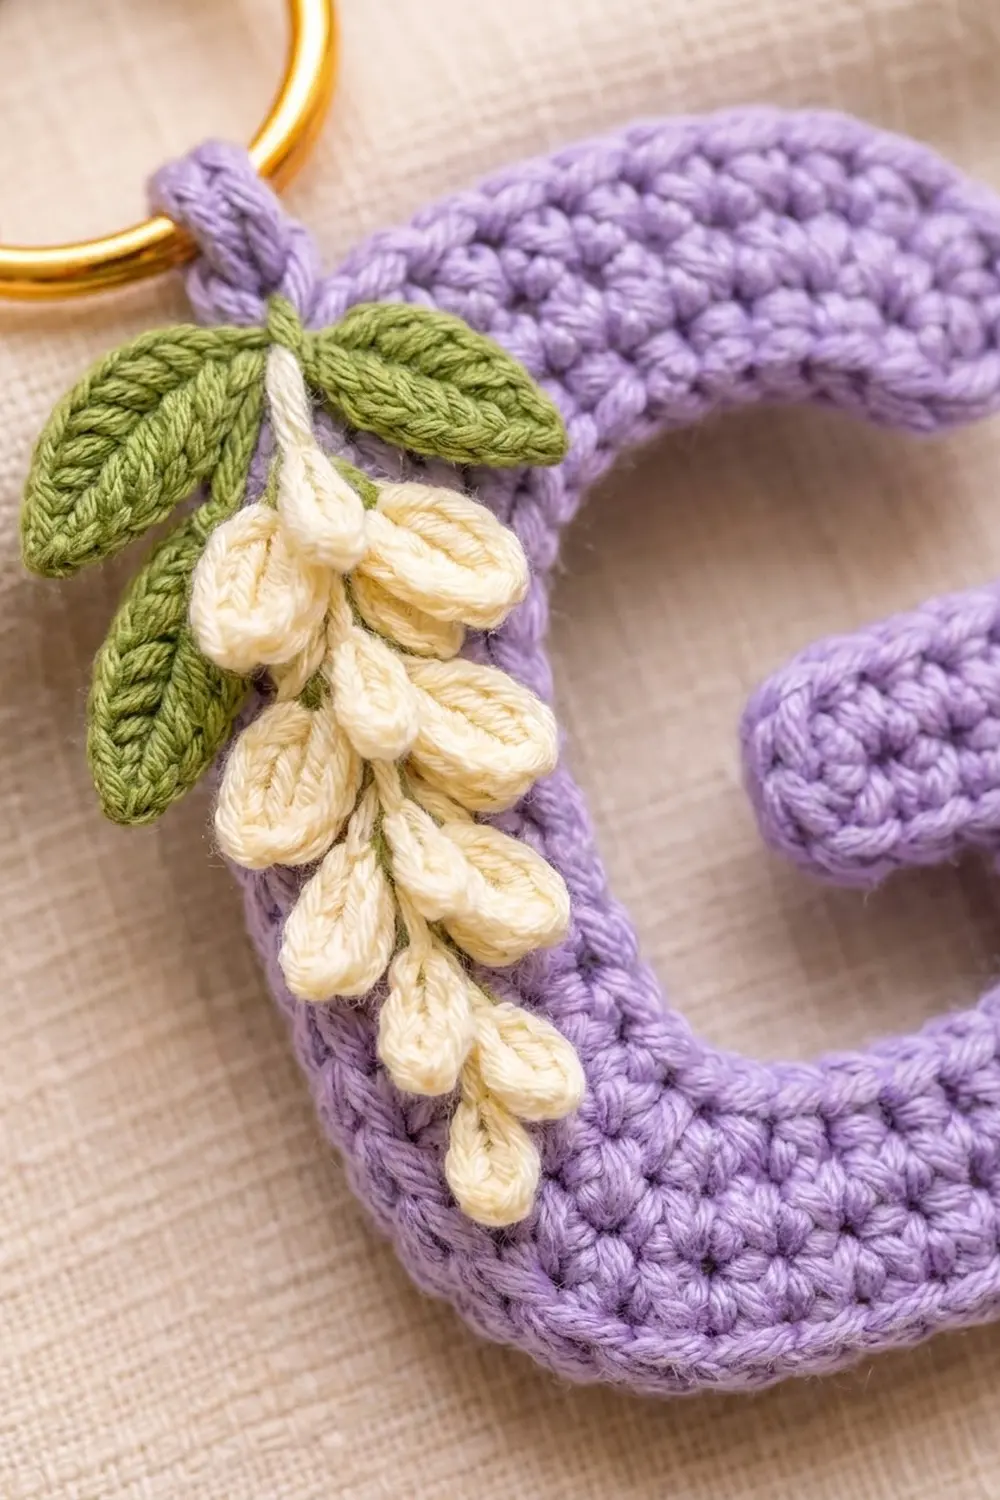
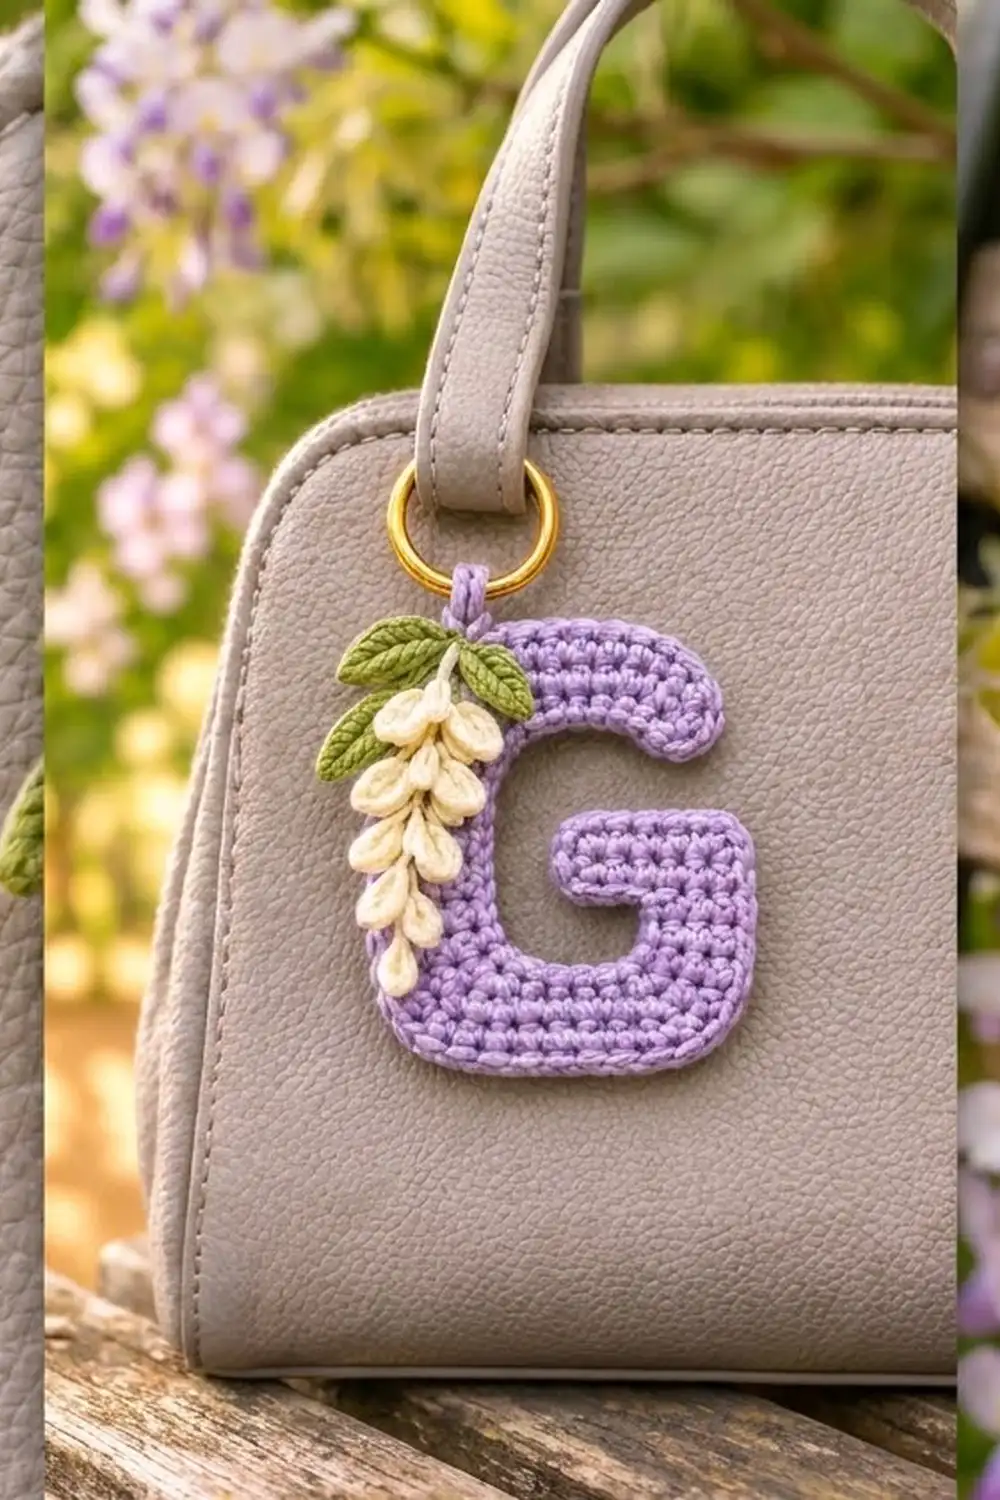
This little keychain is a chunky, rounded letter G in soft lavender. A cream wisteria spray and three sage-green leaves are stitched down its left side, and a gold split ring clips it to a bag handle, a key set, or a zipper pull.
The colors are soft and springlike: lavender for the letter, cream for the hanging petals, and muted green for the leaves. The letter is worked in plain single crochet, which gives it a neat, dense, grid-like texture. One round of single crochet around the edge adds a smooth, slightly raised rim.
This pattern uses US crochet terms. The finished letter measures 3.25 in (8.3 cm) wide and 3.75 in (9.5 cm) tall, not counting the hanging loop and ring.
You work the G flat in rows from the bottom up, splitting the rows to shape the letter’s opening. Then you rejoin the yarn to work the right stroke and the inward crossbar, and add one border round. Last, you make the wisteria spray and leaves and sew them on.
Finished Size and Construction
- Finished size: 3.25 in (8.3 cm) wide x 3.75 in (9.5 cm) tall, plus a hanging loop about 0.5 in (1.3 cm) tall and a 1 in (2.5 cm) ring
- Skill level: Advanced beginner
- Terminology: US
- Yarn weight: DK (light #3) cotton
- Hook: 3.5 mm (E/4)
- Number of pieces: 1 letter, plus 1 wisteria spray and 3 leaves sewn on as appliqué
- Layout: One single item; there are no motifs to join
- Letter size before border: 3 in (7.6 cm) wide x 3.5 in (8.9 cm) tall (15 stitches x 21 rows)
- Border depth: 1 round of sc, about 0.125 in (0.3 cm) per side
Materials
Choose a smooth, mercerized DK cotton or cotton blend. Cotton shows each stitch clearly and keeps the letter firm, which matters for a keychain that gets handled every day. Avoid fuzzy or very stretchy yarns, because the letter will soften and lose its sharp edges.
- Color A, lavender: 8 g, about 19 m (21 yd) – letter, border, hanging loop
- Color B, cream: 3 g, about 7 m (8 yd) – wisteria spray
- Color C, sage green: 2 g, about 5 m (5 yd) – leaves
These amounts include about 30 percent extra, so small gauge differences won’t leave you short.
Tools:
- 3.5 mm (E/4) crochet hook
- Gold split ring, 1 in (2.5 cm) / 25 mm
- Tapestry needle
- Scissors
- Blocking mat and rust-proof pins
- Spray bottle or steam iron
Abbreviations (US Terms)
- ch – chain
- sl st – slip stitch
- sc – single crochet
- hdc – half double crochet
- dc – double crochet
- sc2tog – single crochet 2 together
- st(s) – stitch(es)
- RS / WS – right side / wrong side
Special stitch – Petal: Ch 4. Sc in 2nd ch from hook, hdc in next ch, 5 dc in last ch. Working along the other side of the chain, hdc in next ch, sc in next ch. This makes a 9-stitch teardrop with its narrow end at the base.
Gauge and Checkpoints
Gauge: 20 sc and 24 rows = 4 in (10.2 cm) in sc worked flat. That is 5 sts and 6 rows per 1 in (2.5 cm).
Test first: ch 16 and work 12 rows of 15 sc. The swatch should measure 3 in (7.6 cm) wide and 2 in (5.1 cm) tall. The letter is also 15 sts wide, so this swatch shows you almost exactly how it will turn out.
Checkpoints:
- After Row 5: 3 in (7.6 cm) wide.
- Left stroke: 5 sts = 1 in (2.5 cm) wide.
- After Row 12: 2 in (5.1 cm) tall.
- After Row 21: 3.5 in (8.9 cm) tall.
- Crossbar: 8 sts = 1.6 in (4.1 cm) wide. The gap between it and the left stroke is 2 sts = 0.4 in (1.0 cm).
- After the border: 3.25 in (8.3 cm) x 3.75 in (9.5 cm).
Too big? Go down to a 3.25 mm or 3 mm hook. Too small? Go up to a 3.75 mm hook. Change hooks, not stitch counts, because the letter’s shape depends on the 15 x 21 grid.
Letter G
Orientation: Row 1 is at the bottom. Odd rows are RS rows and end at the left edge. Even rows end at the right edge (as seen from the RS). The 15 columns are numbered 1 to 15 from left to right. The turning ch 1 does not count as a stitch.
Bottom Bar
Row 1 (RS): With A, ch 14. Sc in 2nd ch from hook and in each ch across. (13 sts)
Row 2: Ch 1, turn. 2 sc in first st, sc in next 11 sts, 2 sc in last st. (15 sts)
Rows 3–5: Ch 1, turn. Sc in each st across. (15 sts)
The Row 2 increases round off the bottom corners.
Left Stroke
Row 6 (WS): Ch 1, turn. Sc in first 5 sts (columns 1–5) and leave the other 10 sts unworked. (5 sts)
Rows 7–16: Ch 1, turn. Sc in each st across. (5 sts)
Row 16 ends at column 5, the inner edge of the stroke. Do not fasten off.
Top Bar
Row 17 (RS): Ch 11, turn. Sc in 2nd ch from hook and next 9 ch (columns 15–6), then sc in each of the 5 stroke sts. (15 sts: 10 new + 5 stroke)
Rows 18–20: Ch 1, turn. Sc in each st across. (15 sts)
Row 21: Ch 1, turn. Sc2tog, sc in next 11 sts, sc2tog. (13 sts)
Row 21 rounds the top corners to match the bottom. Fasten off.
Right Stroke and Crossbar
Row 6 (WS): With the WS facing, find the 10 unworked sts of Row 5. Skip the first 5 (columns 6–10) and join A in the next st (column 11). Ch 1, sc in same st and next 4 sts. (5 sts)
Rows 7–8: Ch 1, turn. Sc in each st across. (5 sts)
Row 9 (RS): Ch 1, turn. Sc in each st across, ending at column 11. (5 sts)
Row 10 (WS): Ch 4, turn. Sc in 2nd ch from hook and next 2 ch (columns 8–10), then sc in each of the 5 stroke sts. (8 sts: 3 new + 5 stroke)
Rows 11–13: Ch 1, turn. Sc in each st across. (8 sts)
Fasten off.
The 5 skipped sts of Row 5 form the floor of the inner notch. A 2-stitch gap, 0.4 in (1.0 cm) wide, separates the crossbar tip from the left stroke. Rows 14–16 leave a 3-row opening, 0.5 in (1.3 cm) tall, between the crossbar and the top bar.
Stitch total check: 13 + (4 x 15) + (11 x 5) + (4 x 15) + 13 + (4 x 5) + (4 x 8) = 253 sts.
Border
Border gauge: Along stitch edges, the border sc sit 5 per 1 in (2.5 cm), matching the stitches below. Along row-end edges, they sit 6 per 1 in (2.5 cm), one per row.
Rules:
- Work 1 sc in each stitch or foundation chain.
- Work 1 sc in each row-end.
- At each outer corner, work 2 sc in the corner position (+1 st).
- At each inner corner, add no extra stitch.
Round 1: With the RS facing, join A at the top-left corner of Row 21. Ch 1 and work clockwise:
- Top edge, Row 21: 13 sc, plus 1 extra at the top-left and top-right corners.
- Right end of the top bar, Rows 21–17: 5 sc, plus 1 extra at the lower outer corner.
- Underside of the top bar (the 10 foundation ch of Row 17): 10 sc. Inner corner.
- Inner edge of the left stroke, Rows 16–6: 11 sc. Inner corner.
- Notch floor, Row 5, columns 6–10: 5 sc. Inner corner.
- Inner edge of the right stroke, Rows 6–9: 4 sc. Inner corner.
- Underside of the crossbar (the 3 foundation ch of Row 10): 3 sc, plus 1 extra at the lower corner of the tip.
- Crossbar tip, Rows 10–13: 4 sc, plus 1 extra at the upper corner.
- Top of the crossbar, Row 13: 8 sc, plus 1 extra at the right corner.
- Right side, Rows 13–1: 13 sc, plus 1 extra at the bottom-right corner.
- Bottom edge (foundation ch of Row 1): 13 sc, plus 1 extra at the bottom-left corner.
- Left side, Rows 1–21: 21 sc.
Sl st to the first sc. (118 sts: 110 edge sc + 8 corner extras)
Why the math works: The edge sc add up to 13 + 5 + 10 + 11 + 5 + 4 + 3 + 4 + 8 + 13 + 13 + 21 = 110. That is one per existing stitch or row, so the edge is neither stretched nor gathered. The G outline has 8 outer corners and 4 inner corners. Any closed outline with square corners has 4 more outer corners than inner ones, so this is a good check that no corner was missed. Only outer corners need an extra sc to turn.
The round adds about 0.125 in (0.3 cm) per side. That takes the letter from 3 in x 3.5 in (7.6 cm x 8.9 cm) to 3.25 in x 3.75 in (8.3 cm x 9.5 cm).
Hanging Loop
Join A in the 4th border st from the top-left corner, above the left stroke. Ch 10, slip the split ring onto the chain, and sl st into the same st. For strength, work a second ch-10 loop through the ring into the same st. Fasten off. The loop stands about 0.5 in (1.3 cm) tall.
Wisteria Spray
With B: Ch 15 for the stem.
Tip petal: Work 1 Petal, then sl st into the 15th stem ch at its base.
Pair 1: Sl st in next 3 stem ch. (Work 1 Petal, sl st in same stem ch) twice, making one petal on each side.
Pairs 2–4: Repeat Pair 1 three more times.
The pairs sit on stem ch 12, 9, 6, and 3. Sl st in the last 2 stem ch. Fasten off, leaving a 12 in (30.5 cm) tail.
Total: 9 petals (1 tip + 4 pairs). The spray is about 2.75 in (7.0 cm) long, and each petal is about 0.4 in (1.0 cm). Nudge the petals so they point down and outward.
Leaves (Make 3)
With C: Ch 7. Sc in 2nd ch from hook, hdc in next ch, dc in next 2 ch, hdc in next ch, 3 sc in last ch (tip). Working along the other side of the chain, hdc in next ch, dc in next 2 ch, hdc in next ch, sc in last ch. Sl st to first sc. (13 sts)
Fasten off, leaving an 8 in (20.3 cm) tail. Each leaf is about 1 in (2.5 cm) long and 0.5 in (1.3 cm) wide. If you like, backstitch a center vein with one ply of C.
Assembly
Lay the spray along the left stroke with the top of the stem just right of the hanging loop. Let the outer petals hang about 0.125 in (0.3 cm) past the left edge. With the B tail, whipstitch down the stem and tack each petal at its narrow base. Leave the rounded ends free.
Arrange the leaves around the top of the stem: one pointing up-left, one pointing right over the top bar, and one angled down-left. Sew each leaf down through its center line only. Weave all tails into the WS.
Final Blocking
- Block after adding the border and loop, but before sewing on the appliqué.
- Lightly mist the letter, or hold a steam iron just above it without touching.
- Pin it RS up to 3.25 in (8.3 cm) wide x 3.75 in (9.5 cm) tall, with one pin near each outer corner.
- Use your fingertips to straighten the gap and opening so the crossbar sits level.
- Let it dry completely, about 2 to 4 hours.
- Unpin it, then sew on the spray and leaves.
Final Quality-Control Checklist
- The letter measures 3.25 in (8.3 cm) x 3.75 in (9.5 cm).
- The border has 118 sts and lies flat, without ruffling or cupping.
- The crossbar is level, and the 0.4 in (1.0 cm) gap is open and even.
- The top and bottom corners are evenly rounded.
- The spray has 9 petals, and all 3 leaves are sewn on securely.
- The hanging loop is doubled and the split ring is fully closed.
- All tails are woven in on the WS.
Troubleshooting
- Letter looks squat: Your rows are too short. Pull each loop up slightly taller, or go up a hook size.
- Border ruffles: Extra sc were added at inner corners. Rework those corners without them.
- Corners pull in: An outer-corner extra is missing. Check that all 8 are there.
- Crossbar droops: Block it flat, then add one tacking stitch on the WS where it meets the right stroke.
- Petals curl backward: Steam them lightly and shape them with your fingers.
- Gap closes up: Stitches were worked into column 6 or 7 on Row 6 or Row 10. Recount those rows.
Care
Hand wash in cool water with mild soap, roll it in a towel to remove the water, and dry it flat. Keep the gold ring as dry as possible to protect its finish.
Final Notes
Here is how the measurements build on each other:
- Gauge: 5 sts and 6 rows per 1 in (2.5 cm).
- Letter grid: 15 sts x 21 rows, measuring 3 in x 3.5 in (7.6 cm x 8.9 cm).
- Border: 118 sts, adding 0.125 in (0.3 cm) per side.
- Finished letter: 3.25 in x 3.75 in (8.3 cm x 9.5 cm).
- Appliqué: a 2.75 in (7.0 cm) wisteria spray and three 1 in (2.5 cm) leaves.
If each checkpoint matches, the letter will come out right. The same method of splitting rows also works for other initials.
Happy crocheting!